Interchanging the Magnifier
To remove the Magnifier, gently squeeze the magnifier frame with the sides of the finder and rotate the Magnifier counterclockwise.
To attach the Magnifier, align the white dot on the Magnifier frame, and rotate the Magni- fier clockwise.
•The Magnifier is interchangeable. In addition to the standard
Interchanging the Focusing Screen
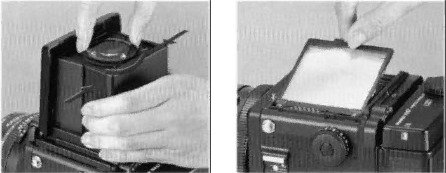
Removing the Focusing Screen
Focusing Screens
There are seven instantly interchangeable focusing screens to choose from, each de- signed for specific applications.
Removing a Focusing Screen
After removing the focusing hood, lift up and remove the screen by grasping the lug on the
CAUTION
When removing screens, exercise care not to touch the vertical and horizontal format viewfinder masks.
16