Samsung S860 manual OK button Select / setup the Custom Colour

Page 59

E (Effect) button : Colour

Custom colour

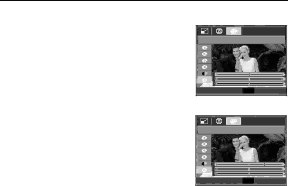
You can change the R (Red), G (Green) and B (Blue) values of the image.

-OK button : Select / setup the Custom Colour

-Up / Down button : Selects R, G, B

-Left / Right button : Change the values

Custom Color


Move

OK

Set

Custom Color


Move

OK

Set

58 _PLAY

Image 59
Contents Page Take a picture Insert the USB cable InstructionsGetting to Know your camera Thank you for buying a Samsung Digital CameraPage Contents Macro / Down button 040 Scene mode Things to Watch Out for When Taking PicturesUsing the camera buttons to set the camera Camera settings Power button RecordingConfigure Multi Slide Show effects 062 Setting play interval046 Formatting a memory 057 Effect button Rotating an image086 Samsung Master 089 Software NotesCamera AA Alkaline Batteries USB cable Camera strap System chartIncluded items Optional itemsFront & Top Identification of featuresMode dial Shutter button Flash DC input connection port Lens/ Lens cover Power button Microphone SpeakerZoom W button Thumbnail Fn / Delete button Play mode Printer buttonBack LCD monitor Effects button Strap eyeletBottom / 5 Function button Self-timer lampAuto Program Manual Connecting to a Power SourceMode icon Included battery may vary depending on sales regionInsert the memory card as shown Insert the battery as shownInserting the memory card Instructions on how to use the memory card Image S860S760 Fine NormalLCD monitor indicator You do not need to insert the memory Starting the recording modeHow to use the Auto mode μ How to use the Program modeHow to use the DIS mode How to use the Manual mode ¸Pressing Menu button Left/Right button Using the Photo Help guide mode `Function that can be used when focusing is difficult Pressing Left/Right buttonHow to use the Portrait mode Frame Rate How to use the Movie clip mode ´Recording the movie clip without sound Movie clip file type AVI MjpegPressing the shutter button down half way Things to Watch Out for When Taking PicturesNearer Power buttonZoom W / T button Shutter buttonDigital zoom Wide Wide ZoomFace DetectionFD button Button Function Description / Info î / Up buttonProgram ‰ DIS Mode ÿMacro e / Down button Auto ŠFocus lock Available focusing method, by recording modeNormal Macro Auto macro Selecting the flash modeFlash / Left button Flash rangeFlash mode indicator Self-timer mode indecator Self-timer / Right buttonMenu / OK button Mode Available Effects, by recording mode o SelectableEffect button Effect button ColourFn button How to use the Fn menuPress the Fn button in an available mode Quality / Frame rate SizeBack lighting MeteringSharpness UseWhite balance Press the OK or Fn button Exposure compensationMENU/OK button selects previous Compensation icon ÂAuto Focus type Items indicated by are default settingsSub menu Available mode Recording ÒPress the shutter button to record a voice Voice Memo Voice RecordingRecording Scene modeVoice Recording Recording the movie clip without voice Press the Pause button Ø to pauseSound menu Beep Sound Setup menuThis feature can be set byusing the OFF and on buttons SoundLanguage sub menu DisplayLanguage LCD brightness Setting up the Date / Time / Date typeStart up image Off Quick viewLCD save Sub menusNo The memory will not be formatted SettingsFormatting a memory InitialisationAn image may not be printed correctly File name Imprinting the recording dateSub menus Off Date Only the Date will beSpecified Auto power offSelecting Video out type For the period of timeAuto Focus lamp Selecting a battery typePlaying back a still image Starting play modeSelect the Play mode by pressing the play mode button Î Playing back a movie clipPlaying back a voice memo Movie clip capture functionPlaying back a recorded voice Thumbnail º / Enlargement í button Sage will be displayed Thumbnail º / Enlargement í buttonImage enlargement EnlargementPlay & Pause Ø / Down button Info î / Up buttonPrinter » button Left / Right / Menu / OK buttonDelete Õ button Image Resize Types S860 Effect button ResizeChanged image is saved as a new file name Effect button Rotating an imageEffect button Colour You can rotate the stored images by various degreesOK button Select / setup the Custom Colour Setting up the play back function using the LCD monitor Up / Down button Repeated until cancelledStarting the Multi Slide Show ❸ Start the Multi Slide ShowSelecting Images Configure Multi Slide Show effects Voice memo Setting play intervalSetting Background Music Playback øProtecting images Deleting imagesDpof Cancel Cancel the print setupPrinted size of the image is displayed Dpof Size secondary menu Cancel, 3X5, 4X6, 5X7Sub menu will display If No is selectedPress the Right button No Cancels Copy to CardCopy To Card PictBridge Connecting the Camera to a PrinterPress the Up / Down button to select the number of prints PictBridge Picture Selection PictBridge Print SettingMenu will display Press the Menu button and the PictBridge menu will displayOK button PictBridge ResetIf No is selected Settings will not be Important notesSamsung cannot be held responsible for camera malfunctions Extremes in temperature may cause problemsDo not attempt to disassemble or modify the camera Take pictures in Flash Photography mode Insert fresh batteries. p.12 Before contacting a service centreTurn the camera power on The battery is exhausted Please check the followingCheck the connection The camera is off Select appropriate White balance and effectCamera buttons do not operate Camera malfunction Specifications Movie Clip Interface Digital output connector USB Audio Mono· S760 Capacity 256 MB Size · S860~ 40C Power SourceOperating Temperature System Requirements Software NotesAbout the software Setting up the application software Setting up the application software Starting PC mode Refer to page 84 Removing the removable disk Connecting the camera to a PCDownloading stored images Connect the camera to your PC with the USB cableCut Removing the removable disk Using the USB Driver for MAC Setting up the USB Driver for MACSamsung Master Will be displayed after connecting the camera to your PCMenu AdjustImage viewer You can view the stored images Image viewer functions are listed belowDows media asf file types Edit ClipSaturation NameWhen the camera is connected to the USB port located on FAQCorrect Disposal of This Product Address Seaview Dr. Secaucus,NJ FCC noticeDeclaration of Conformity Trade Name Model No Samsung S860/S760Memo