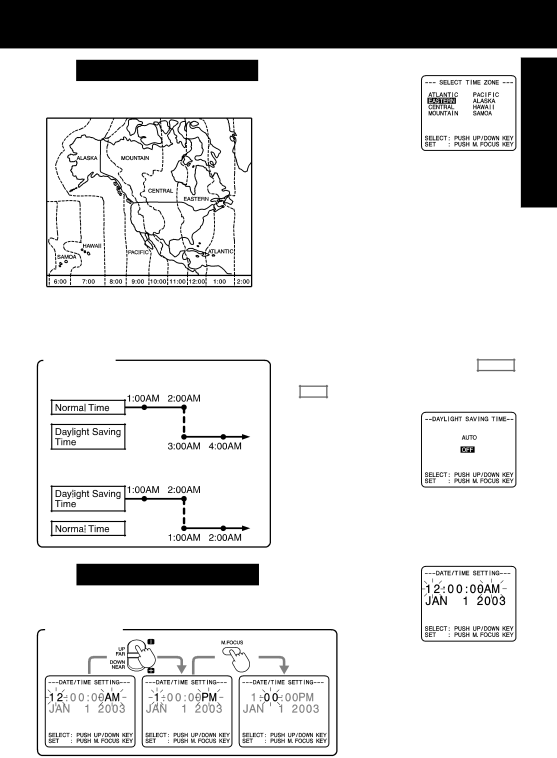
3a Setting the Time Zone
The Camcorder is preset to Eastern time.
[ Time Zone chart ]
Setting the Clock
Press UP or DOWN to
select local time zone.
Press M.FOCUS to
confirm entry.
•When traveling, repeat this operation and select one of the 8 listed time zones to set the clock to local time.
Note :
•Clock may lose or gain up to 2 minutes per month.
•When traveling outside the listed time zones, set clock to local time manually.
•To adjust or set clock, see “Setting Date and Time” (below).
Getting Started
3b Auto Daylight Saving Time
Clock will
DST: AUTO
Spring (First Sunday in April) : ahead one hour.
Autumn (Last Sunday in October) : back one hour.
The Camcorder is preset to DST: AUTO . If DST is not observed in your area, set to OFF by doing the following.
Press UP or DOWN to
select OFF or AUTO. Press M.FOCUS to confirm entry.
Note:
•Auto DST does not function if time zone is set to Hawaii or Samoa (see “Setting the Time Zone” above).
3c Setting Date and Time
Date and time including leap year are calculated up to DEC 31, 2099.
EXAMPLE :
Press or hold down UP or DOWN to select hour, then press M.FOCUS to fix.
Repeat for minute, month, day, and year.
Clock starts when year is entered and M.FOCUS is pressed.
15