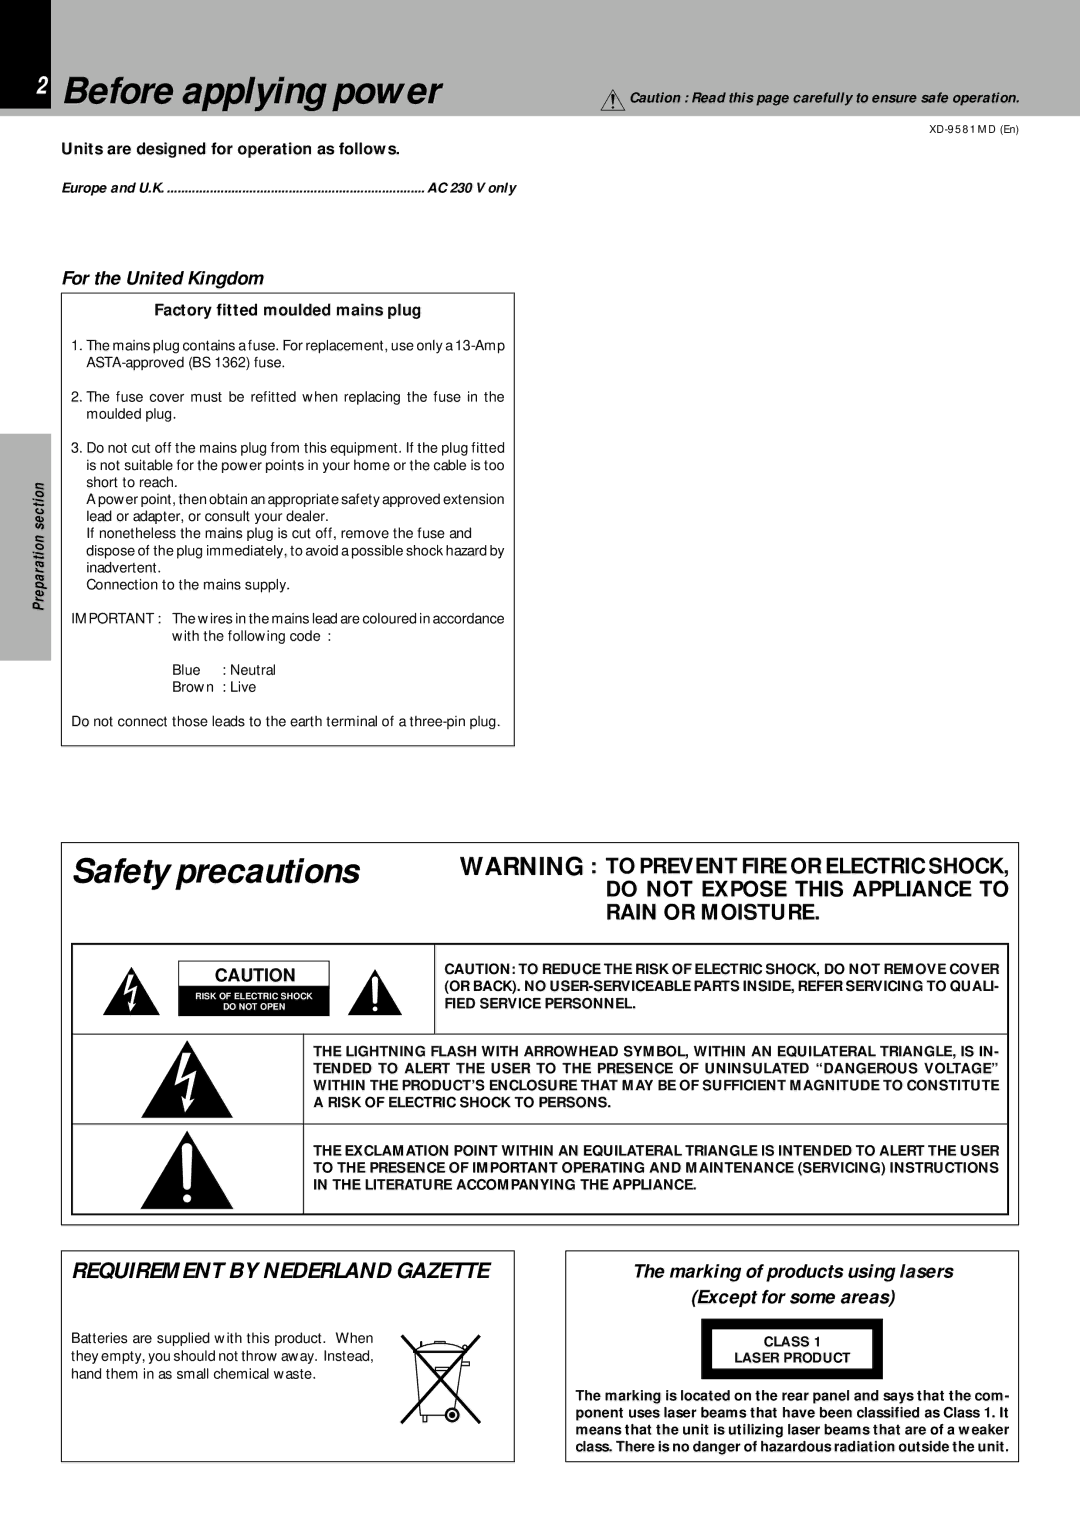
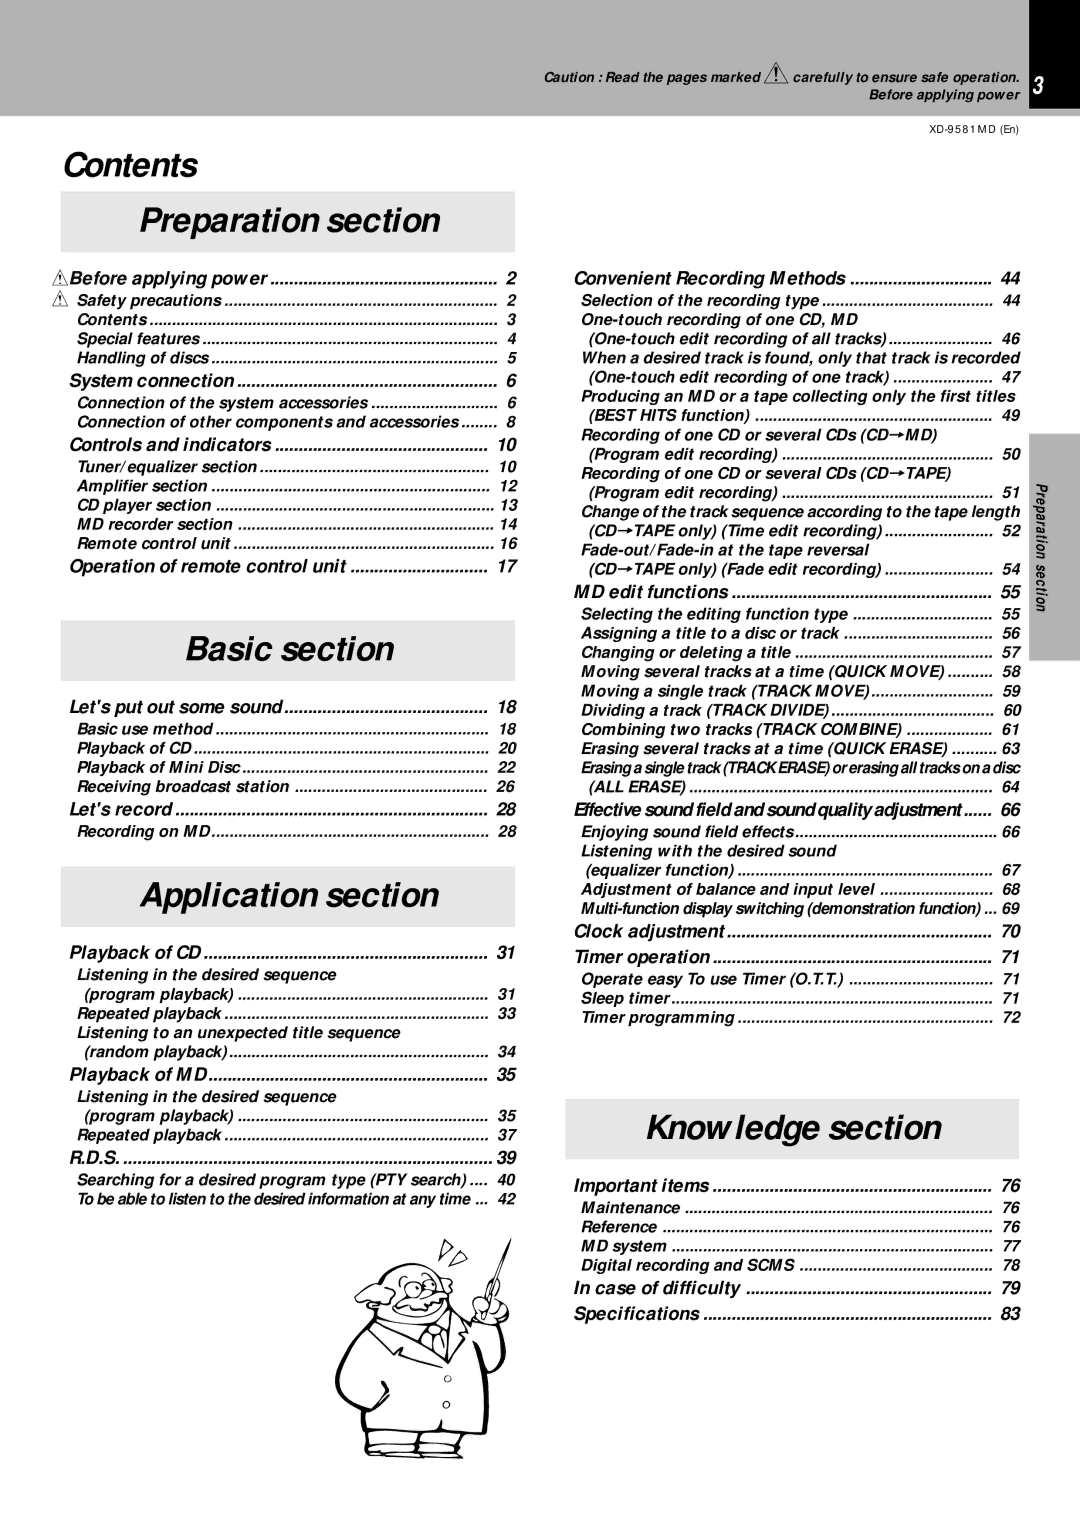
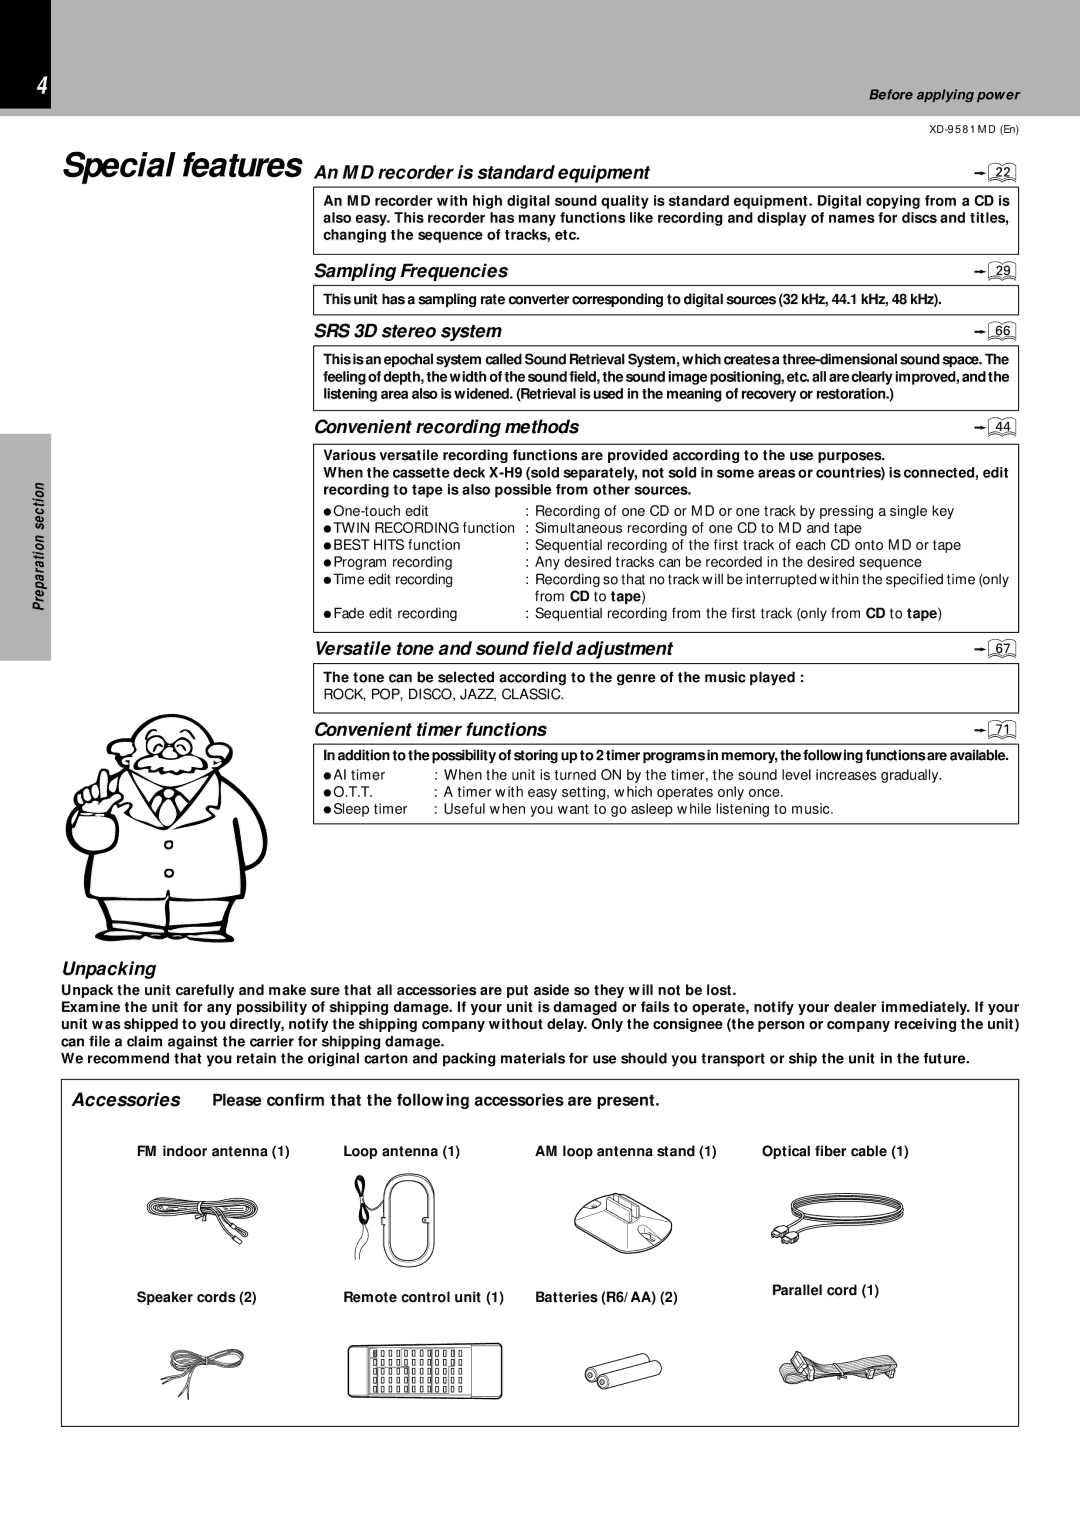
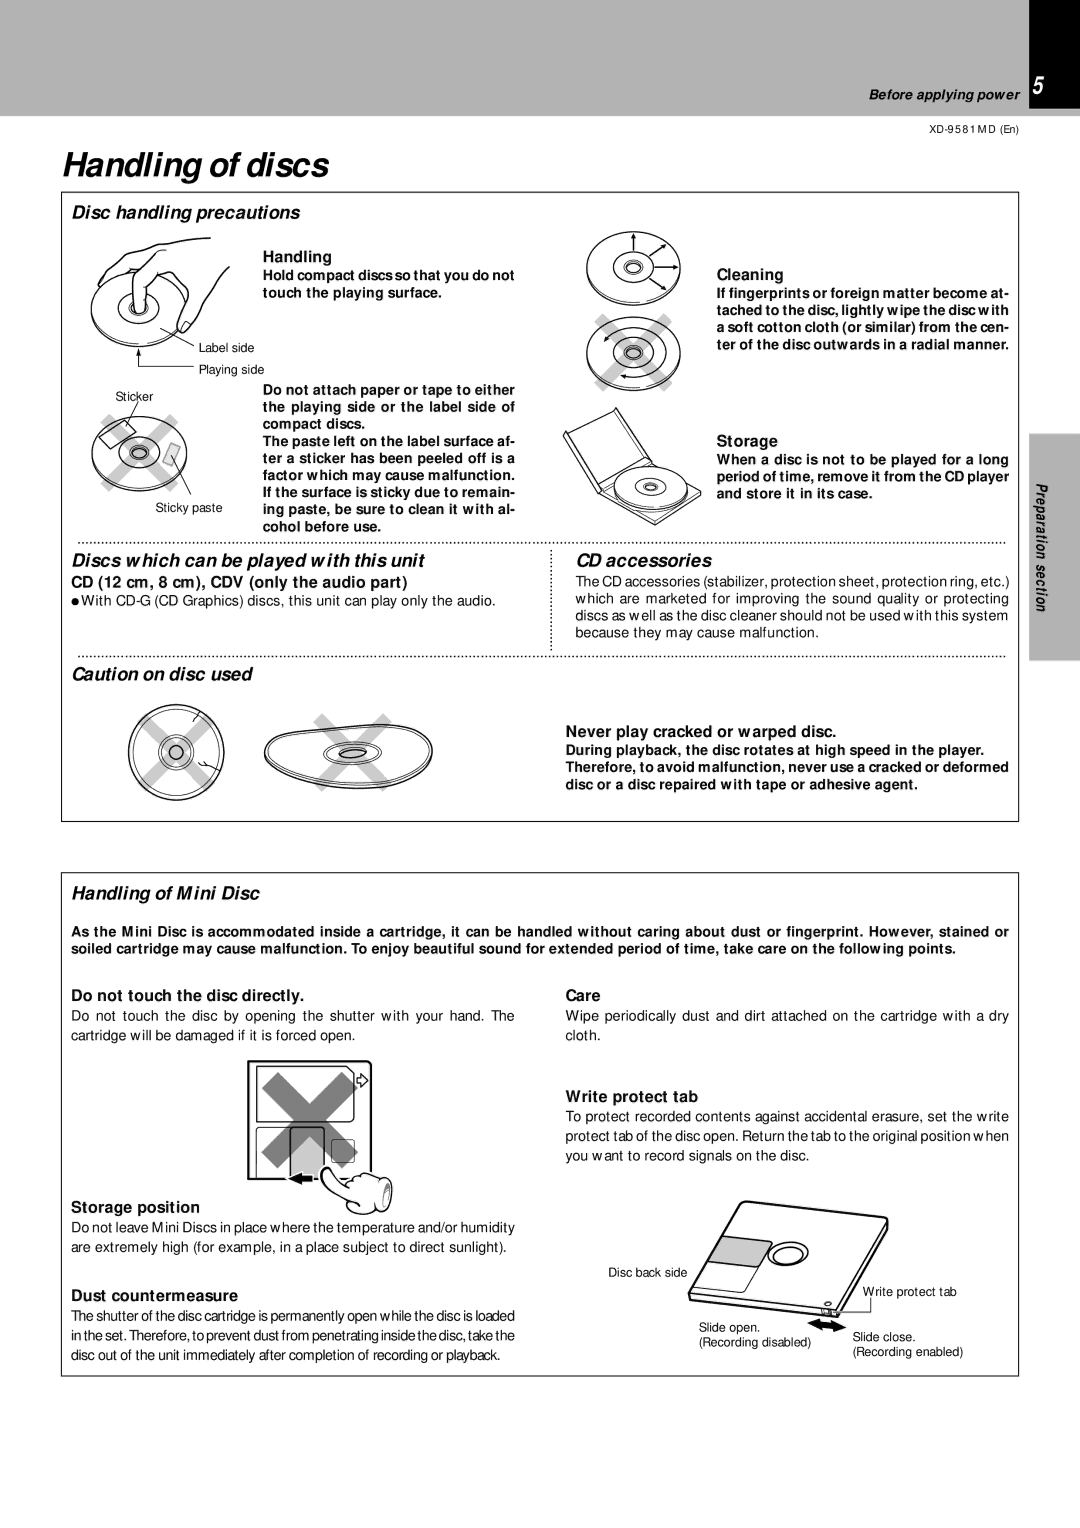
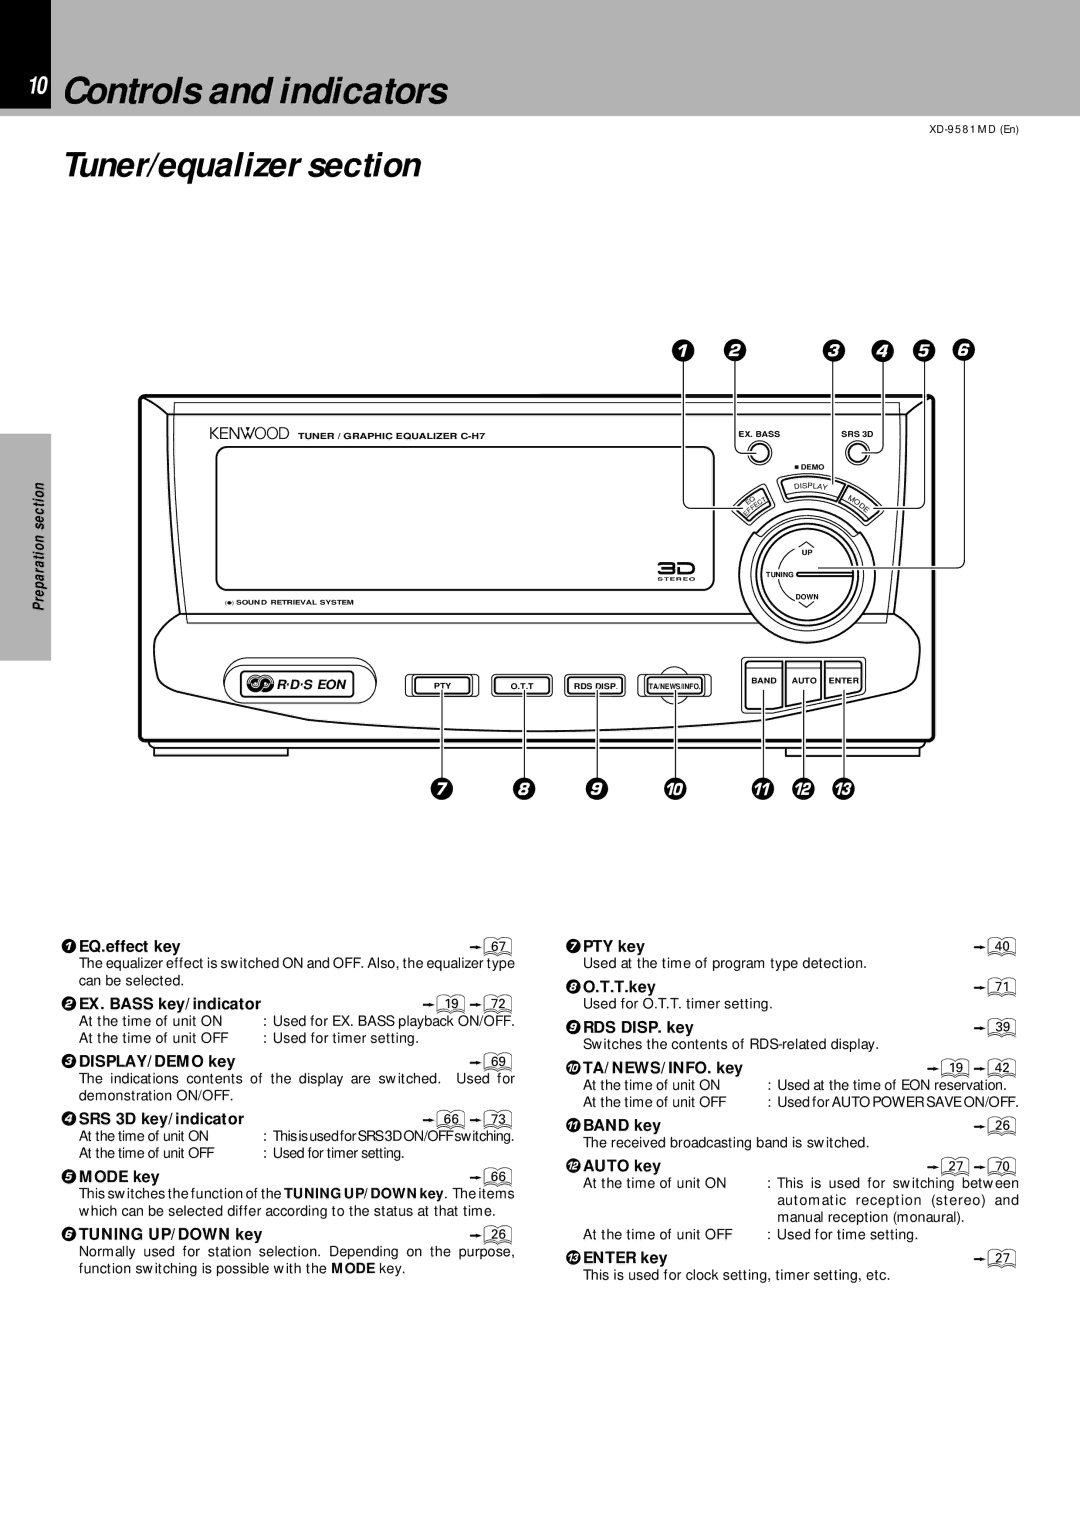
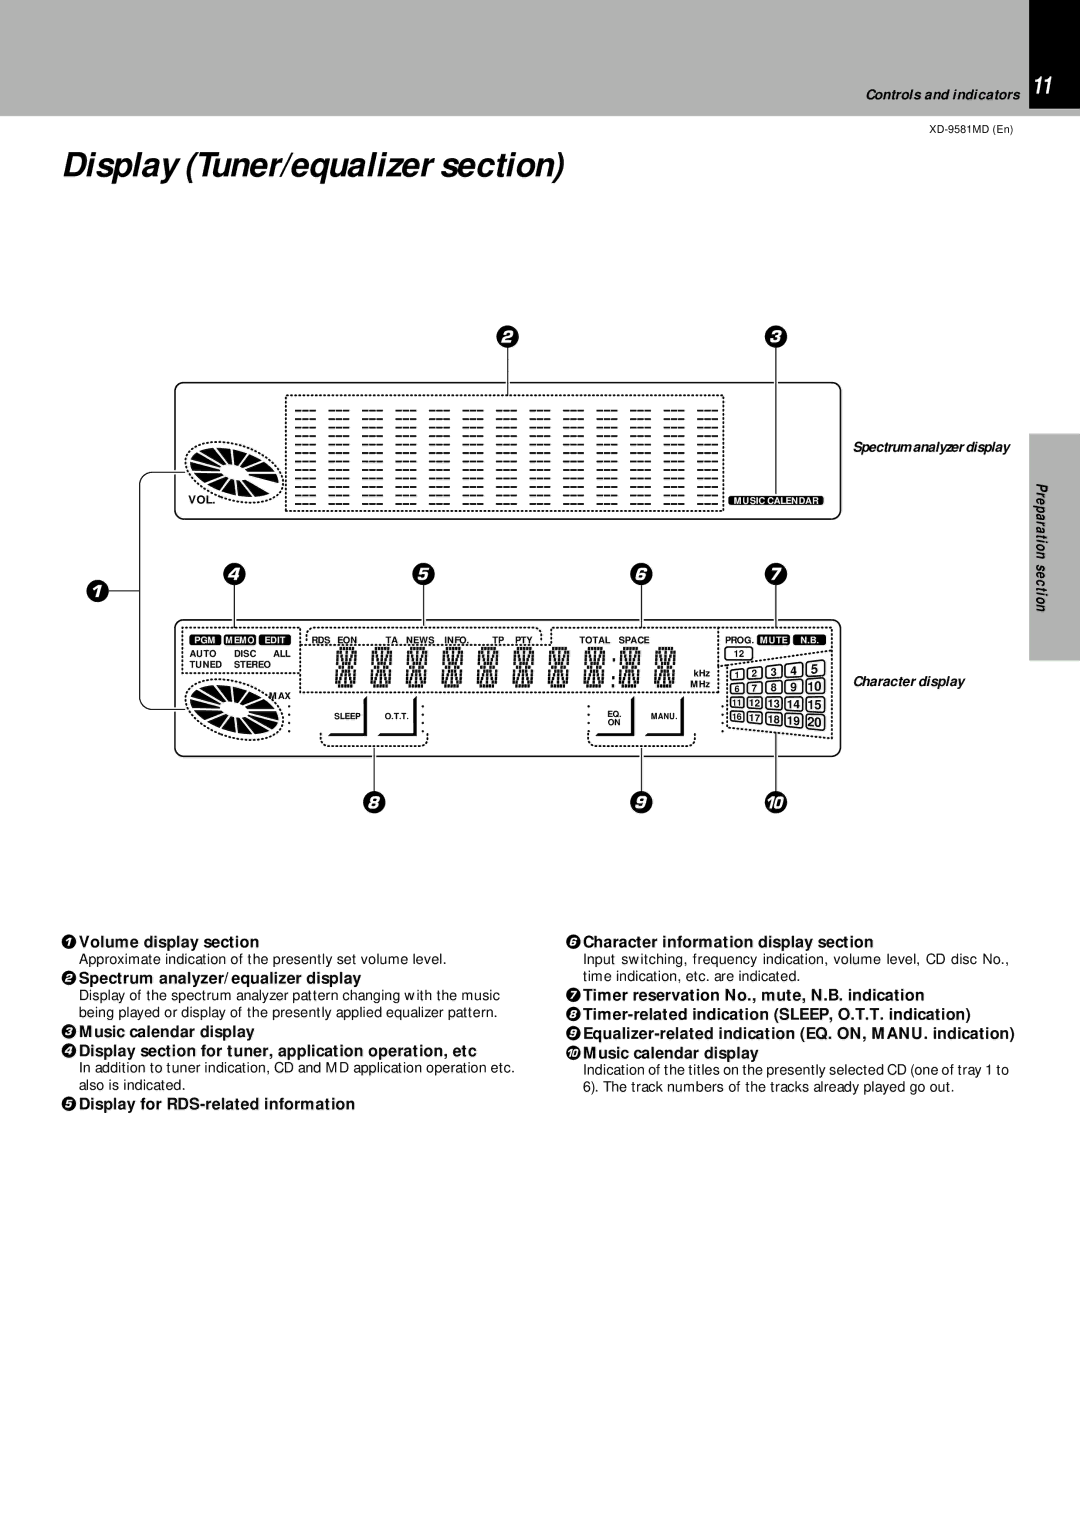
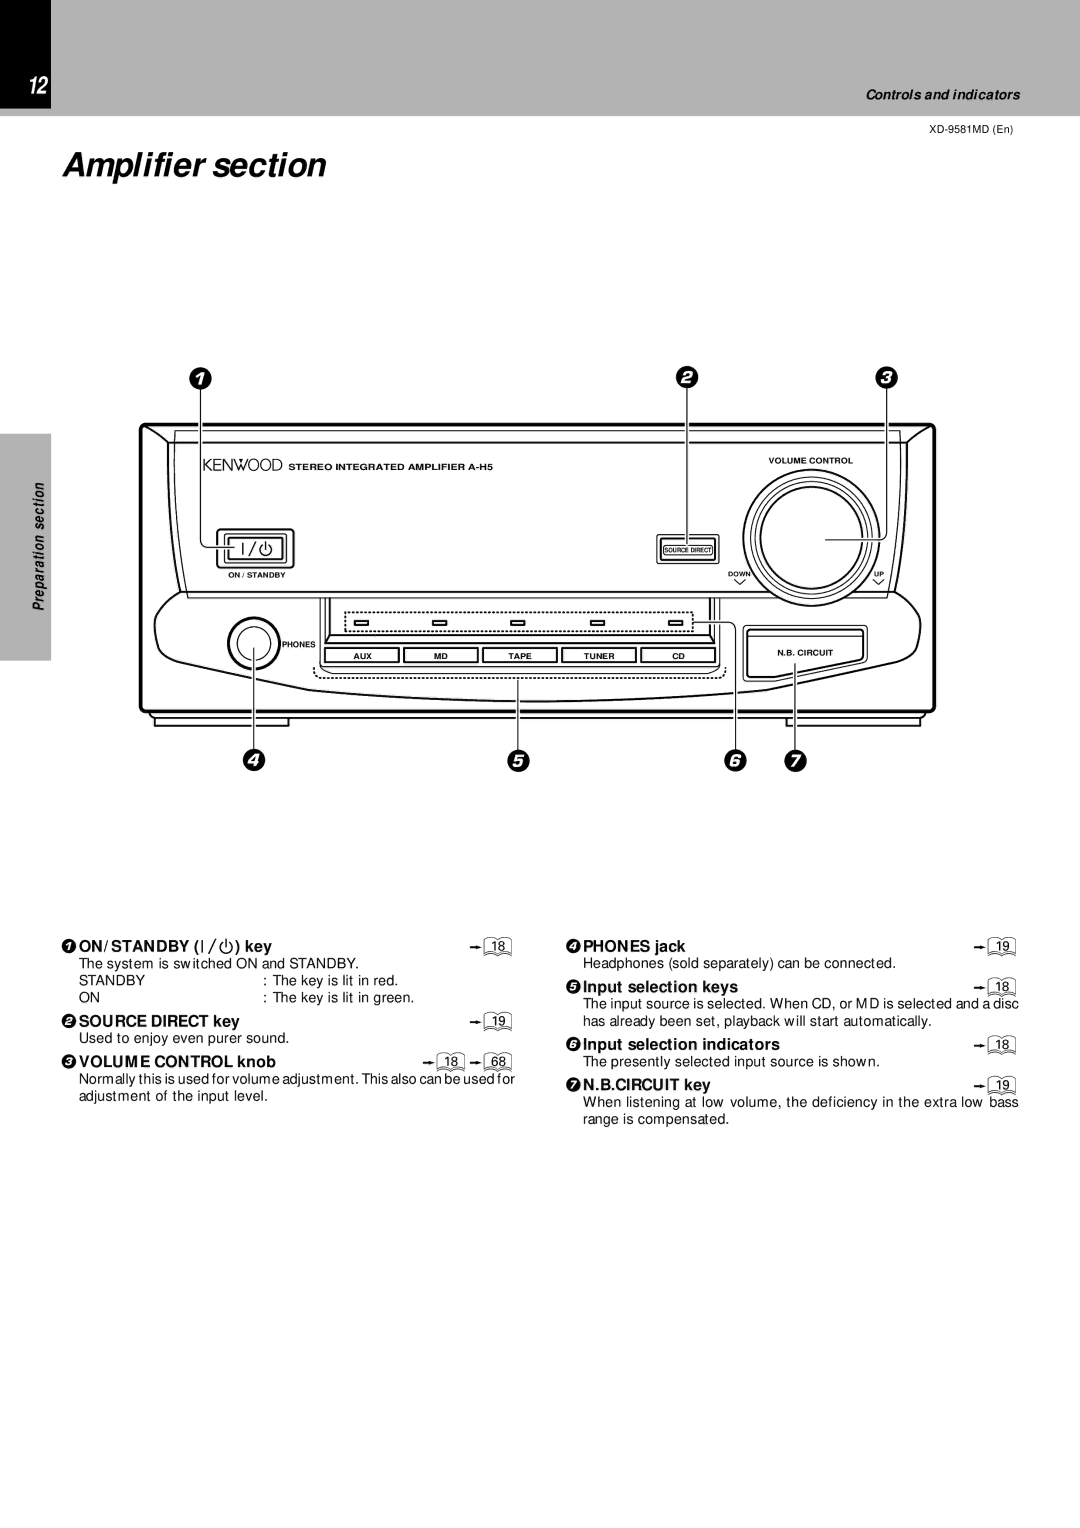
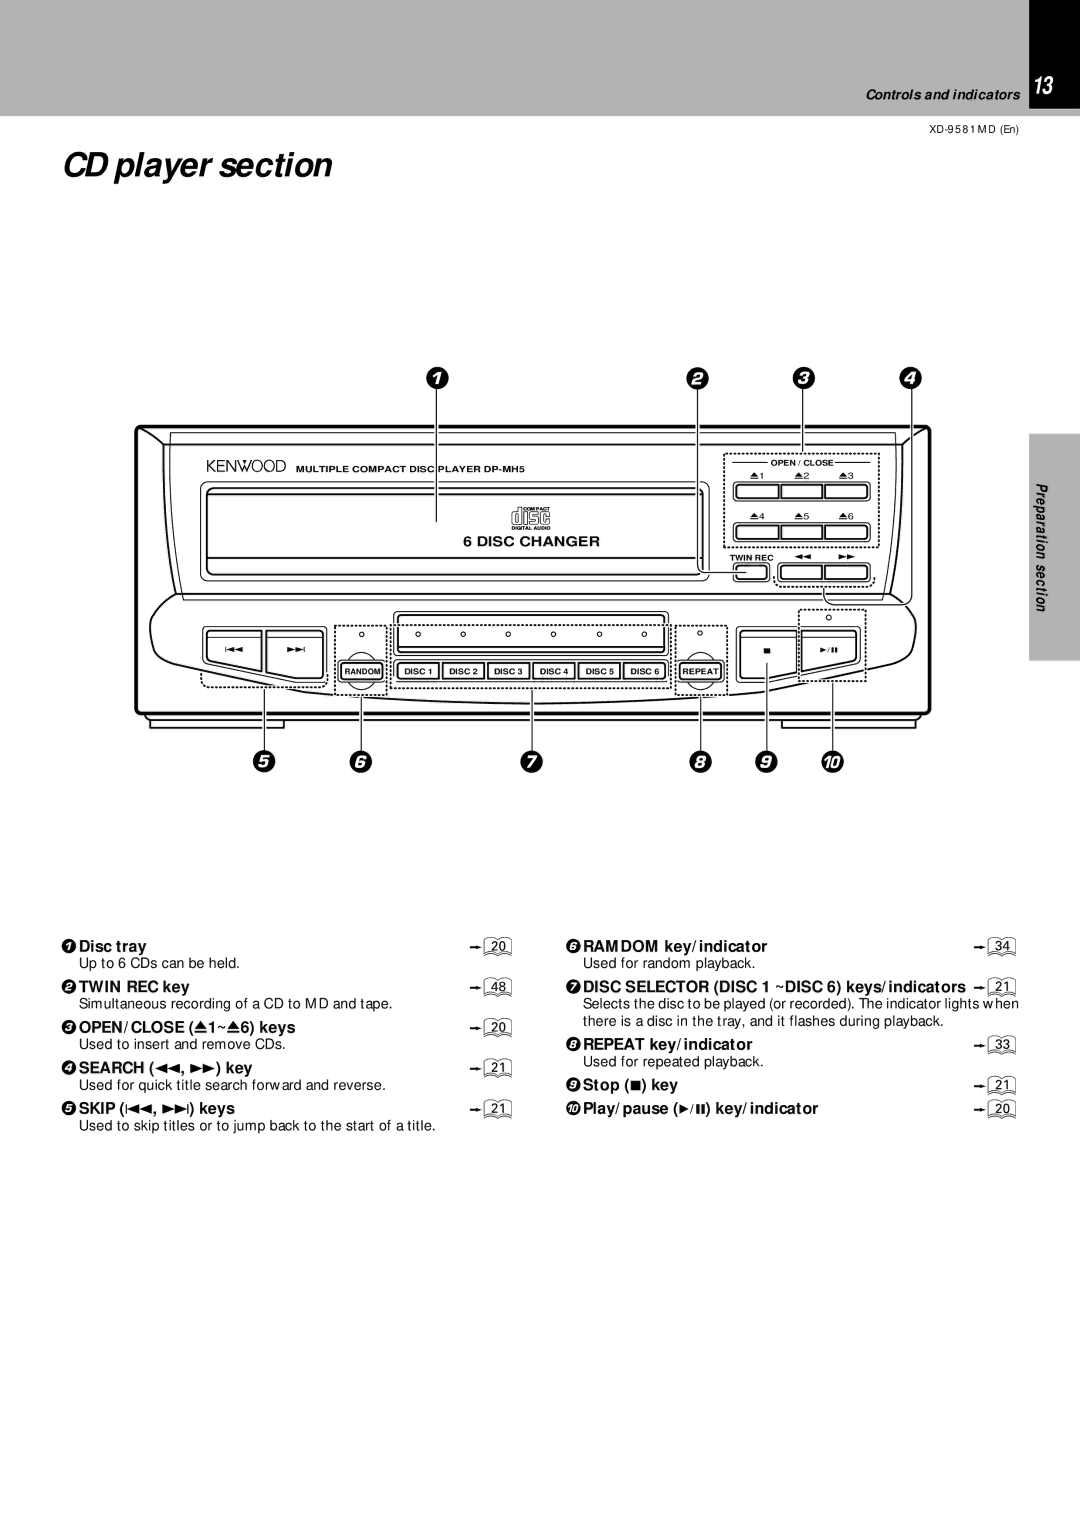
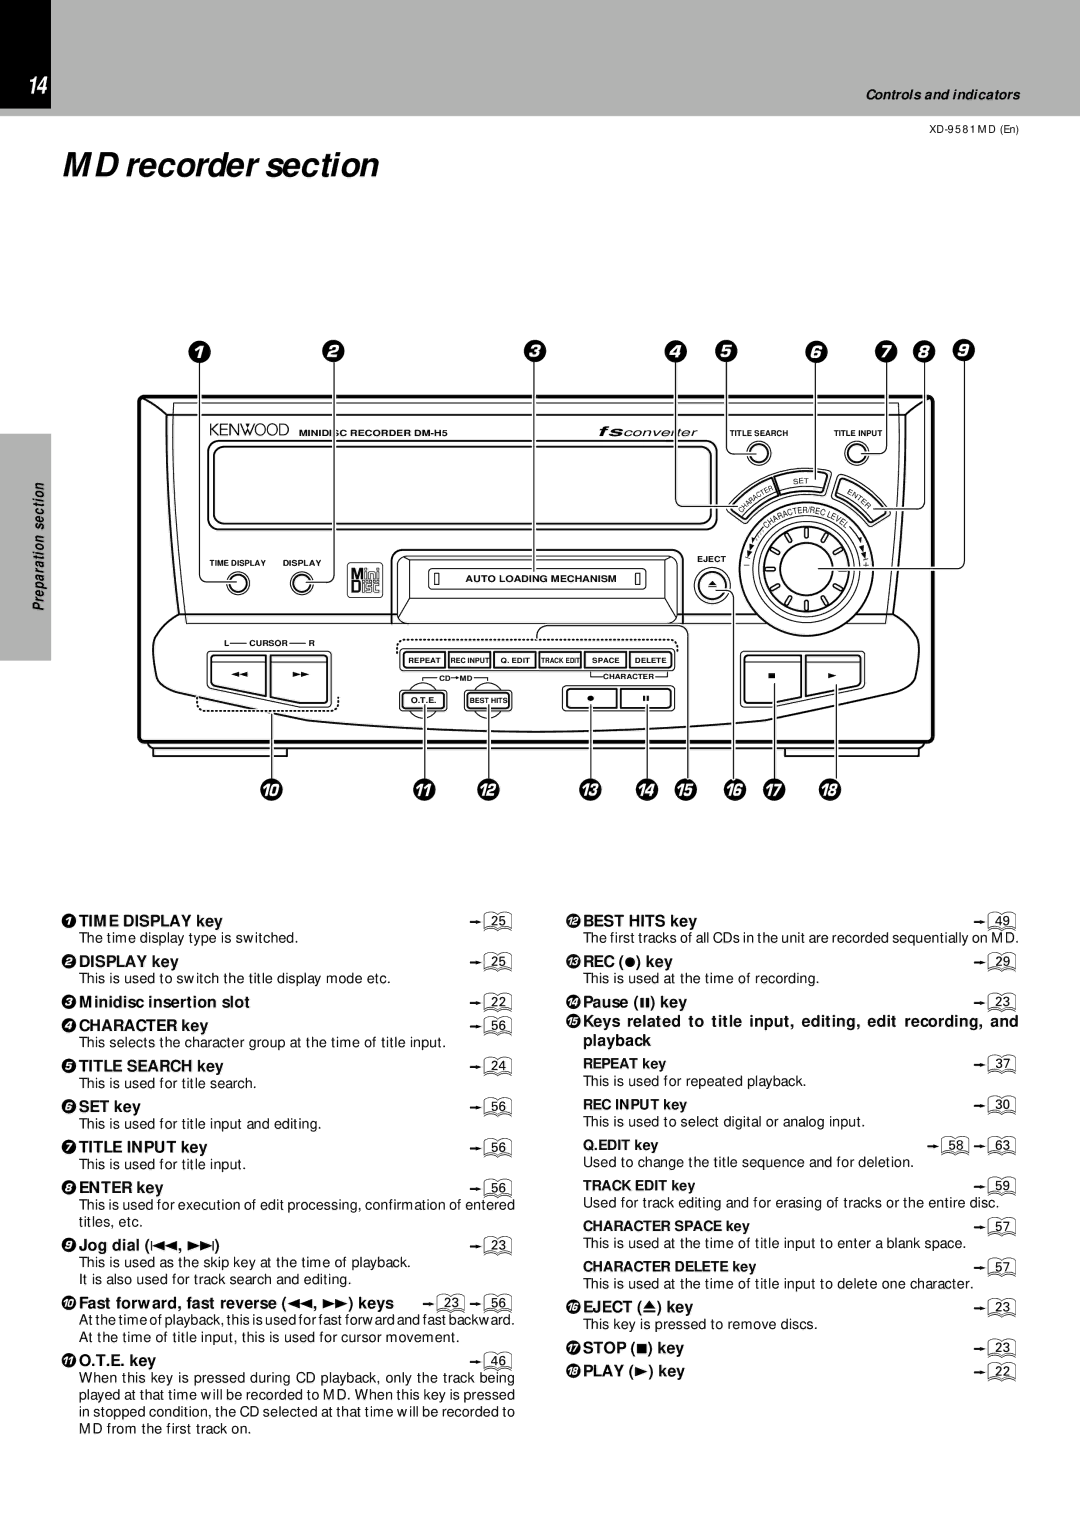
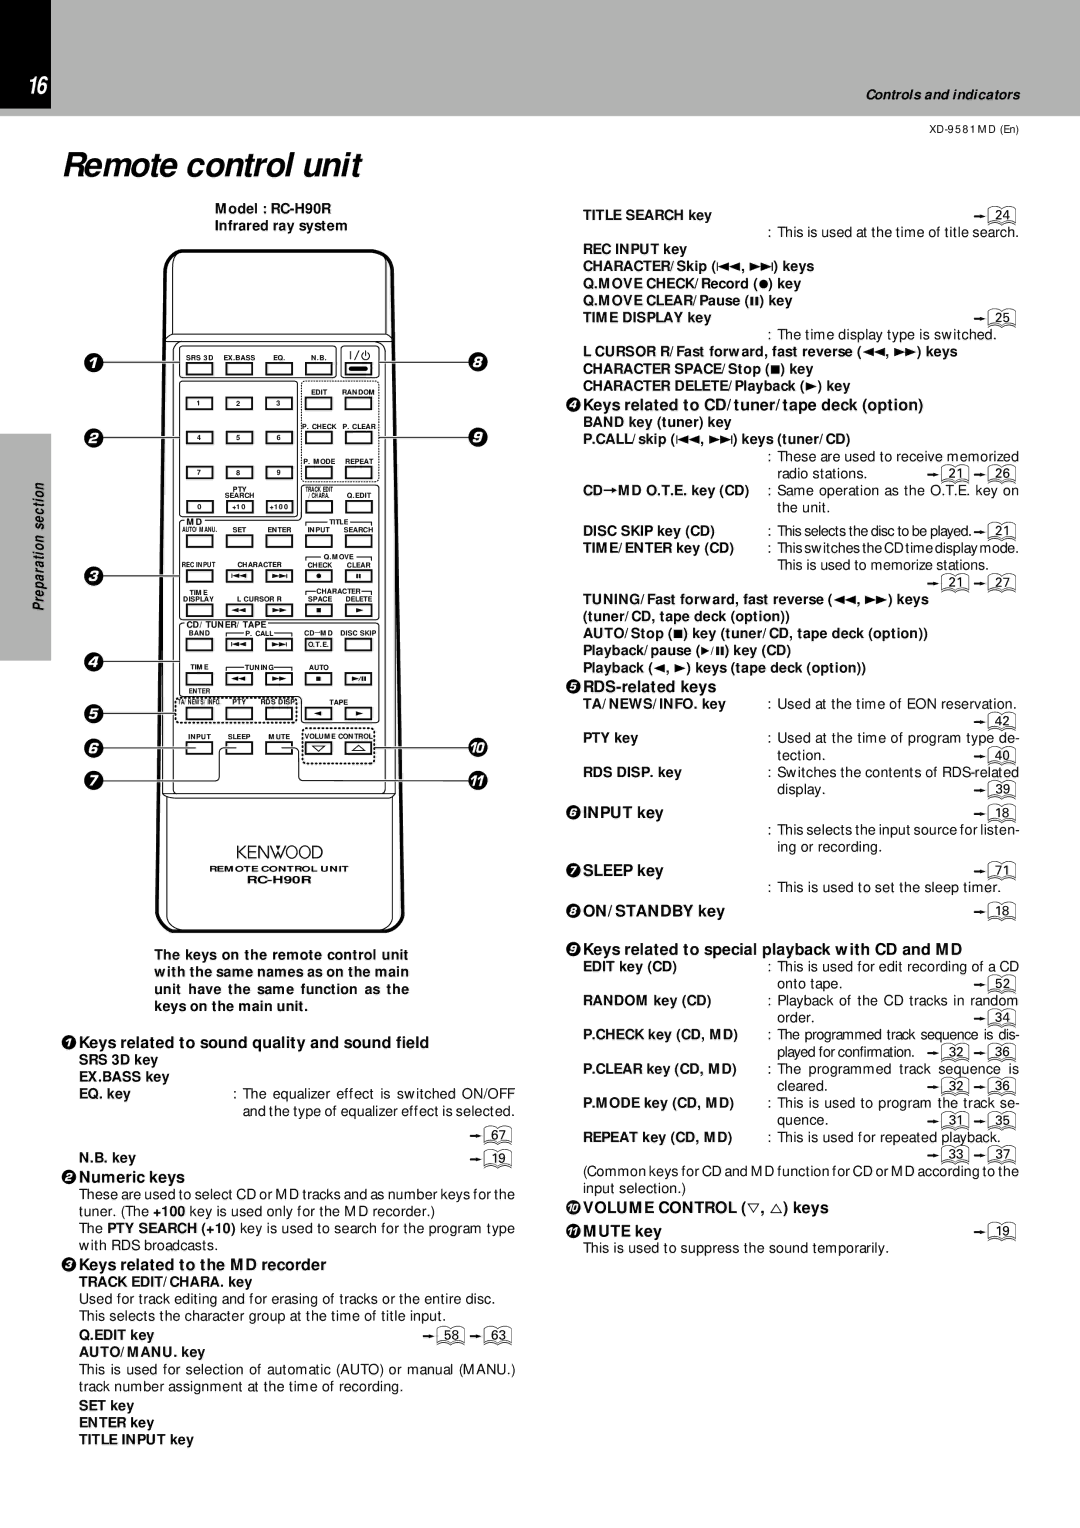
Kenwood XD-9581MD Speaker left, Speaker Section Speaker cord, Digital output terminal

Page 7

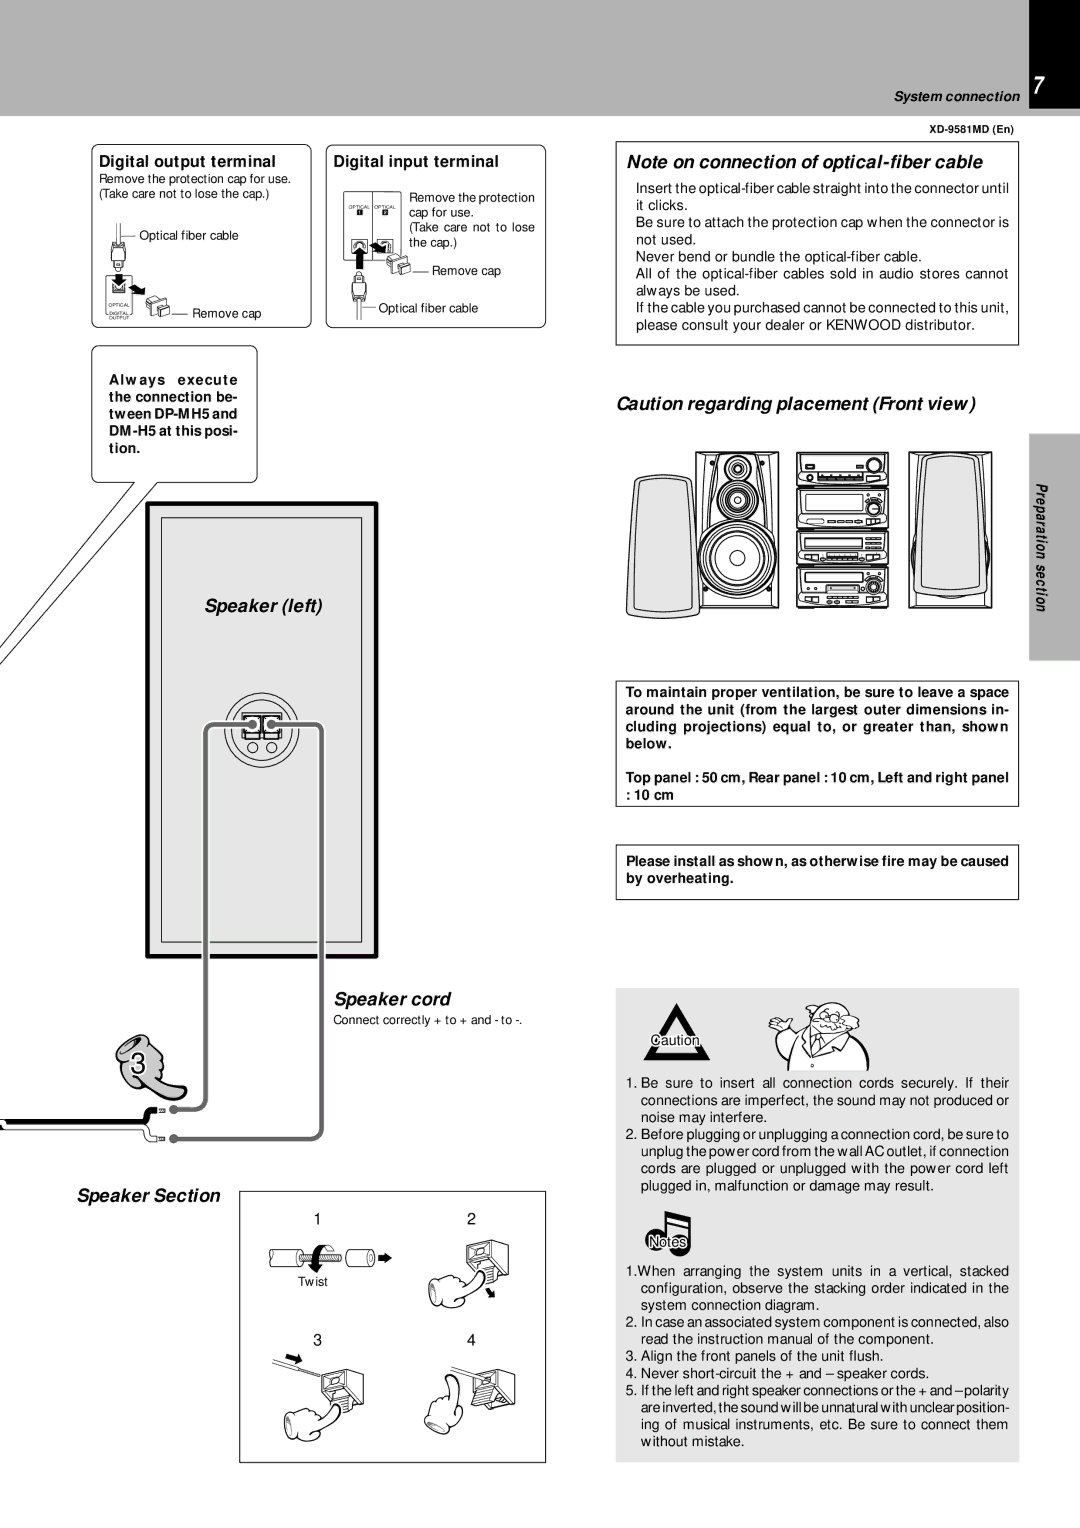
Digital output terminal

Remove the protection cap for use. (Take care not to lose the cap.)

Optical fiber cable

OPTICAL

Remove cap

OUTPUT

DIGITAL


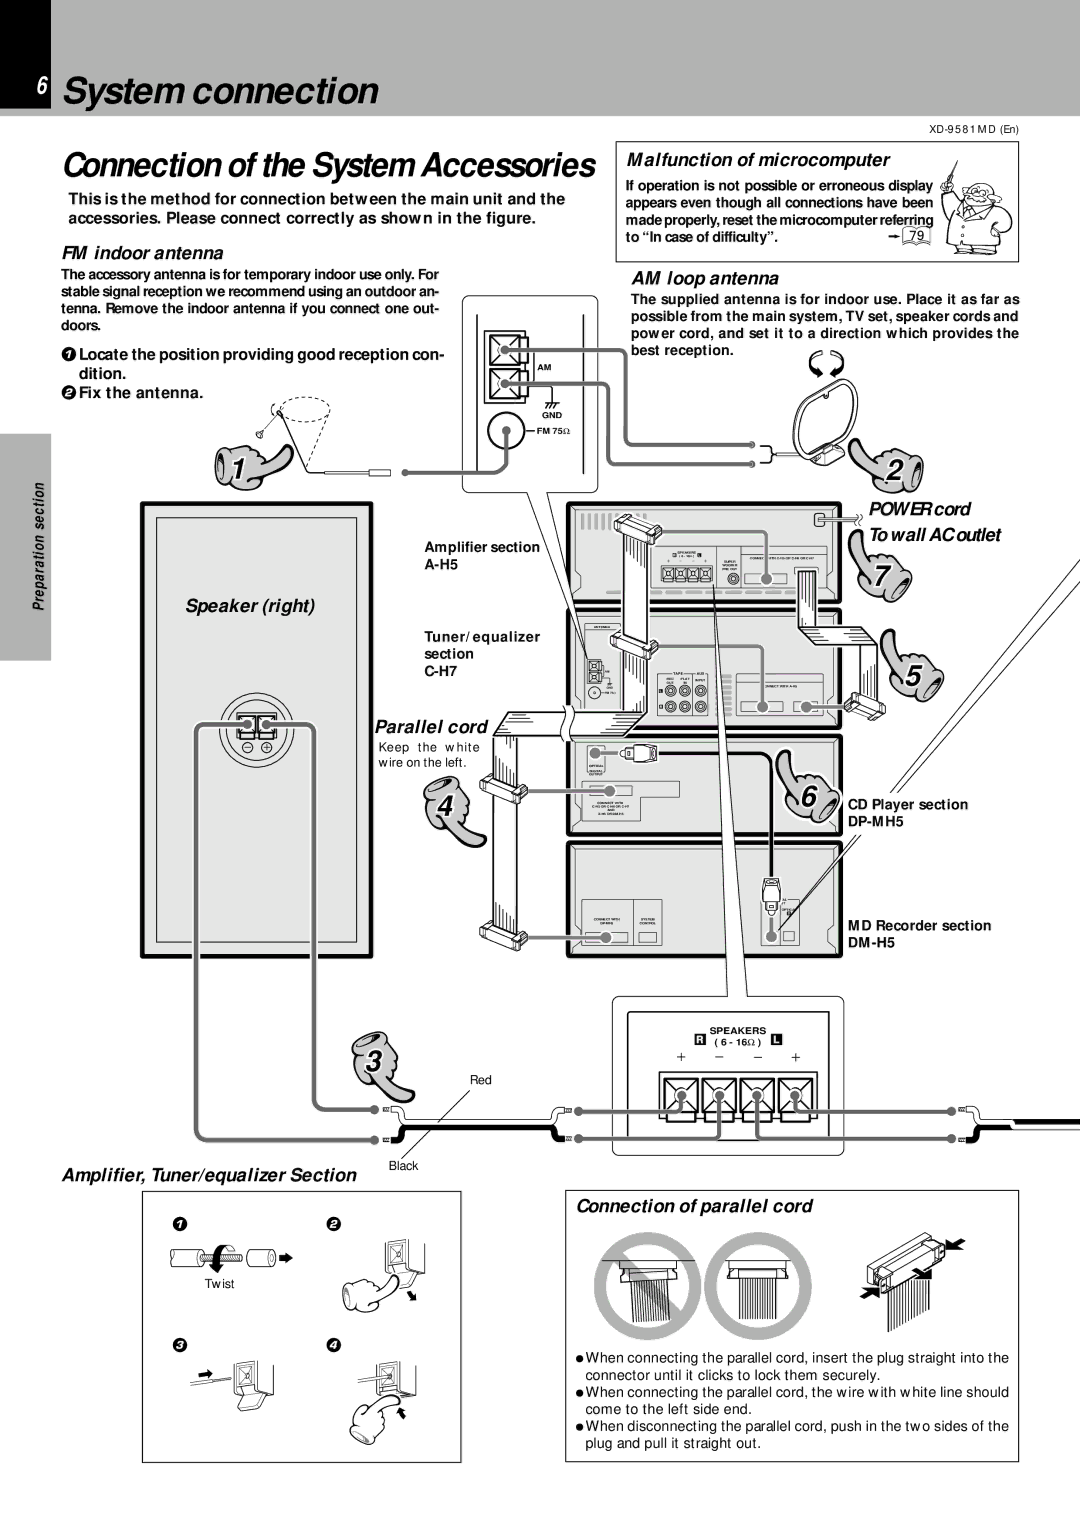
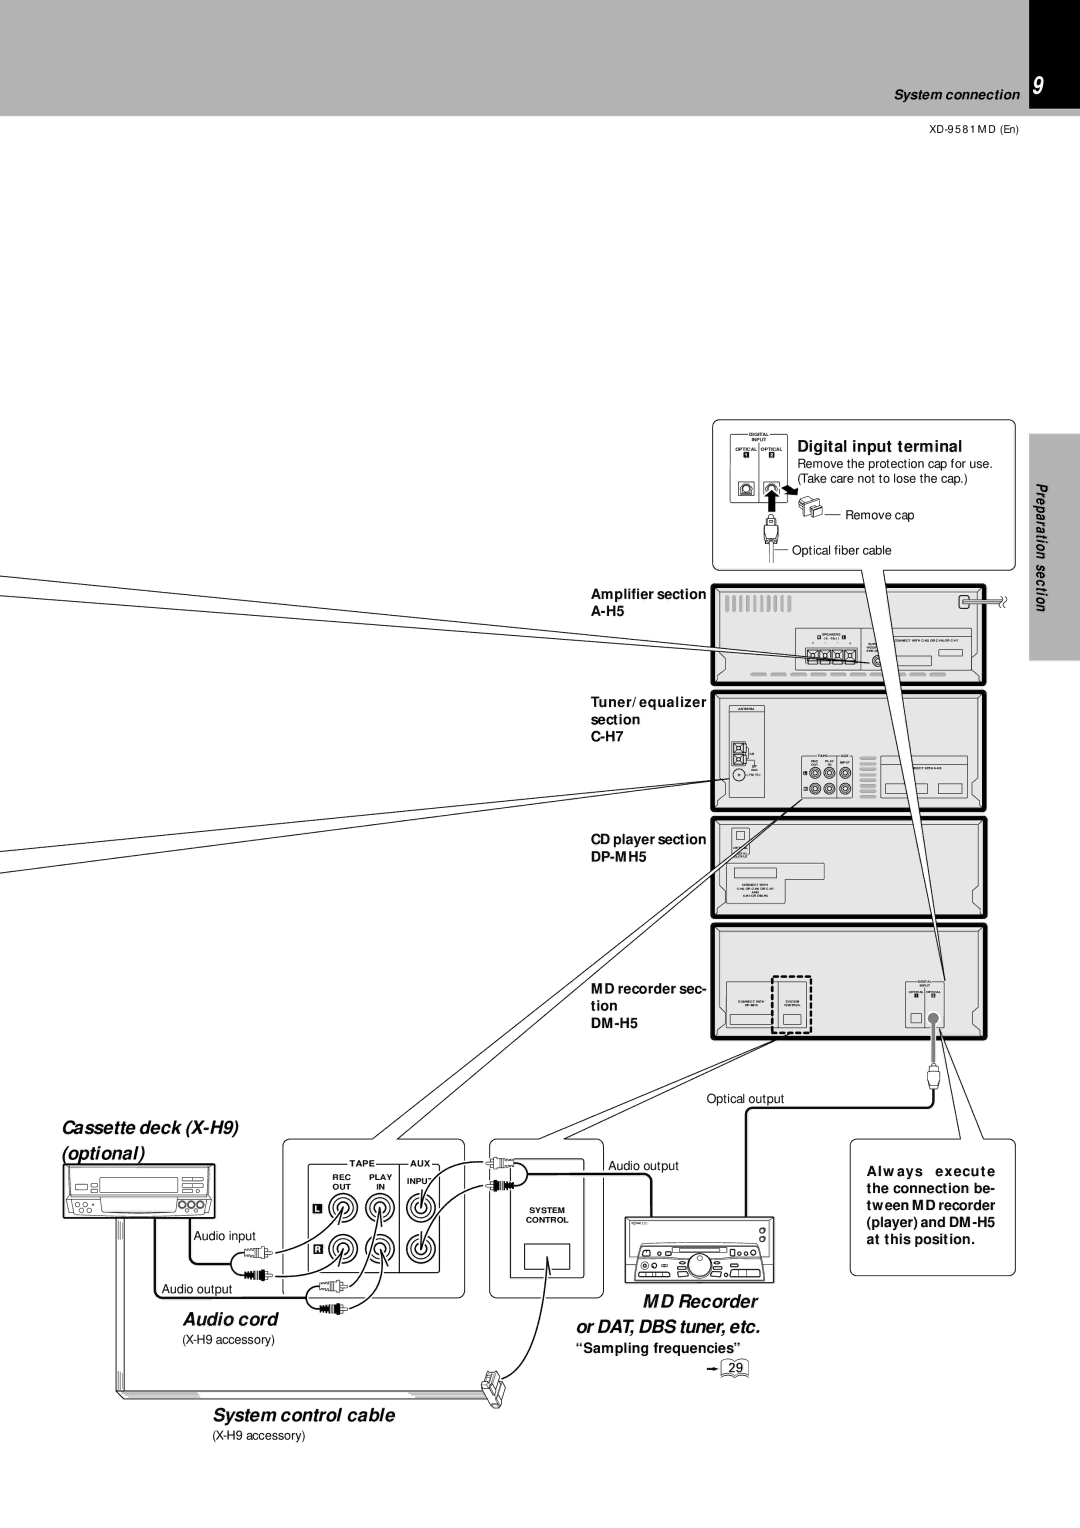
Always execute the connection be- tween DP-MH5 and DM-H5 at this posi- tion.

Digital input terminal

OPTICAL OPTICAL

Remove the protection

cap for use.

1

2


(Take care not to lose


the cap.)


Remove cap


Optical fiber cable

System connection 7

XD-9581MD (En)

Note on connection of optical-fiber cable

ÖInsert the optical-fiber cable straight into the connector until it clicks.

ÖBe sure to attach the protection cap when the connector is not used.

ÖNever bend or bundle the optical-fiber cable.

ÖAll of the optical-fiber cables sold in audio stores cannot always be used.

ÖIf the cable you purchased cannot be connected to this unit, please consult your dealer or KENWOOD distributor.

Caution regarding placement (Front view)

Speaker (left)

+

Preparation section

To maintain proper ventilation, be sure to leave a space


around the unit (from the largest outer dimensions in-


cluding projections) equal to, or greater than, shown


below.

Basic

Top panel : 50 cm, Rear panel : 10 cm, Left and right panel


: 10 cm

section


Please install as shown, as otherwise fire may be caused


by overheating.


3

Speaker Section

Speaker cord

Connect correctly + to + and - to -.

12

Twist

34

Caution

1.Be sure to insert all connection cords securely. If their connections are imperfect, the sound may not produced or noise may interfere.

2.Before plugging or unplugging a connection cord, be sure to unplug the power cord from the wall AC outlet, if connection cords are plugged or unplugged with the power cord left plugged in, malfunction or damage may result.

Notes

1.When arranging the system units in a vertical, stacked configuration, observe the stacking order indicated in the system connection diagram.

2.In case an associated system component is connected, also read the instruction manual of the component.

3.Align the front panels of the unit flush.

4.Never short-circuit the + and – speaker cords.

5.If the left and right speaker connections or the + and – polarity are inverted, the sound will be unnatural with unclear position- ing of musical instruments, etc. Be sure to connect them without mistake.

Application section

Knowledge sections

Image 7
Contents XD-9581MD For the United Kingdom Before applying powerSafety precautions Marking of products using lasers Except for some areasKnowledge section ContentsSampling Frequencies Special features An MD recorder is standard equipmentVersatile tone and sound field adjustment Convenient timer functionsHandling of discs Disc handling precautionsHandling of Mini Disc System connection Digital input terminal Speaker leftSpeaker Section Speaker cord Digital output terminalFM outdoor antenna BeforeSystemapplyingconnectionpowerSuper-Woofer Operation Super woofer SW-500 optionalOptical Optical Digital input terminal Cassette deck X-H9 optionalAudio cord System control cableTuner/equalizer section Controls and indicatorsDisplay Tuner/equalizer section Controls and indicatorsSpectrum analyzer display 1ON/STANDBY Amplifier sectionCD player section MD recorder section Peak level meter display Display MD recorder sectionRemote control unit Remove the cover Insert batteries Close the cover Operation of remote control unitLoading batteries OperationBasic use method Lets put out some soundStandby mode Muting the sound temporarily only on the remote controlListening through headphones Auto Power Save functionLets put out some sound Playback of CDTo pause playback Skipping tracksPlayback from desired track To fast forward and backwardPlayback of Mini Disc Regard to display scrolling Disc recorded in monaural modeSearching in a track To pause playback To stop playbackSelect the desired title Confirm that the PGM indicator is not litRegard to automatic title search Press the Title Search keyPeak level meter independent L and R indication Regard to the Time Display keyRegard to Display key Elapsed time of track being playedReceiving broadcast station One-by-one presetting manual preset Collective presetting of stations auto presetSelect the tuning mode Tape Lets recordRecording on MD AUXStop the recording Regard to display messages Pause the recordingAlways remove the minidisc after recording How to use the AUTO/MANU. Key How to use the REC Input keyTips for recording from a CD Listening in the desired sequence program playback Playback of CD1Select the disc To quit the program modeTo check the programmed tracks To add a track to the programTo stop repeated playback Repeated playbackPlease select the disc before selecting Confirm that the PGM indicator is not litSelect the Random mode Press so that the Random indicator goes off@ 0 0 1Let the PGM indicator lightPlayback of MD Start playbackClearing all tracks Checking the order of tracksTo clear tracks from the program Clearing tracks from the endPress the Repeat key again Desired sequence Let the Repeat indicator lightPlayback of MD S. Radio Data System To switch the display contentsSearching for a desired program type PTY search Select the PTY search mode2Select the desired program type Repeat steps 1, 2 When a station is receivedStart the search To change to a different program typeReceive an RDS station Auto preset the stationsSelect a station where RDS and EON are lit Select the desired informationWait for the desired information Regard to TP Traffic Program indicatorConvenient recording methods Convenient recording methodsSelection of the recording type Convenient functionRecording of one CD or several CDs CD =MD p CD =TAPE Q When a desired track is found, only that track is recordedFade-in/fade-out One-touch recording of one CD, MDStart recording Make the preparations for recordingTo interrupt a recording At the end of the recording Playback of a CD or MDPress during playback Press the Twin REC key Twin Recording FunctionPress the Best Hits key Producing an MD or a tape collecting only the first titlesRepeat key is not effective 4Start edit recordingSelect the disc Within 8 secondsTo step To check the edited contents To clear the edited contentsRecording of one CD or several CDs CD =TAPE 3Start edit recordingStart edit recording Make sure that the PGM indicator is offLight the Edit indicator Enter the disc and tape conditionsTo clear the edited contents To check the edited contentsAutomatic Space Function Fade-out/Fade-in at the tape reversal CD =TAPE only Make sure that the PGMindicator is offSelect the disc MD edit functions MD edit functionsDividing a track, combining two tracks Erasing tracksExecute title assignment Activate the title input modeAssigning a title to a disc or track Input the titleCharacter Track Edit Changing or deleting a titleTotal number of title characters Execute title change or deletionExecute the track move operation Moving several tracks at a time Quick Move1Select Q.MOVE 2Select the range of tracks to be reorderedSelect the moving destination track Moving a single track Track MoveSelect Move Select the track to be movedPreview function Dividing a track Track DividePlay the track to be divided Divide ?Disc Writing displayed during the mini disc ejection Execute the track divide operationAfter editing, eject and remove the mini disc Title division imageExecute the track combine operation Combining two tracks Track CombineSelect Combine 2Select the track to be combinedExecute the erase operation Erasing several tracks at a time Quick Erase1Select Q.ERASE Select the titles to be erasedTrack Erase ALL Erase 2Select the Erase modeMake the preparations To erase one track Track Erase To erase all tracks ALL EraseTrack Divide P Erasing a part of a trackExecute Track Erase Once Adjust the effect strength level Switch on SRS 3DEnjoying sound field effects Effective sound field and sound quality adjustment Equalizer frequency band adjustmentListening with the desired sound equalizer function Adjust Select balance adjustment2Adjust Select Tape adjustment or AUX ad- justmentSwitching the superposed display Multi-function display switching demonstration functionSwitching the spectrum analyzer display 3Enter the figure of minute Clock adjustmentActivate the clock adjustment mode 2Enter the figure of hourTo cancel Timer operationOperate easy To use Timer O.T.T Sleep timerMake preparations for the play recording 2Adjust the listening volume4Select a program No Make the desired reservation Select the timer program No. to be usedEnter the on time Enter the OFF Standby timeTo set the same timer program again Check the reservation contentTo change the reserved contents When timer operation is not requiredAdjust the clock before setting the timer Important items MaintenanceMaintenance of the Set Regard to contact cleanersCaseImportantof difficultyItems MD systemDigital copy can- not be repeated Digital recording and ScmsScms Serial Copy Management System Amplifier section/Speakers Operation to resetSymptom Cause Remedy Case of difficultySymptom Cause MD recorder section other symptomsBlank Disc Disc ErrorNo Disc Title FullCD player section Remote control unitTuner/equalizar unit C-H7 / Amplifier unit A-H5 SpecificationsSpeakers LS-J6 CD player unit DP-MH5For your records