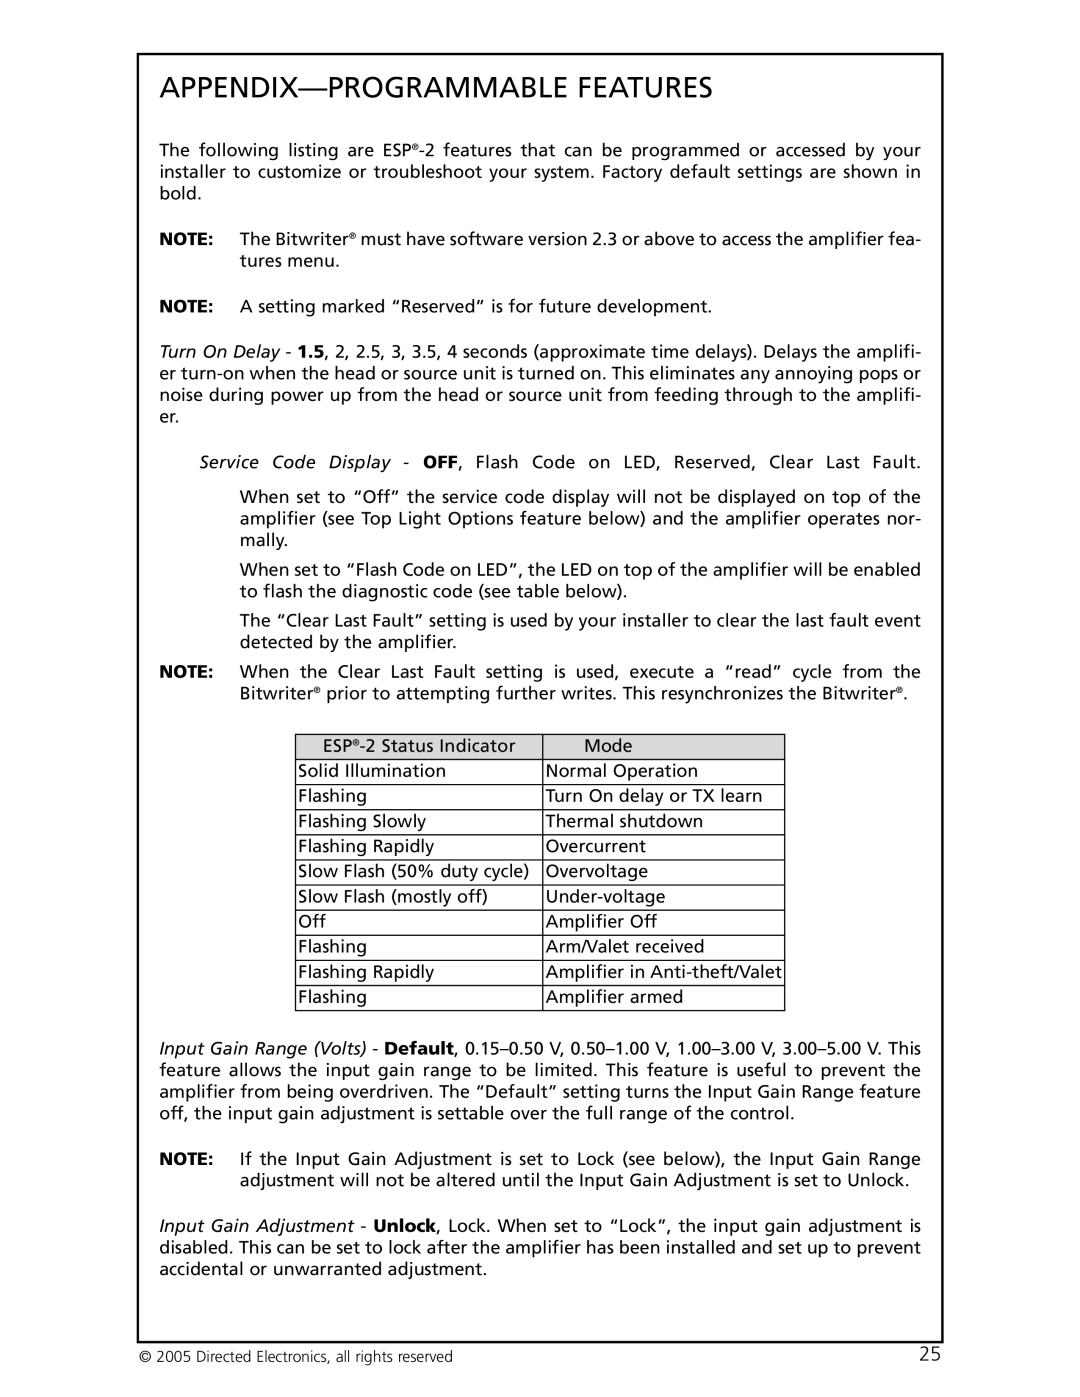
Orion Car Audio HP-2800, HP-4800 manual Amplifier Wiring, Remote Bass Operation optional

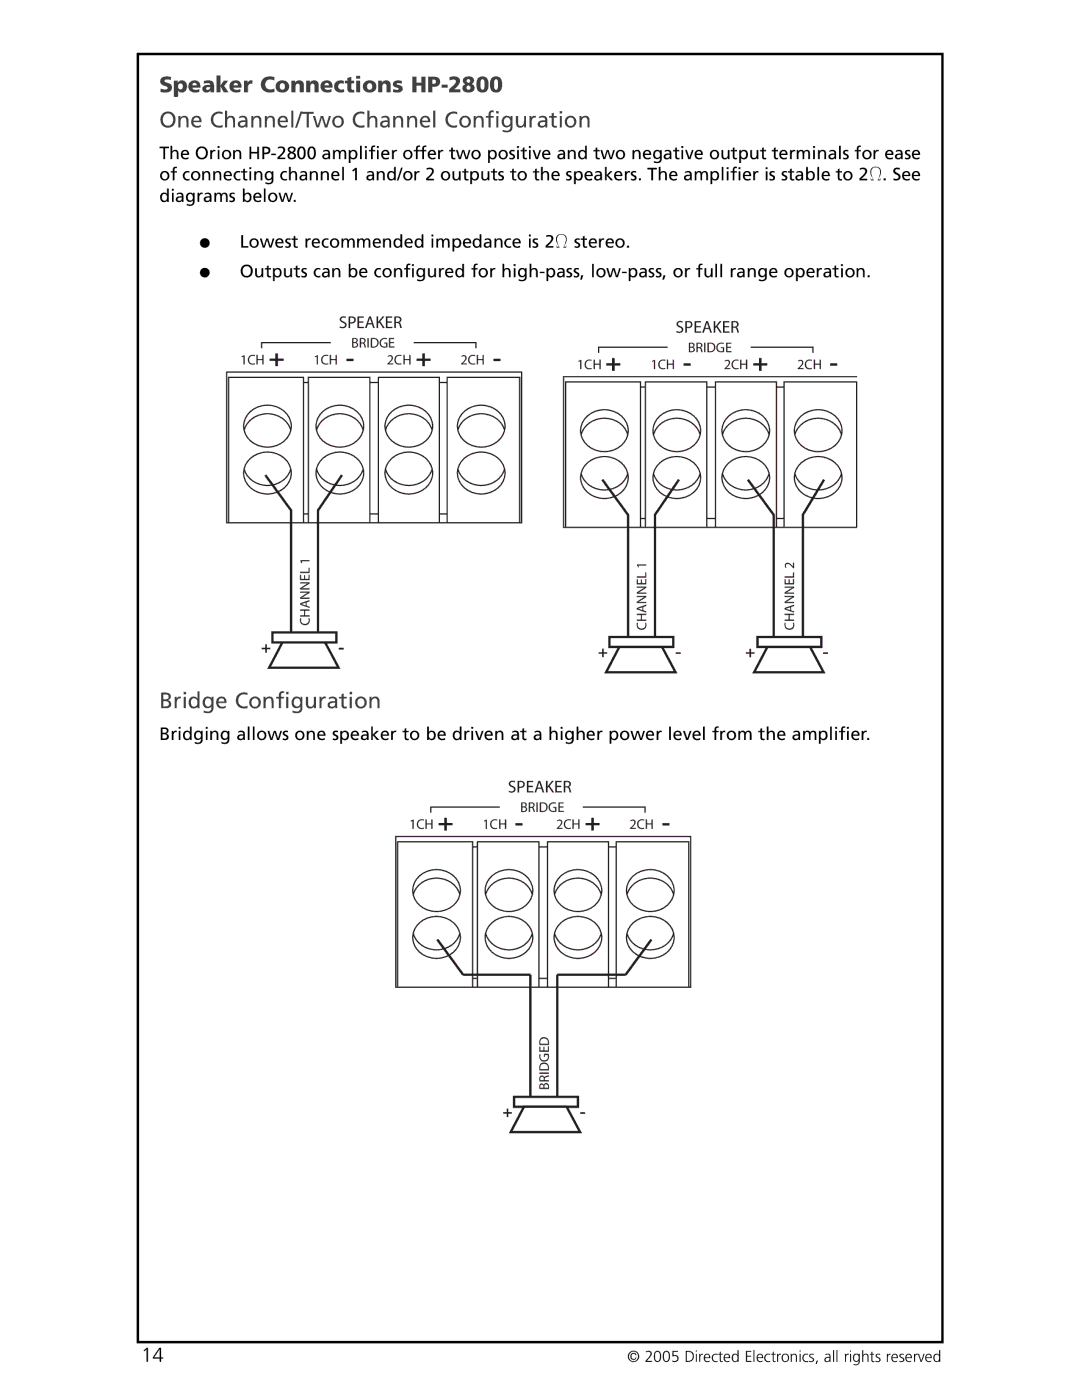
Page 14

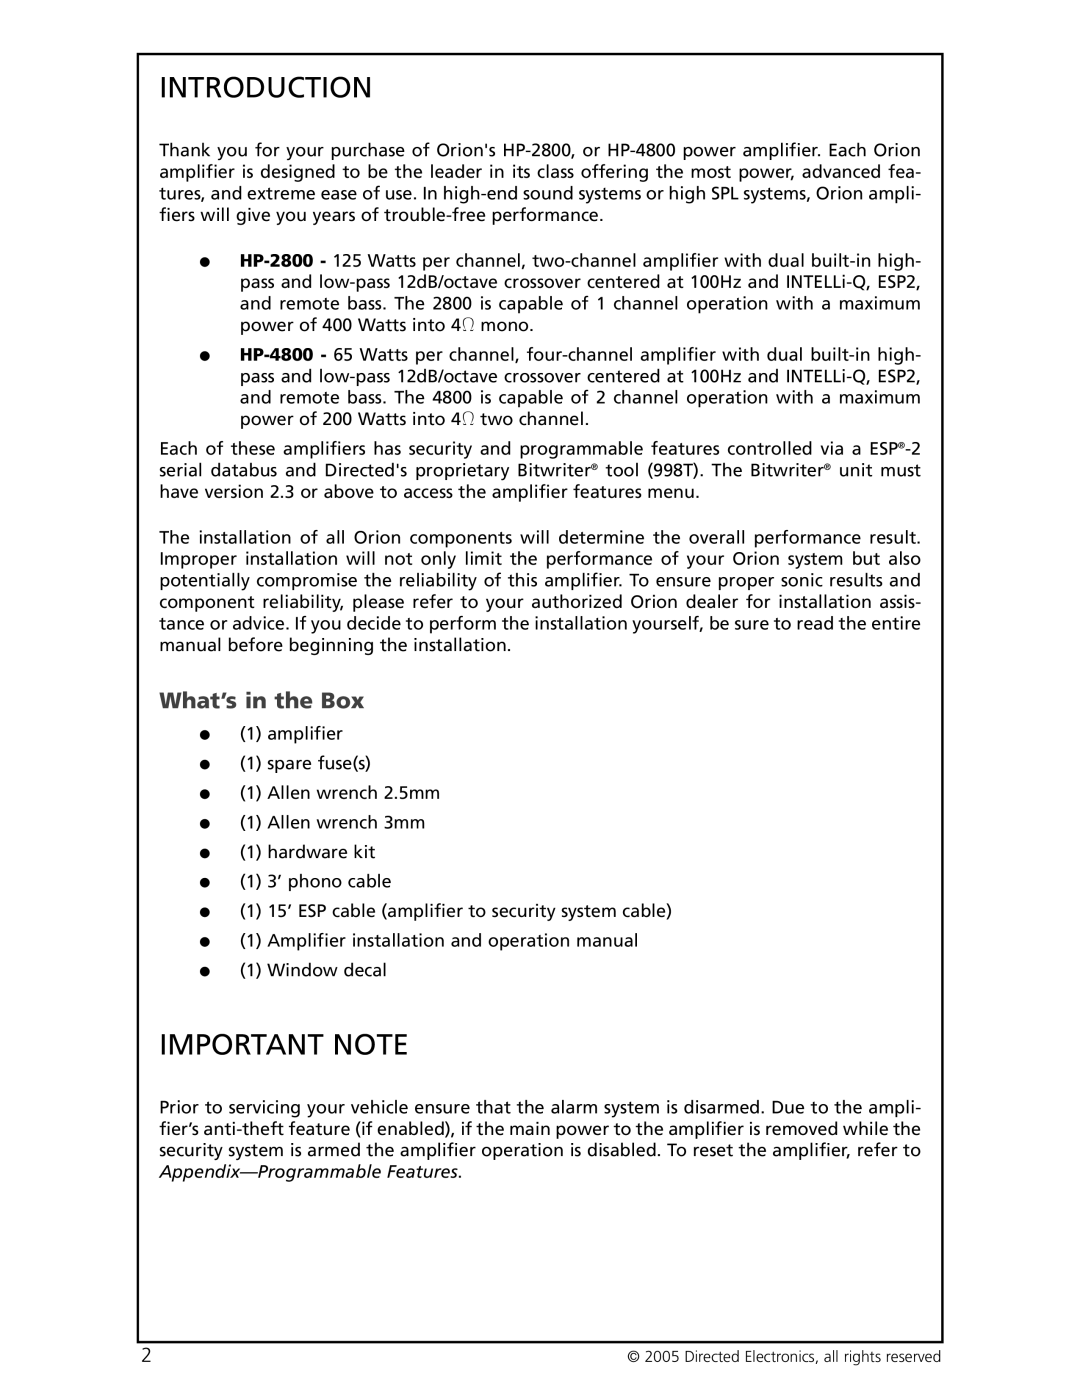
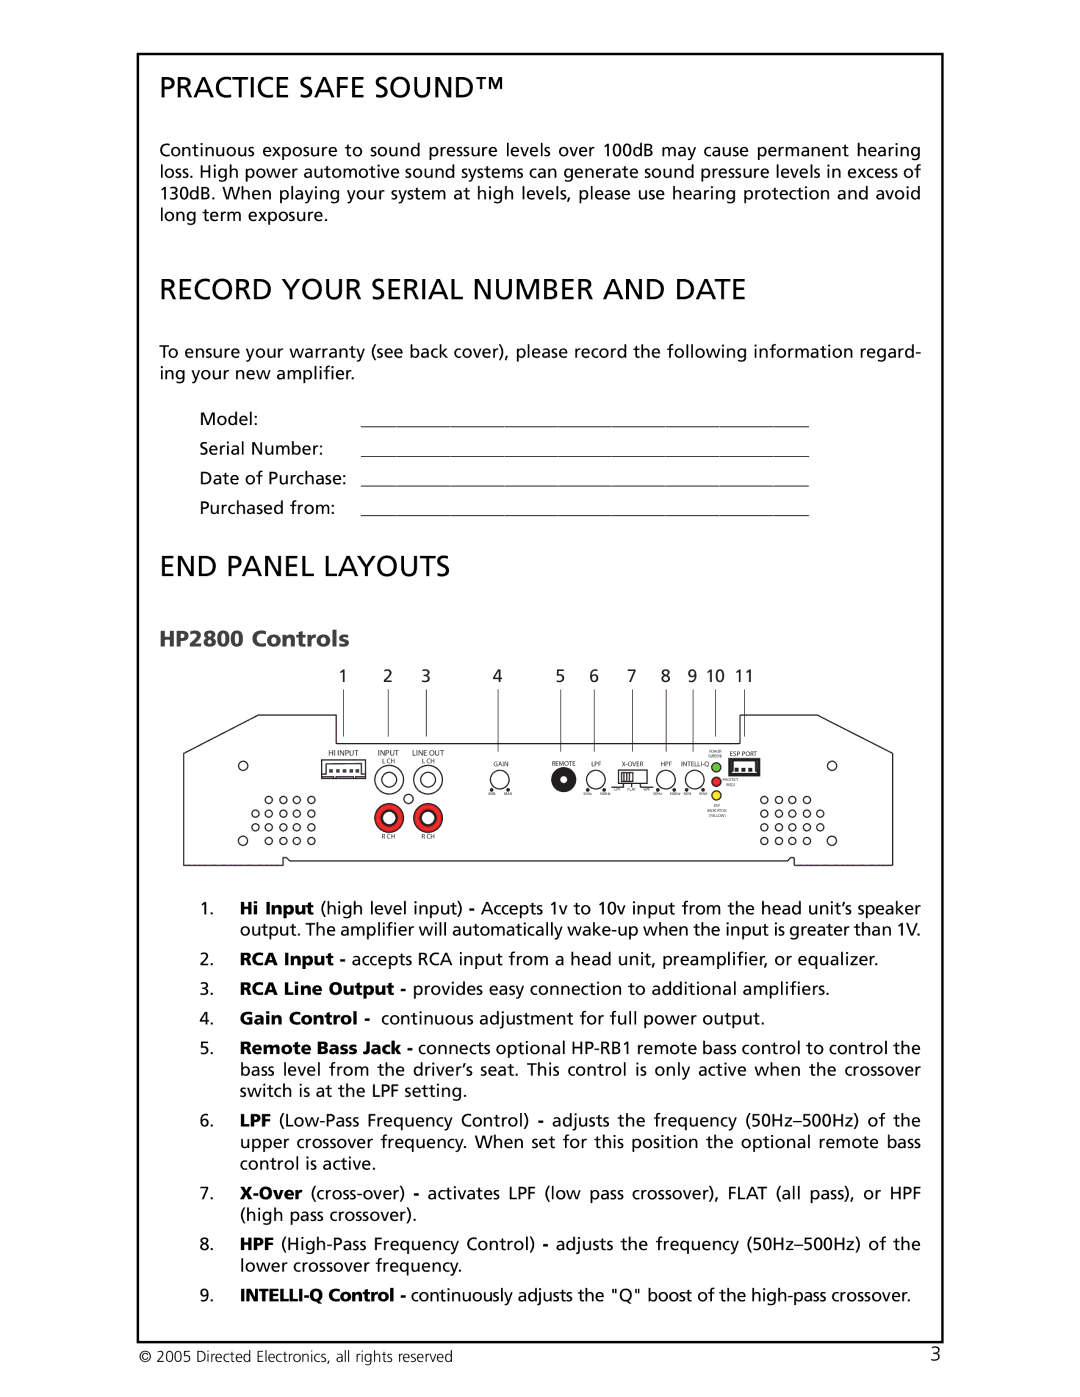
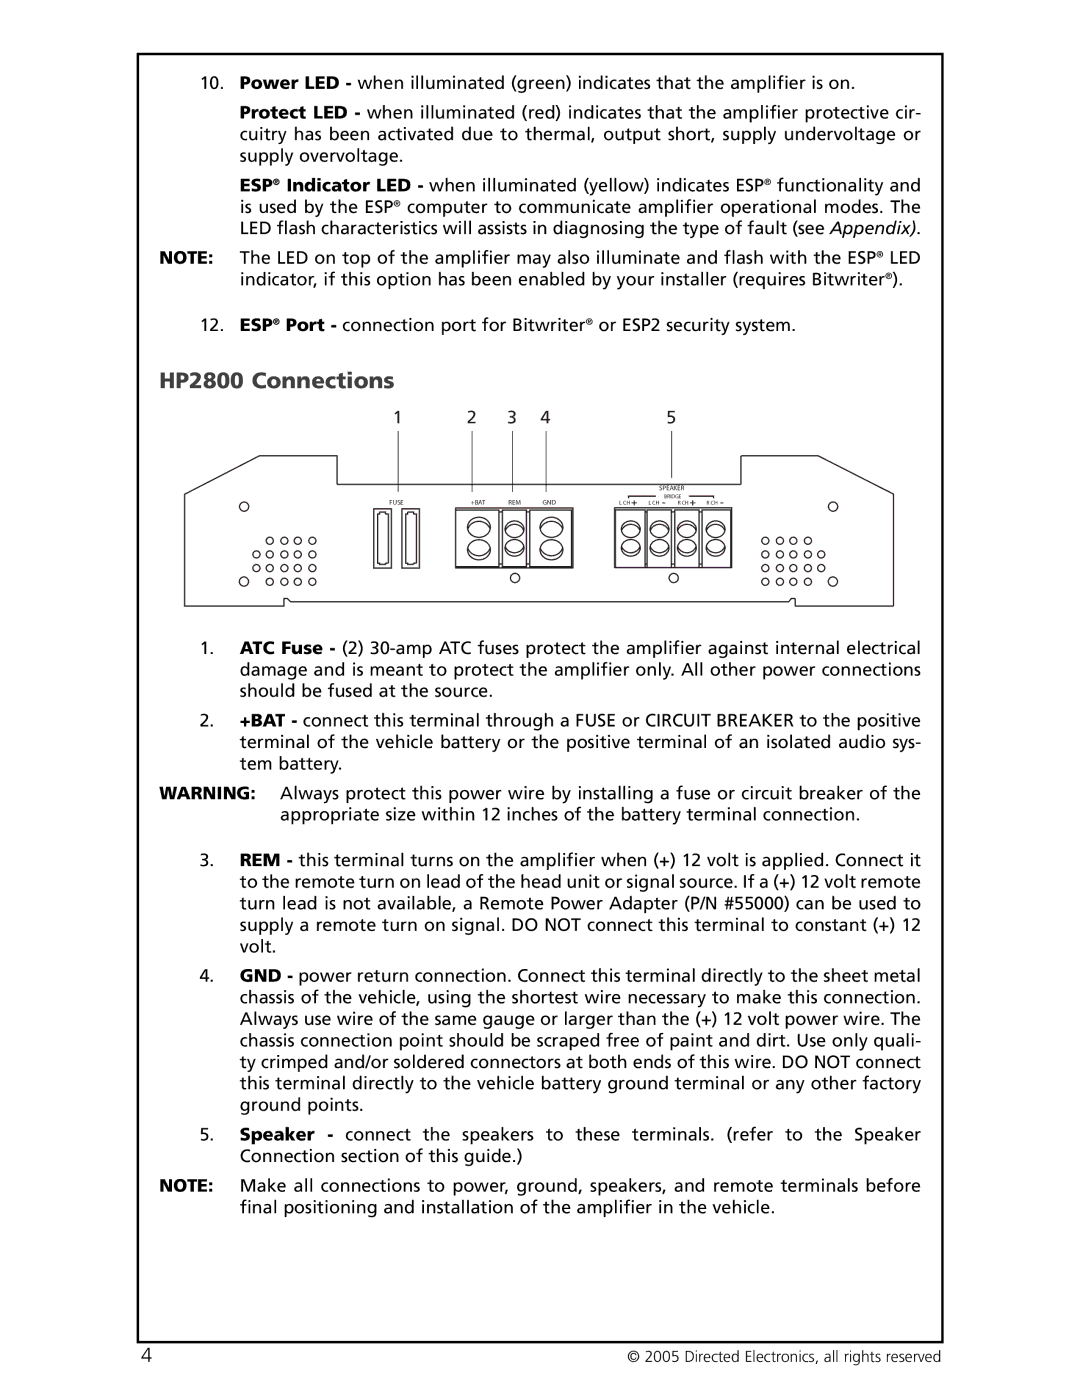
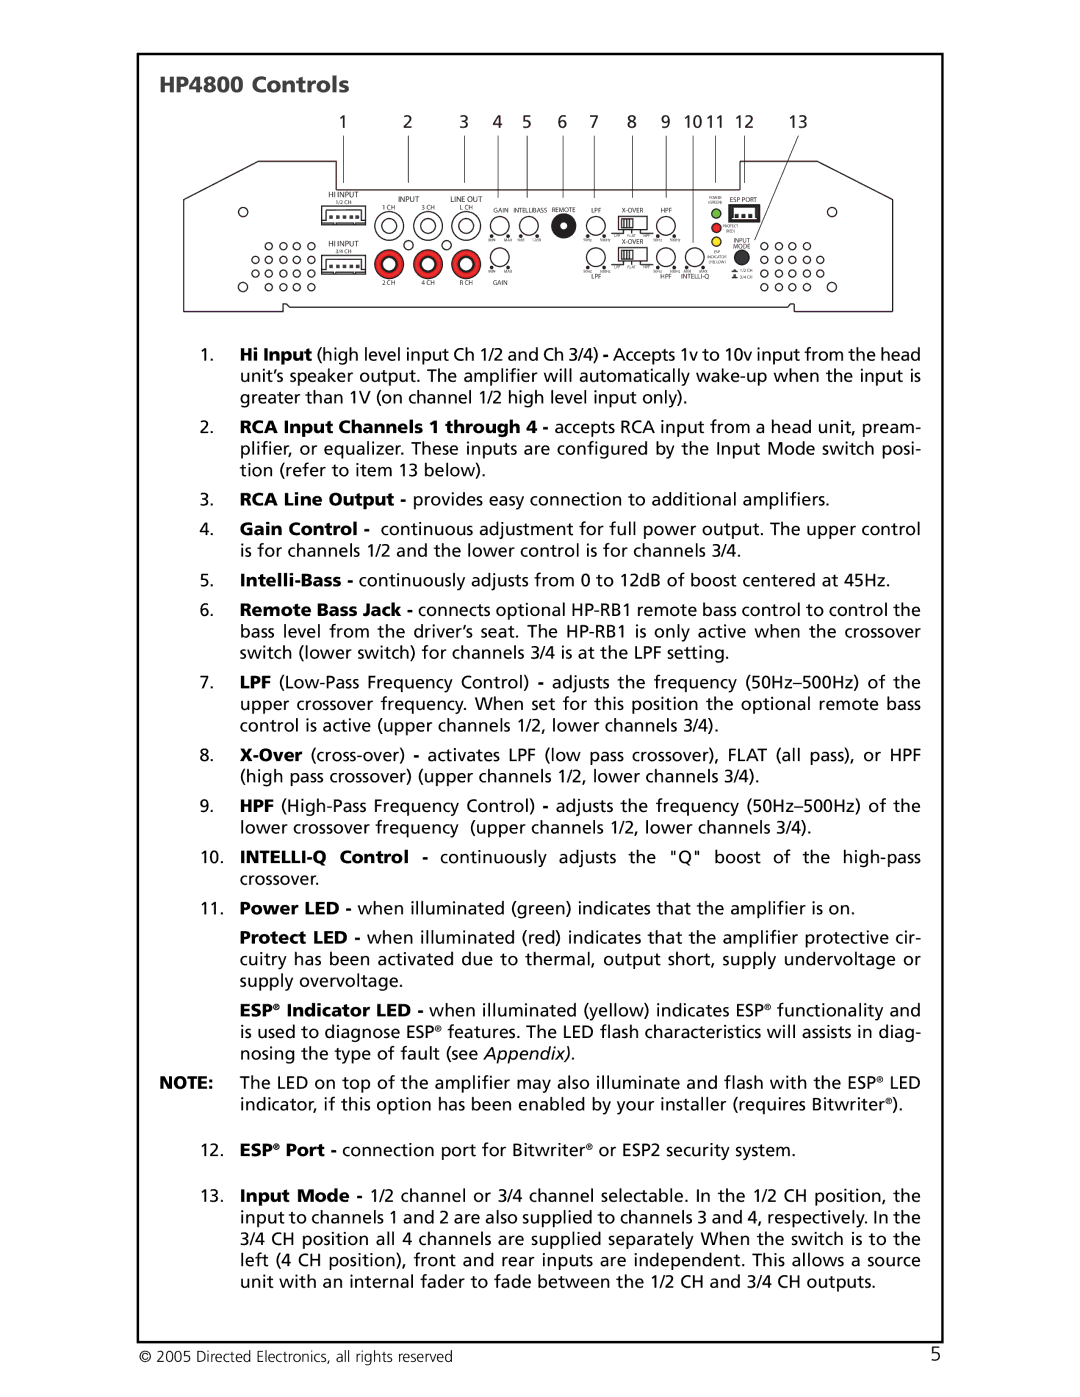
Remote Bass Operation (optional)

The remote bass port provides easy remote access to the internal gain structure of the HP power amplifier. The optional HP-RB1 plugs into the amplifier via the 1/8" mini jack plug. The HP-RB1 can be installed in the front of the vehicle near the driver’s position to control the amplifier bass level.

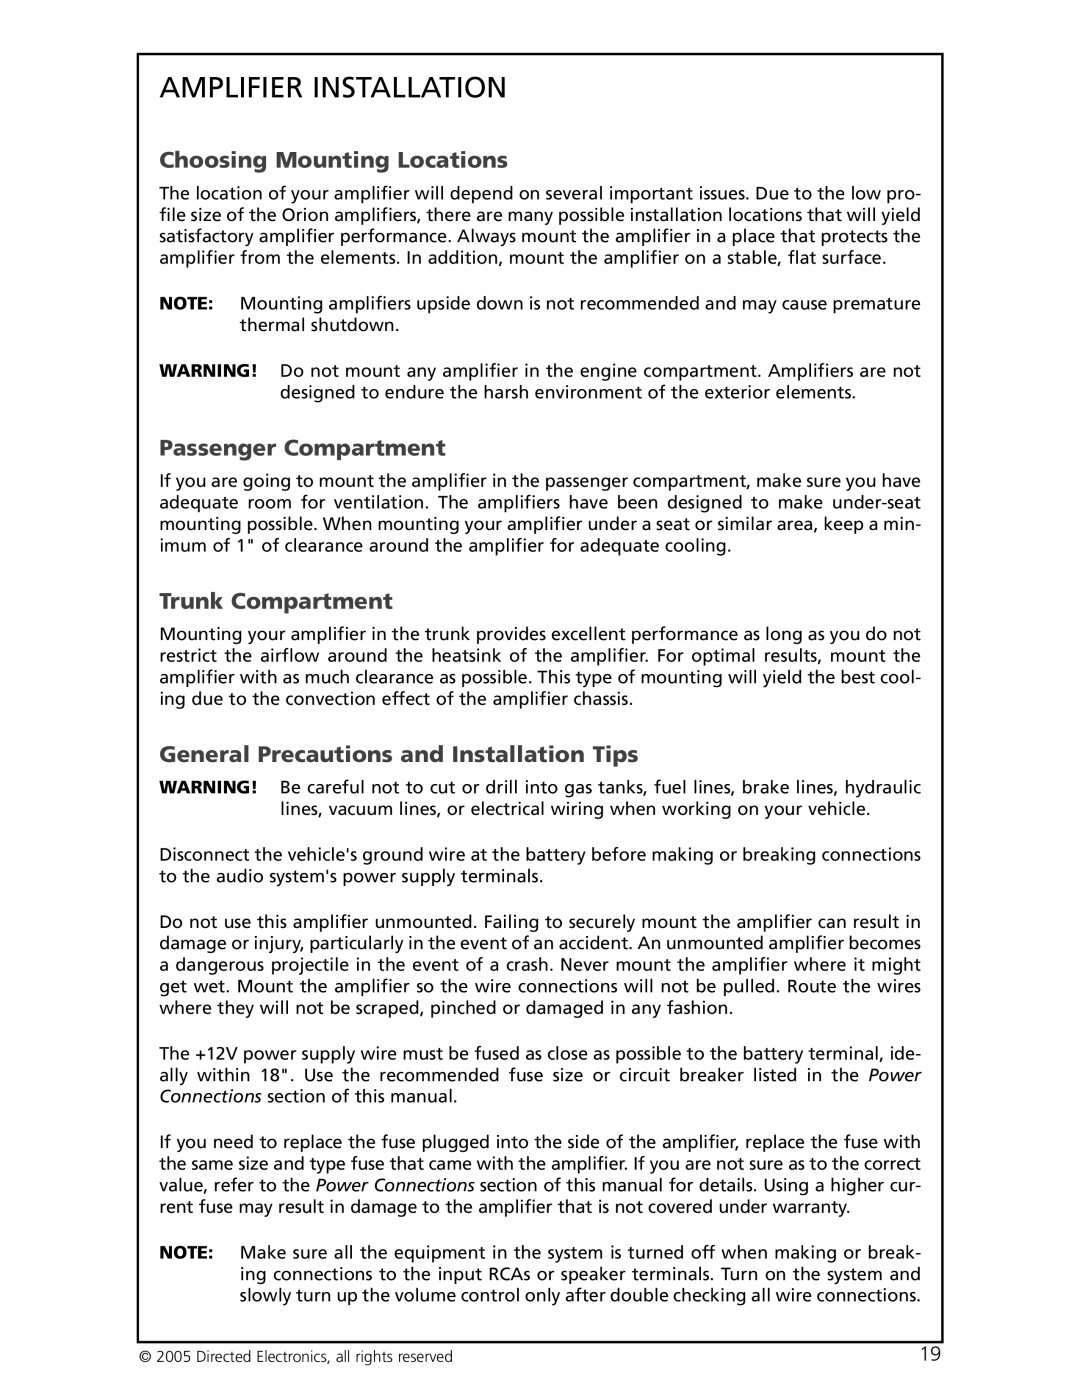
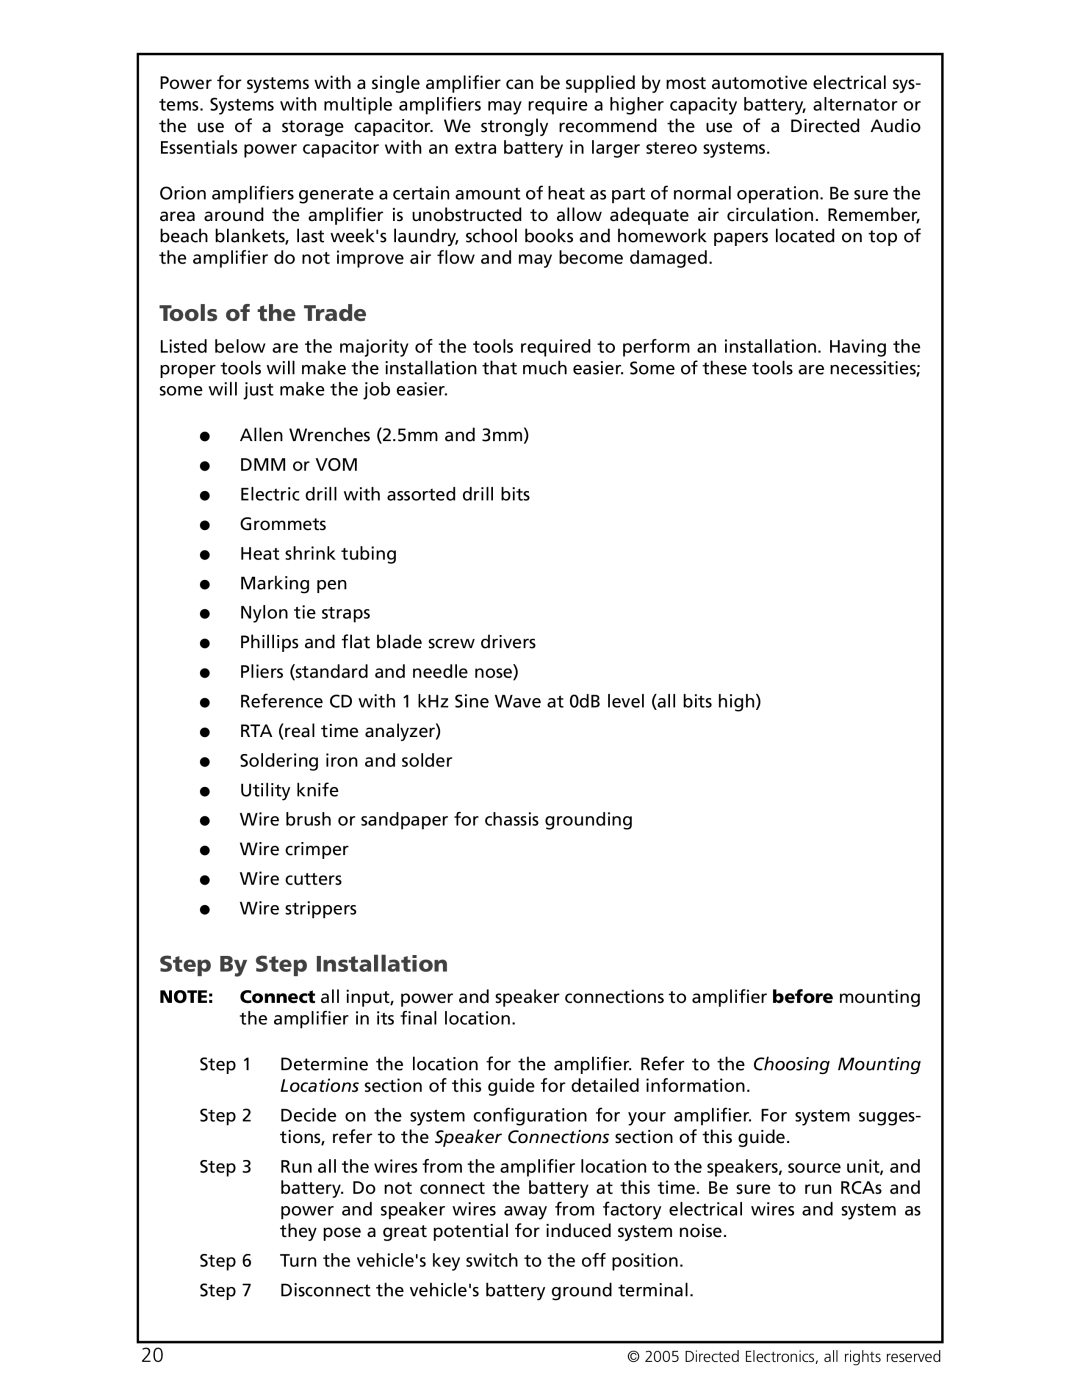
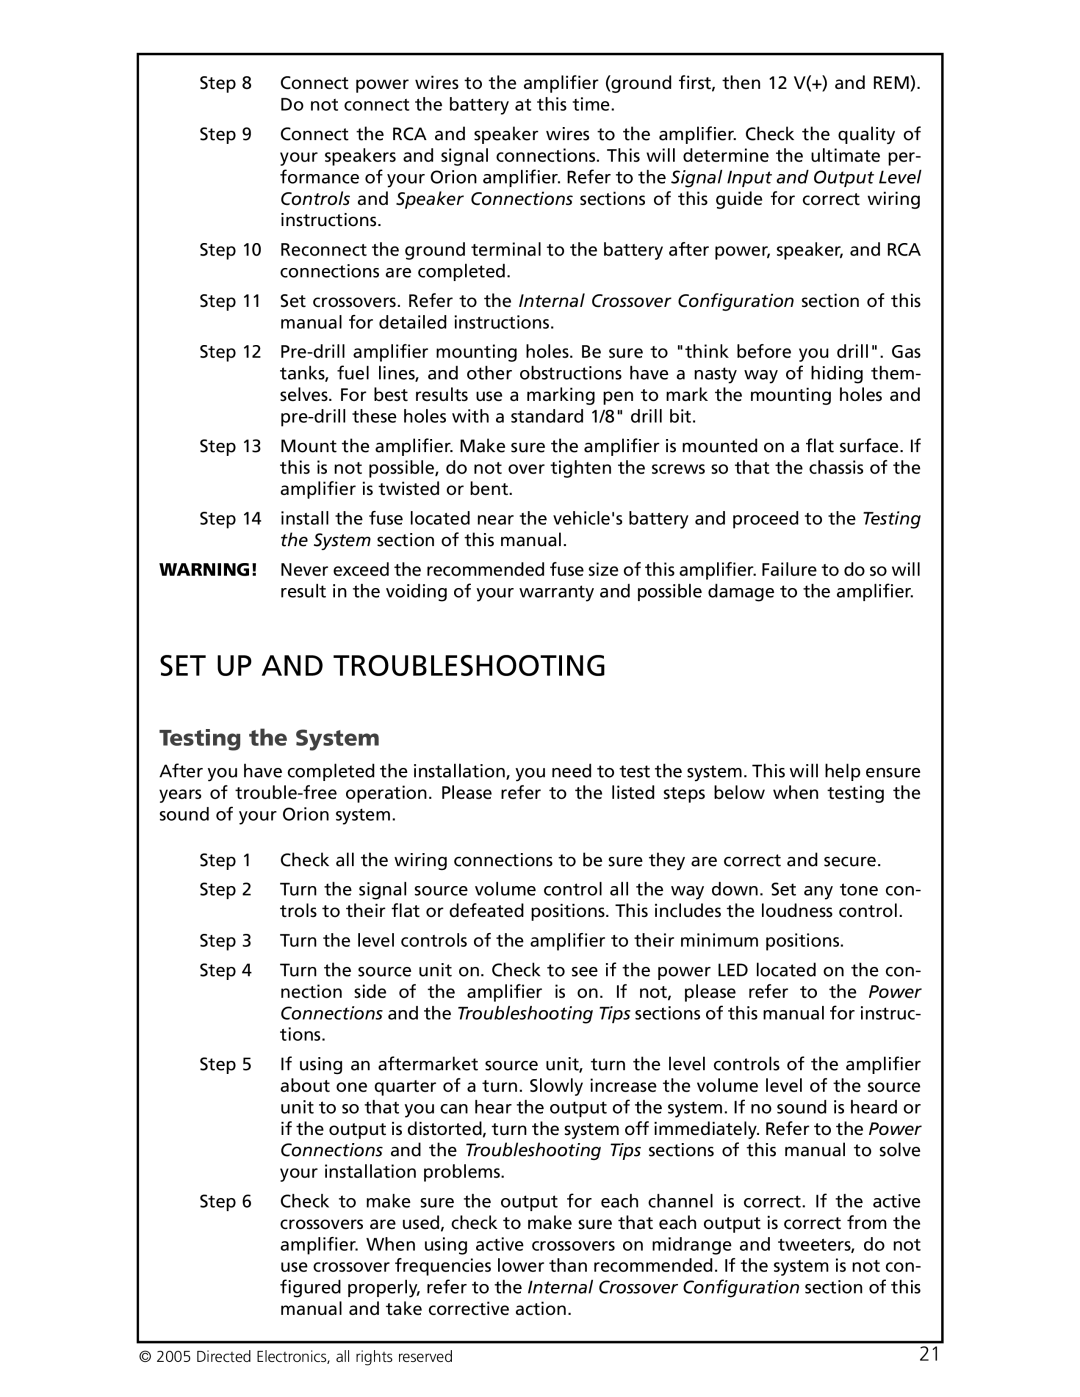
AMPLIFIER WIRING

NOTE: Power and speaker connections to the amplifier should be made prior to final positioning and mounting of the amplifier in the vehicle.

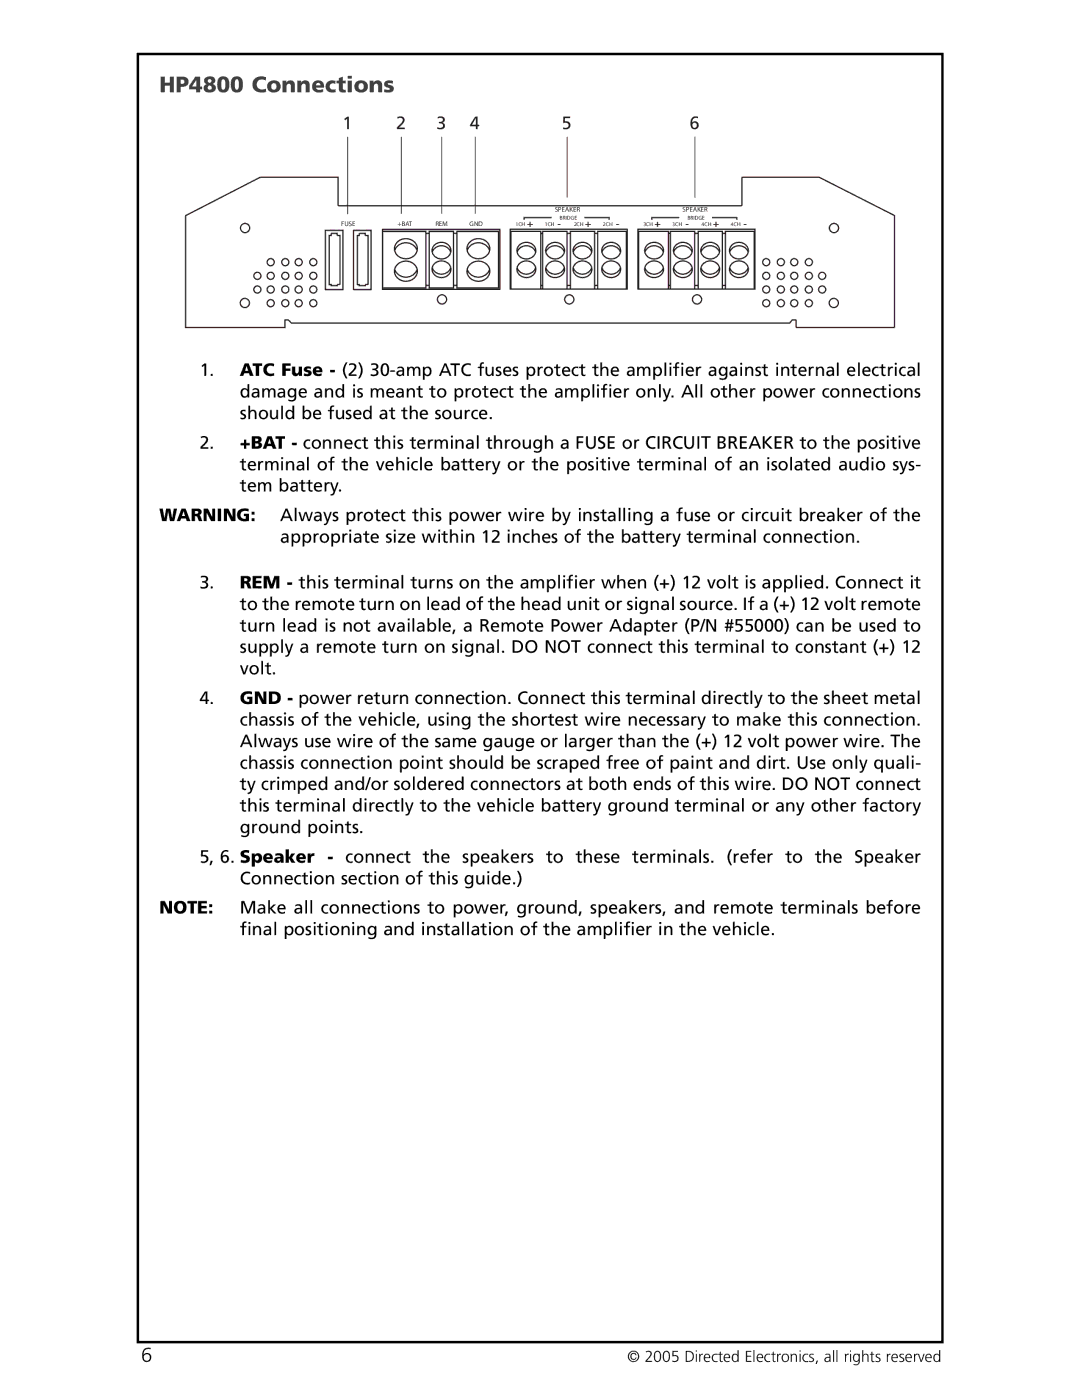
Power Connections for the HP-2800, and HP-4800

Orion HP-2800 Fuse Size: 2 x 30 AMP ATC.

Orion HP-4800 Fuse Size: 2 x 30 AMP ATC.

Power connections accept up to 4 AWG wire.

4 AWG power and ground wire recommended for optimal performance.

Connect 12V+ to the battery through fuse holder. This connection provides +12V main power to the amplifier.

Power wire must be fused no more than 18" from battery.

Ground amplifier to a good chassis ground as close as possible to the amplifier.

Connect REM terminal to remote turn-on lead from source unit. This connection provides +12V power to turn-on the amplifier.

Add extra ground wire between the negative terminal of the battery and the chassis.

NOTE: The addition of a ground wire from the battery to the chassis of the vehicle improves the ability of the battery to supply power to the amplifier. This is recom- mended because the current delivery of the factory electrical system was designed only to accommodate electronics supplied by the auto manufacturer.

High Level Input Harness

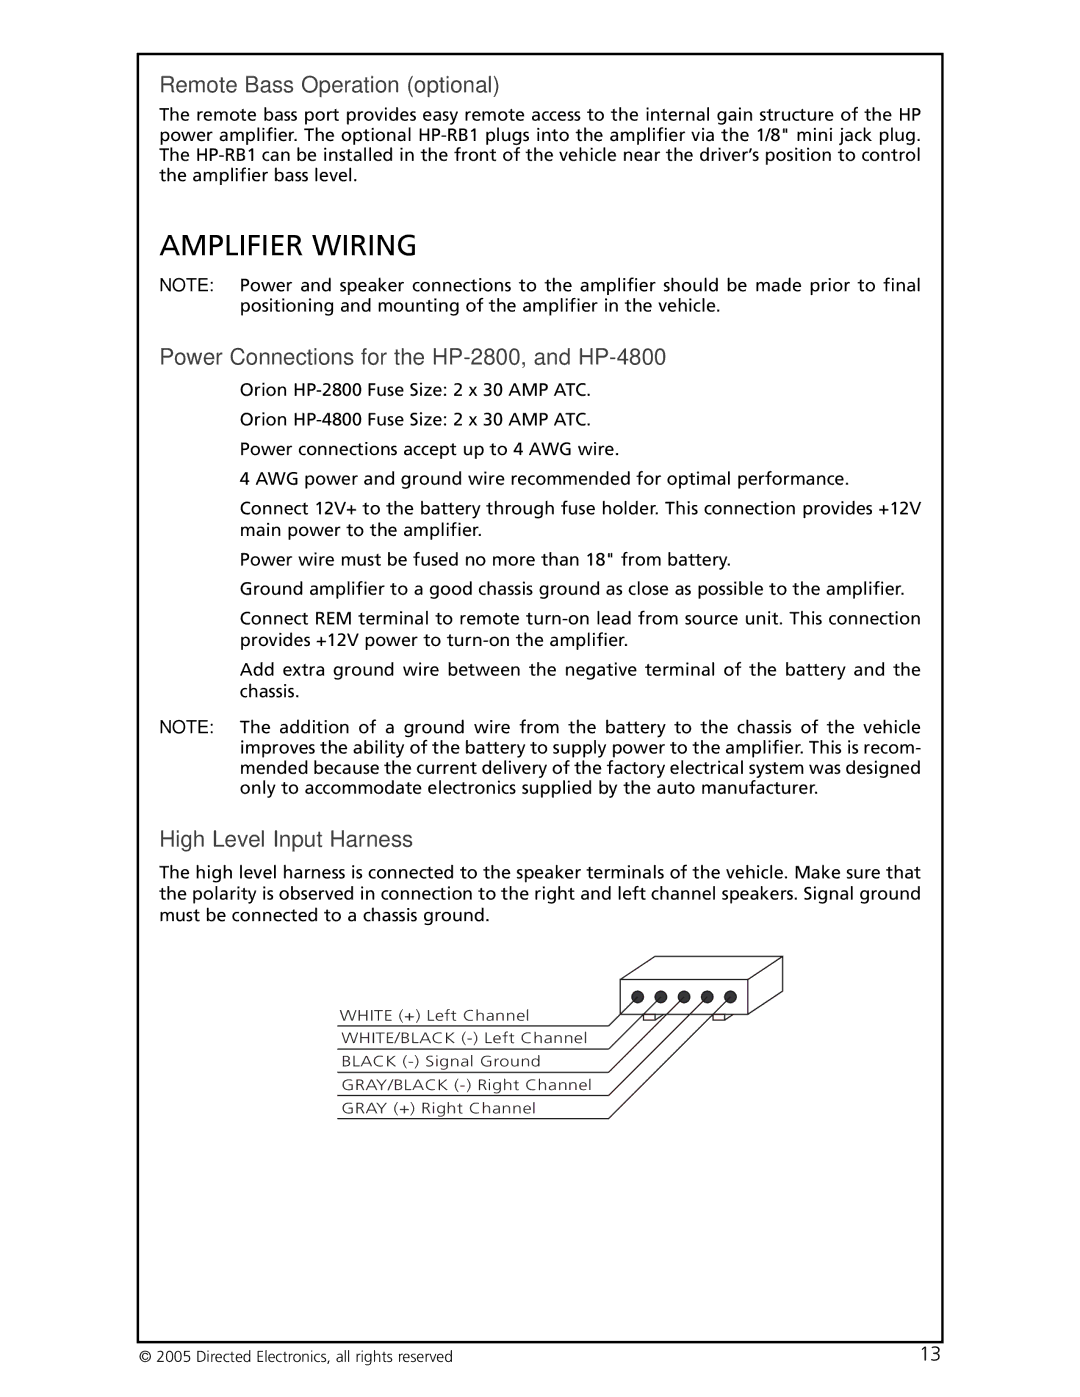
The high level harness is connected to the speaker terminals of the vehicle. Make sure that the polarity is observed in connection to the right and left channel speakers. Signal ground must be connected to a chassis ground.

WHITE (+) Left Channel

WHITE/BLACK (-) Left Channel

BLACK (-) Signal Ground

GRAY/BLACK (-) Right Channel

GRAY (+) Right Channel

© 2005 Directed Electronics, all rights reserved

13

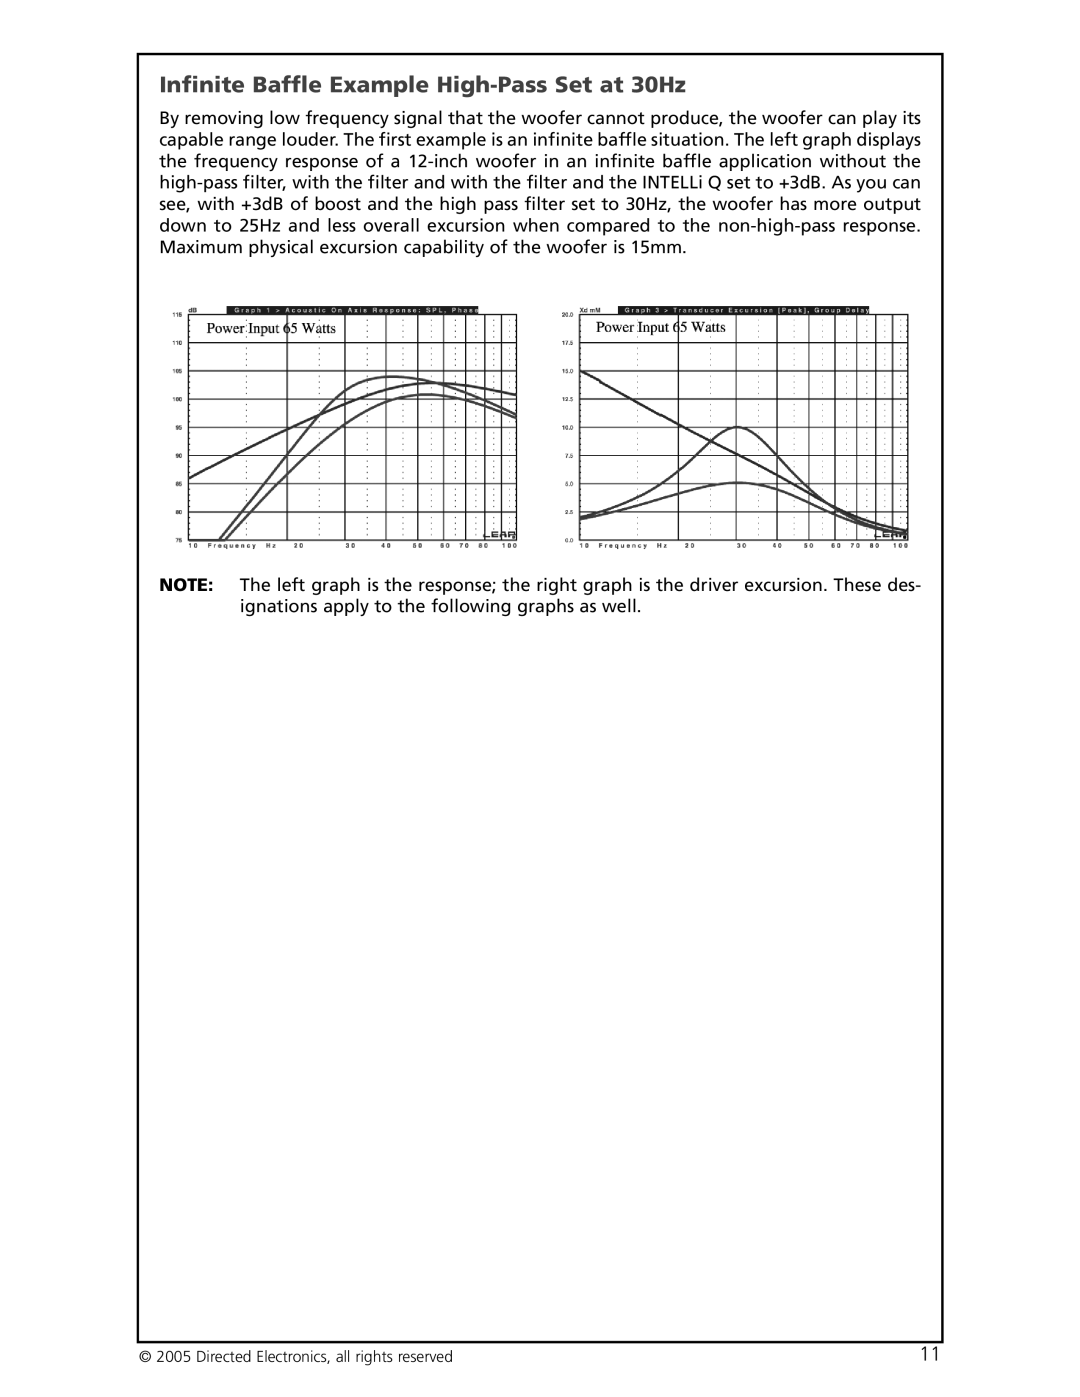
Image 14
Contents HP-2800 HP-4800 Contents What’s in the Box IntroductionImportant Note END Panel Layouts Practice Safe SoundRecord Your Serial Number and Date HP2800 ControlsHP2800 Connections HP4800 Controls 1011HP4800 Connections CEA Specifications Specifications Amplifier Section HP-2800 HP-4800Amplifier Settings Adjusting Intelli-Q Adjusting Intelli-BassInfinite Baffle Example High-Pass Set at 30Hz Vented Example High-Pass Set at 30Hz Sealed Example High-Pass Set at 20HzSealed Example High-Pass Set at 30Hz Remote Bass Operation optional Amplifier WiringPower Connections for the HP-2800, and HP-4800 High Level Input HarnessSpeaker Connections HP-2800 One Channel/Two Channel ConfigurationBridge Configuration Three Channel Channel 1, Channel 2, Bridged Four Channel Stereo Configuration Speaker Connections HP-4800Three Channel Stereo/Bridged Configuration Tri-Mode Six Channel Configuration Choosing Mounting Locations Amplifier InstallationGeneral Precautions and Installation Tips Passenger CompartmentStep By Step Installation Tools of the TradeSET UP and Troubleshooting Testing the SystemAdjusting the Sound of the System Troubleshooting Tips Symptom Probable Cause Action To TakeInternal Crossover Configuration APPENDIX-PROGRAMMABLE Features Directed Electronics, all rights reserved Directed Electronics, all rights reserved Directed Electronics, all rights reserved Warranty