LAUNDRY TOWER SAFETY
Your safety and the safety of others are very important.
We have provided many important safety messages in this manual and on your appliance. Always read and obey all safety messages.
This is the safety alert symbol.
This symbol alerts you to potential hazards that can kill or hurt you and others.
All safety messages will follow the safety alert symbol and either the word “DANGER” or “WARNING.” These words mean:
![]() DANGER
DANGER
![]() WARNING
WARNING
You can be killed or seriously injured if you don't immediately follow instructions.
You can be killed or seriously injured if you don't follow instructions.
All safety messages will tell you what the potential hazard is, tell you how to reduce the chance of injury, and tell you what can happen if the instructions are not followed.
INSTALLATION REQUIREMENTS
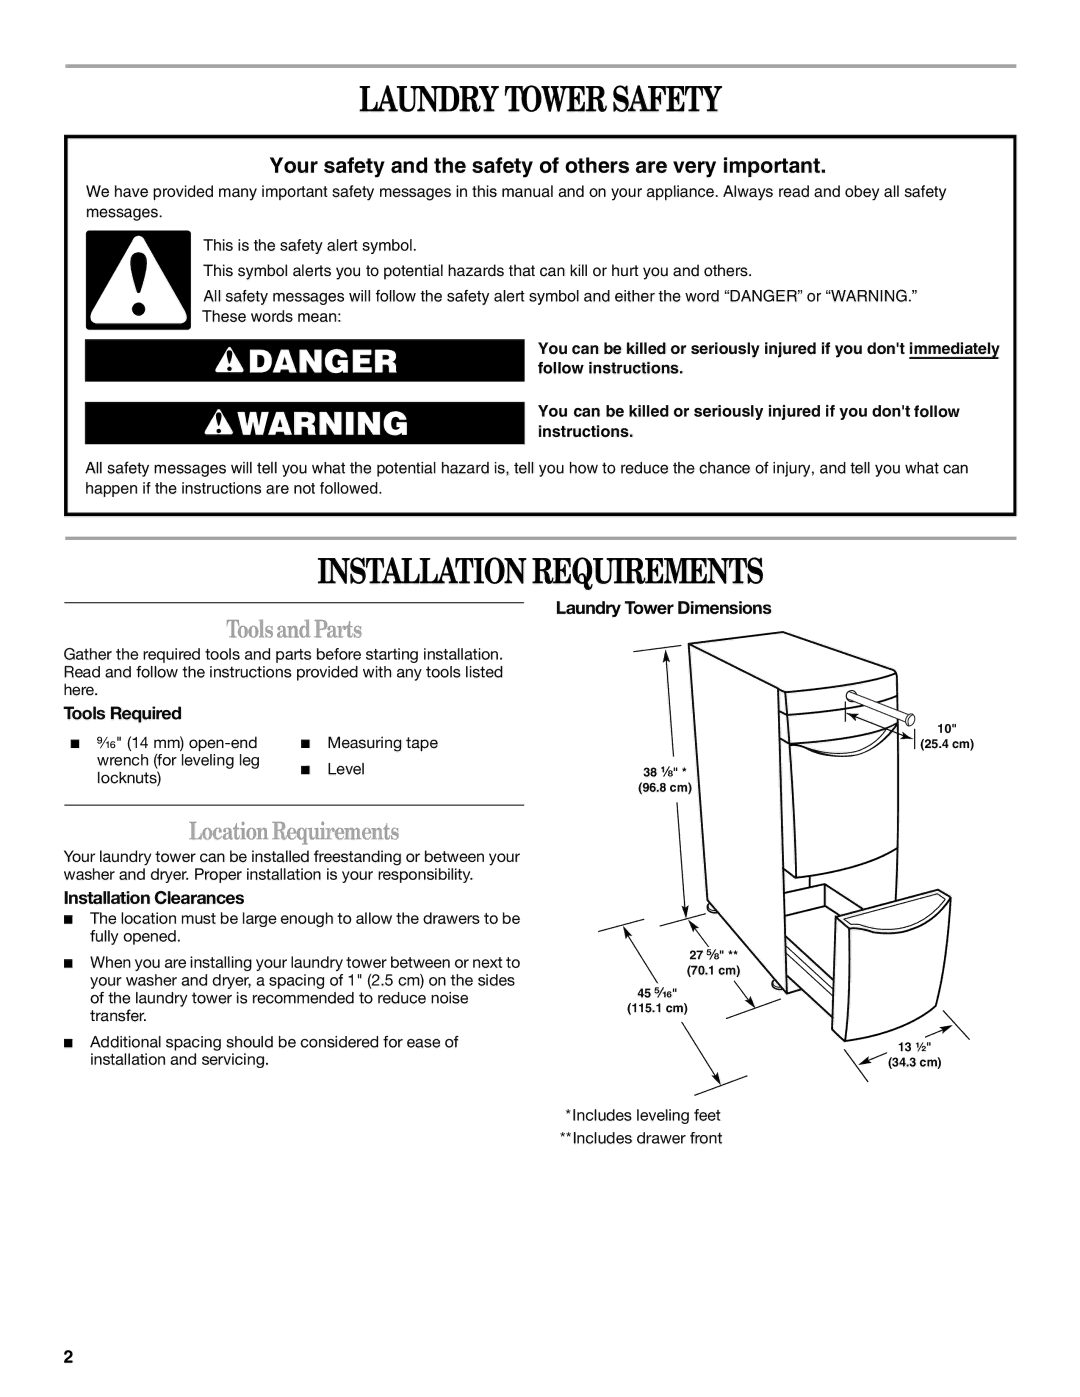
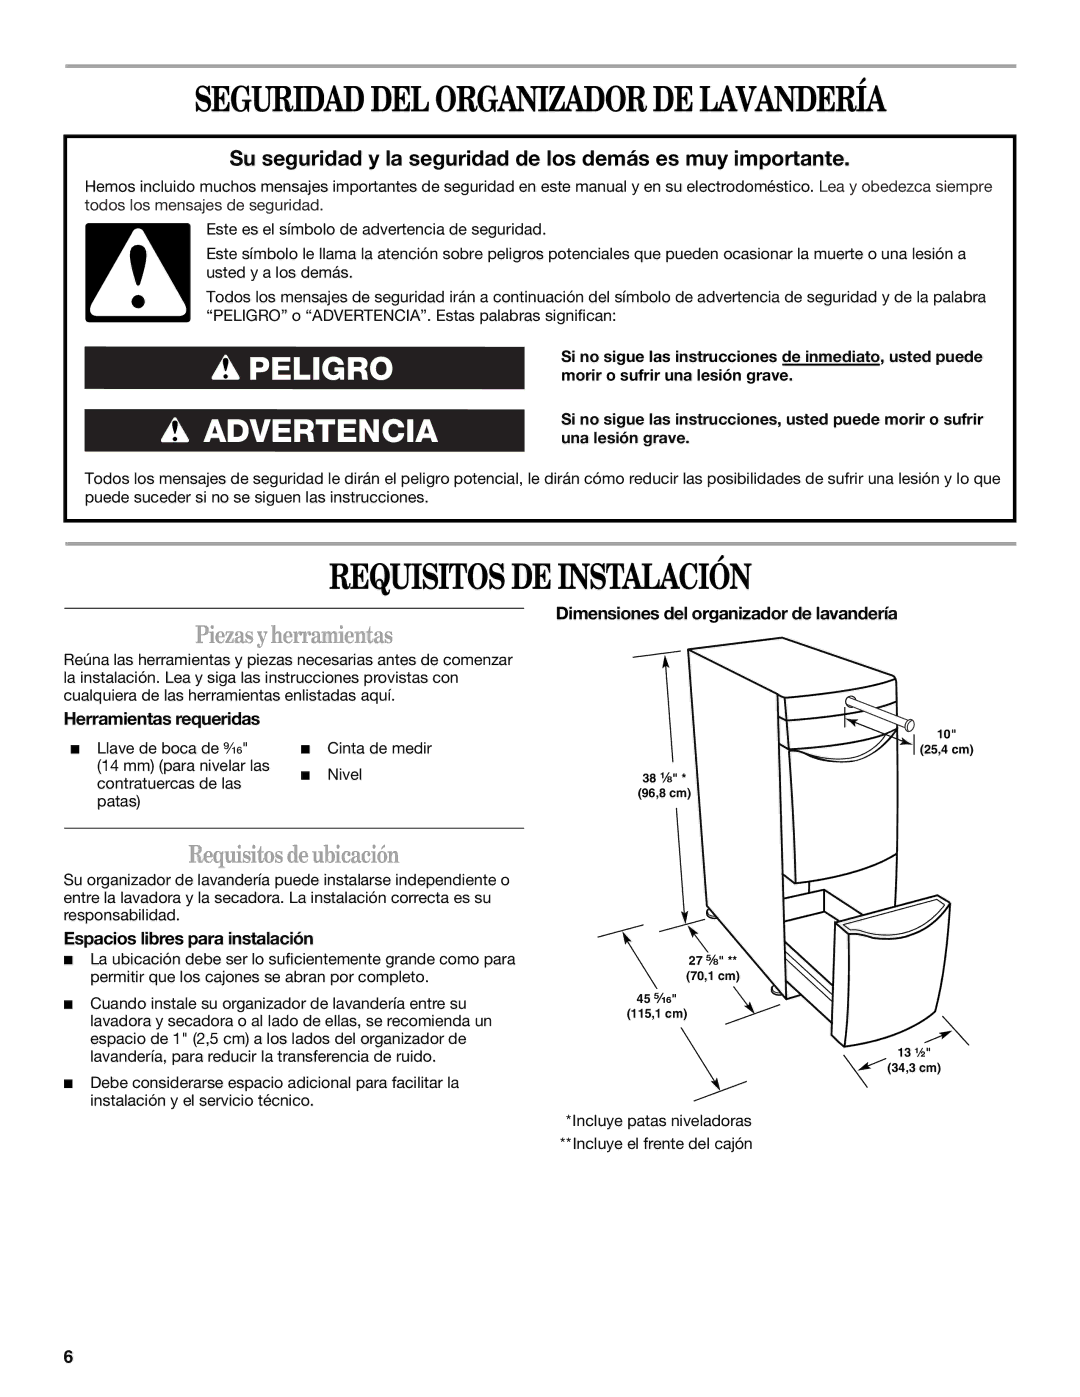
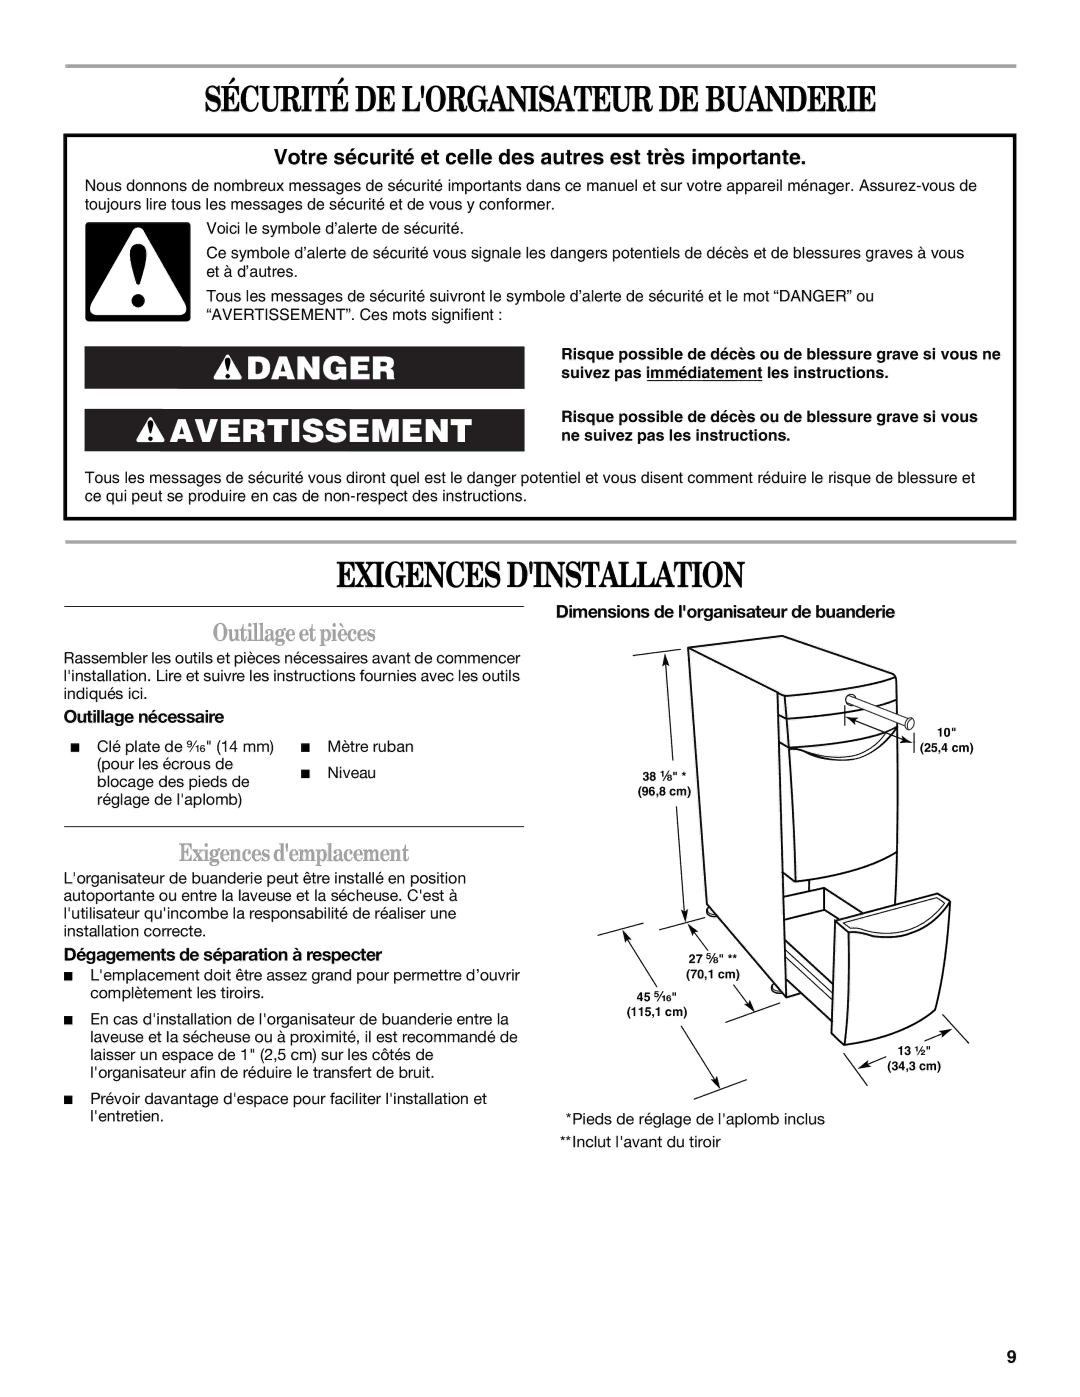
Laundry Tower Dimensions
ToolsandParts
Gather the required tools and parts before starting installation. Read and follow the instructions provided with any tools listed here.
Tools Required
■ ⁹⁄₁₆" (14 mm) | ■ | Measuring tape |
|
|
|
|
wrench (for leveling leg | ■ | Level |
|
|
|
|
|
| 38 ¹⁄₈" * |
| |||
|
|
| ||||
locknuts) |
|
|
| |||
|
|
|
| (96.8 cm) |
| |
|
|
|
|
|
| |
|
|
|
|
|
|
|
|
|
|
|
|
|
|
|
|
|
|
|
|
|
10"
(25.4 cm)
LocationRequirements
Your laundry tower can be installed freestanding or between your washer and dryer. Proper installation is your responsibility.
Installation Clearances
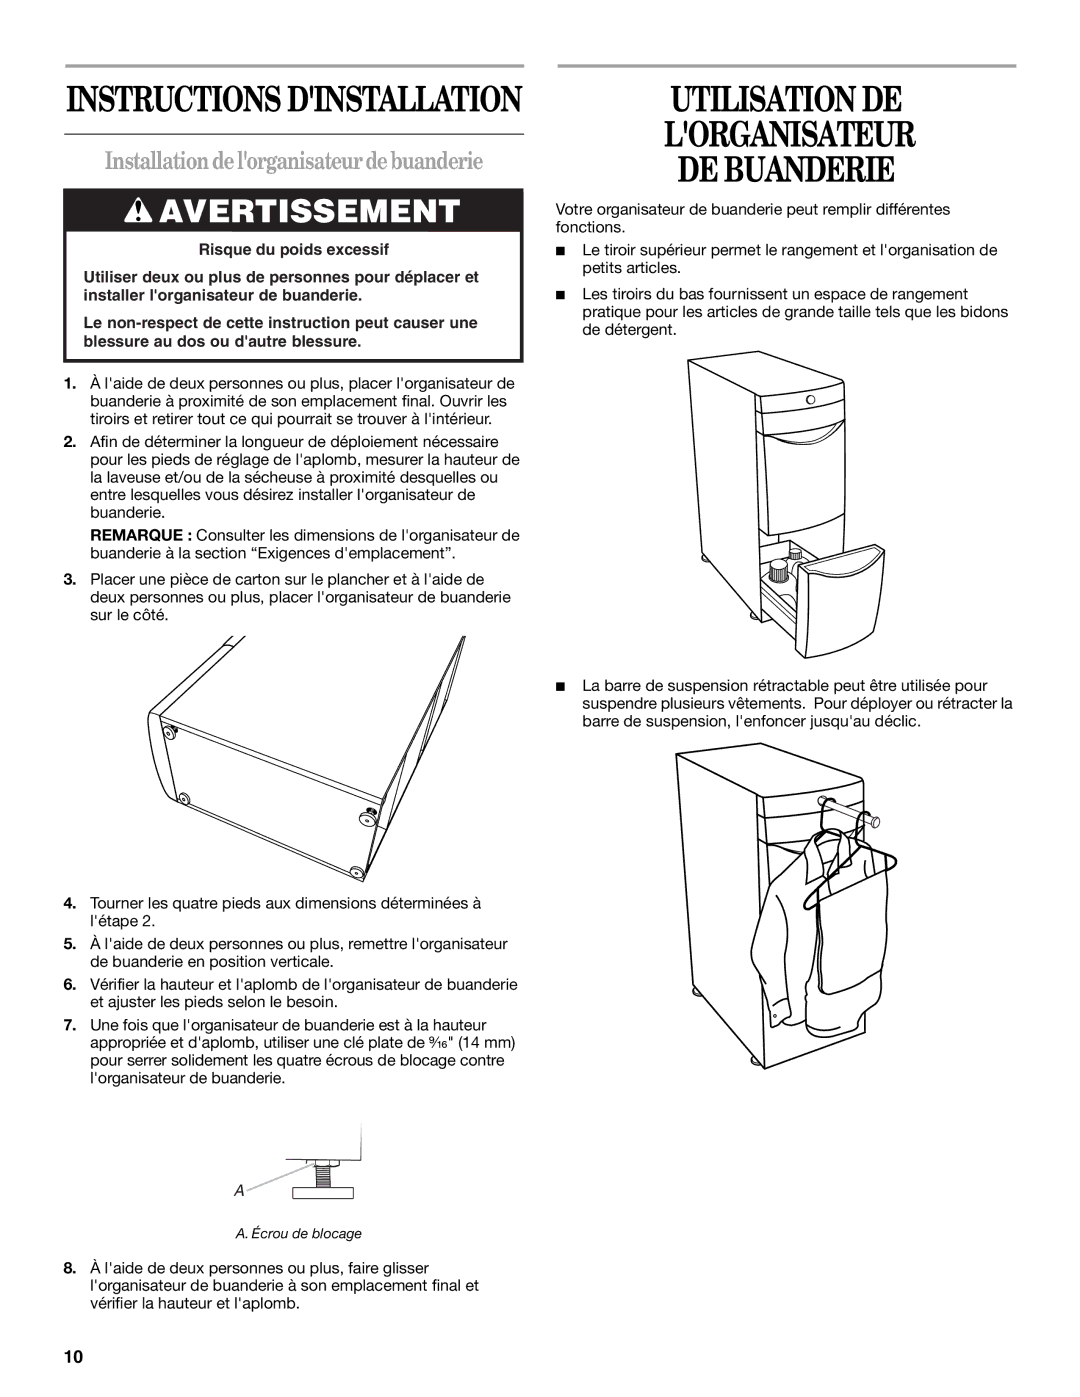
■The location must be large enough to allow the drawers to be fully opened.
■When you are installing your laundry tower between or next to your washer and dryer, a spacing of 1" (2.5 cm) on the sides of the laundry tower is recommended to reduce noise transfer.
■Additional spacing should be considered for ease of installation and servicing.
27 ⁵⁄₈" **
(70.1 cm)
45 ⁵⁄₁₆"
(115.1 cm)
*Includes leveling feet
**Includes drawer front
13¹⁄₂"
(34.3 cm)
2
