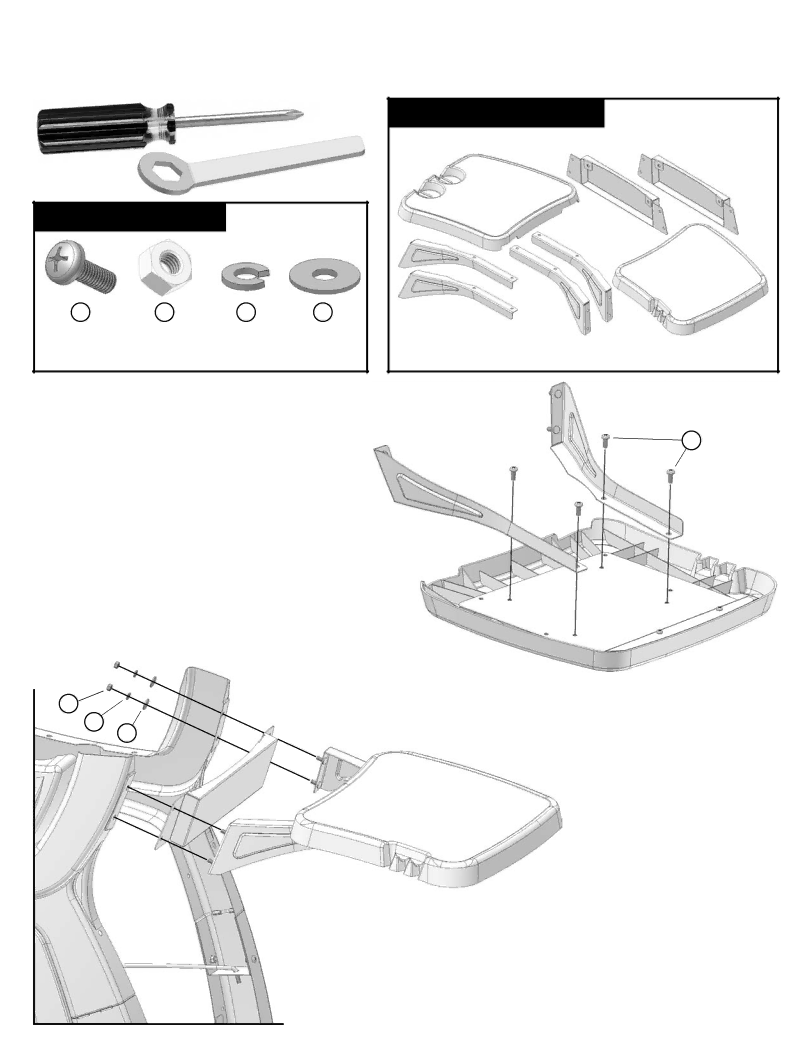
Assembly Step 6 - Attach the Side Tables
Tools Needed:
Phillips head |
|
screwdriver | 10mm Wrench |
USE HARDWARE ”E” |
|
LOCATE THESE PARTS:
Left Side Table | Table Mounting | |
Brackets (2) | ||
|
A | B | C | D |
M6x25mm | M6 Hex | Lock | Washer |
Bolt (8) | Nut (8) | Washer (8) | (8) |
Side Table Arms (2 Left, 2 Right)
Right Side Table
1.To assemble each table, use one left and one right table arm.
2.Line up the bolt hole of the table arms to the INSIDE set of holes on the side table as shown.
3.For each bolt location, insert a M6 bolt. Once all bolts are mounted, securely tighten.
4.Align the assembled side table, along with one side table bracket to the side of the grill assembly as shown. Insert the
the side of the grill assembly.
A
B |
|
| 5. For each bolt, thread on a flat washer, |
| C |
| |
| D | lock washer and M6 hex nut. | |
|
| ||
|
| Do not yet tighten the nuts. | |
|
|
|
6.After 4 nuts are in place, securely tighten all of the bolts.
7.Repeat steps for the other side table.
15