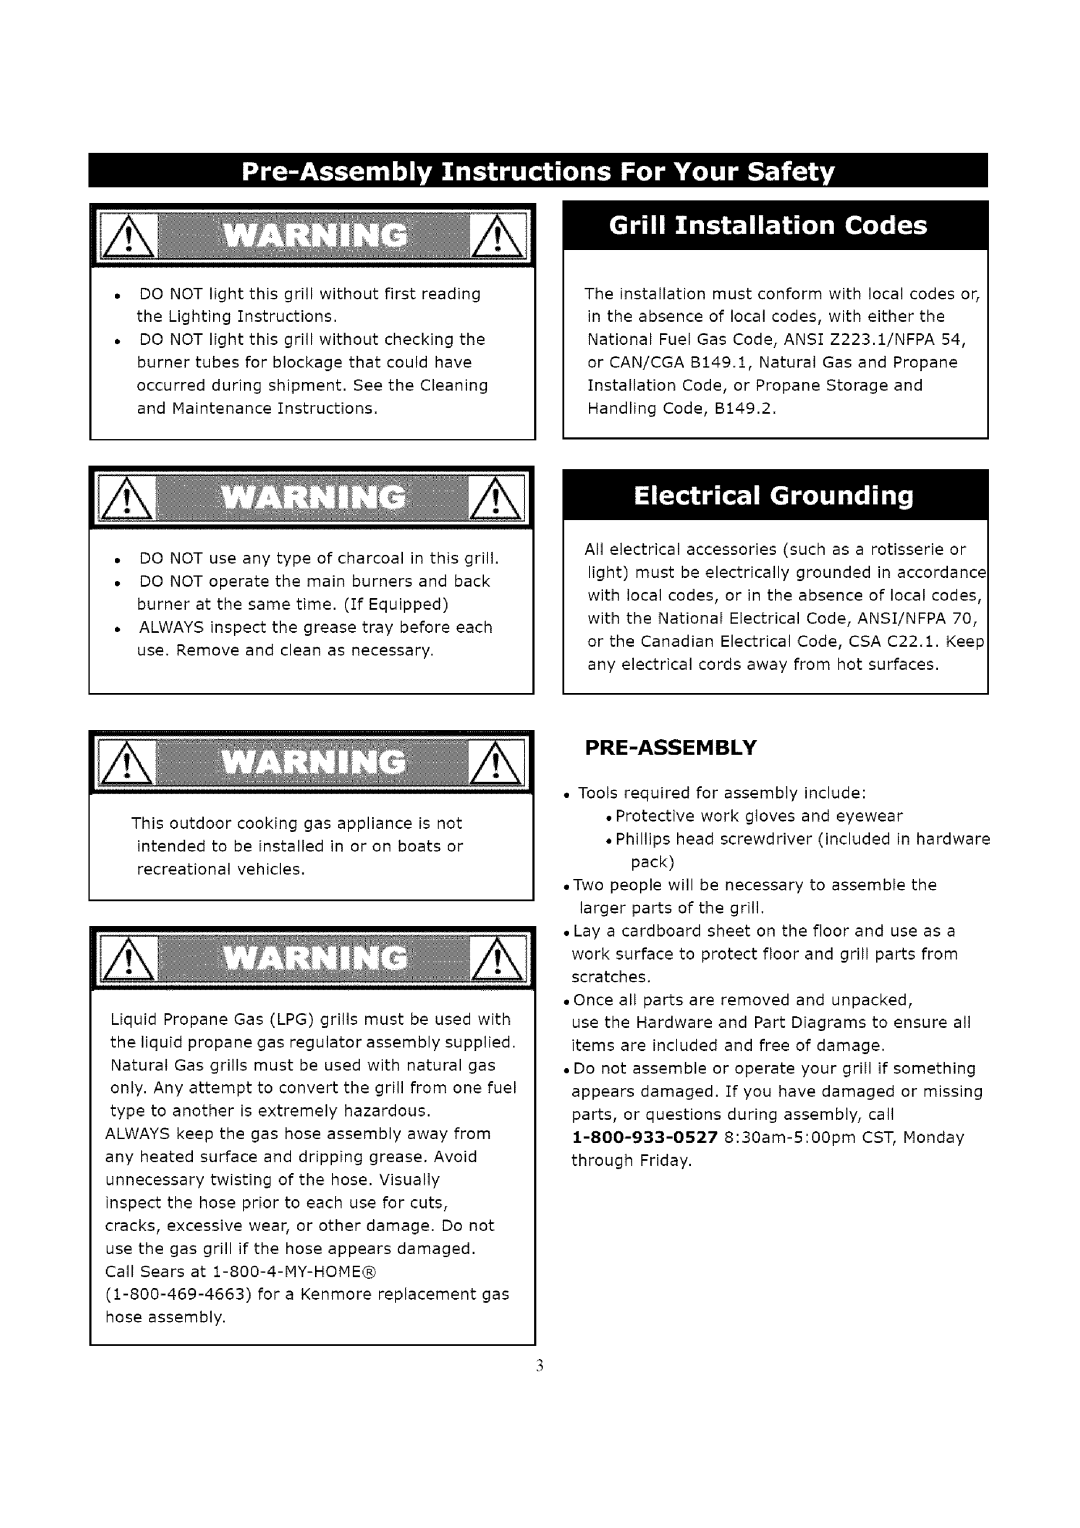
DONOTlightthisgrillwithoutfirstreading theLightingInstructions. DONOTlightthisgrillwithoutcheckingthe burnertubesforblockagethatcouldhave
occurredduringshipmentSeetheCleaning.
andMaintenanceInstructions.
•DO NOT use any type of charcoal in this grill.
•DO NOT operate the main burners and back burner at the same time. (If Equipped)
•ALWAYS inspect the grease tray before each use. Remove and clean as necessary.
Theinstallationmustconformwithlocalcodesor,
inthe absence of local codes, with either the National Fuel Gas Code, ANSI Z223.1/NFPA 54, or CAN/CGA B149.1, Natural Gas and Propane Installation Code, or Propane Storage and Handling Code, B149.2.
All electrical accessories (such as a rotisserie or light) must be electrically grounded in accordance with local codes, or in the absence of local codes, with the National Electrical Code, ANSI/NFPA 70, or the Canadian Electrical Code, CSA C22.1. Keep any electrical cords away from hot surfaces.
This outdoor cooking gas appliance is not intended to be installed in or on boats or recreational vehicles.
Liquid Propane Gas (LPG) grills must be used with the liquid propane gas regulator assembly supplied. Natural Gas grills must be used with natural gas only. Any attempt to convert the grill from one fuel type to another is extremely hazardous.
ALWAYS keep the gas hose assembly away from any heated surface and dripping grease, Avoid unnecessary twisting of the hose, Visually inspect the hose prior to each use for cuts, cracks, excessive wear, or other damage, Do not use the gas grill if the hose appears damaged. Call Sears at
PRE-ASSEMBLY
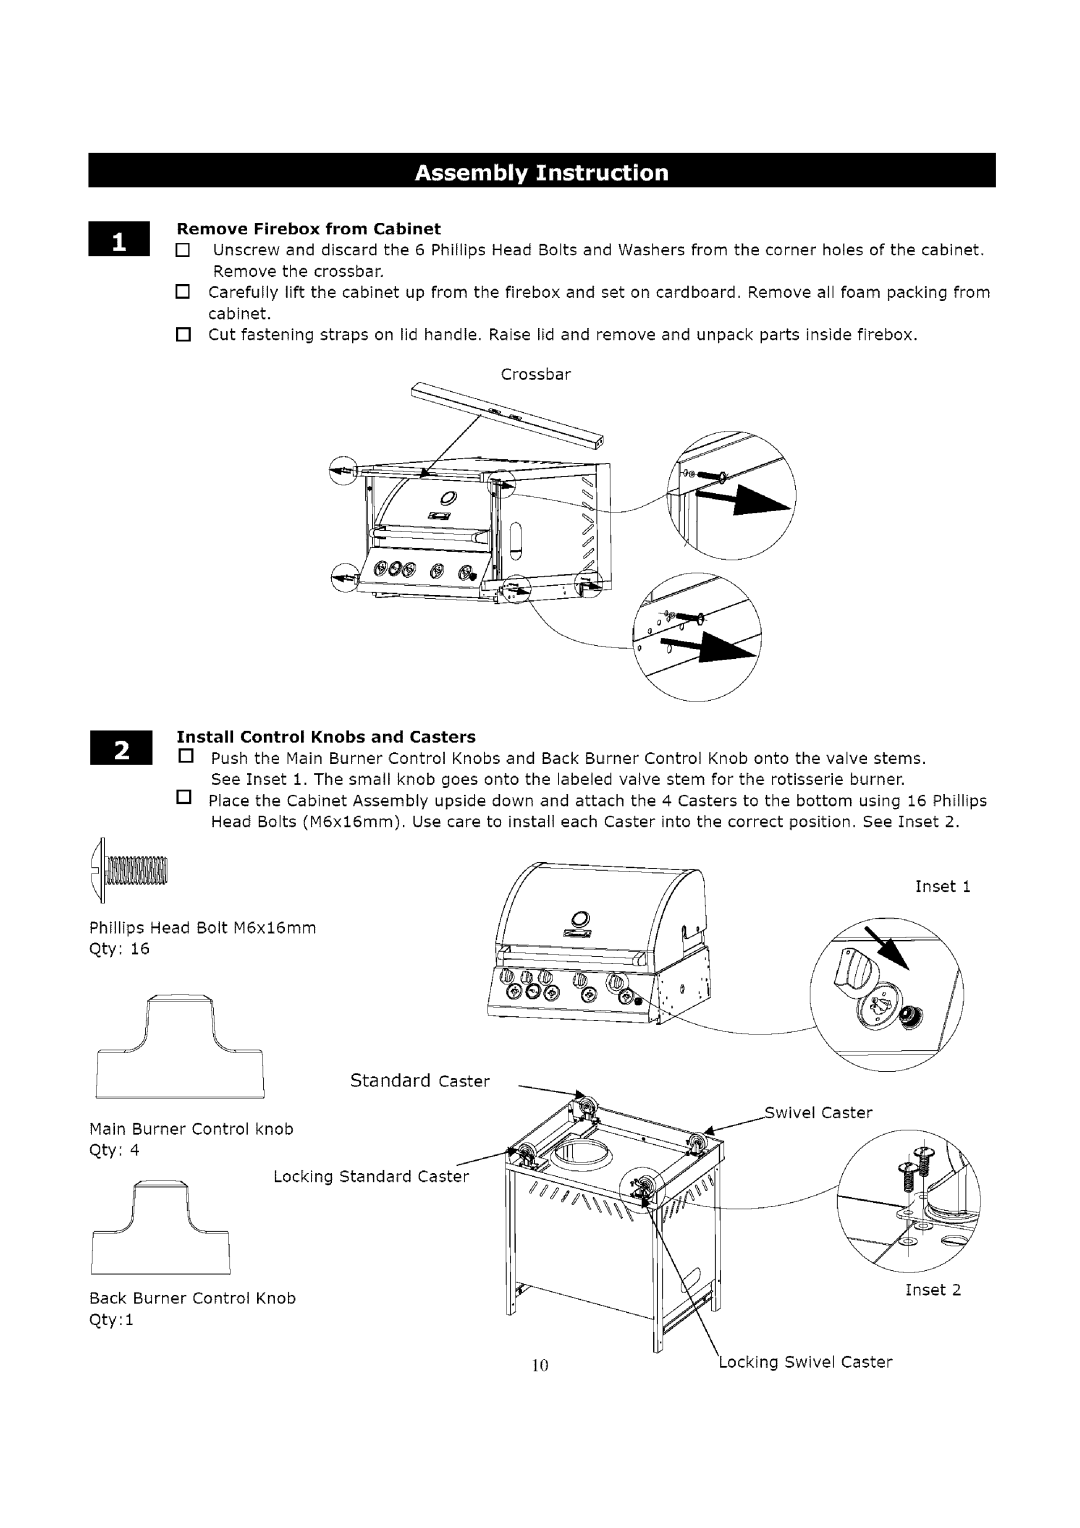
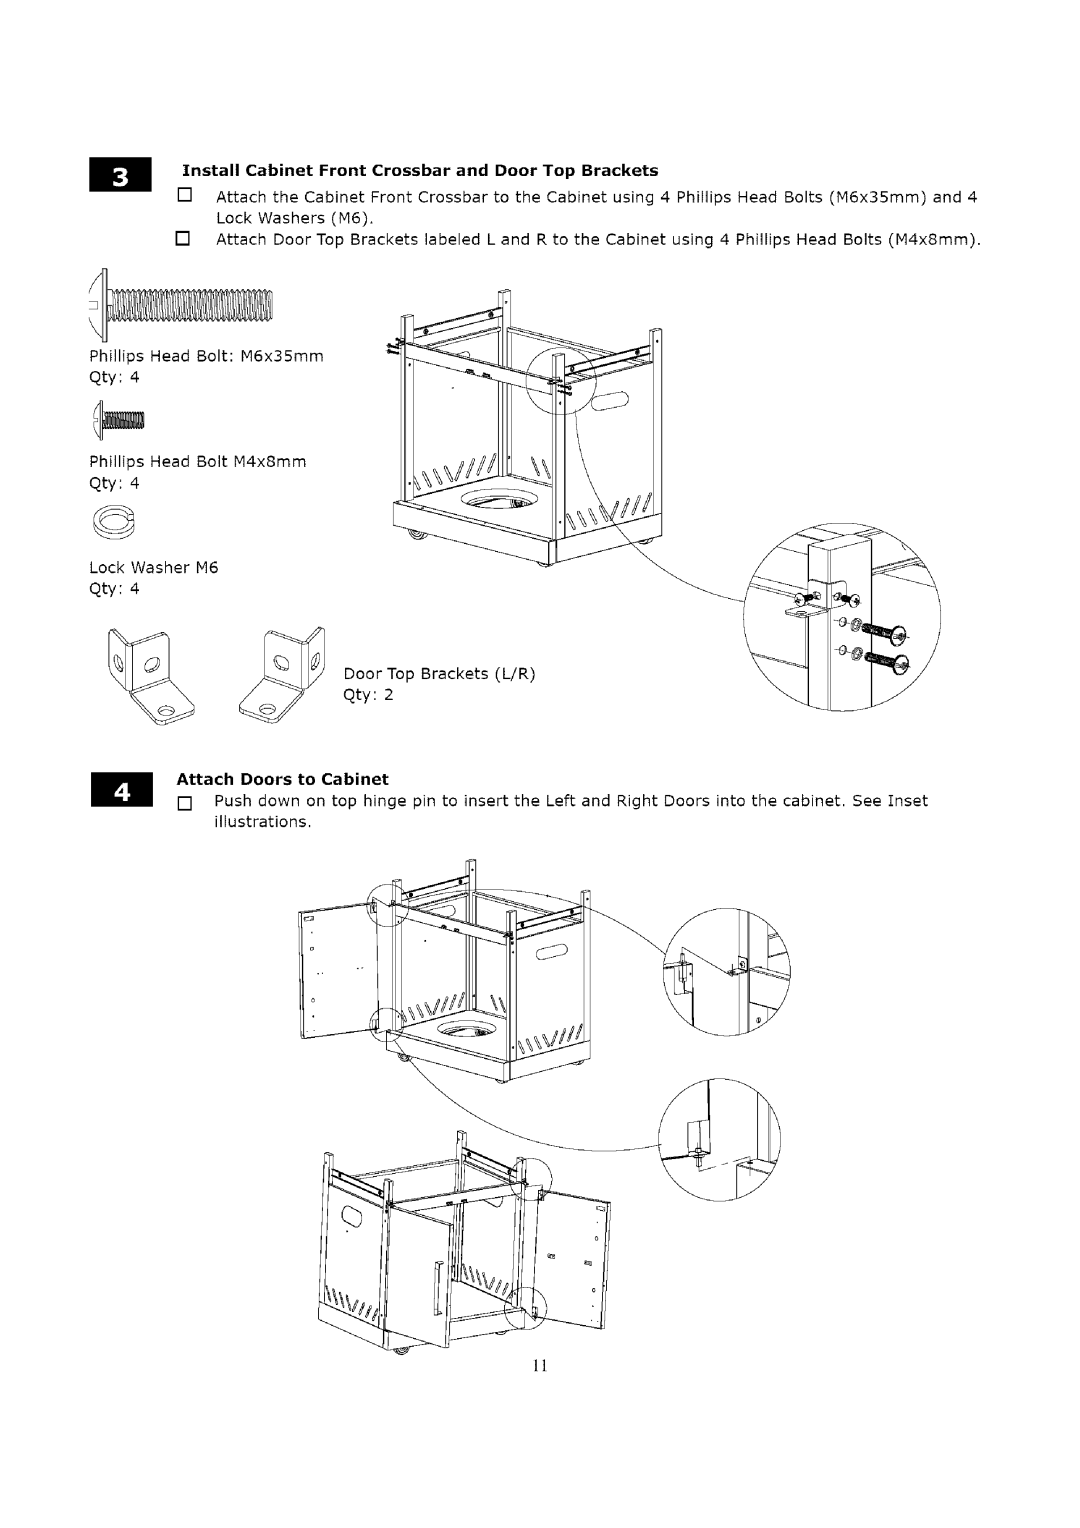
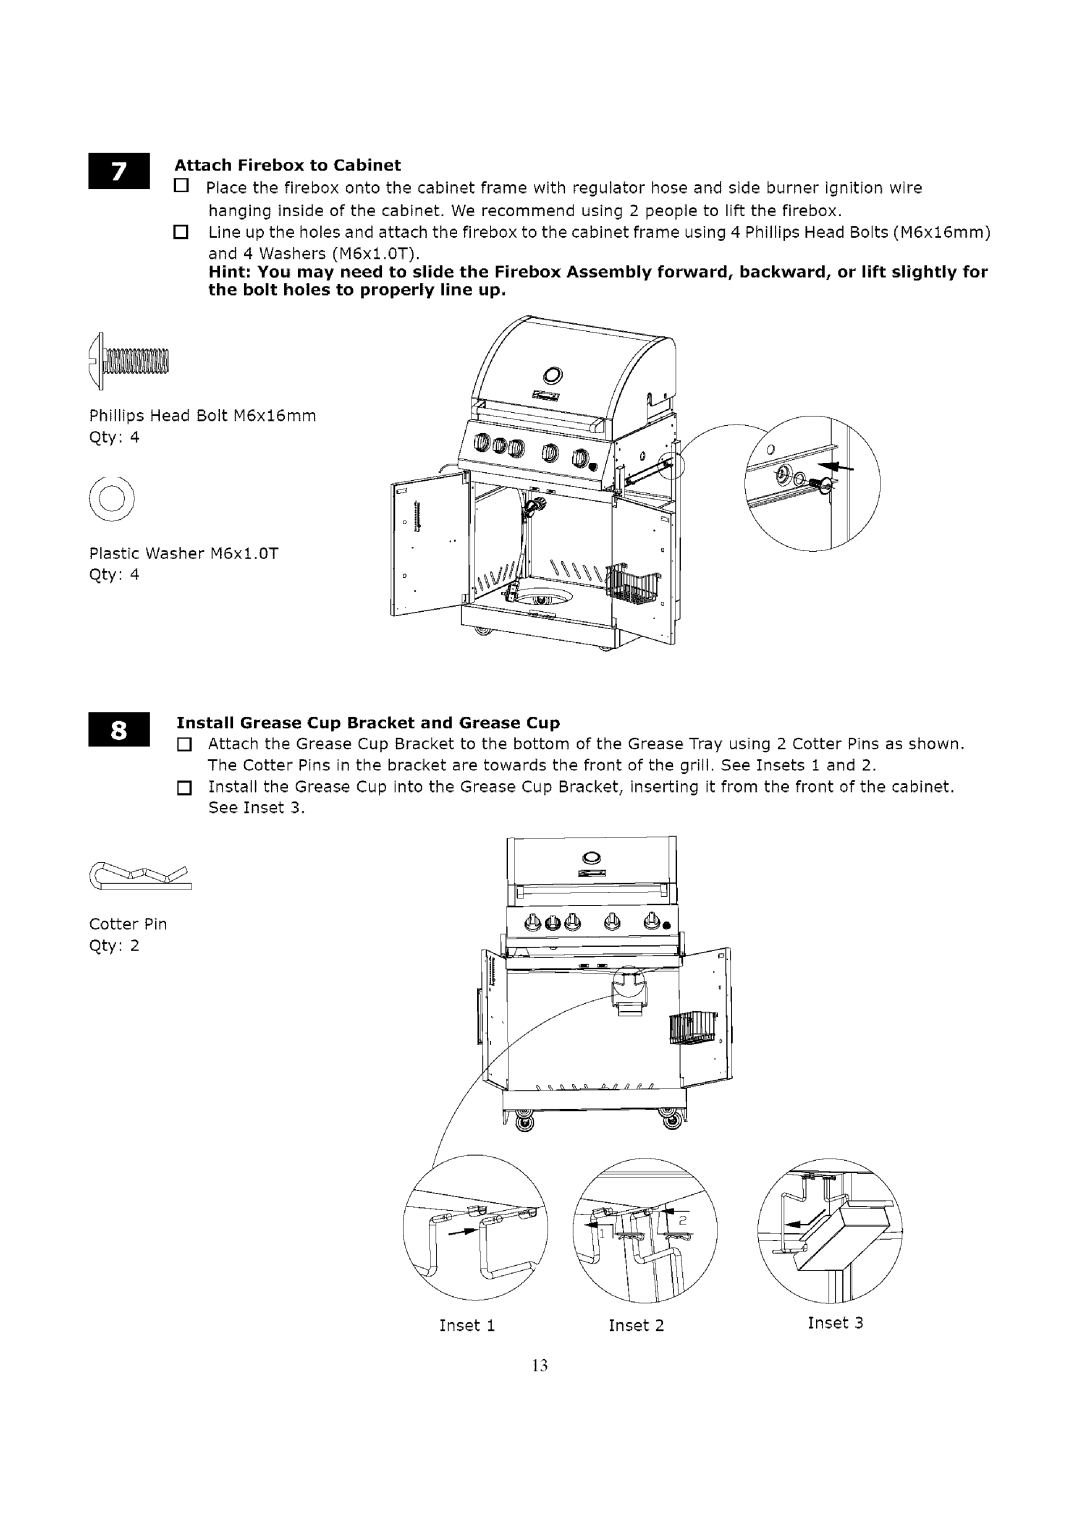
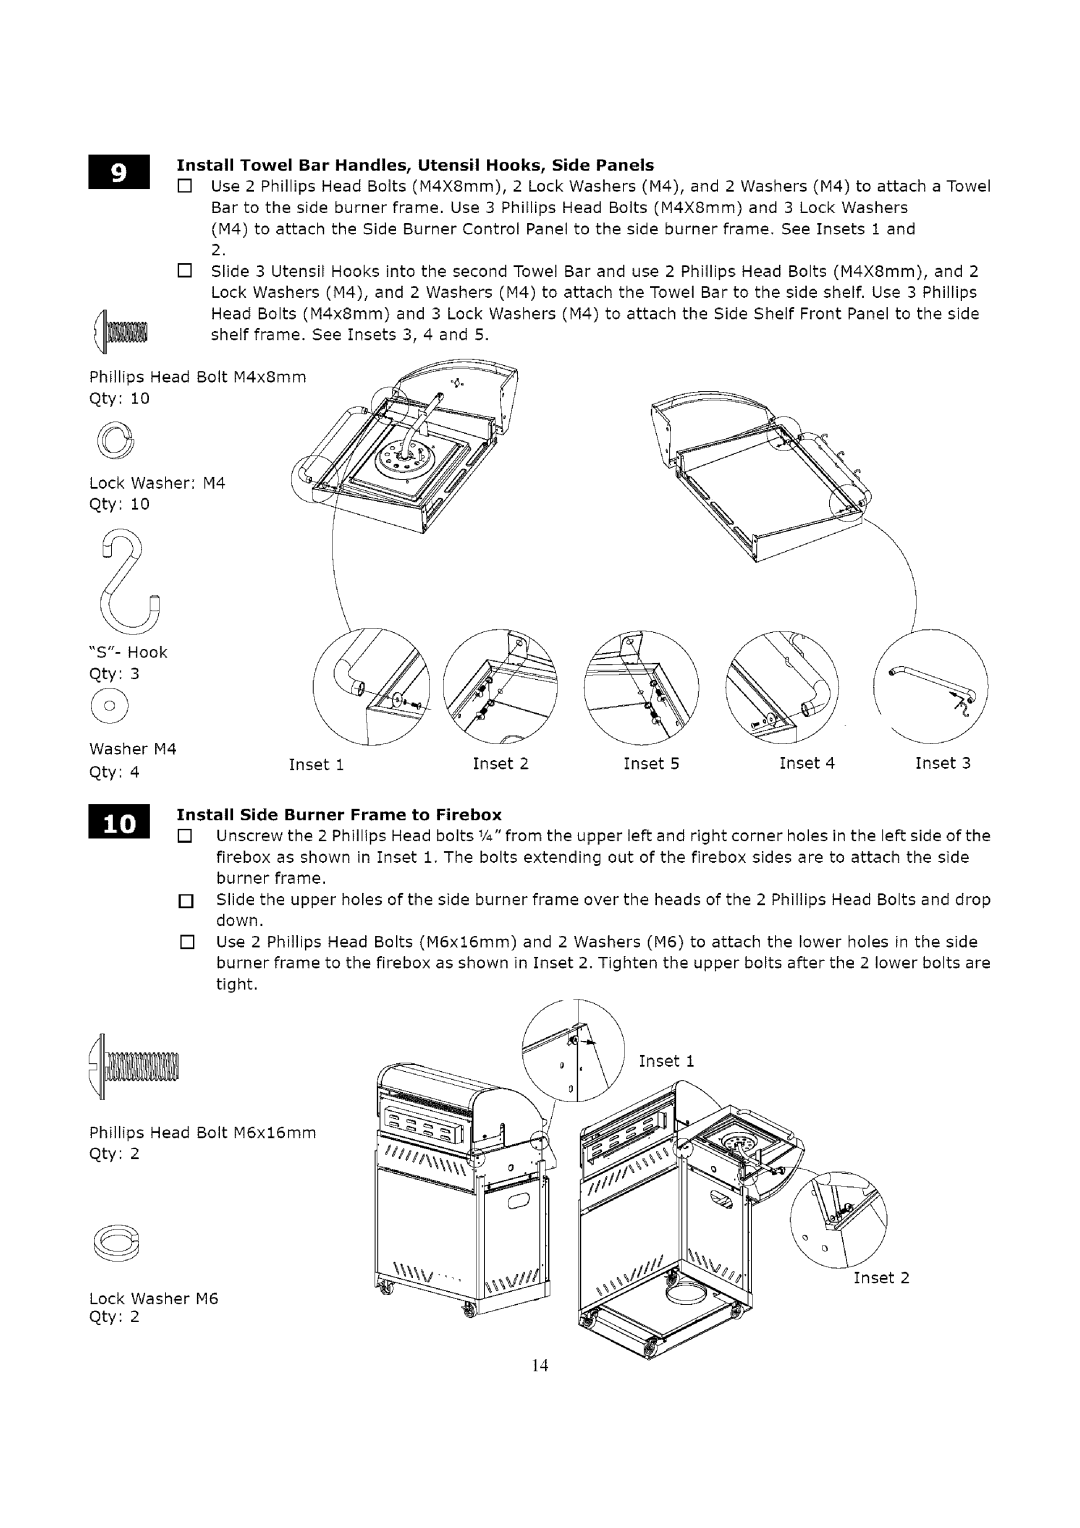
•Tools required for assembly include:
•Protective work gloves and eyewear
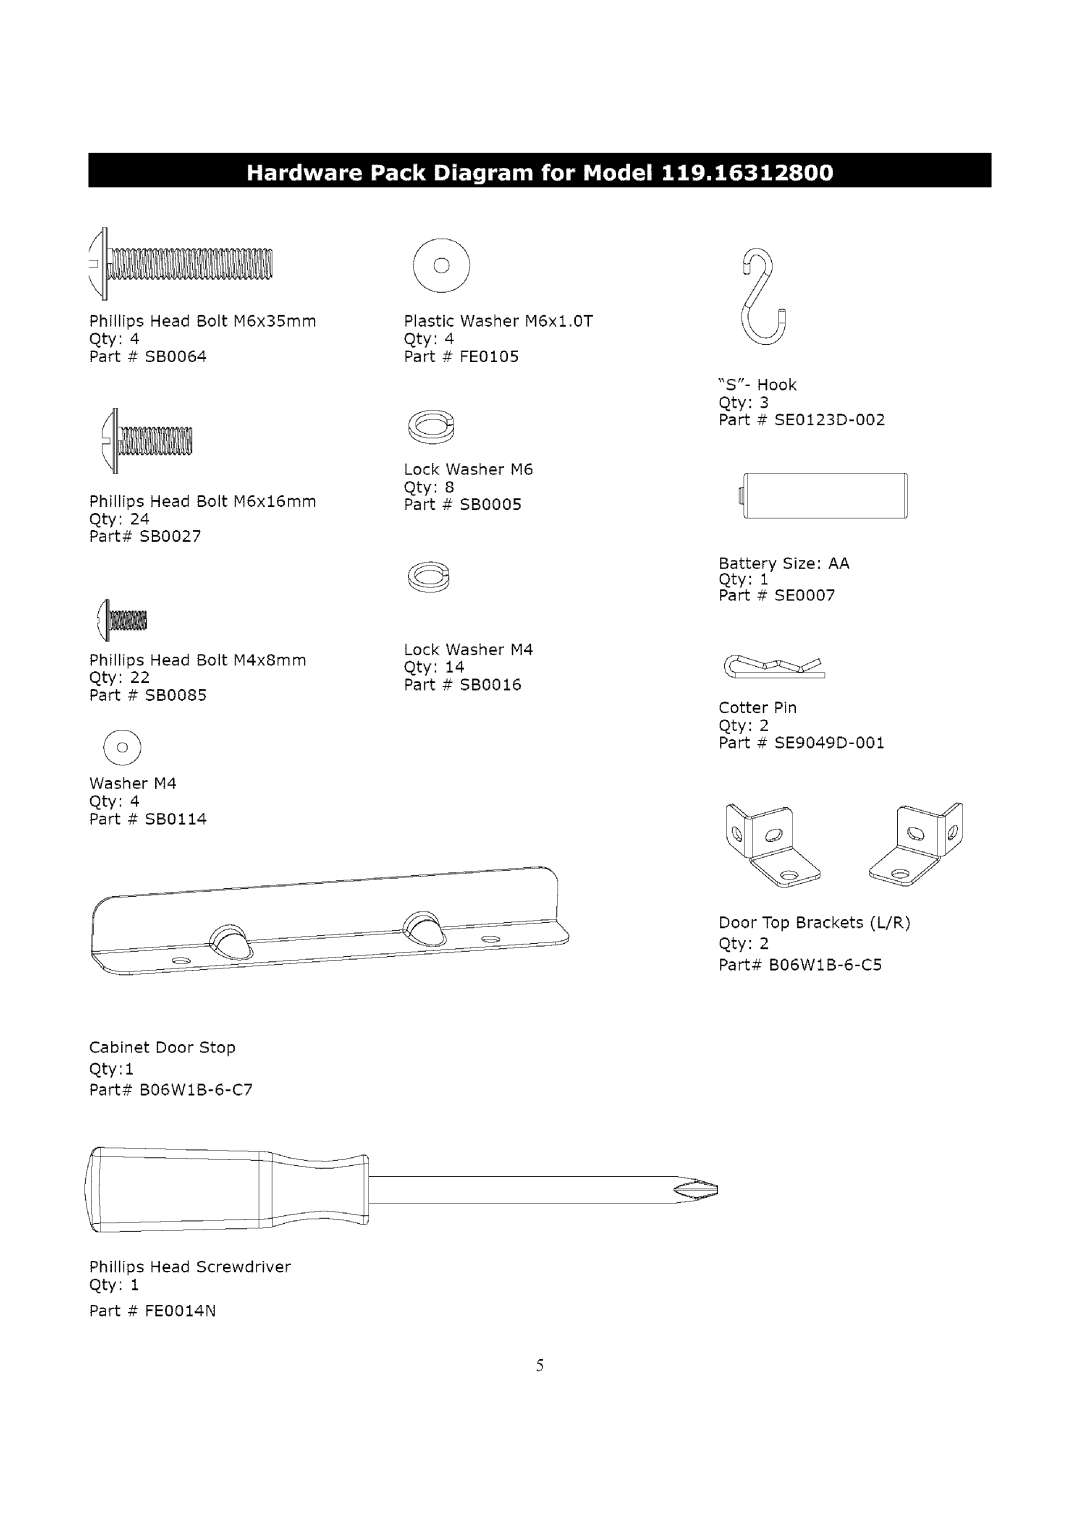
•Phillips head screwdriver (included in hardware pack)
•Two people will be necessary to assemble the
larger parts of the grill.
•Lay a cardboard sheet on the floor and use as a work surface to protect floor and grill parts from scratches.
•Once all parts are removed and unpacked,
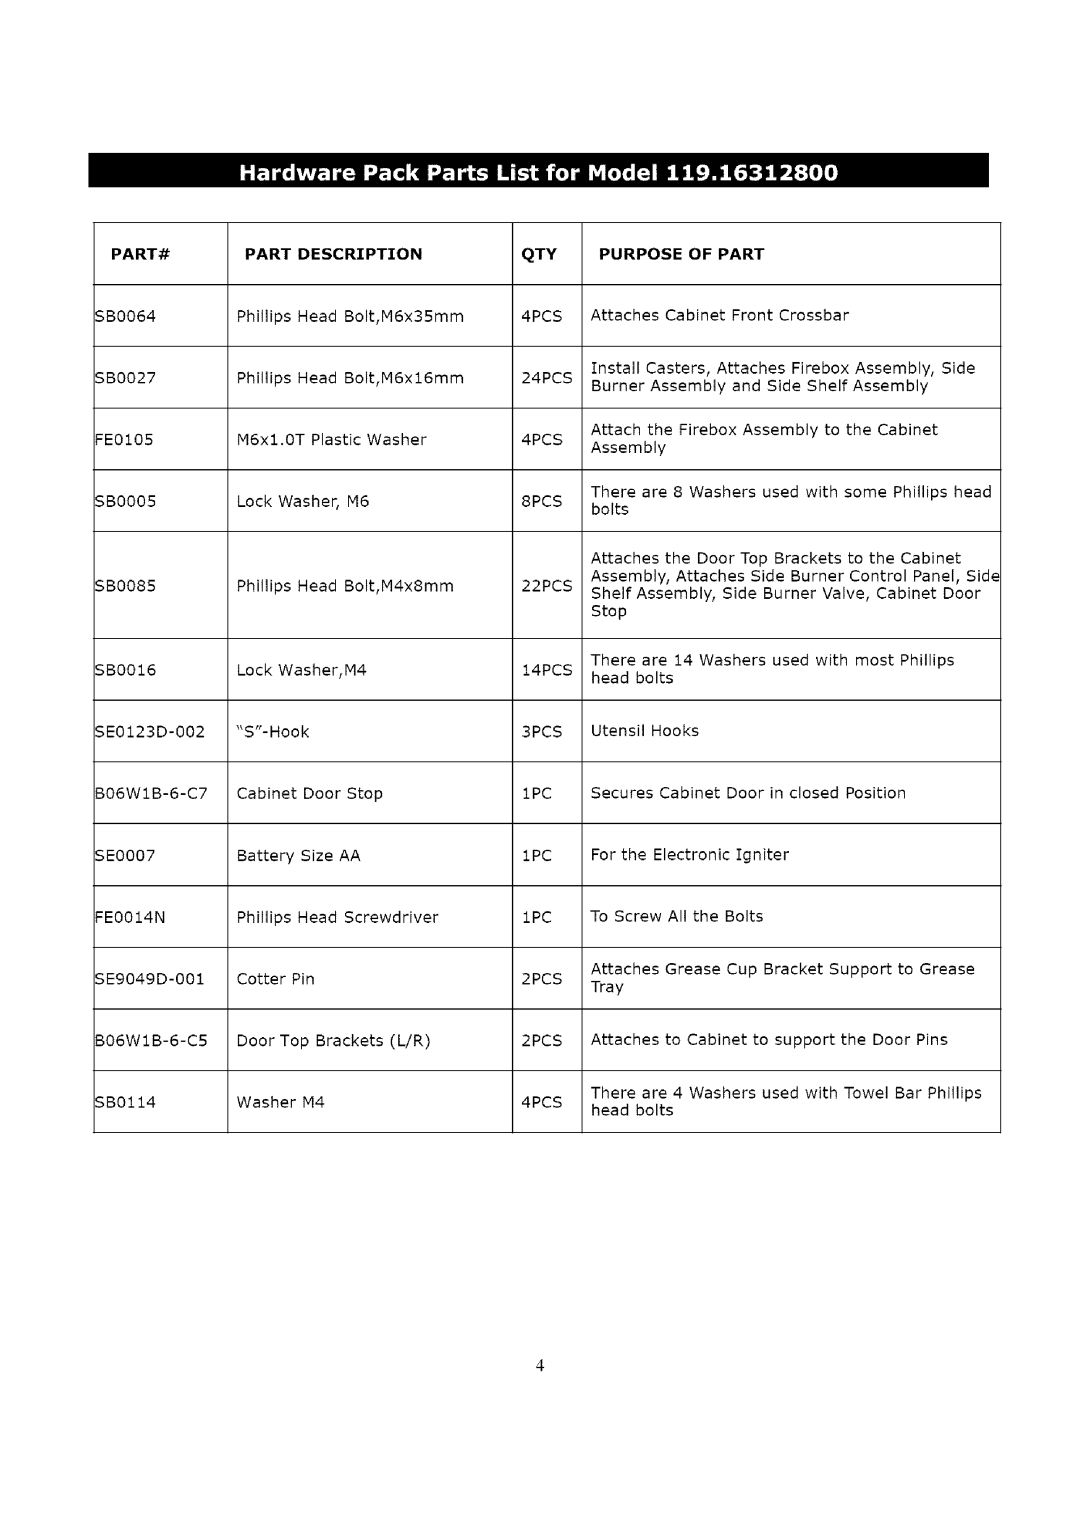
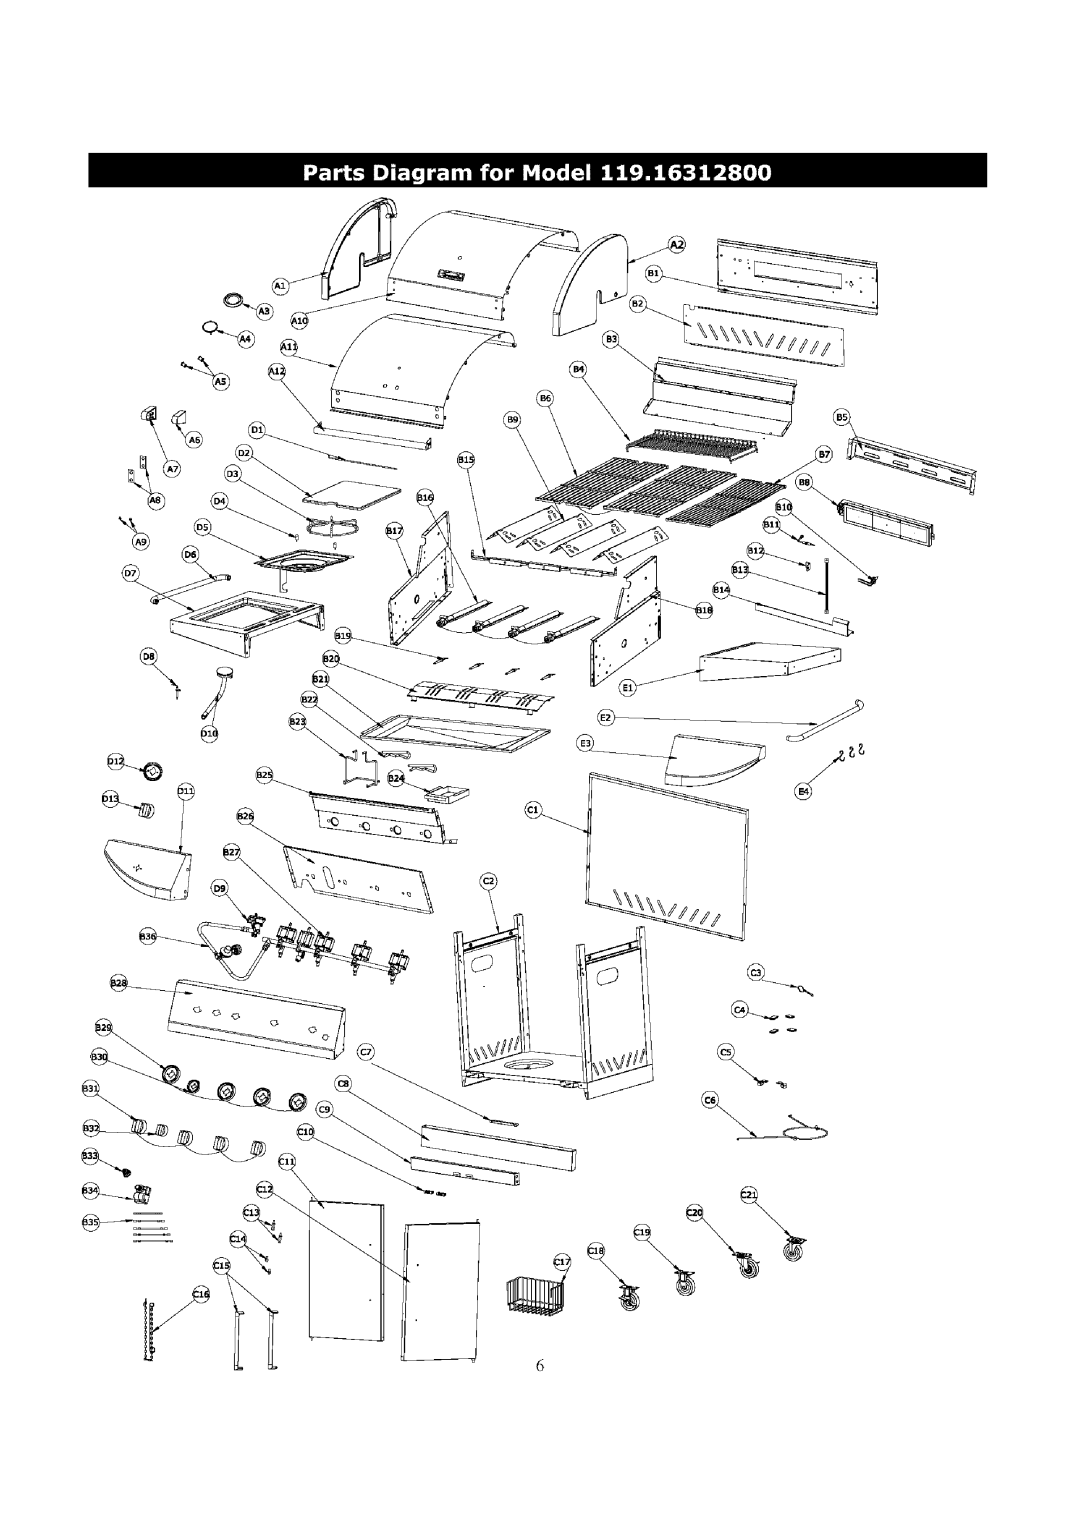
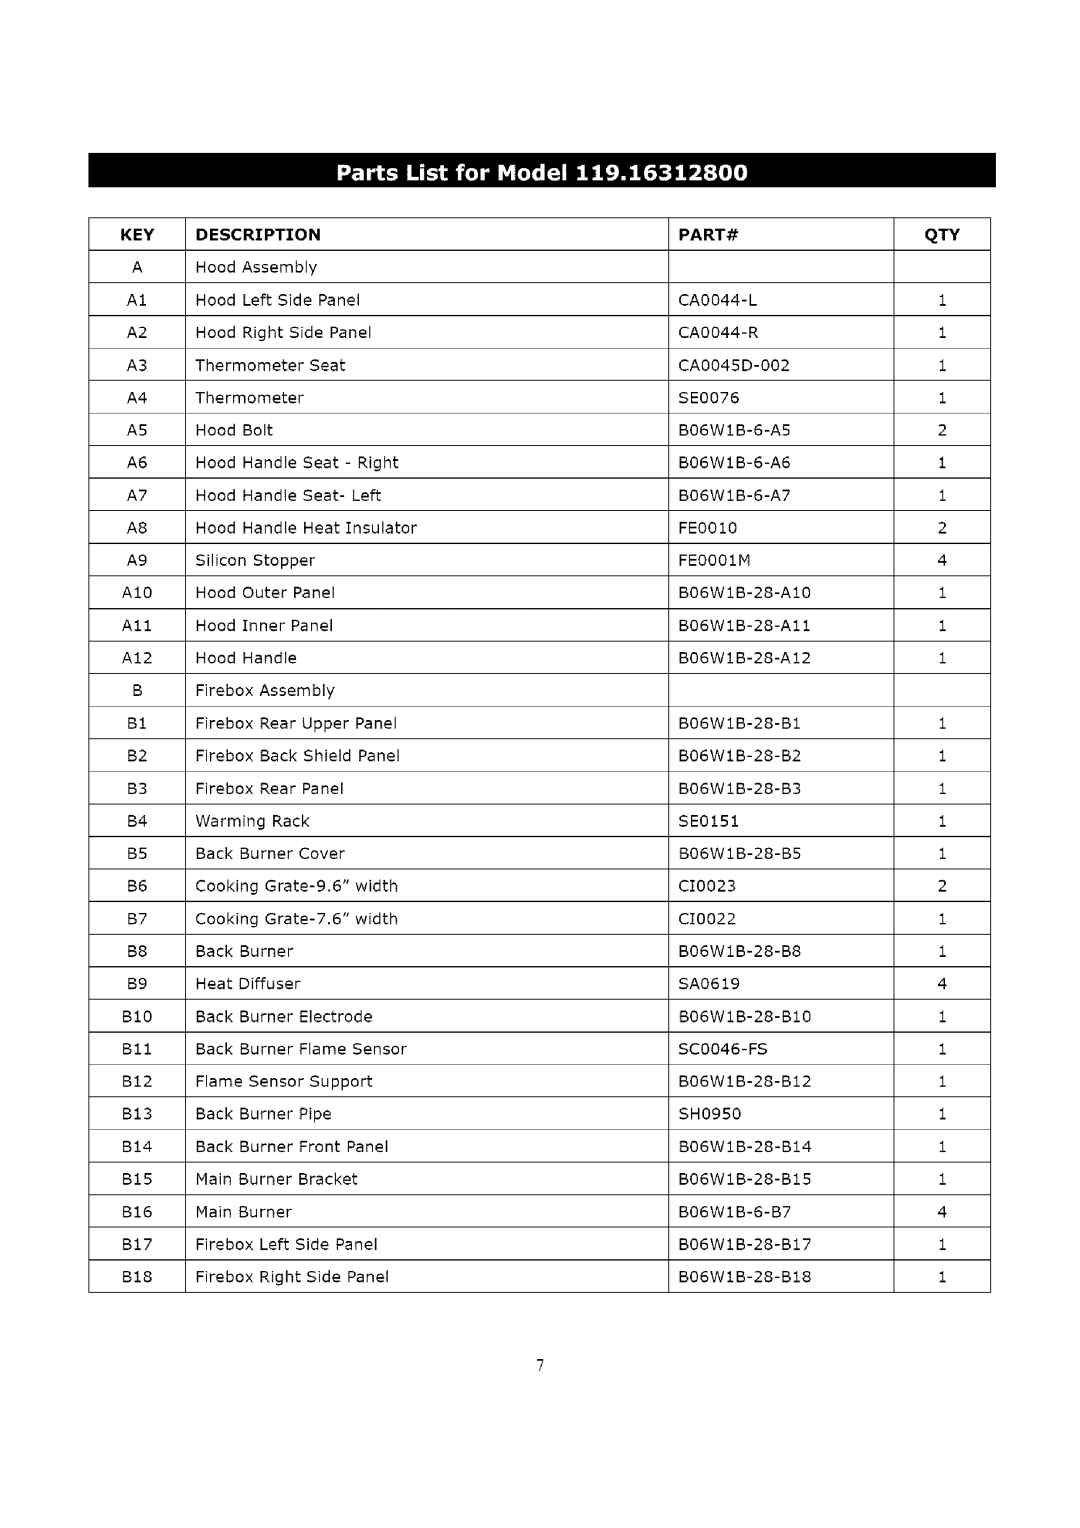
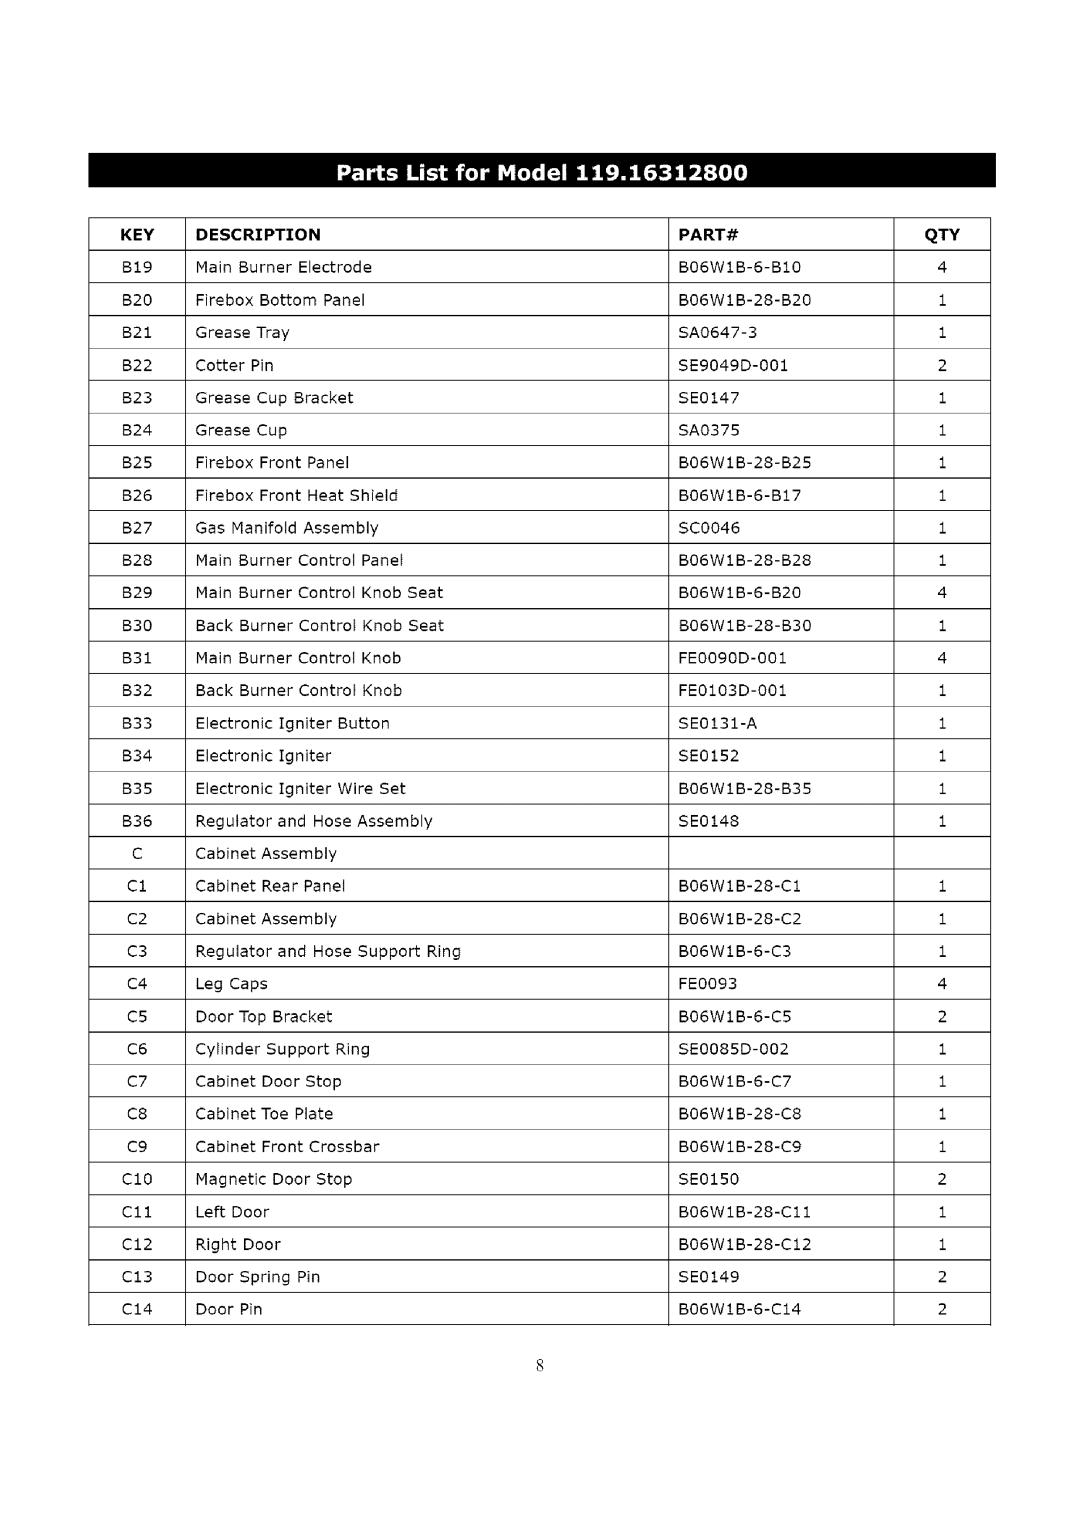
use the Hardware and Part Diagrams to ensure all items are included and free of damage.
•Do not assemble or operate your grill if something appears damaged. If you have damaged or missing parts, or questions during assembly, call
