

Quickie Match Point specifications
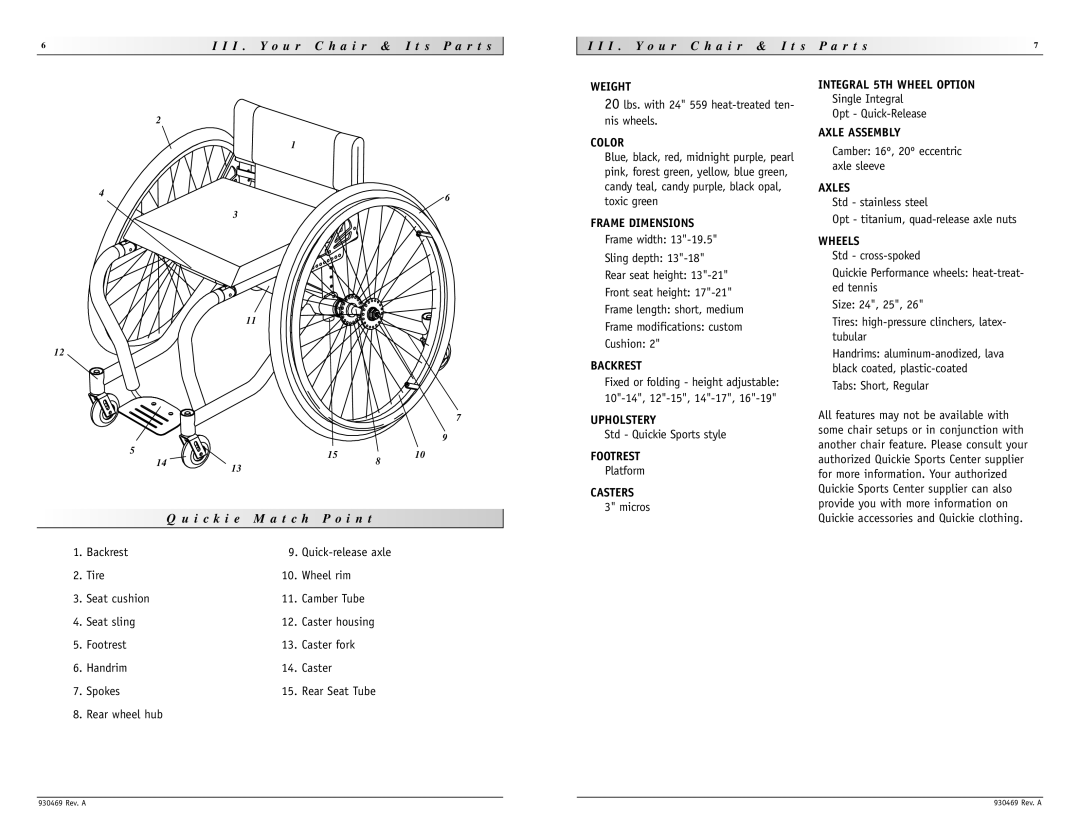
The Sunrise Medical Quickie Match Point is a sophisticated wheelchair designed to meet the diverse needs of individuals seeking mobility solutions that prioritize both functionality and comfort. This innovative wheelchair stands out for its customized options, robust construction, and advanced technology, making it an ideal choice for users who demand both performance and personalization in their mobility devices.One of the main features of the Quickie Match Point is its adjustable frame, which allows users to tailor the wheelchair's dimensions to their specific requirements. The frame is available in various widths and depths, ensuring an optimal fit that promotes posture and comfort. This customization is essential, as a proper fit can significantly enhance the user's overall experience and improve daily activities.
The Quickie Match Point also boasts a lightweight yet durable construction. The use of high-strength aluminum materials allows for a sturdy design that does not compromise on weight. This combination of durability and lightweight materials ensures that users can easily maneuver the chair while maintaining a strong, robust structure that can withstand everyday use.
Another notable feature is the wheelchair's seating system. The Quickie Match Point offers various seating options, including customizable cushions and backrests that provide excellent support and pressure relief. These seating options are pivotal in reducing the risk of pressure sores, allowing users to remain comfortable throughout the day.
The wheelchair incorporates advanced technologies that enhance its usability. For instance, the Quickie Match Point includes an innovative suspension system that absorbs shocks and provides a smoother ride, particularly on uneven terrains. This makes the wheelchair ideal for both indoor and outdoor use, ensuring a seamless transition across different environments.
Moreover, the Quickie Match Point is designed with an array of accessory options, enabling users to further personalize their wheelchair based on their lifestyle and needs. From custom wheel sizes to specialized handrims, the range of accessories ensures that each user can configure their wheelchair for maximum efficiency and comfort.
In summary, the Sunrise Medical Quickie Match Point is a versatile and adaptable mobility solution that combines advanced engineering with user-centric design. With its customizable frame, durable construction, advanced seating options, and innovative technologies, the Quickie Match Point stands as a premier choice for those seeking mobility solutions that do not compromise on comfort or performance.