Philips 1260X, 1280XCC, 1250XCC manual Shaving, Trimming, To Groom Sideburns and Moustache

Page 12

22ENGLISH

Shaving

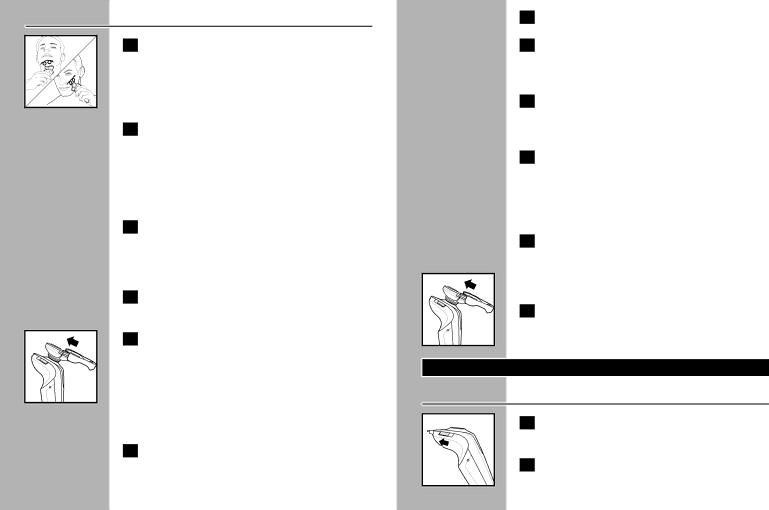
C 1 Turn razor ON by pressing the on/off button once. Shave against the direction of beard growth using both straight and circular movements.

The razor display will light up briefly.

2Stretch your skin with your free hand so blades can lift and cut whiskers. Gently press razor to skin so the floating heads can follow the contours of your face.

DO NOT press too hard.Too much pressure can pinch the skin into the combs.

3Turn razor OFF by pressing the on/off button once.

The display lights up for a few seconds and then shows the remaining battery capacity.

4Clean the razor after each use (see chapter ‘Cleaning’).

C5 Put the Protective Razor Head Cap on the

razor to protect razor heads.

Wet Shaving

You can also use the razor on a wet face with shaving foam.

1Apply some water to your skin.

ENGLISH 23

2Apply shaving foam to your skin.

3Rinse the shaving unit under the tap to ensure that the shaving unit glides smoothly over your skin.

4Press the on/off button once to switch on the razor.

5Move the shaving heads in circular movements over your skin.

NOTE: Rinse the razor under the tap regularly to ensure that it continues to glide smoothly over your skin.

6Dry your face and thoroughly clean the razor after each use (see chapter ‘Cleaning’).


NOTE: Make sure you rinse all foam off the razor.

C

7 Put the Protective Razor Head Cap on the


razor to protect heads.

Trimming

To Groom Sideburns and Moustache:

1Turn razor ON.

The display lights up for a few seconds.

C2 Press the trimmer slide forward to slide out the trimmer.

Image 12
Contents 1290X 1280X 1280XCC 1260X 1250X 1250XCC 1290X/1280X/1280XCC/1260X/1250X/1250XCC Important Safety Instructions Table of Contents Features Full 2-Year Warranty Day Money-Back GuaranteeQuick Charge Jet Clean System Razor Holder Cleaning Indicator Light DryingButton Cleaning Program Selector Full Charge Indicator Charging IndicatorMulti-Level Display Display provides the following informationBlocked Shaving Heads Indicator Low Battery IndicatorReplacement Shaving Unit Indicator Power-saving mode 1290X onlyPower plug transforms 100-240V AC to less than 24V DC Charge MeterBefore First Use Travel Lock 1280X, 1280XCC, 1260X, 1250X and 1250XCCCharging Razor with Jet Clean System 1280XCC and 1250XCC Configuration for the power outletCharging in the Charging Stand Display on the razor will indicate razor is chargingHow To Shave With An Electric Razor RechargingQuick Charge Put It To The Test & Shaving TipsShaving TrimmingTo Groom Sideburns and Moustache Cleaning Travel Lock 1280X, 1280XCC, 1260X, 1250X and 1250XCCActivating the travel lock Deactivating the travel lockCleaning the Shaving Unit Hot water for a few minutesShaving head open Hair chambers under hot tap water byPlace the Jet Clean System on a flat, level surface Jet Cleaning the Razor Press the ON/OFF button to start the cleaning cyclePull the razor forward and lift razor from Jet Clean System Extra-thorough cleaning method Cleaning the Trimmer Lift the appliance off the Jet Clean canisterDiscard any remaining cleaning solution Canister 12 Insert the notch of the shaving unit intoReplacement Razor Head Assembly Indication MaintenanceReplacing the Shaving Unit StorageBattery Removal AccessoriesAssistance Information is available 24 hours a day, 7 days a weekFull Twoyear Warranty