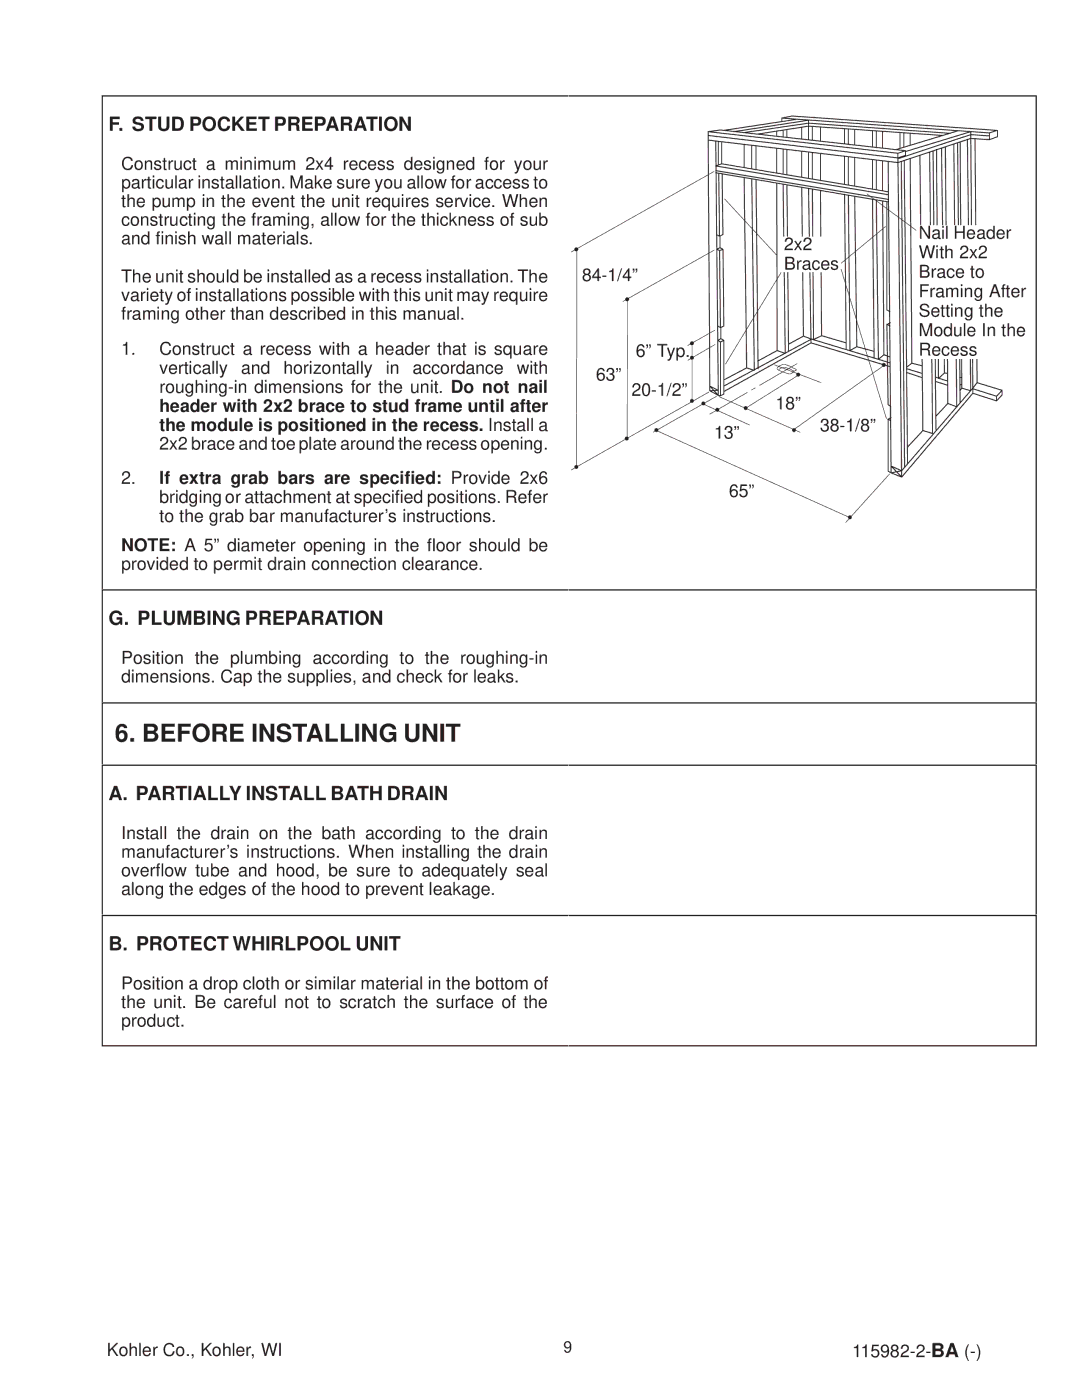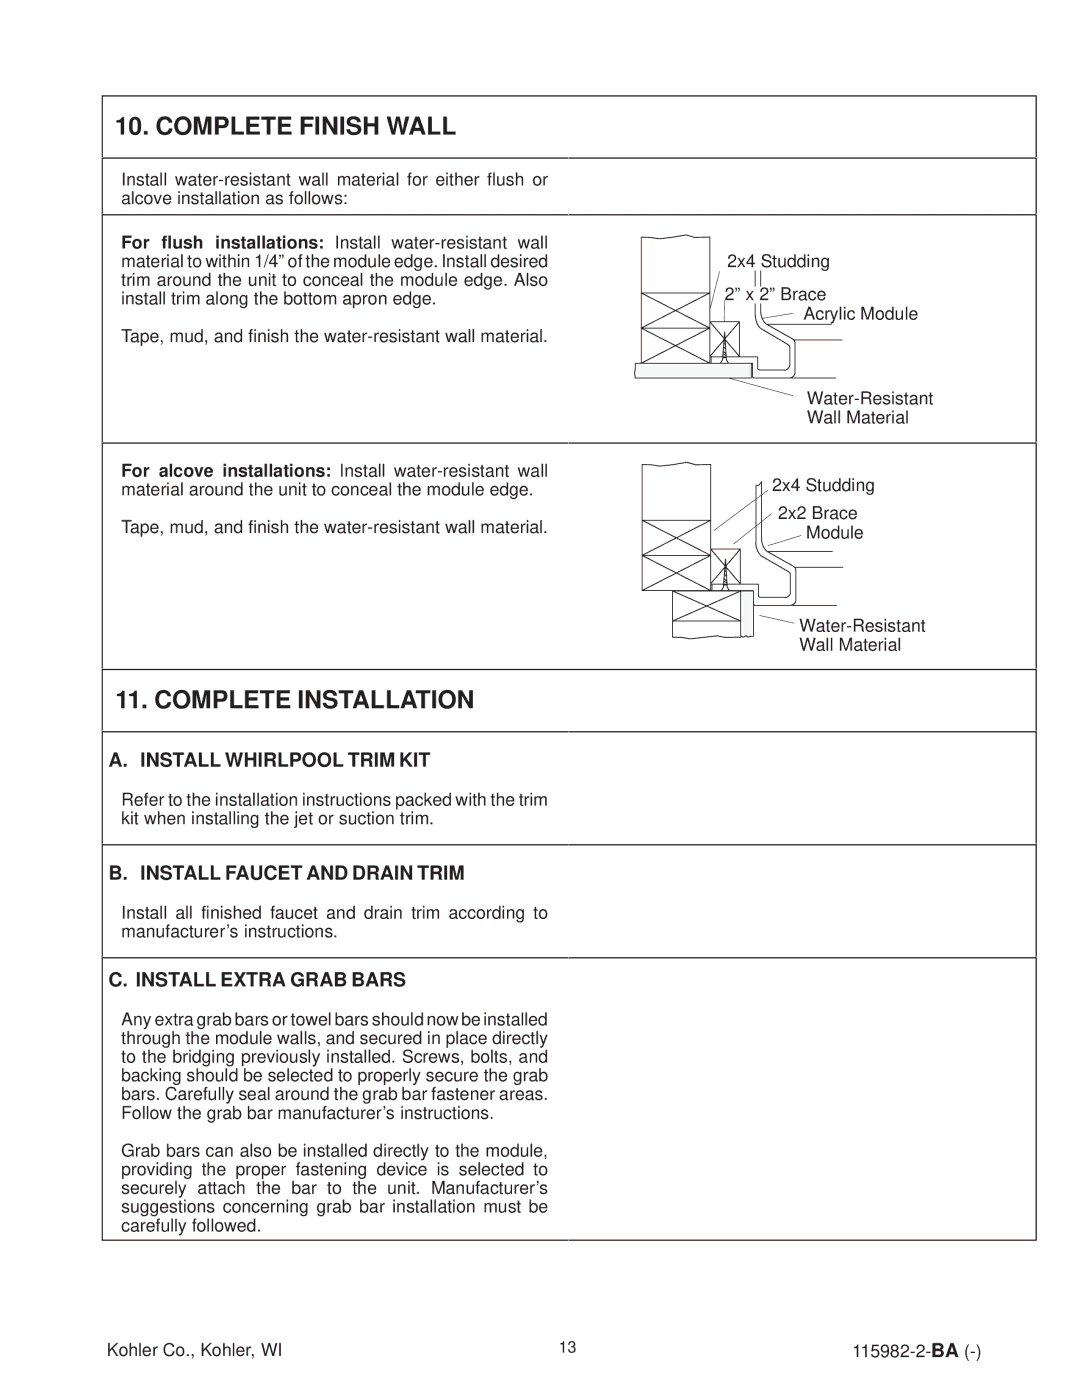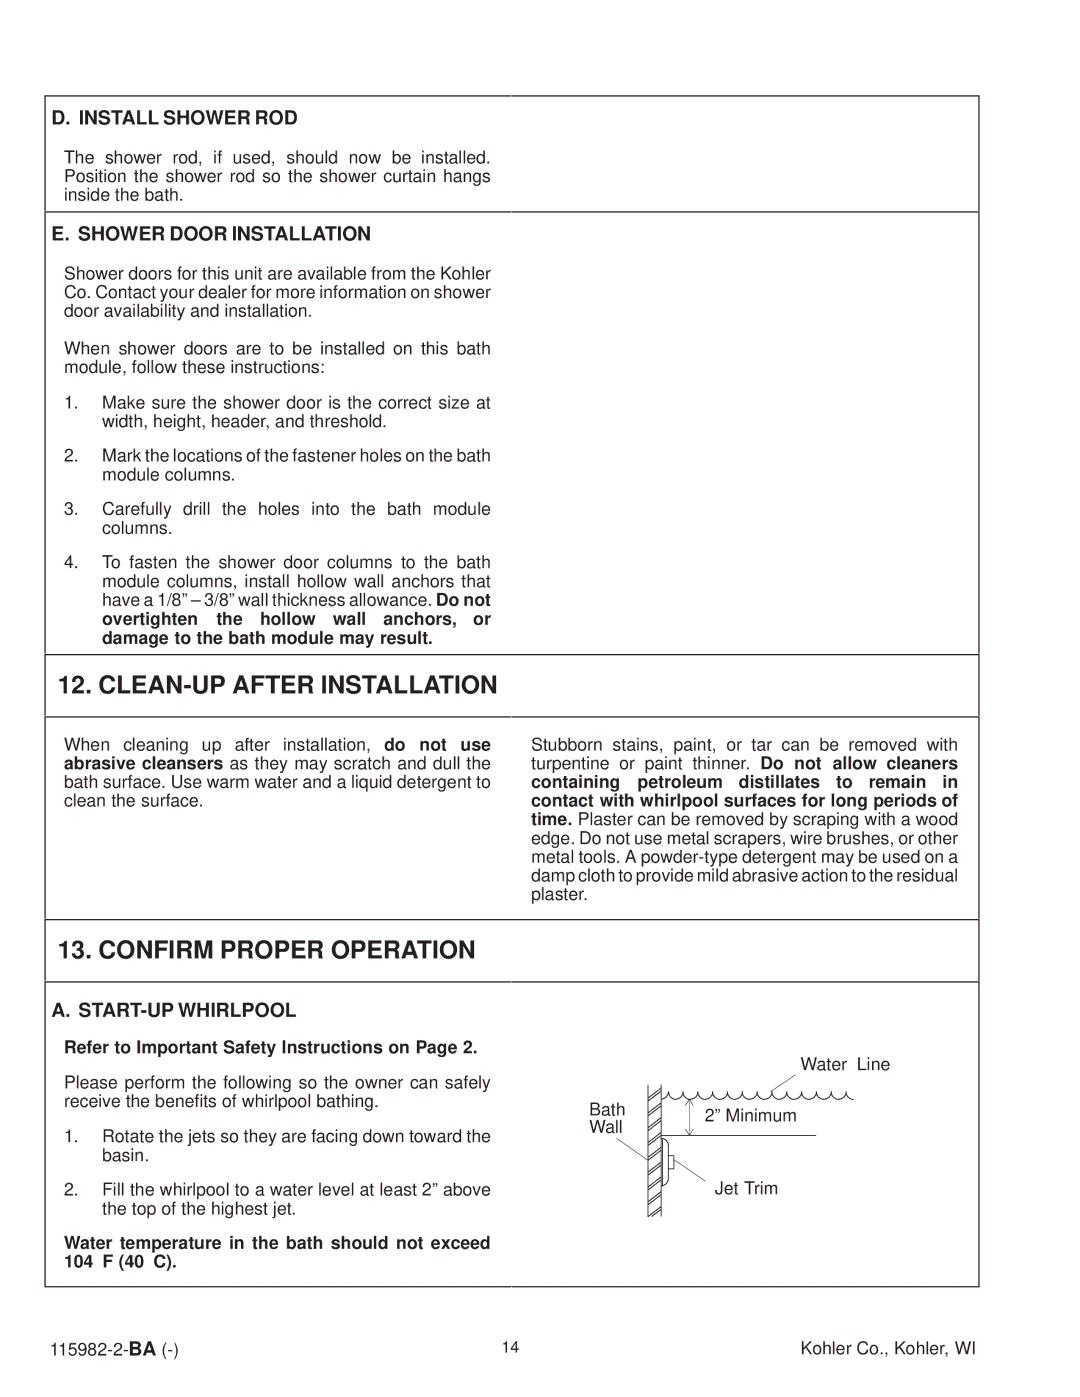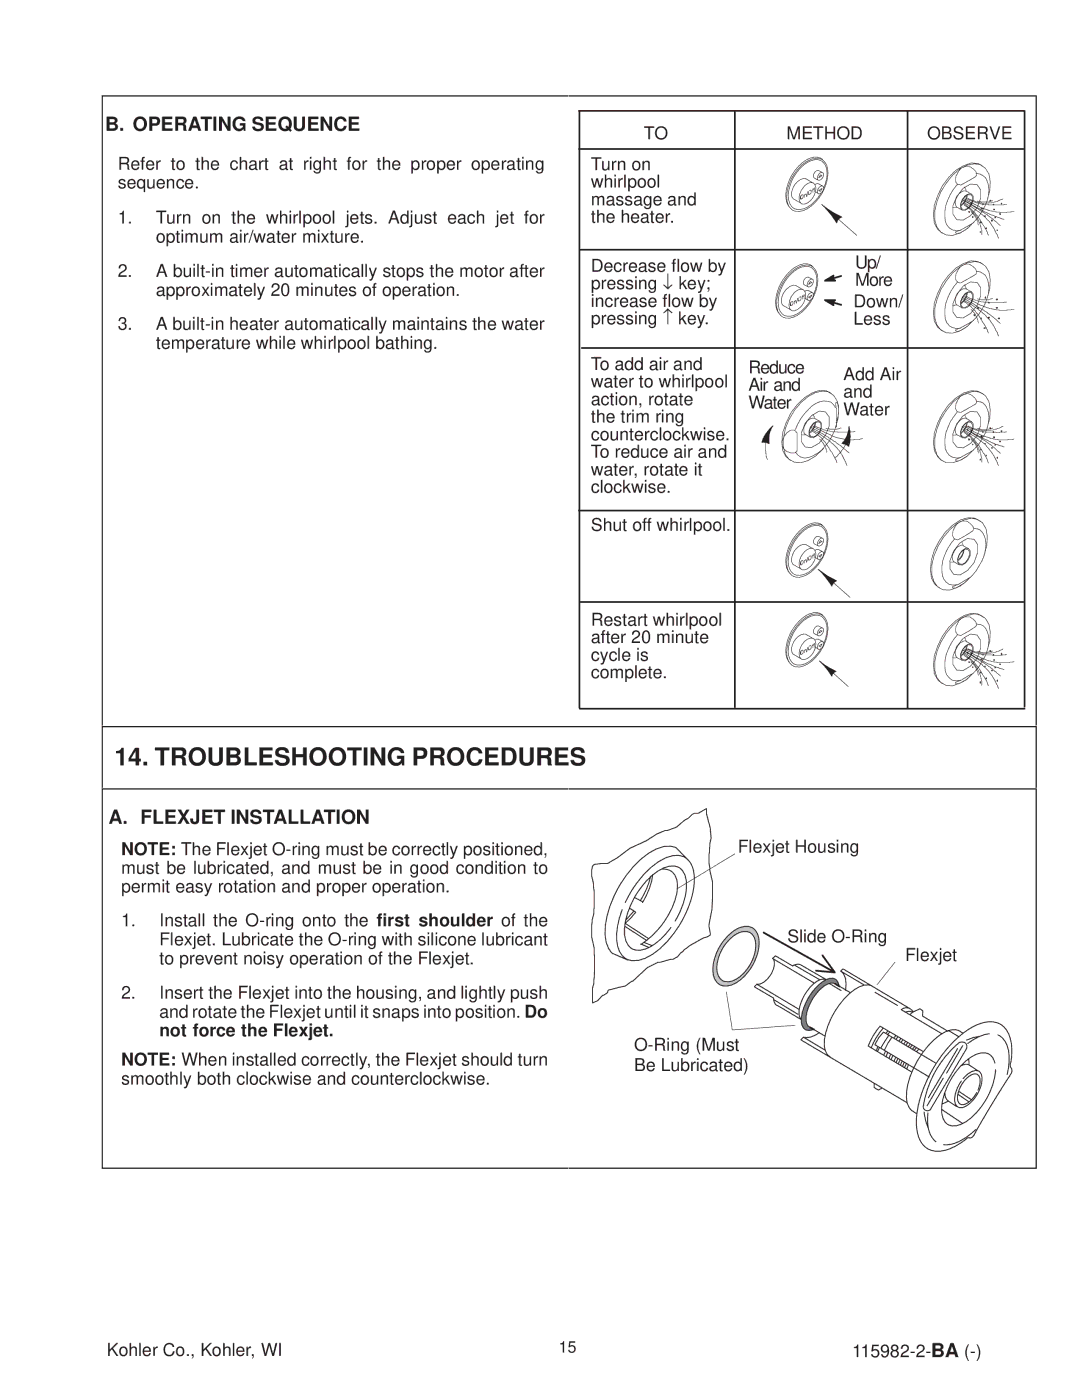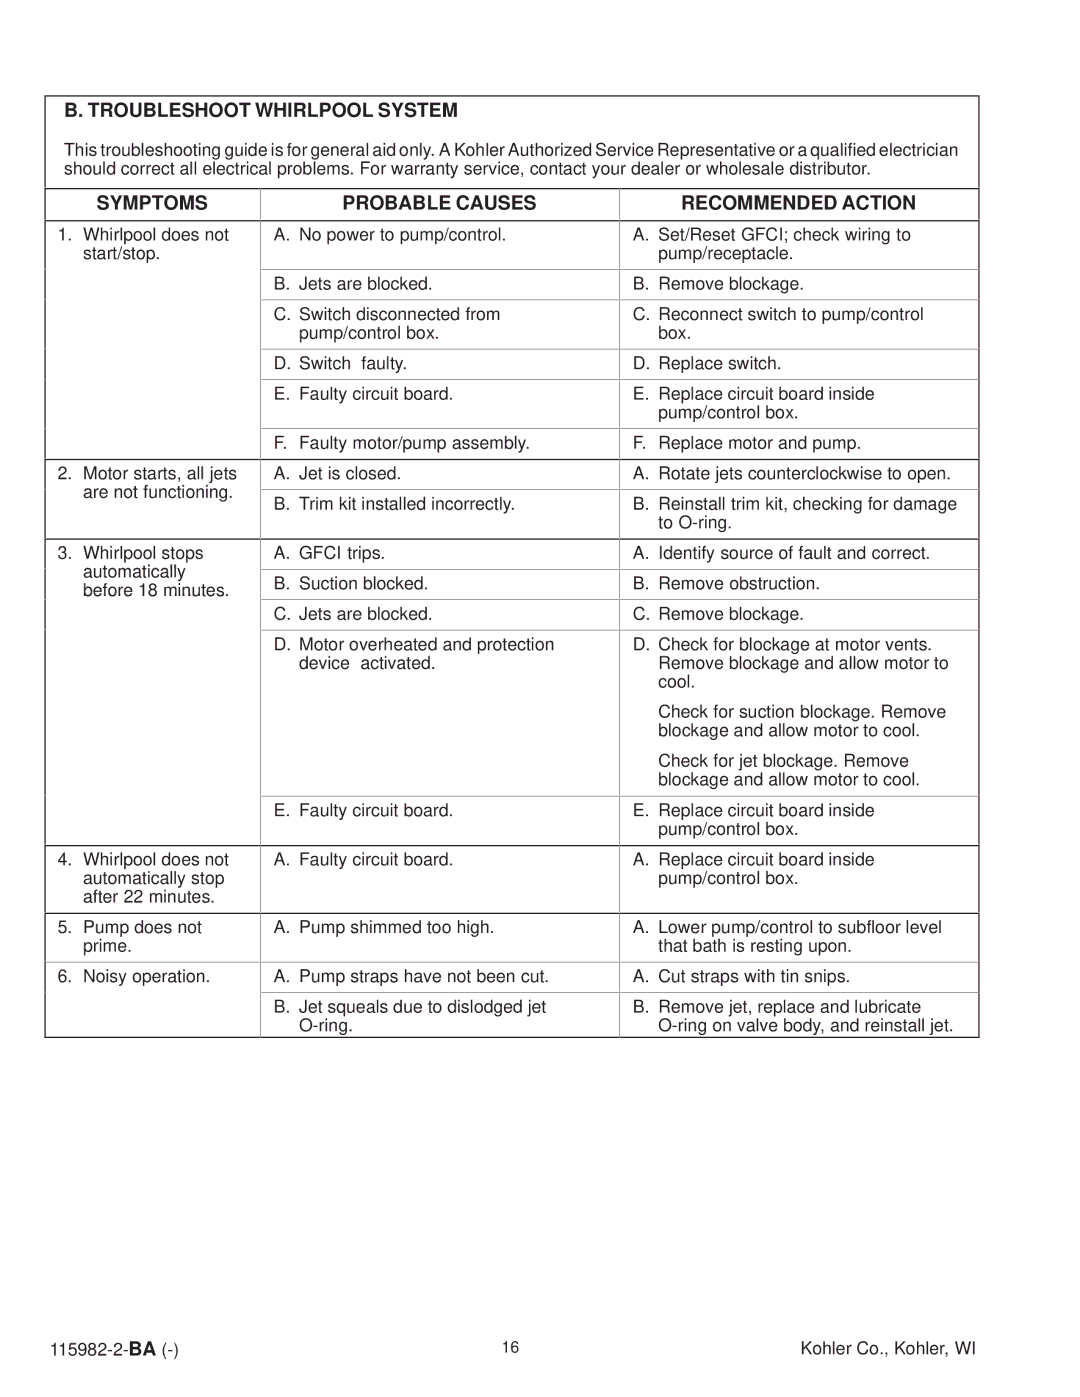
F. STUD POCKET PREPARATION
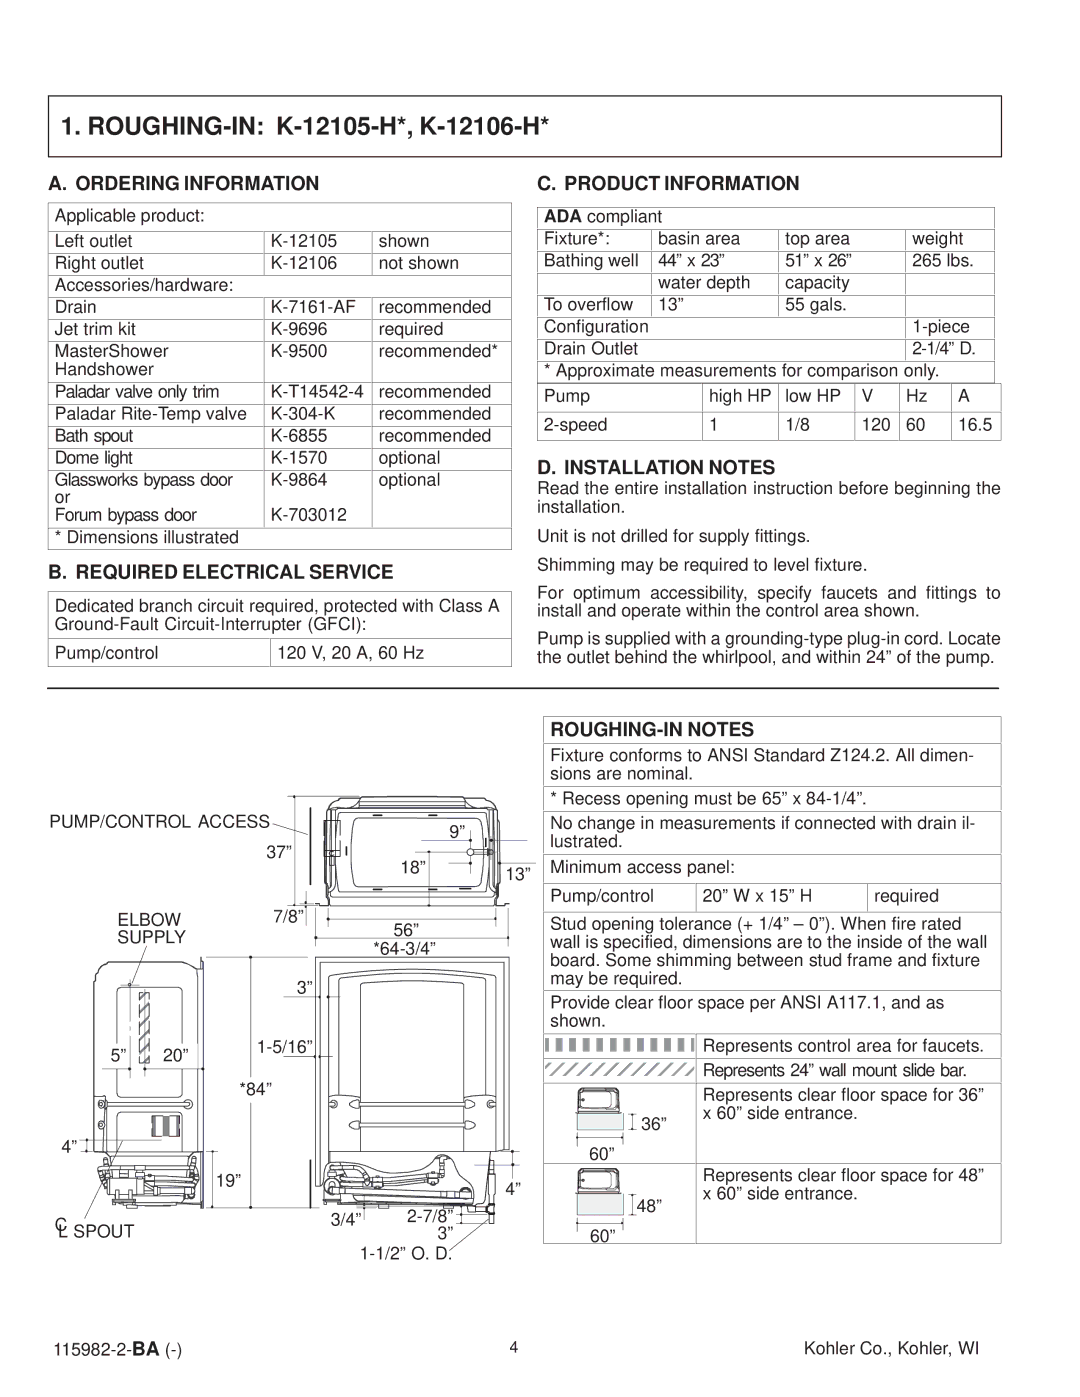
Construct a minimum 2x4 recess designed for your particular installation. Make sure you allow for access to the pump in the event the unit requires service. When constructing the framing, allow for the thickness of sub and finish wall materials.
The unit should be installed as a recess installation. The variety of installations possible with this unit may require framing other than described in this manual.
1.Construct a recess with a header that is square vertically and horizontally in accordance with
2.If extra grab bars are specified: Provide 2x6 bridging or attachment at specified positions. Refer to the grab bar manufacturer's instructions.
NOTE: A 5º diameter opening in the floor should be provided to permit drain connection clearance.
G. PLUMBING PREPARATION
Position the plumbing according to the
|
| 2x2 | Nail Header |
|
| With 2x2 | |
|
| Braces | |
| Brace to | ||
|
| ||
|
|
| Framing After |
|
|
| Setting the |
|
|
| Module In the |
6º Typ. |
|
| Recess |
63º |
|
|
|
| 18º |
| |
|
|
| |
| 13º |
| |
|
|
| |
| 65º |
|
|
6.BEFORE INSTALLING UNIT
A.PARTIALLY INSTALL BATH DRAIN
Install the drain on the bath according to the drain manufacturer's instructions. When installing the drain overflow tube and hood, be sure to adequately seal along the edges of the hood to prevent leakage.
B. PROTECT WHIRLPOOL UNIT
Position a drop cloth or similar material in the bottom of the unit. Be careful not to scratch the surface of the product.
Kohler Co., Kohler, WI | 9 |
