OPERATION
ATTACHING THE DUST BAG
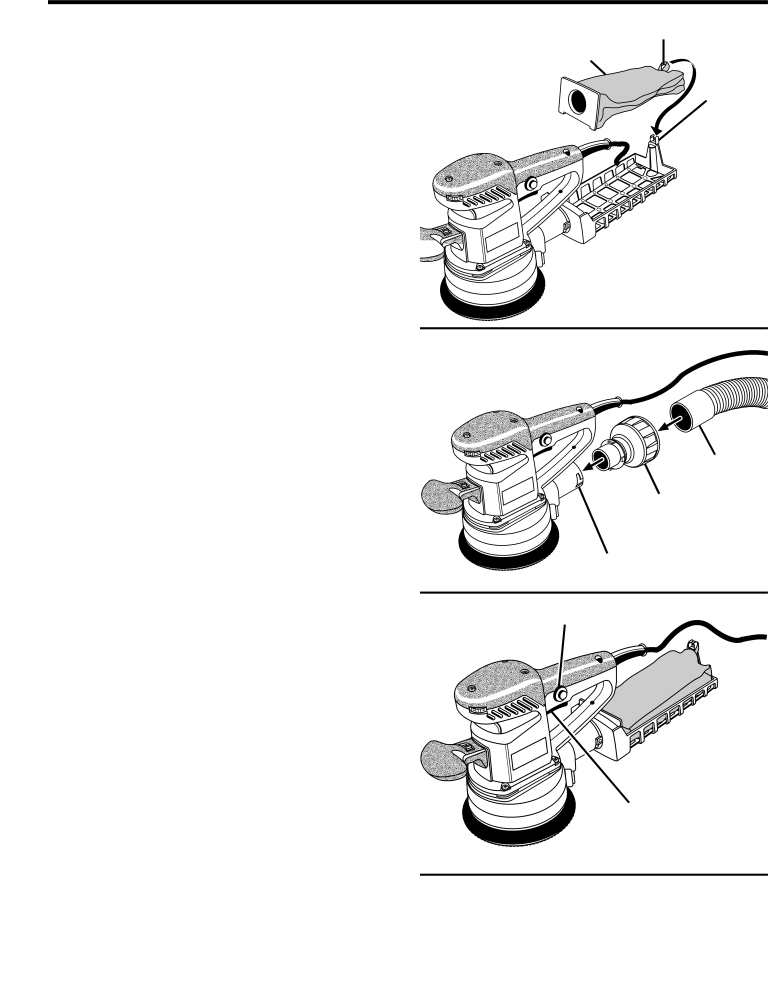
See Figure 6.
The dust bag provides a dust collection system for the sander. Sanding dust is drawn up through the holes of the sanding disc and collected in the dust bag during sanding.
To attach the dust bag:
nUnplug the sander.
n Fit the front tabs on the dust bag into the slots in the front of the dust bag support.
nPress the the dust bag into the hole of the dust bag
support.
nFit the elastic band on the dust bag over the tab of the ![]()
![]()
![]()
![]()
![]() dust bag support.
dust bag support.
nSlide the dust bag support onto the blower exhaust using a slight twisting motion.
CORD RETAINER
ELASTIC BAND
CLOTH BAG
CORD RETAINER
DUST BAG
![]() SUPPORT
SUPPORT
Fig. 6
See Figure 6.
At the rear of the Plastic dust bag holder is a cord retainer. The power cord may be pressed into this retainer to keep the cord in place while the tool is in use.
ATTACHING THE SANDER TO A VACUUM
See Figure 7.
To attach the sander to a vacuum:
nUnplug the sander.
nRemove the dust bag from the sander.
nAttach the vacuum adaptor to the blower exhaust on the sander.
nAttach the vacuum hose to the vacuum adaptor.
TURNING ON/OFF THE SANDER
VACUUM HOSE
VACUUM
ADAPTOR
BLOWER EXHAUST
Fig. 7
See figure 8.
To turn on/off the sander:
nTurn on the sander: Press the trigger switch.
nTurn off the sander: Release the trigger switch.
LOCKING ON THE SANDER
See Figure 8.
The
If you have the
TRIGGER SWITCH
Fig. 8
12