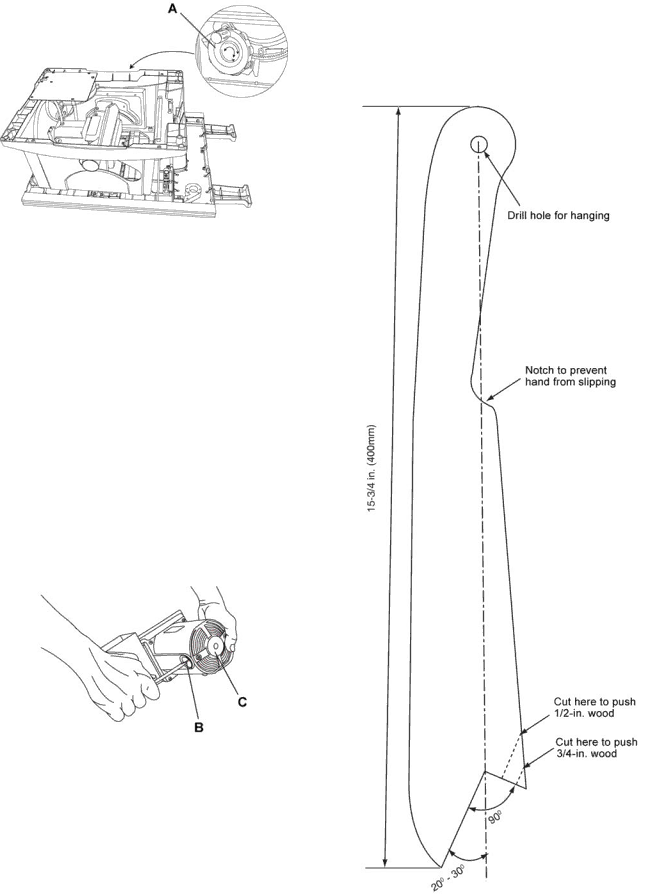
Push Stick Construction
Use solid wood or good quality plywood to construct a push stick using the template below. The push stick must be thinner than the width of the material being cut.
Figure 44
5.Referring to Figure 45:
6.Remove the black plastic cap (B) from the side of the motor (C).
7.Carefully remove the
8.Replace the other side.
9.The ears on the metal end of the assembly go in the same hole the carbon part fits into. Do not overtighten the plastic cap.
10.Carefully set the saw in an upright position on a clean level surface.
11.Replace the blade guard, blade, rip fence, miter gauge and stand assembly to the table saw.
Note: To reinstall the same brushes, first make sure the brushes go back in the way they came out. This will avoid a
Figure 45
Lubrication
All motor bearings are permanently lubricated at the factory and require no additional lubrication.
On all mechanical parts of your table saw where a pivot or threaded rod is present, lubricate using graphite or silicone. These dry lubricants will not hold sawdust as would oil or grease.
Figure 46
29