InventoryCleanup
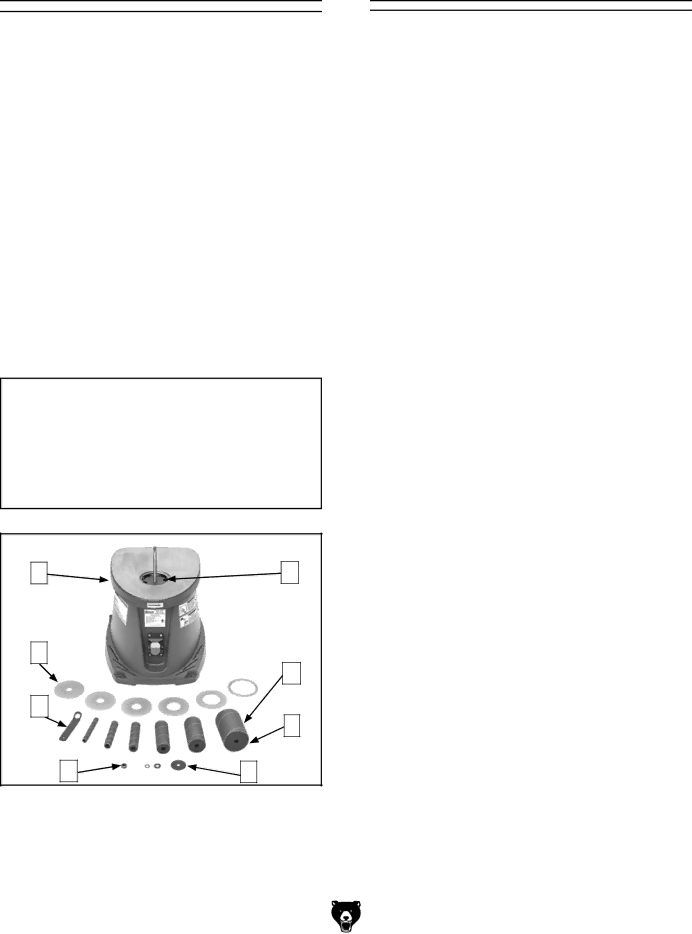
The following is a description of the main compo- nents shipped with your machine. Lay the compo- nents out to inventory them.
If any
Inventory: (Figure 3) | Qty | |
A. | Spindle Sander Assembly | 1 |
B. | Table Inserts 1⁄2", 3⁄4", 1", 1⁜1⁄2", 2", 3" | 6 |
C. | Arbor Wrench | 1 |
D. | Spindle Hex Nut | 1 |
E. | Spindle Washers 5⁄8", 7⁄8", 1⁜3⁄4" | 3 |
F. | Sanding Drums 3⁄4", 1", 1⁜1⁄2", 2", 3" | 5 |
G. | Sanding Sleeves 1⁄2", 3⁄4", 1", 1⁜1⁄2", 2", 3" | 6 |
H. | Base Washer 23⁄4" | 1 |
NOTICE
If you cannot find an item on this list, care- fully check the machine and the packaging materials. Some of these items may be pre- installed for shipping or become misplaced during unpacking.
A | H |
B
G
C
F
D | E |
Figure 3. Box Contents
The unpainted surfaces of your machine are coated with a heavy-duty rust preventative that prevents corrosion during shipment and storage. This rust preventative works extremely well, but it will take a little time to clean.
Be patient and do a thorough job cleaning your machine. The time you spend doing this now will give you a better appreciation for the proper care of your machine's unpainted surfaces.
There are many ways to remove this rust preven- tative, but the following steps work well in a wide variety of situations. Always follow the manufac- turer’s instructions with any cleaning product you use and make sure you work in a well-ventilated area to minimize exposure to toxic fumes.
Before cleaning, gather the following:
•Disposable Rags
•Cleaner/degreaser (WD•40 works well)
•Safety glasses & disposable gloves
•Plastic paint scraper (optional)
Basic steps for removing rust preventative:
1.Put on safety glasses.
2.Coat the rust preventative with a liberal amount of cleaner/degreaser, then let it soak for
3.Wipe off the surfaces. If your cleaner/degreas- er is effective, the rust preventative will wipe off easily. If you have a plastic paint scraper, scrape off as much as you can first, then wipe off the rest with the rag.
4.Repeat Steps
Model G0739 (Mfg. Since 2/12) |