Pinion Housing/Rotor/Shaft/Clutch/Pulley
PinionHousing/Rotor/Shaft/Clutch/Pulley
Removal
1.If pinion housing (29) is not removed from clutch housing (19), do 2. through 5. Otherwise, do 2 and then start at 6.
WARNING
Read Skin Injection Hazard, page 3; Burn Hazard, page 4
2.Do Pressure Relief Procedure, page 5.
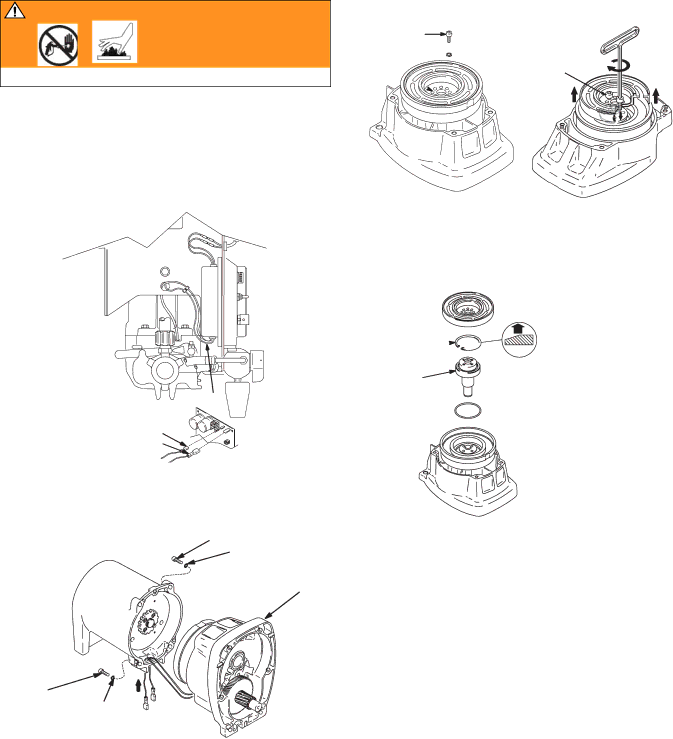
3.FIG. 4. Disconnect clutch cable connectors.
a.Remove two screws (71) and swing down cover (130a).
b.Remove strain relief (171).
c.Disconnect clutch cable connectors (X).
ti6293a
X
Bottom View
CLUTCH
CLUTCH (+)
FIG. 4
4.FIG. 5. Remove four screws (36), lock washers (37) and pinion housing (29).
36
37
29
36
37
ti5742a
FIG. 5
5.FIG. 6. Place pinion housing (29) on bench with rotor side up.
6.Remove four screws (28) and lock washers (24). Install two screws in threaded holes (E) in rotor. Alternately tighten screws until rotor comes off.
28
24 ![]()
E ![]() E
E
ti5987b
ti5743a
FIG. 6
7.FIG. 7. Remove retaining ring (29e).
8.Turn pinion housing over and tap pinion shaft (29d) out with plastic mallet.
29e 
29d
ti5482a
FIG. 7
9.FIG. 9. Remove belt guide bracket (146), belt guard (148) and Vee belt (147).
10.Hold pulley (62) and remove four screws (23) and washers (24) from hub (26). Remove armature (25) and spacer (19f).
11.Engine Detail, page 18. Remove screw (20) and washer (61) from engine drive shaft. Remove pulley (62) and motor shaft sleeve (144). Remove pulley and key (18).
12.Fig. 9. Remove three screws (35) from beneath cart frame (1).
13.Lift off clutch housing (19e).
14.Remove retaining ring (19b). Pull drive shaft assembly (19c) out.
10 | 311046H |