Contents
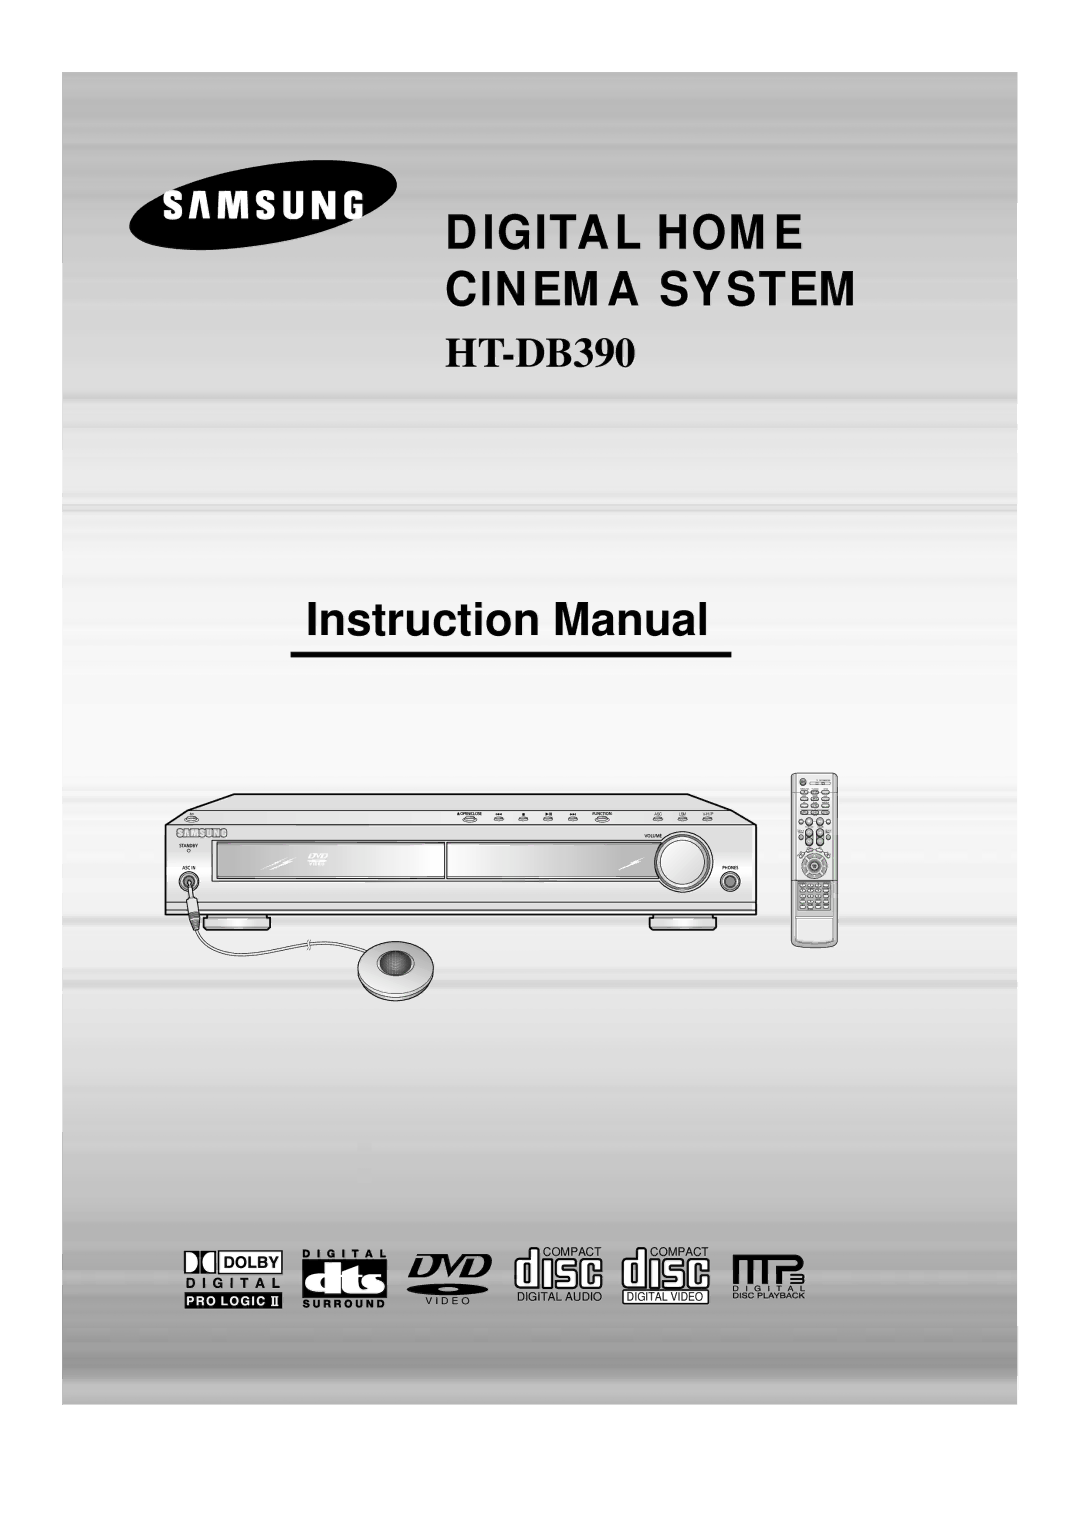
Digital Home Cinema System
Class 1 Laser Product
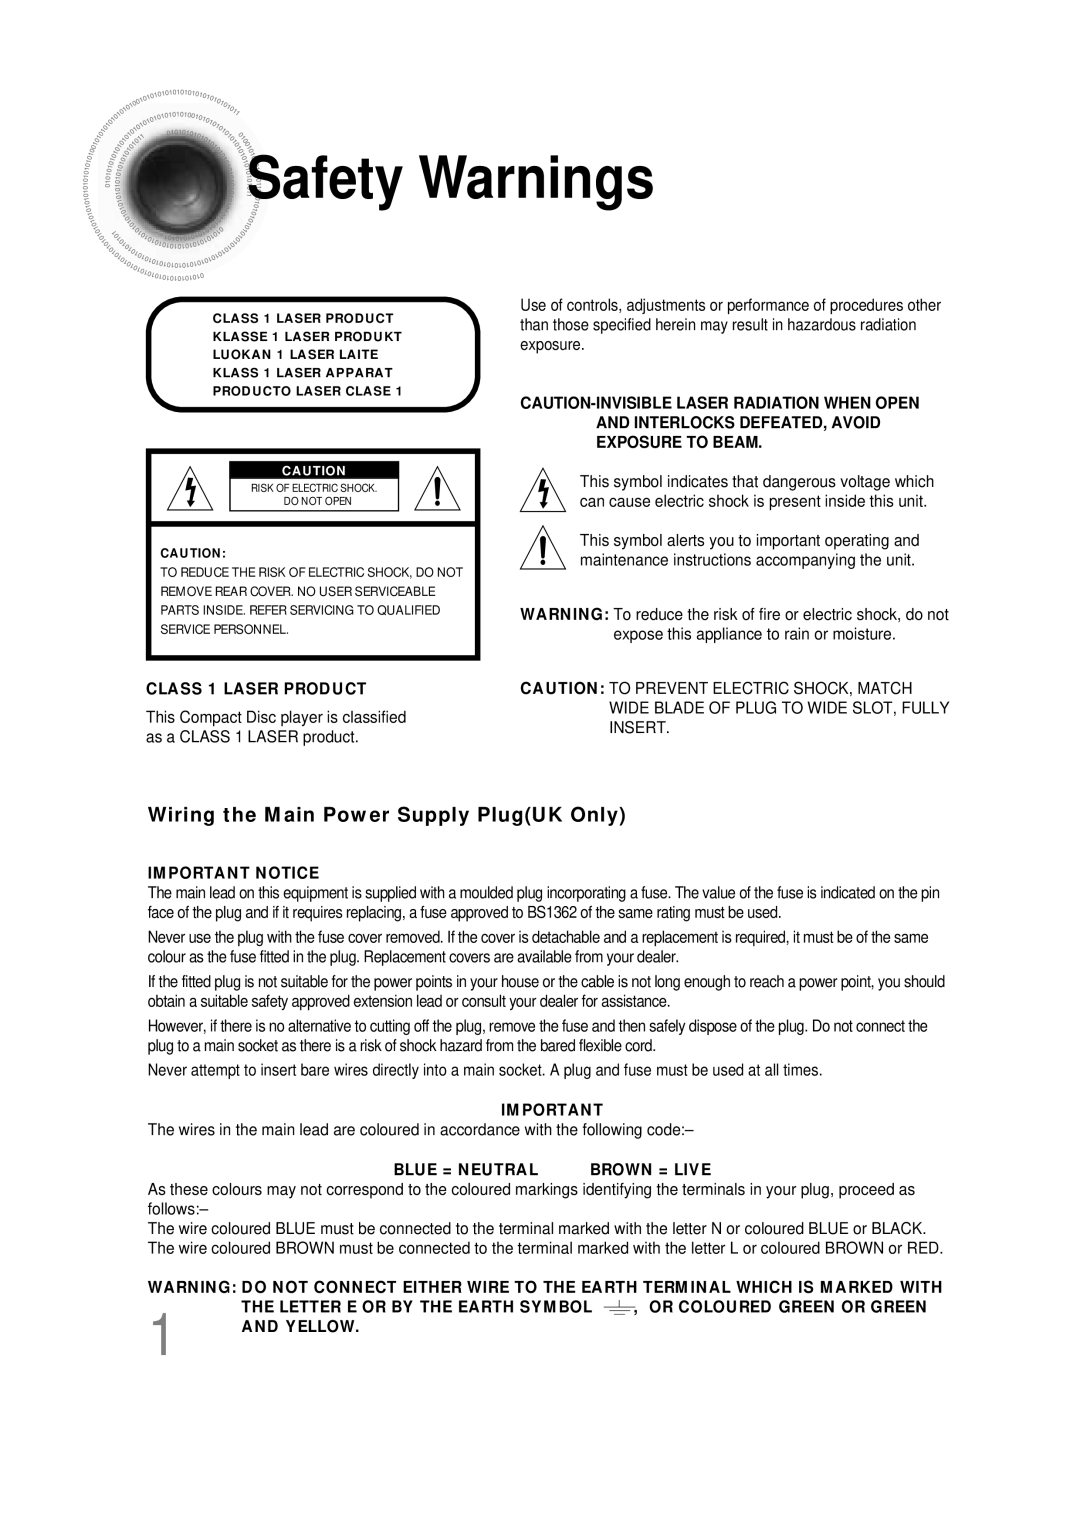
Safety Warnings
Preparation
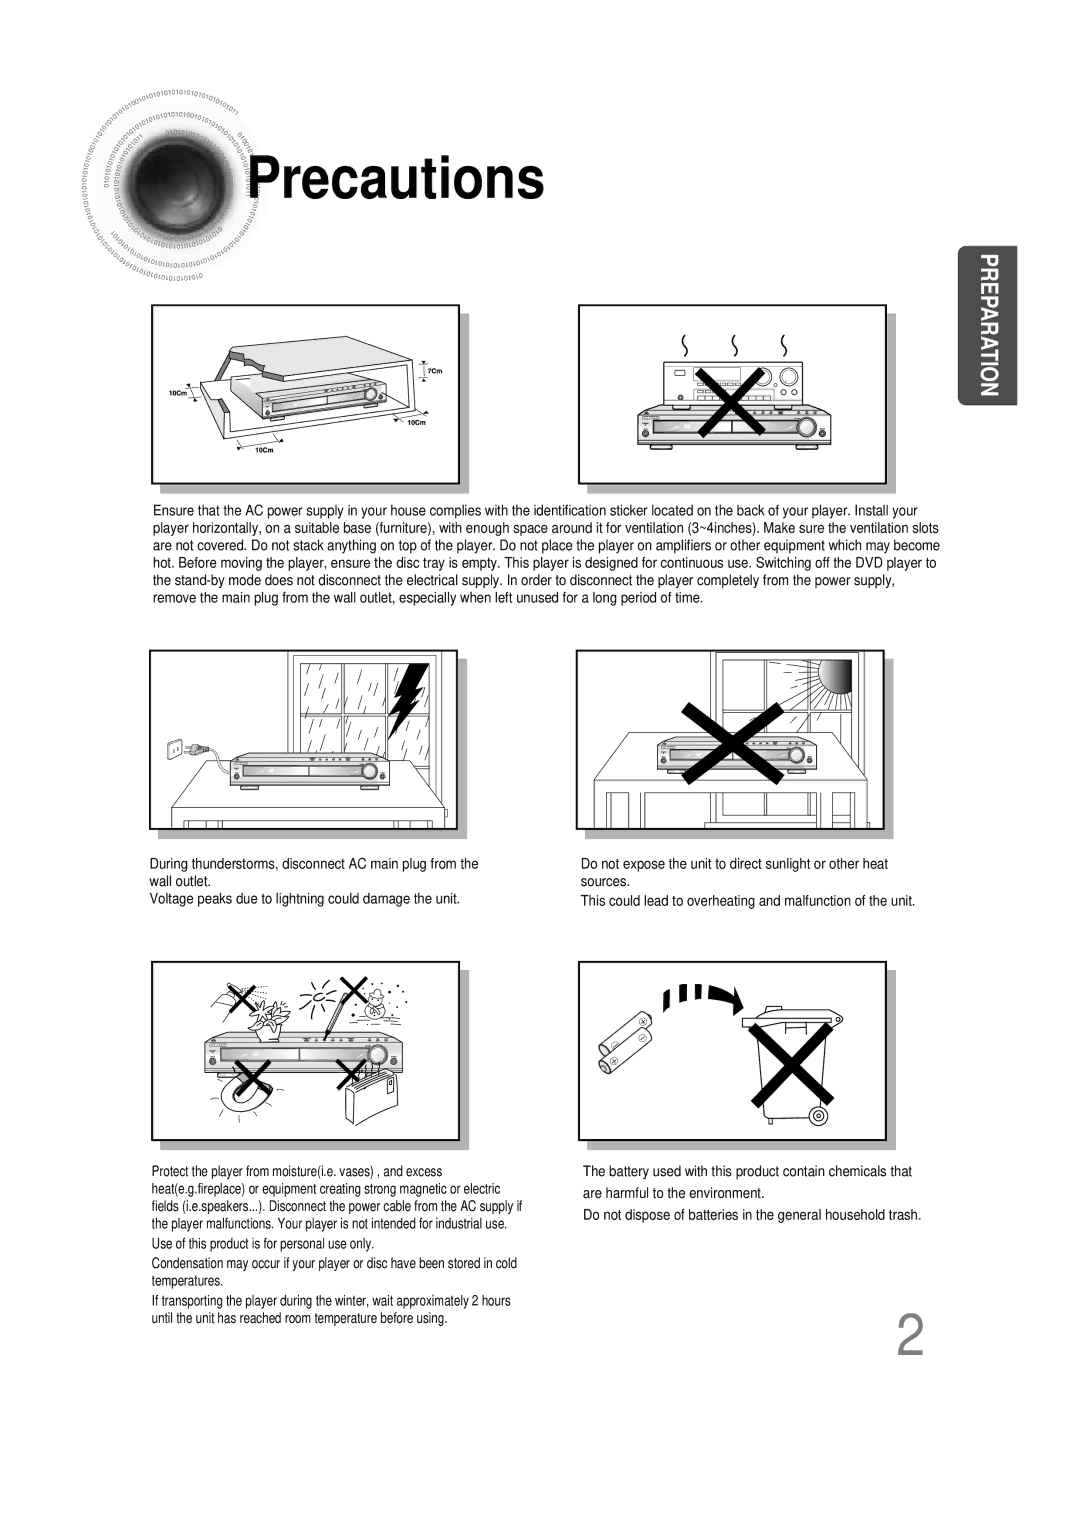
Precautions
Multi-Disc Playback & AM/FM Tuner
Features
Contents
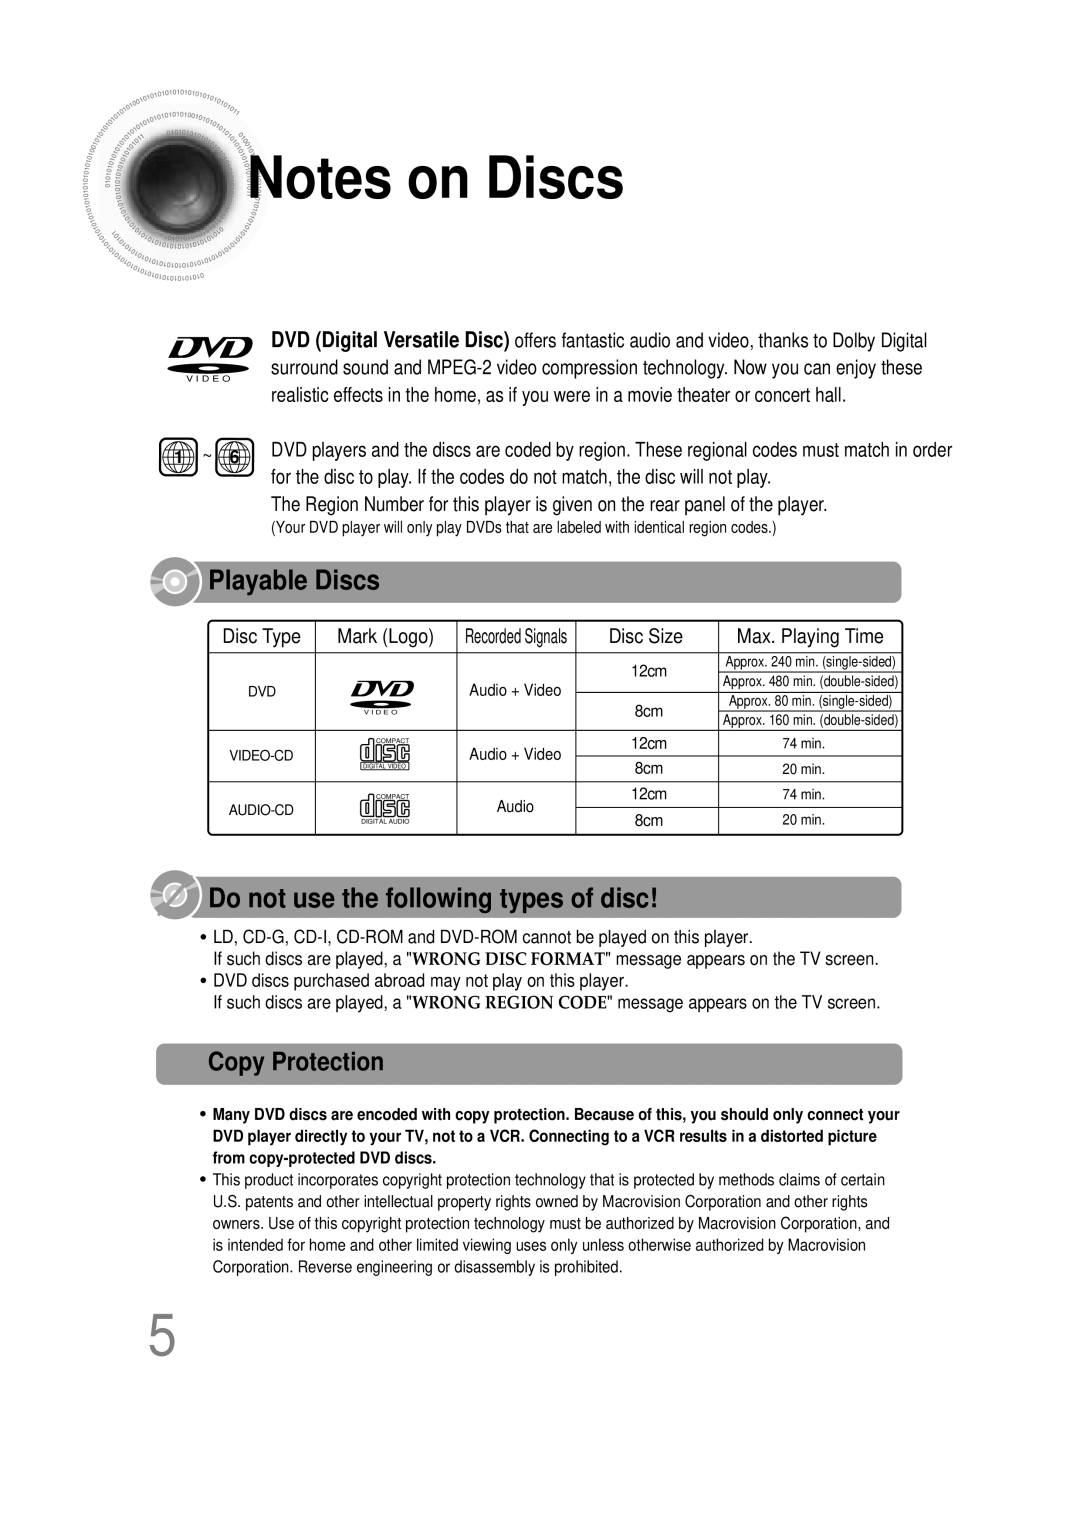
Max. Playing Time
Copy Protection
Disc Size
Mark Logo
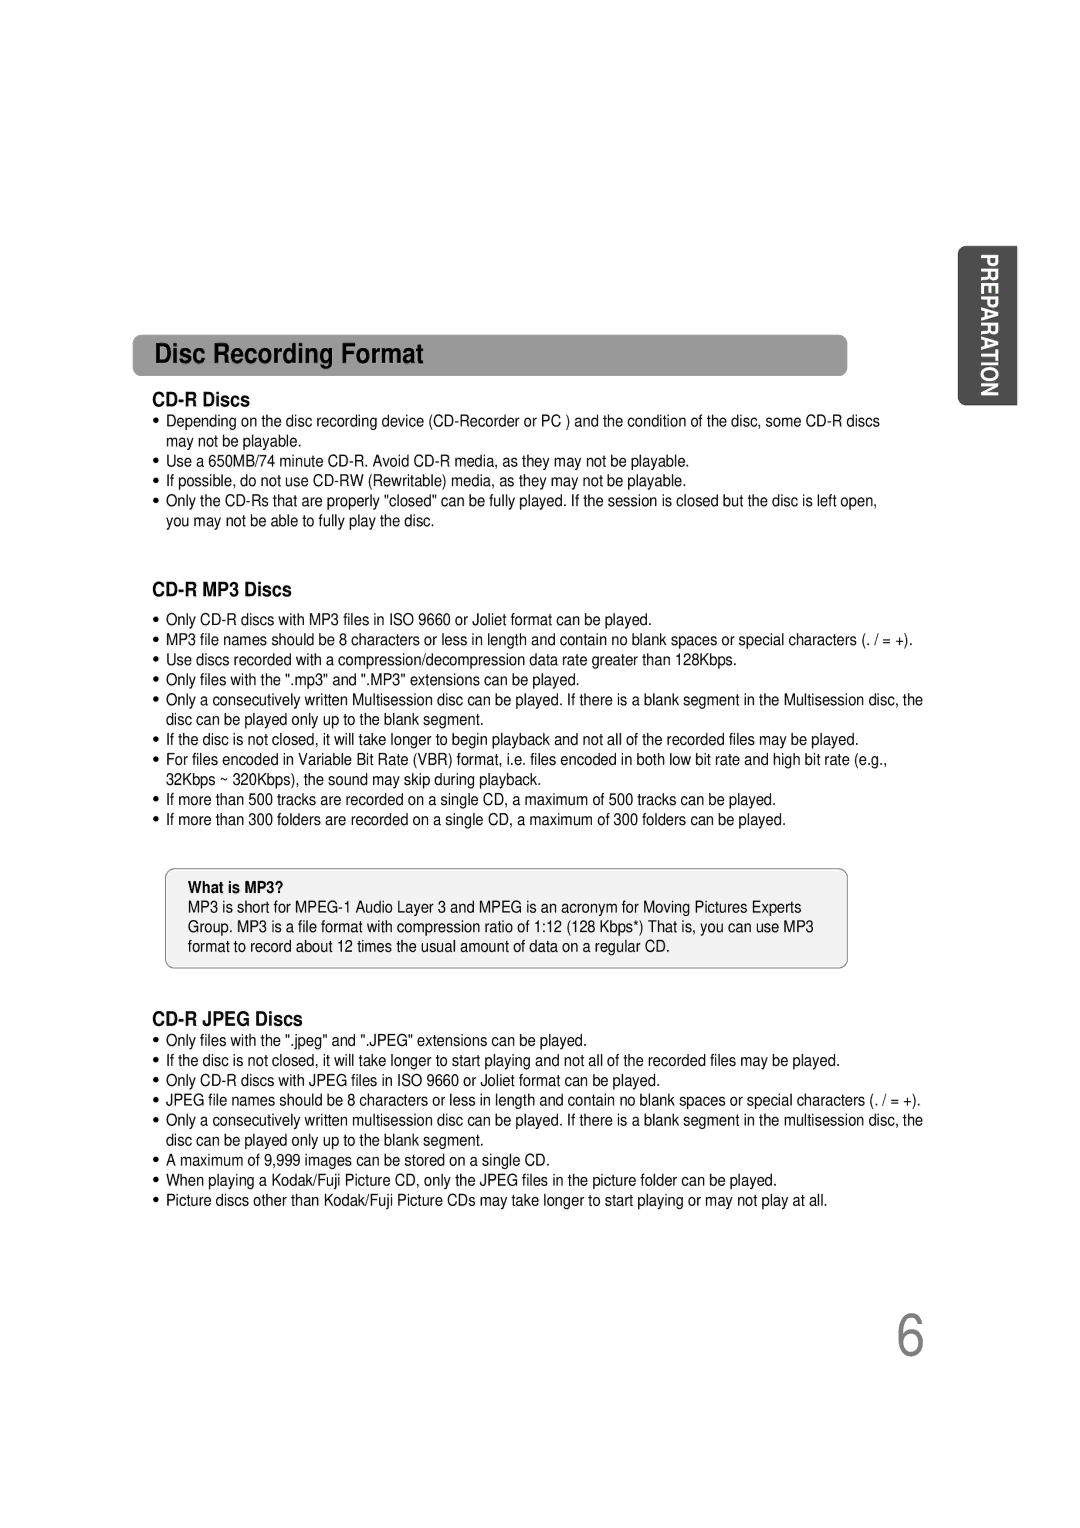
CD-R Discs
CD-R MP3 Discs
CD-R Jpeg Discs
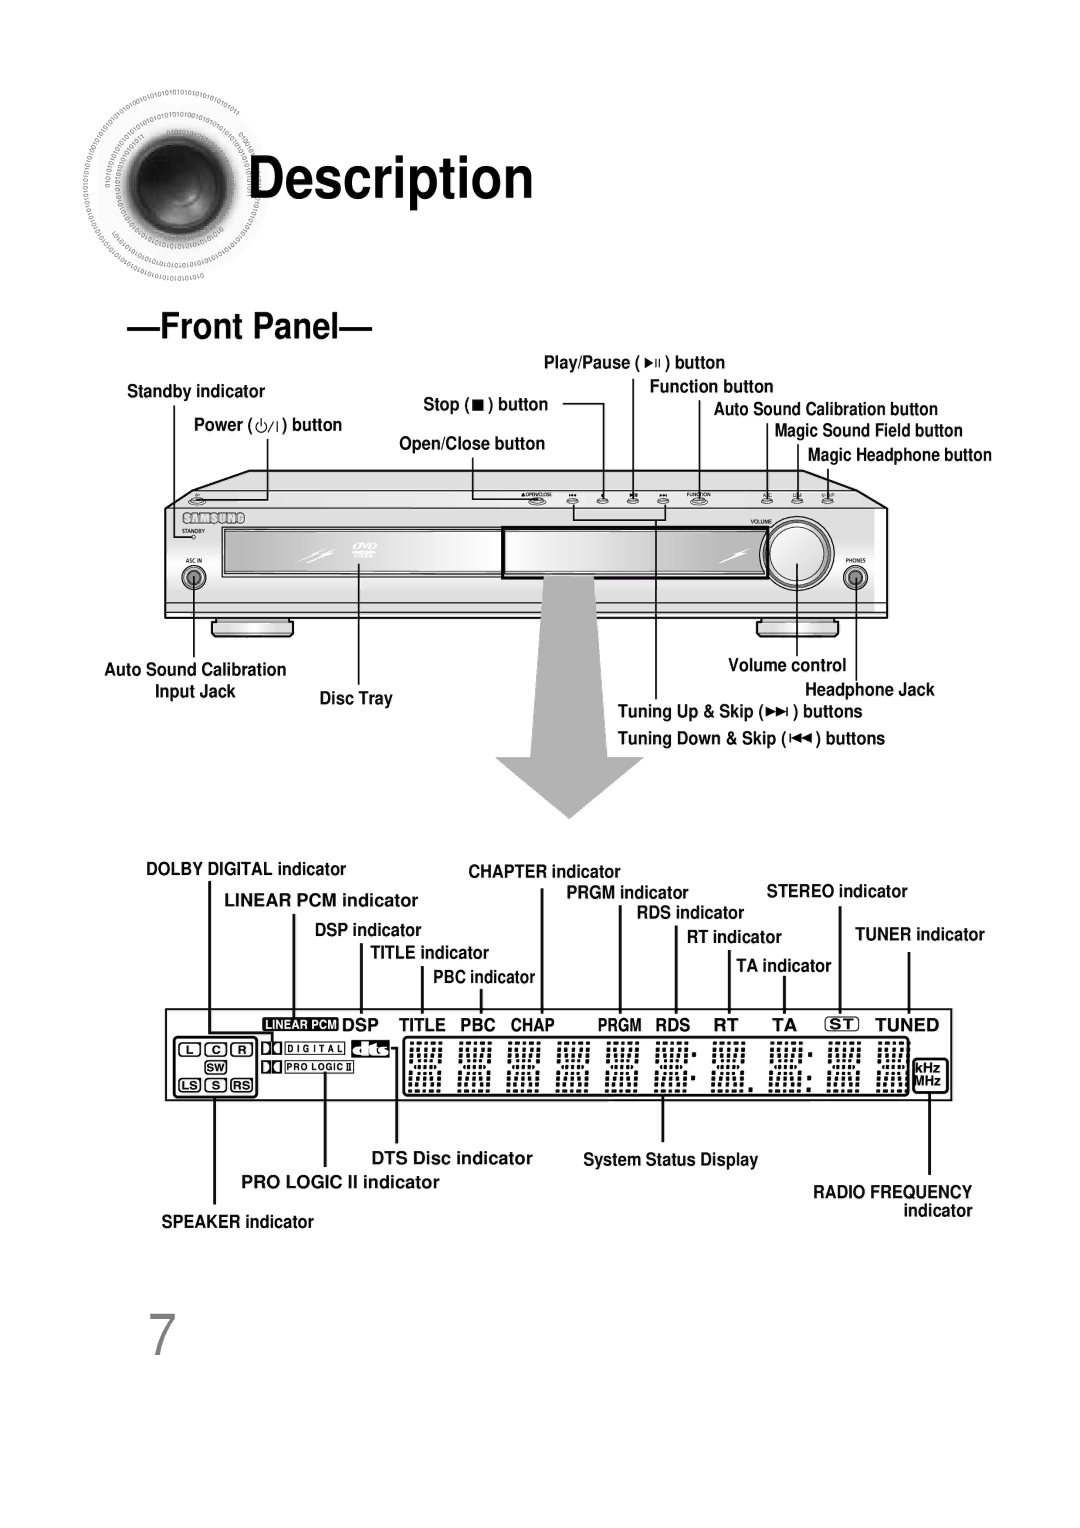
Description
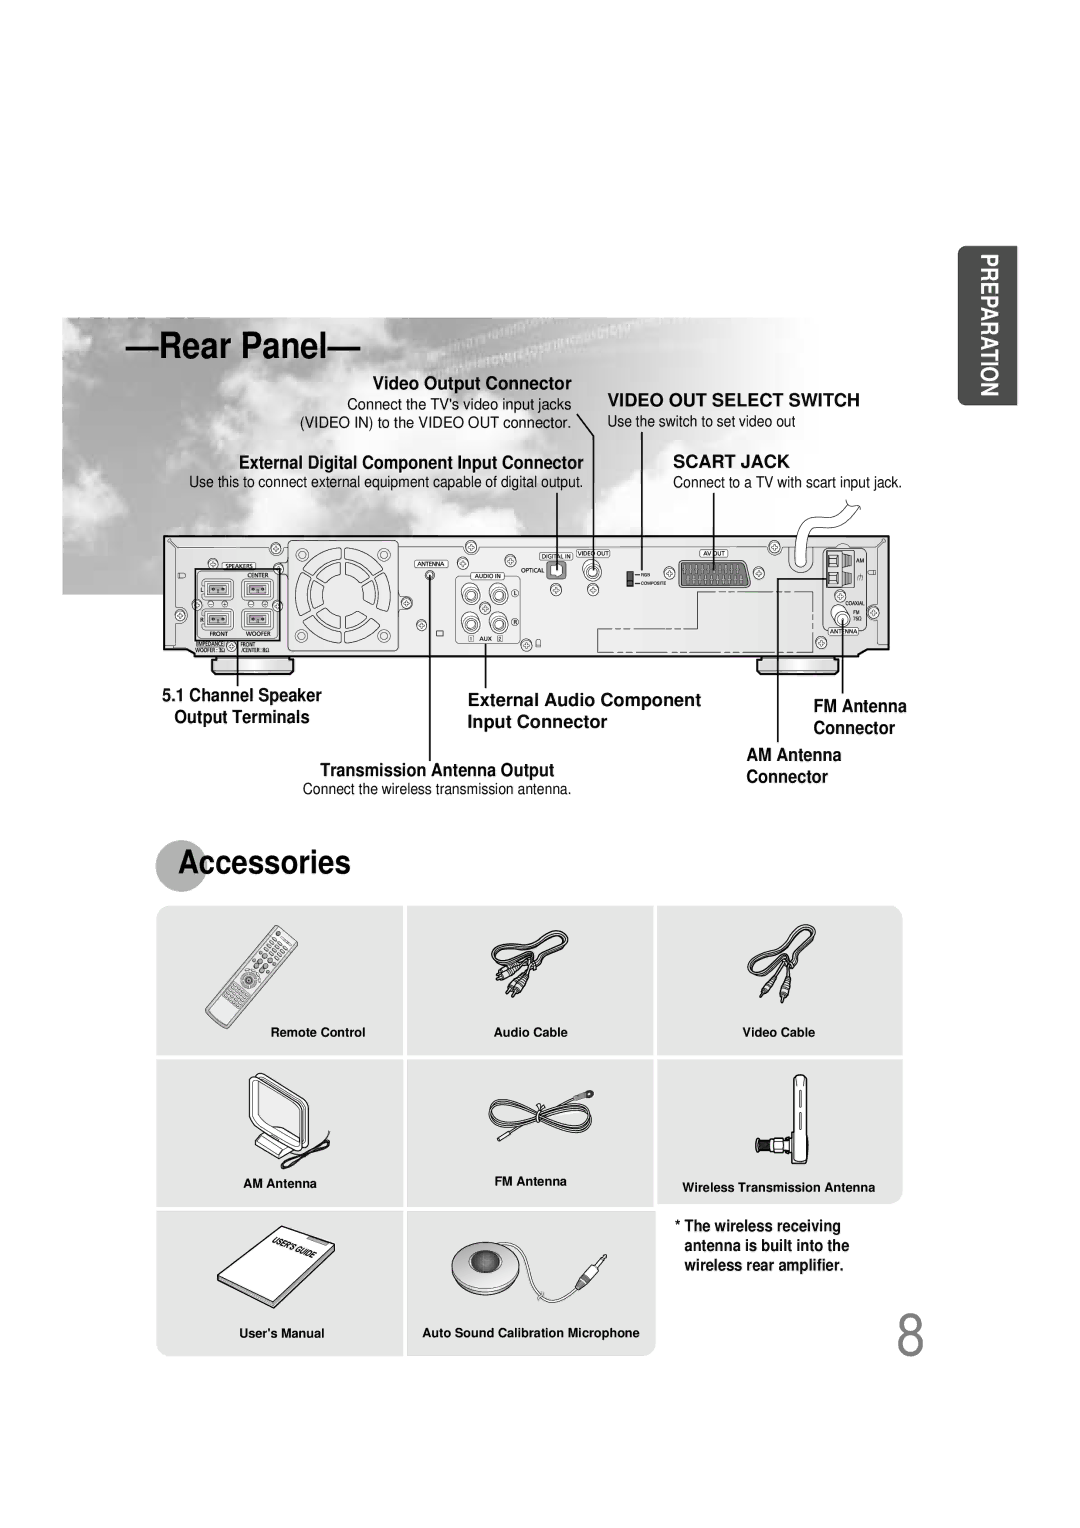
External Audio Component
Video Output Connector
Input Connector
Connector
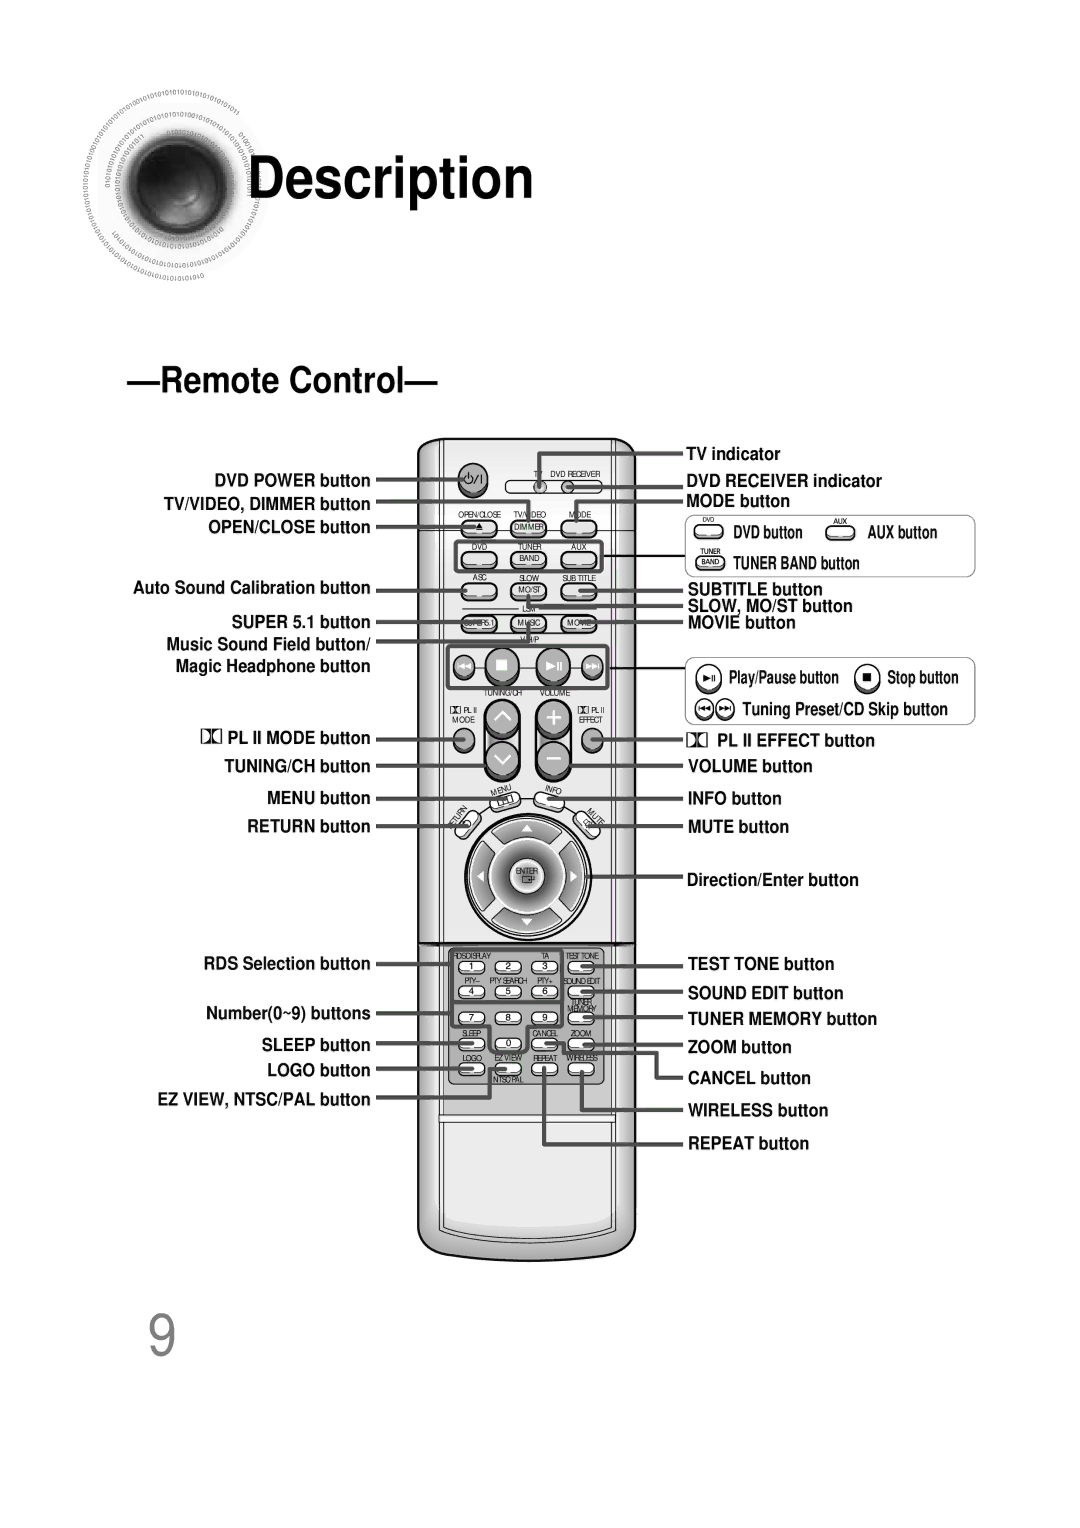
Auto Sound Calibration button
TV indicator
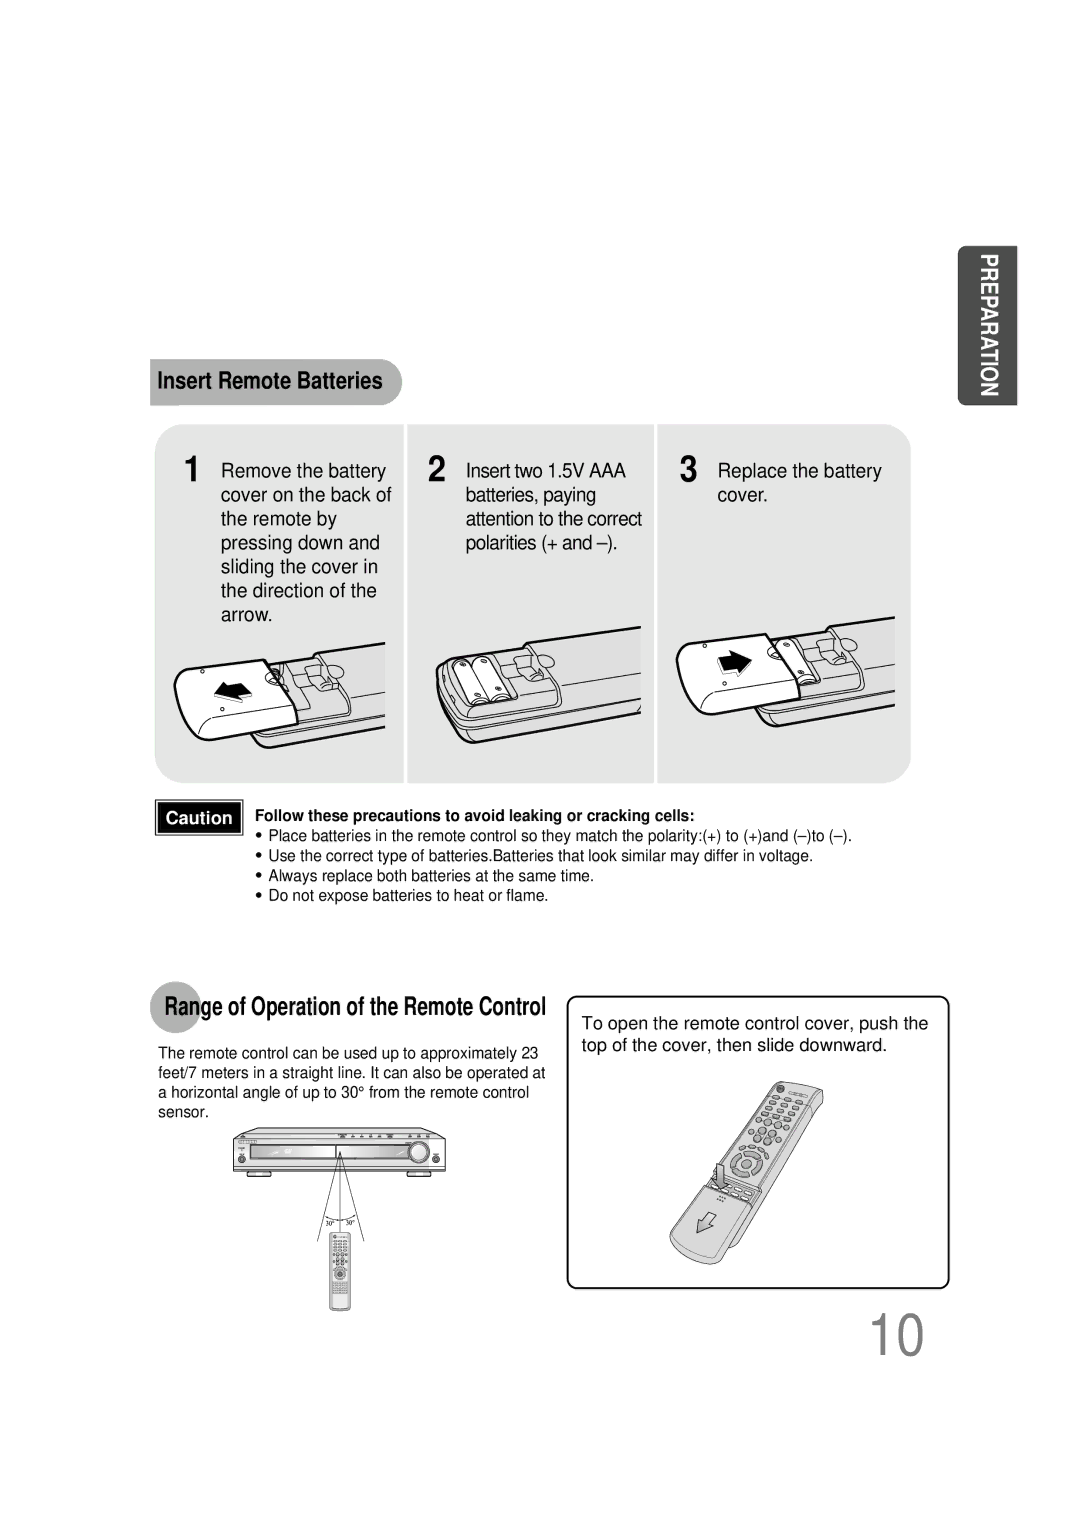
Range of Operation of the Remote Control
Replace the battery cover
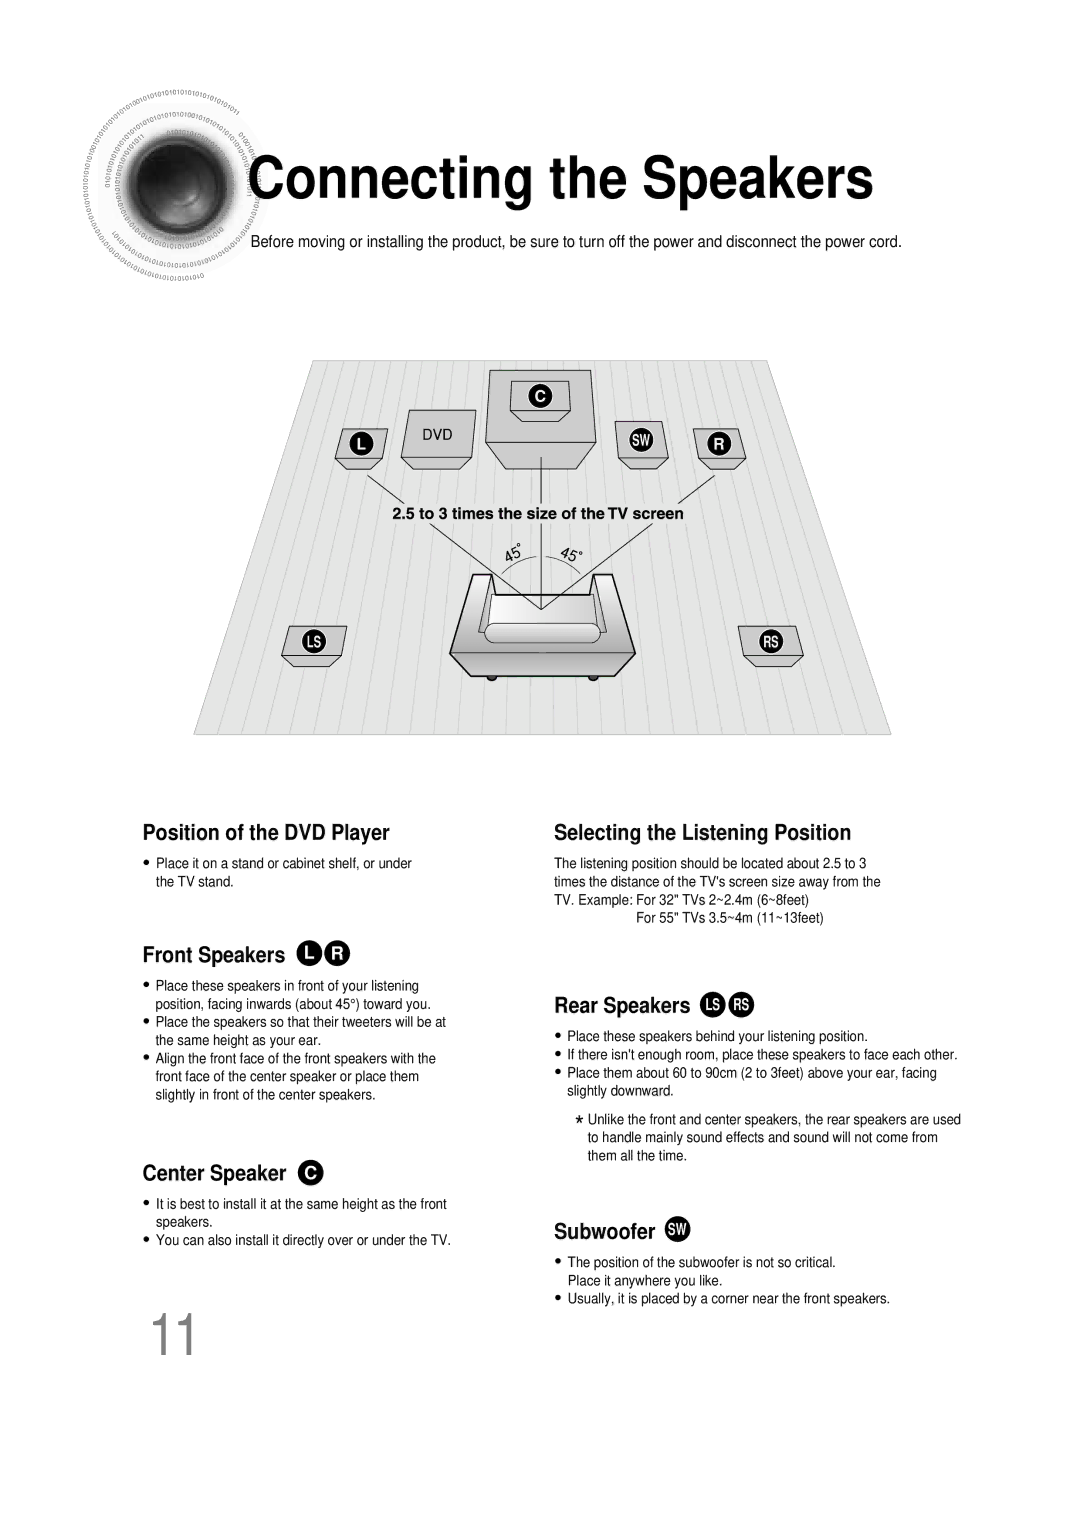
Selecting the Listening Position
Connecting the Speakers
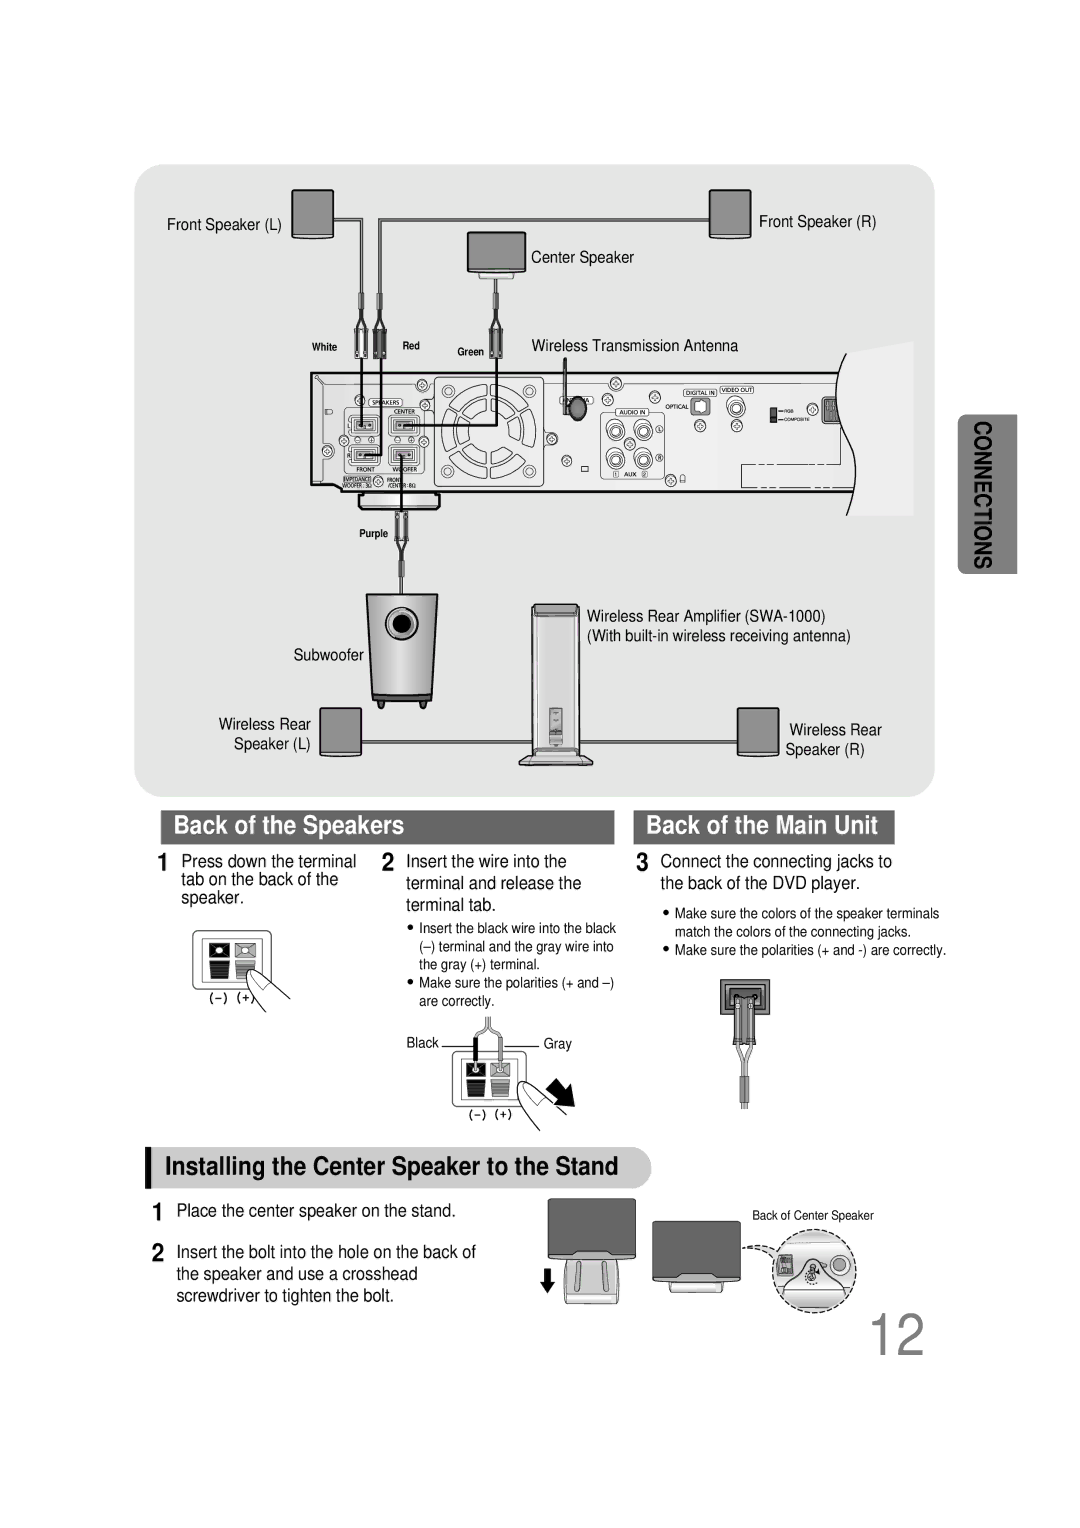
Installing the Center Speaker to the Stand
Connect the connecting jacks to the back of the DVD player
Place the center speaker on the stand
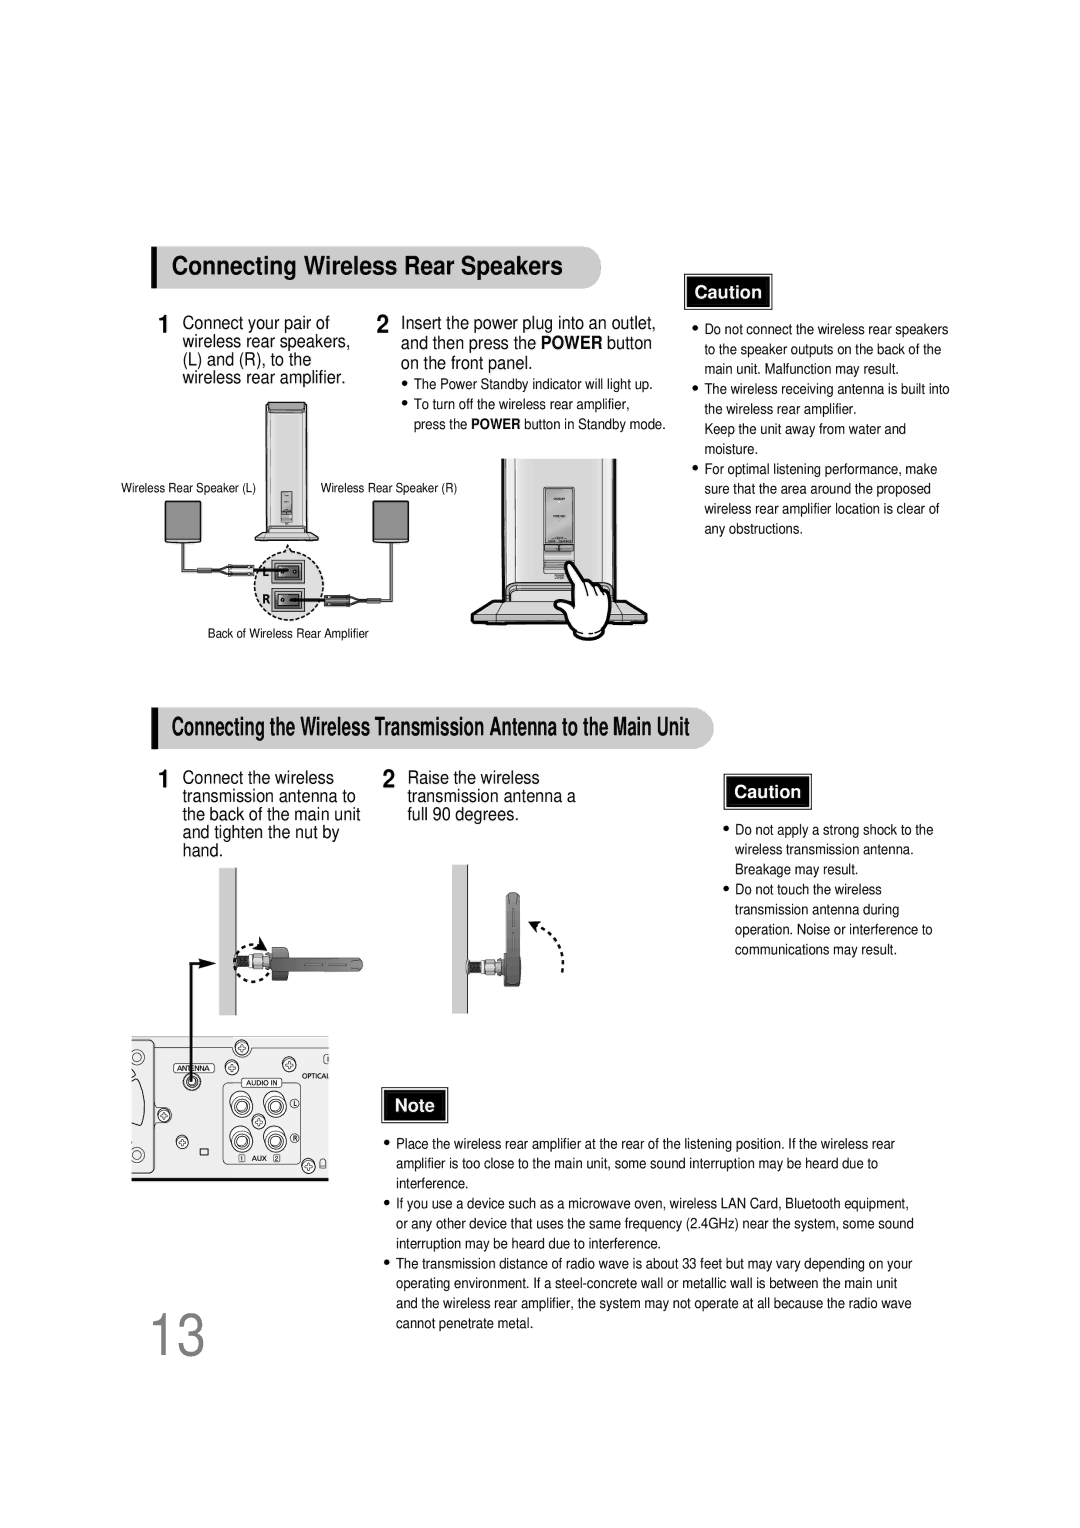
Connect your pair
Connecting Wireless Rear Speakers
Wireless rear speakers
R, to On the front panel Wireless rear amplifier
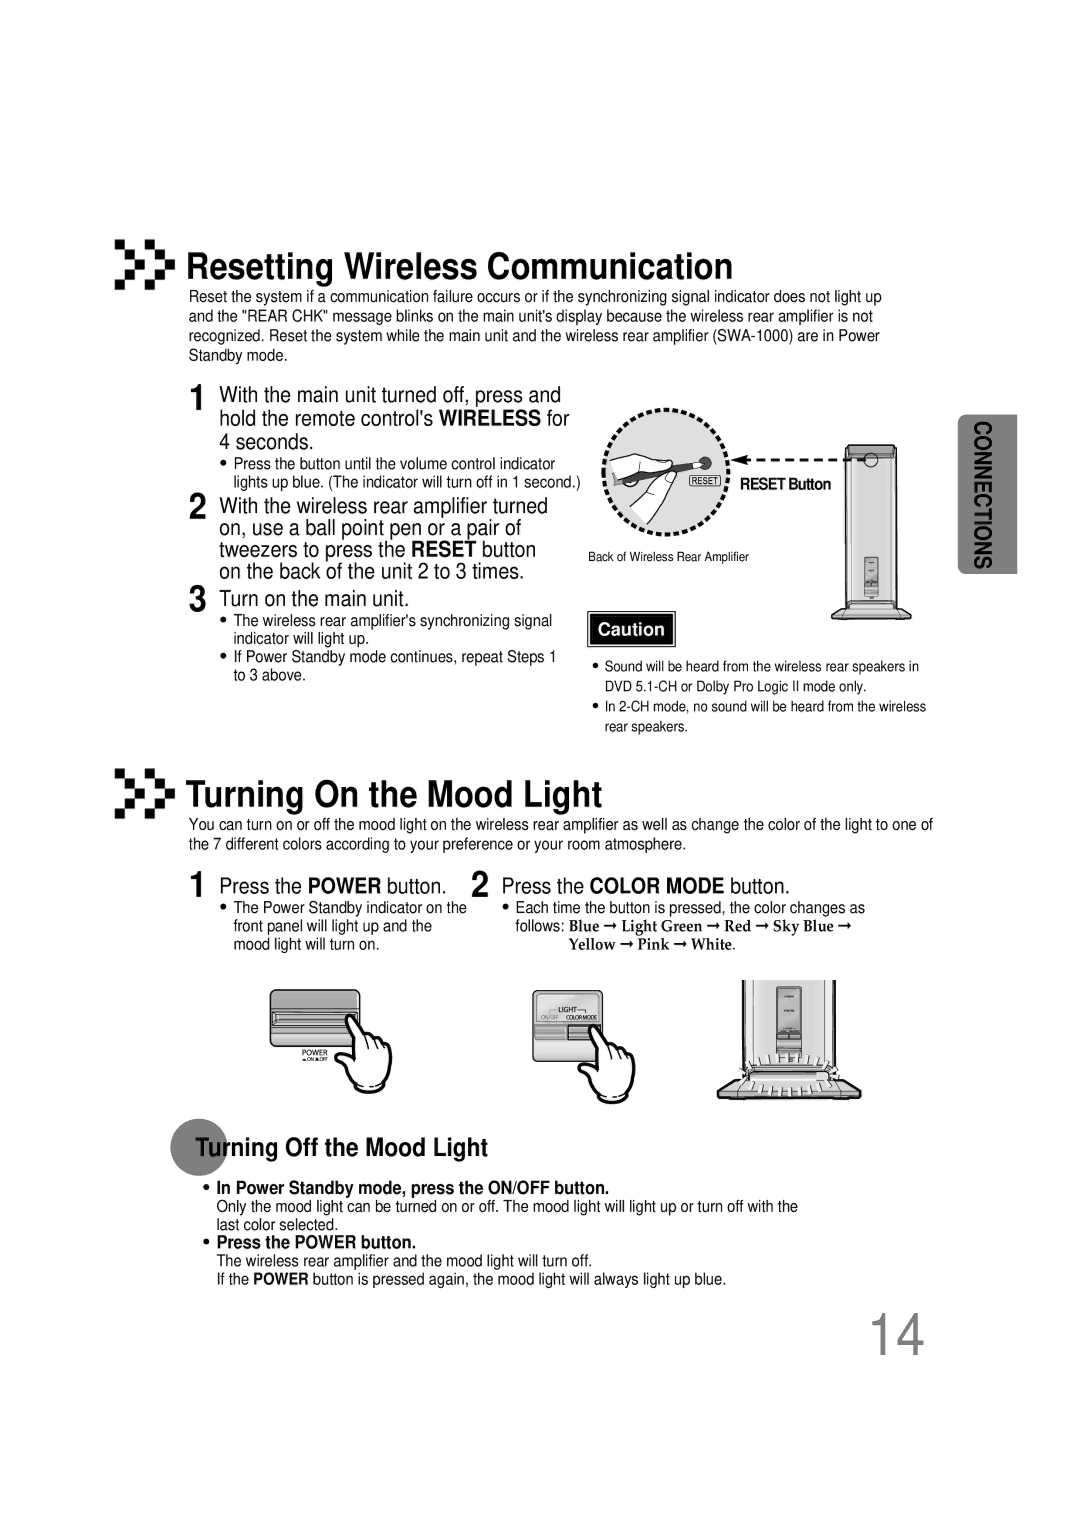
Press the Power button
Power Standby mode, press the ON/OFF button
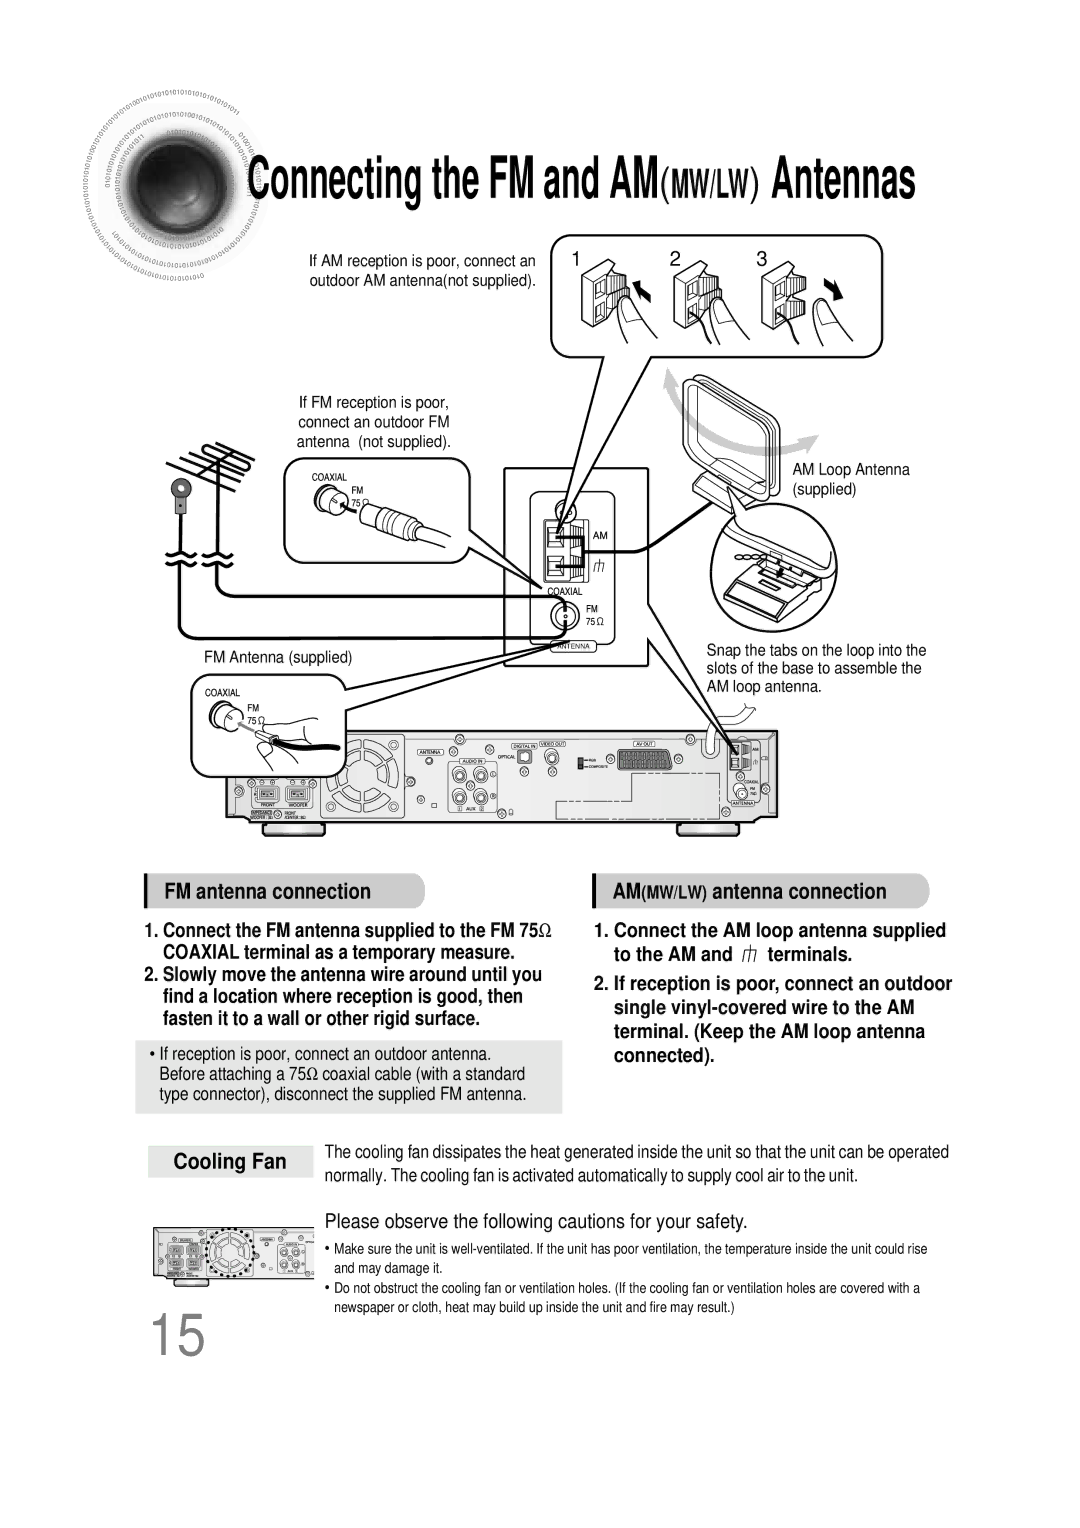
Please observe the following cautions for your safety
Coaxial terminal as a temporary measure
Connect the FM antenna supplied to the FM 75Ω
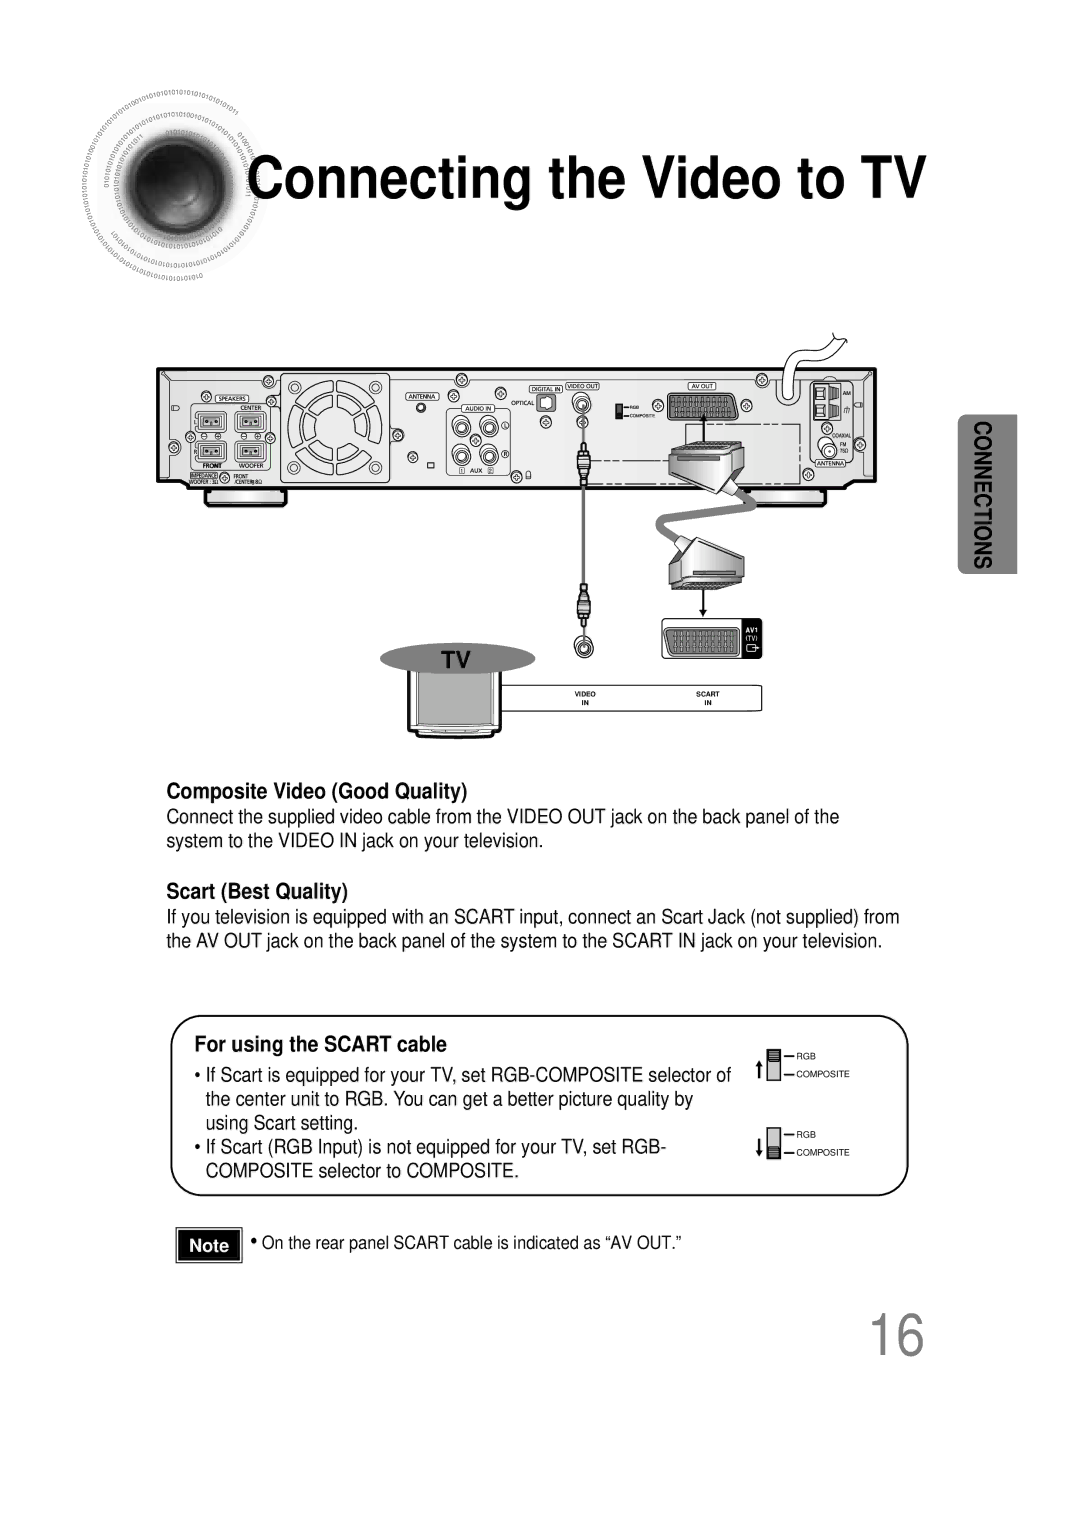
Connecting the Video to TV
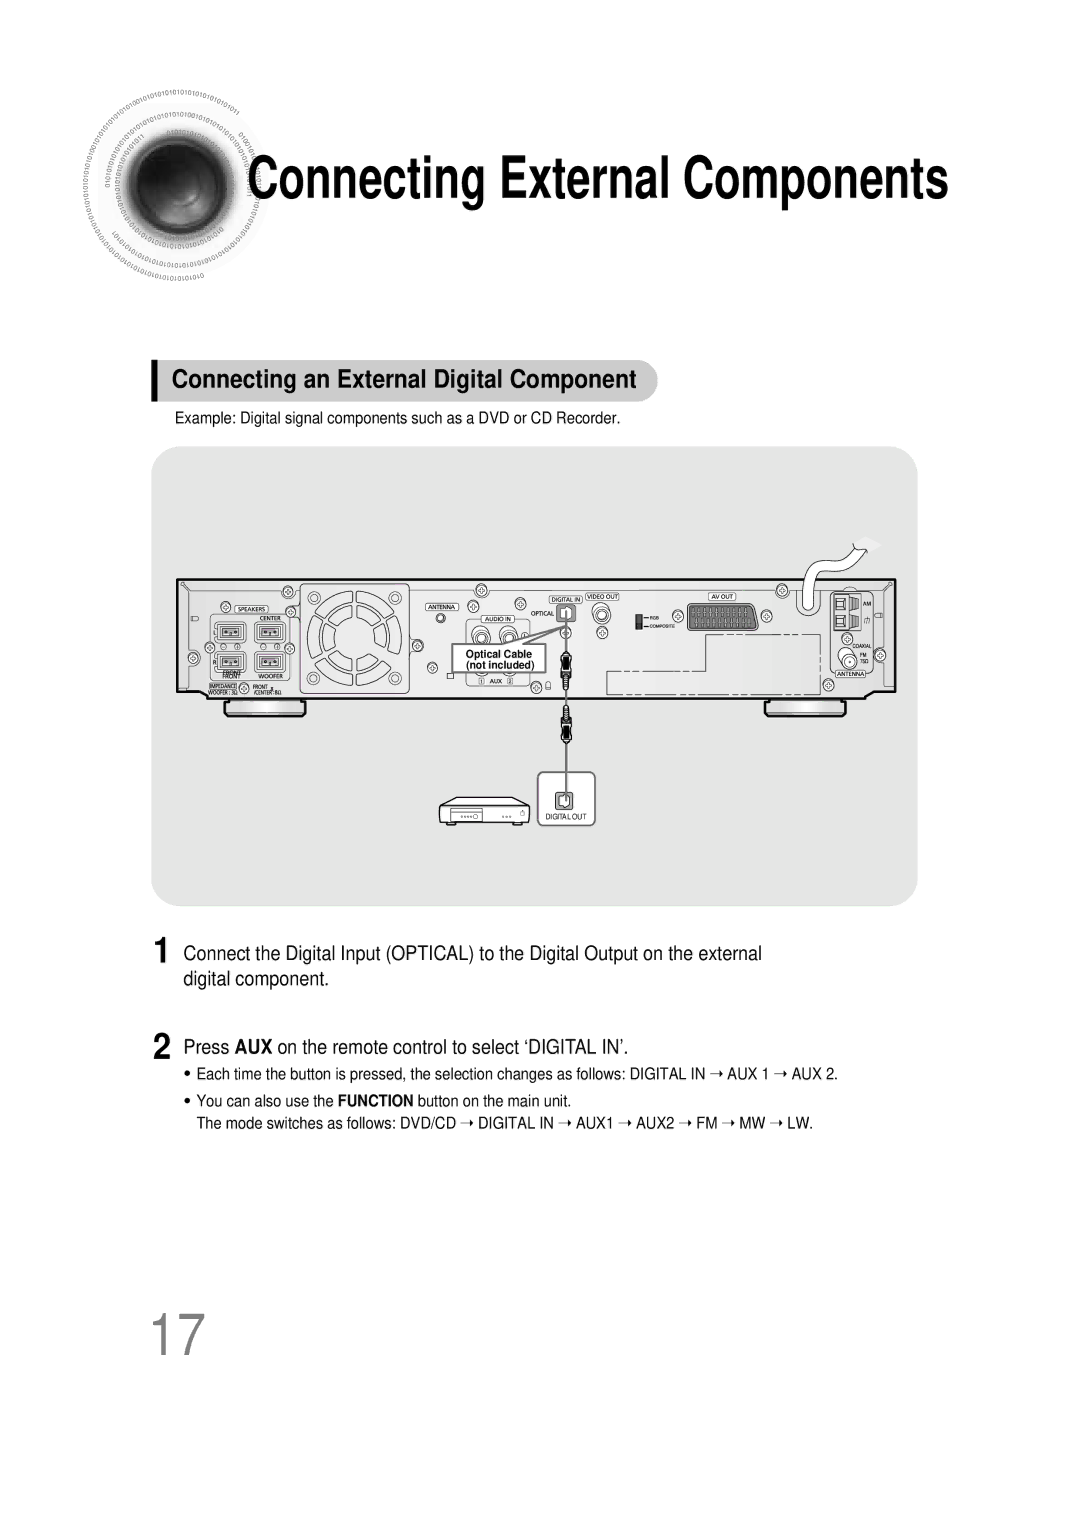
Connecting an External Digital Component
Connecting External Components
Press AUX on the remote control to select AUX 1 or AUX
Connecting an External Analog Component
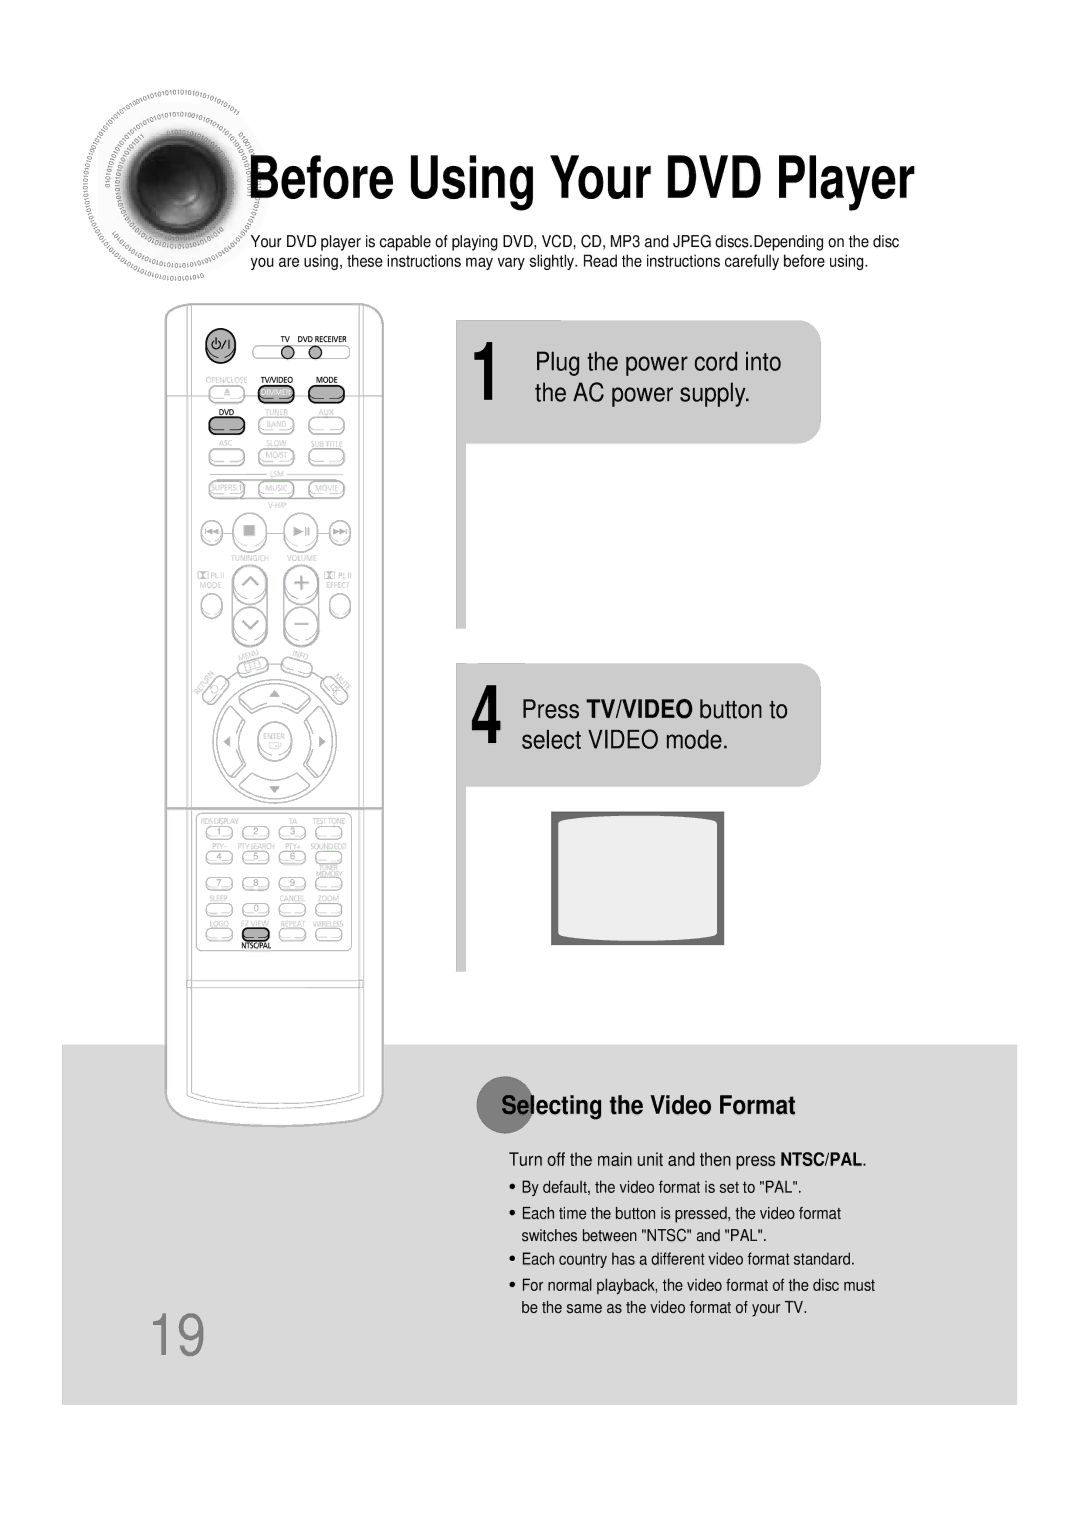
AC power supply
Selecting the Video Format
Turn off the main unit and then press NTSC/PAL
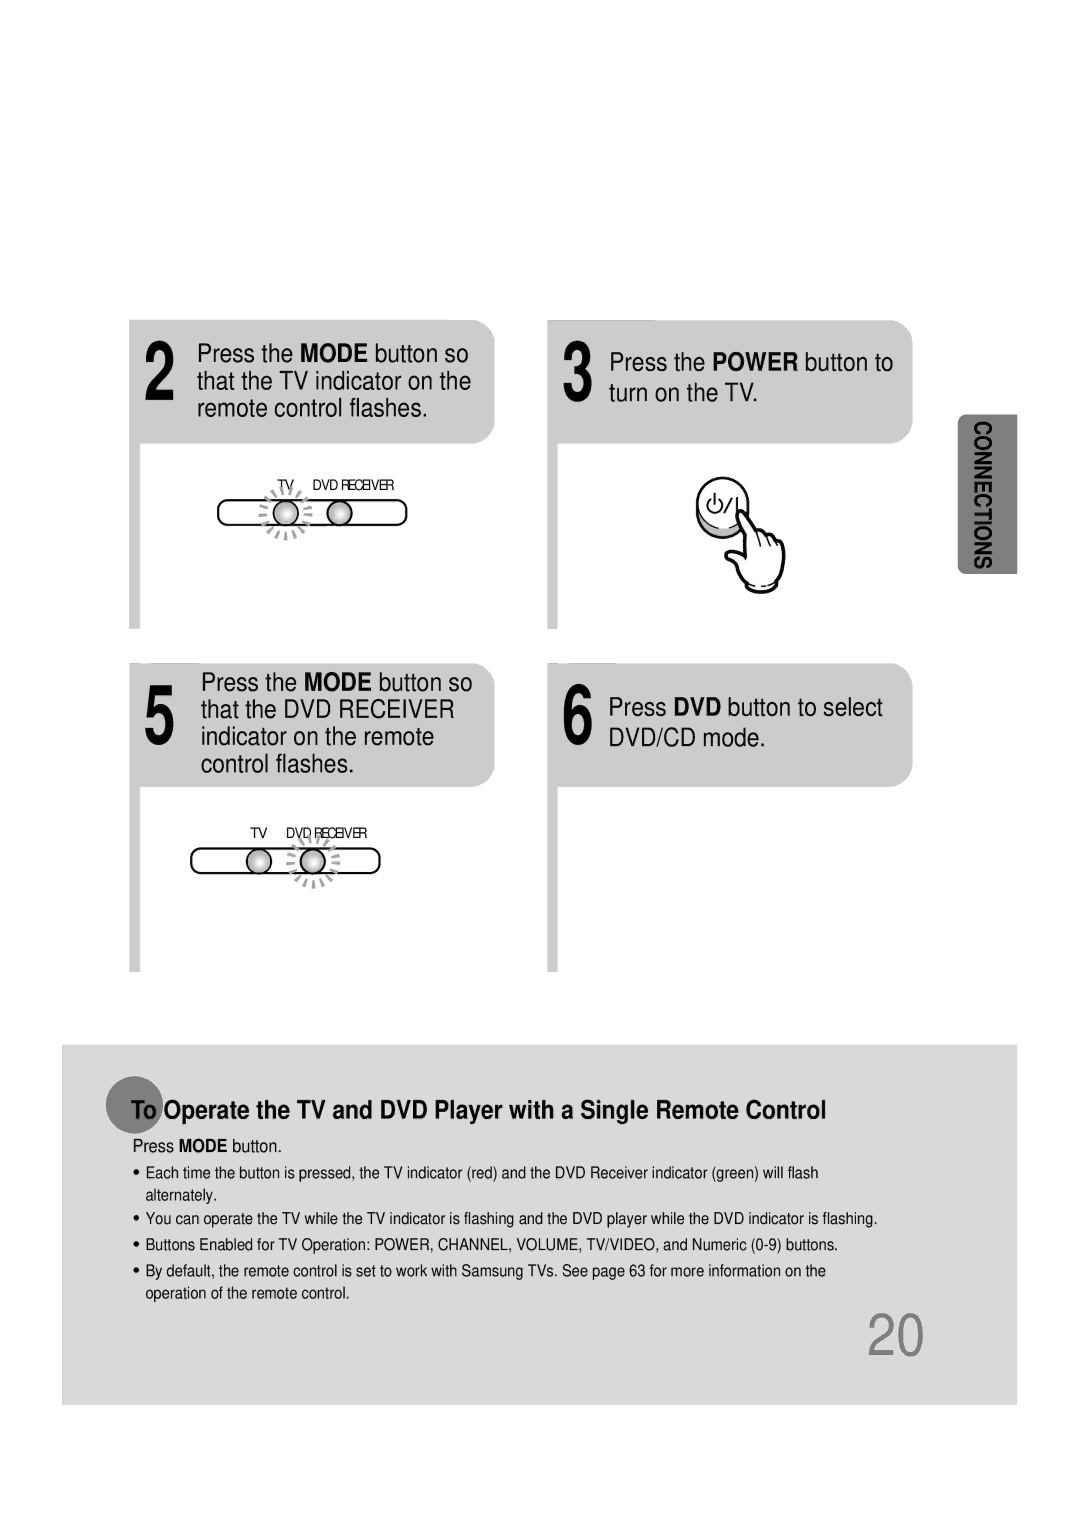
Press Mode button
Press the Power button to turn on the TV
Press the Mode button so
Press DVD button to select DVD/CD mode
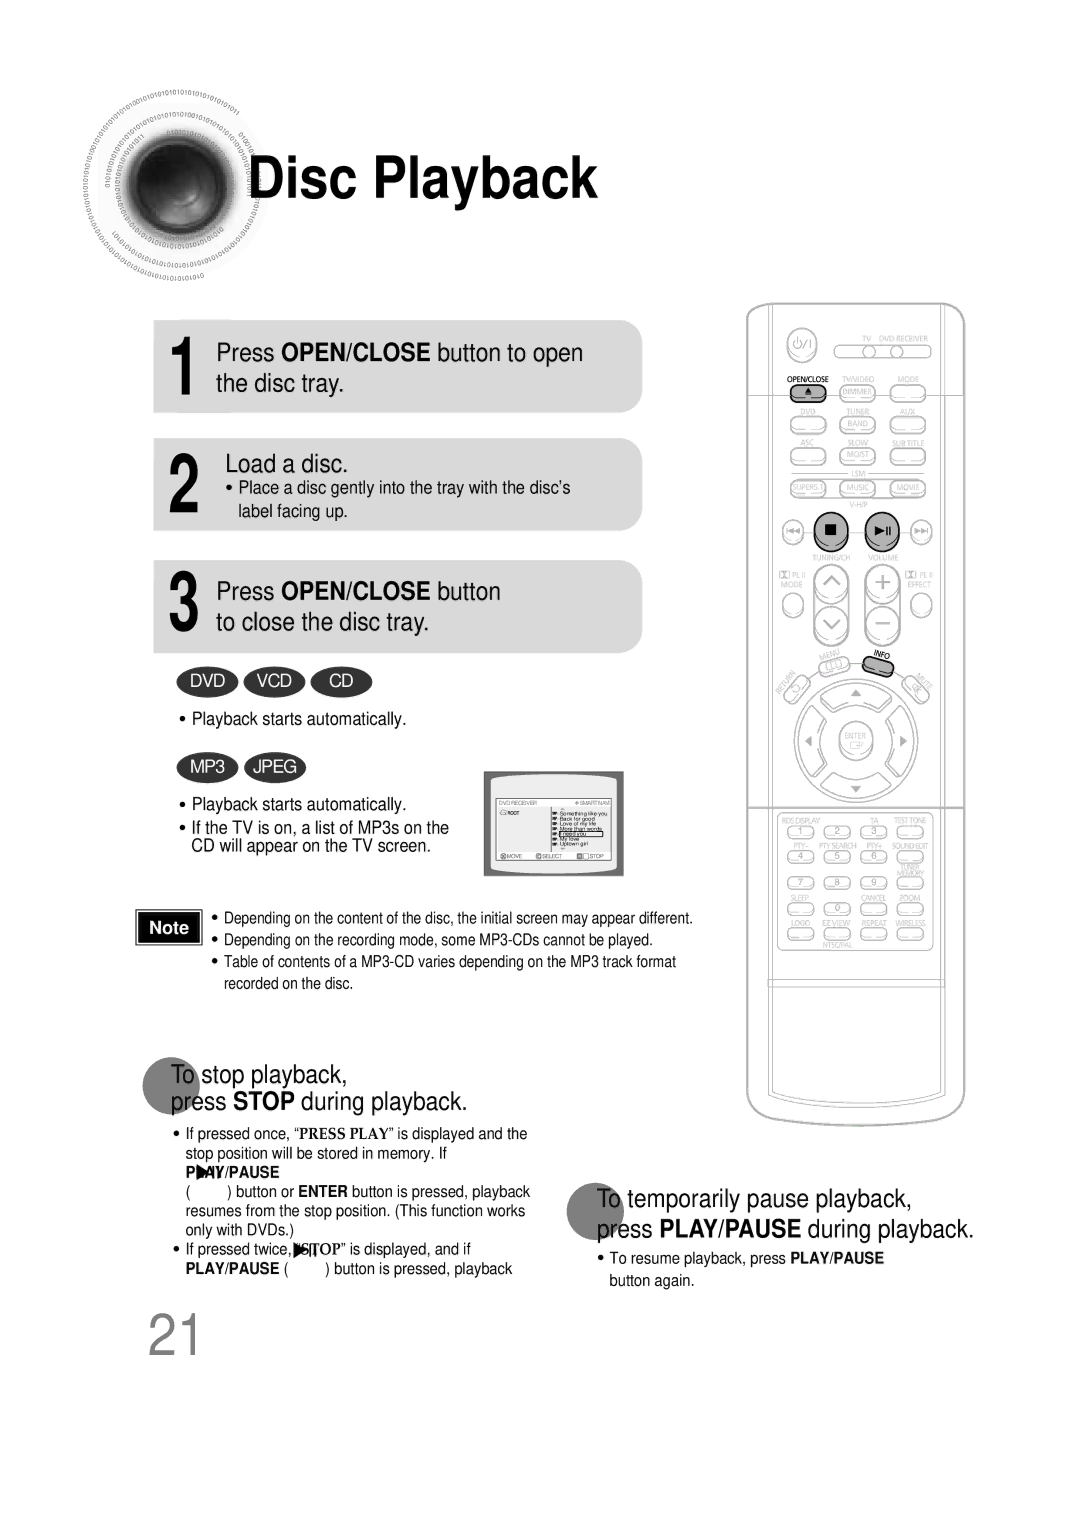
Playback starts automatically
Disc Playback
Press OPEN/CLOSE button to open the disc tray Load a disc
To stop playback Press Stop during playback
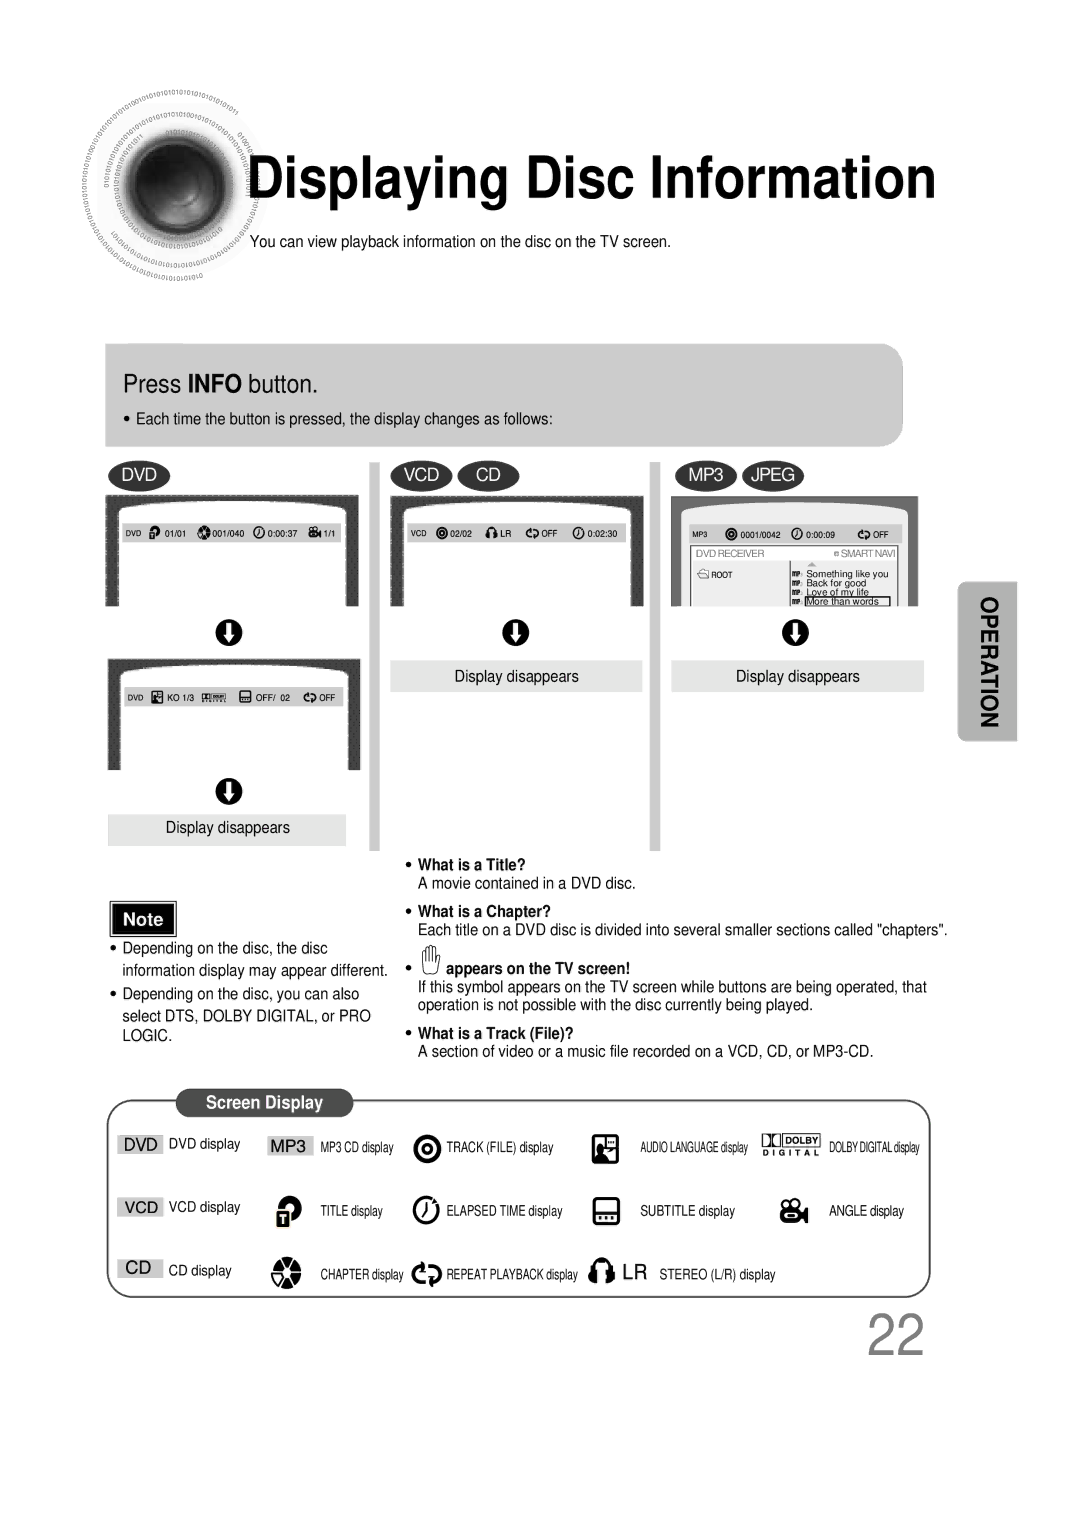
Press Info button
Displaying Disc Information
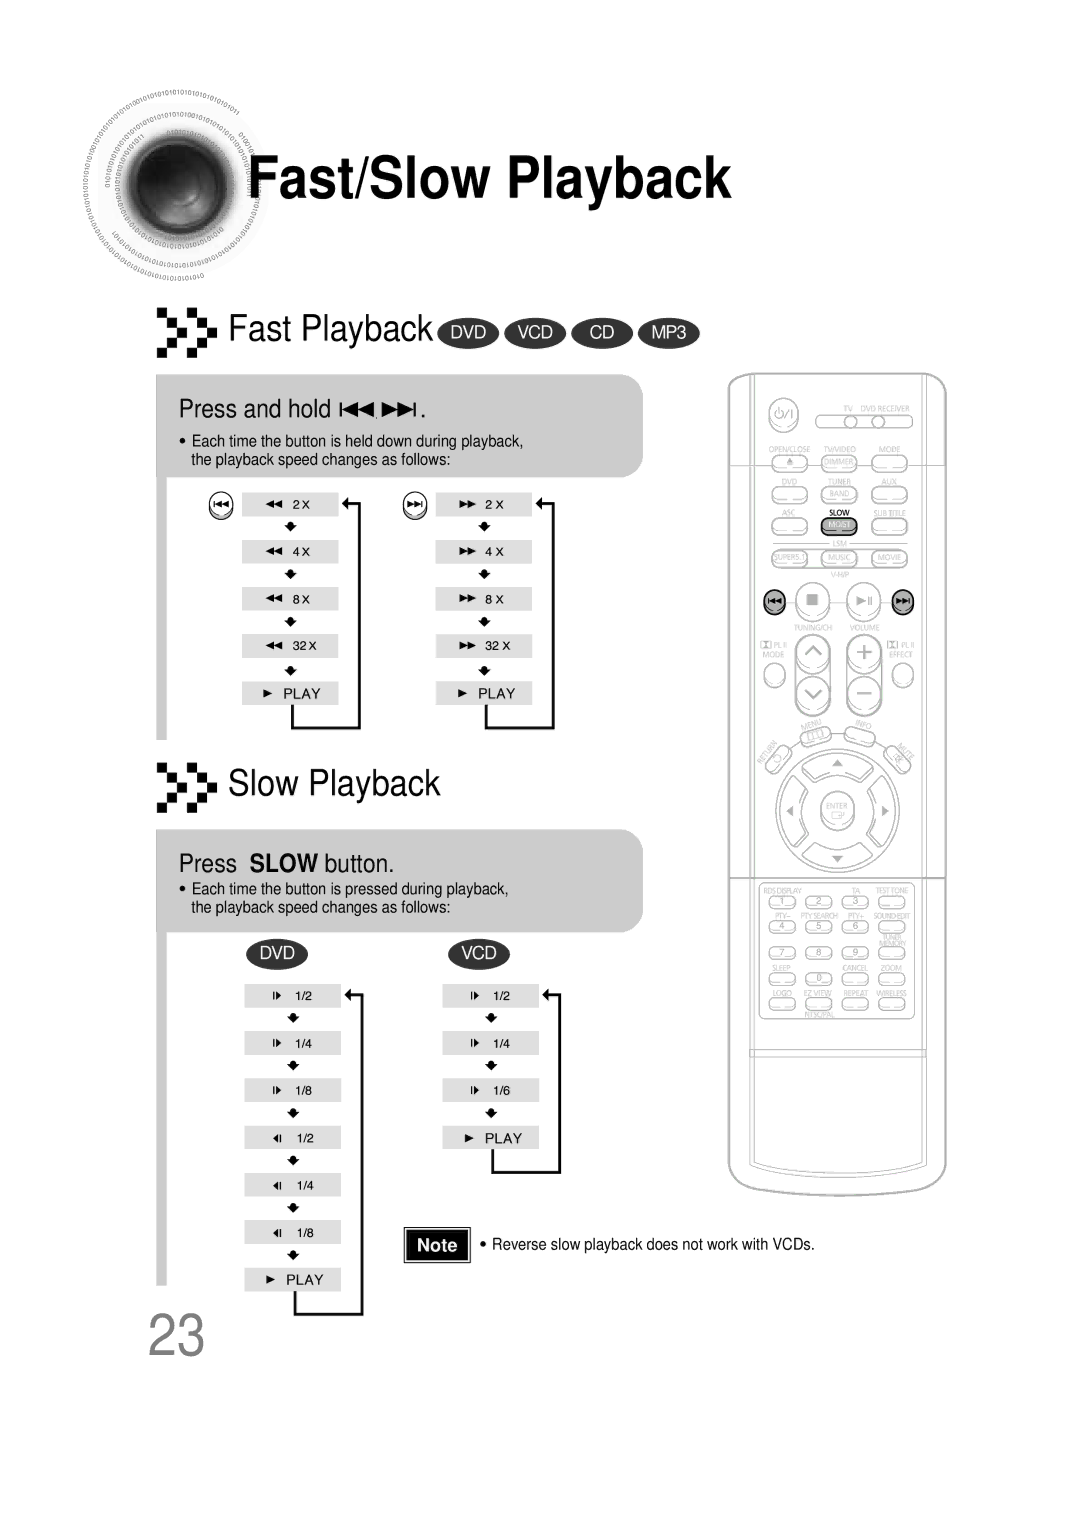
Fast/Slow Playback
Press and hold
Press Slow button
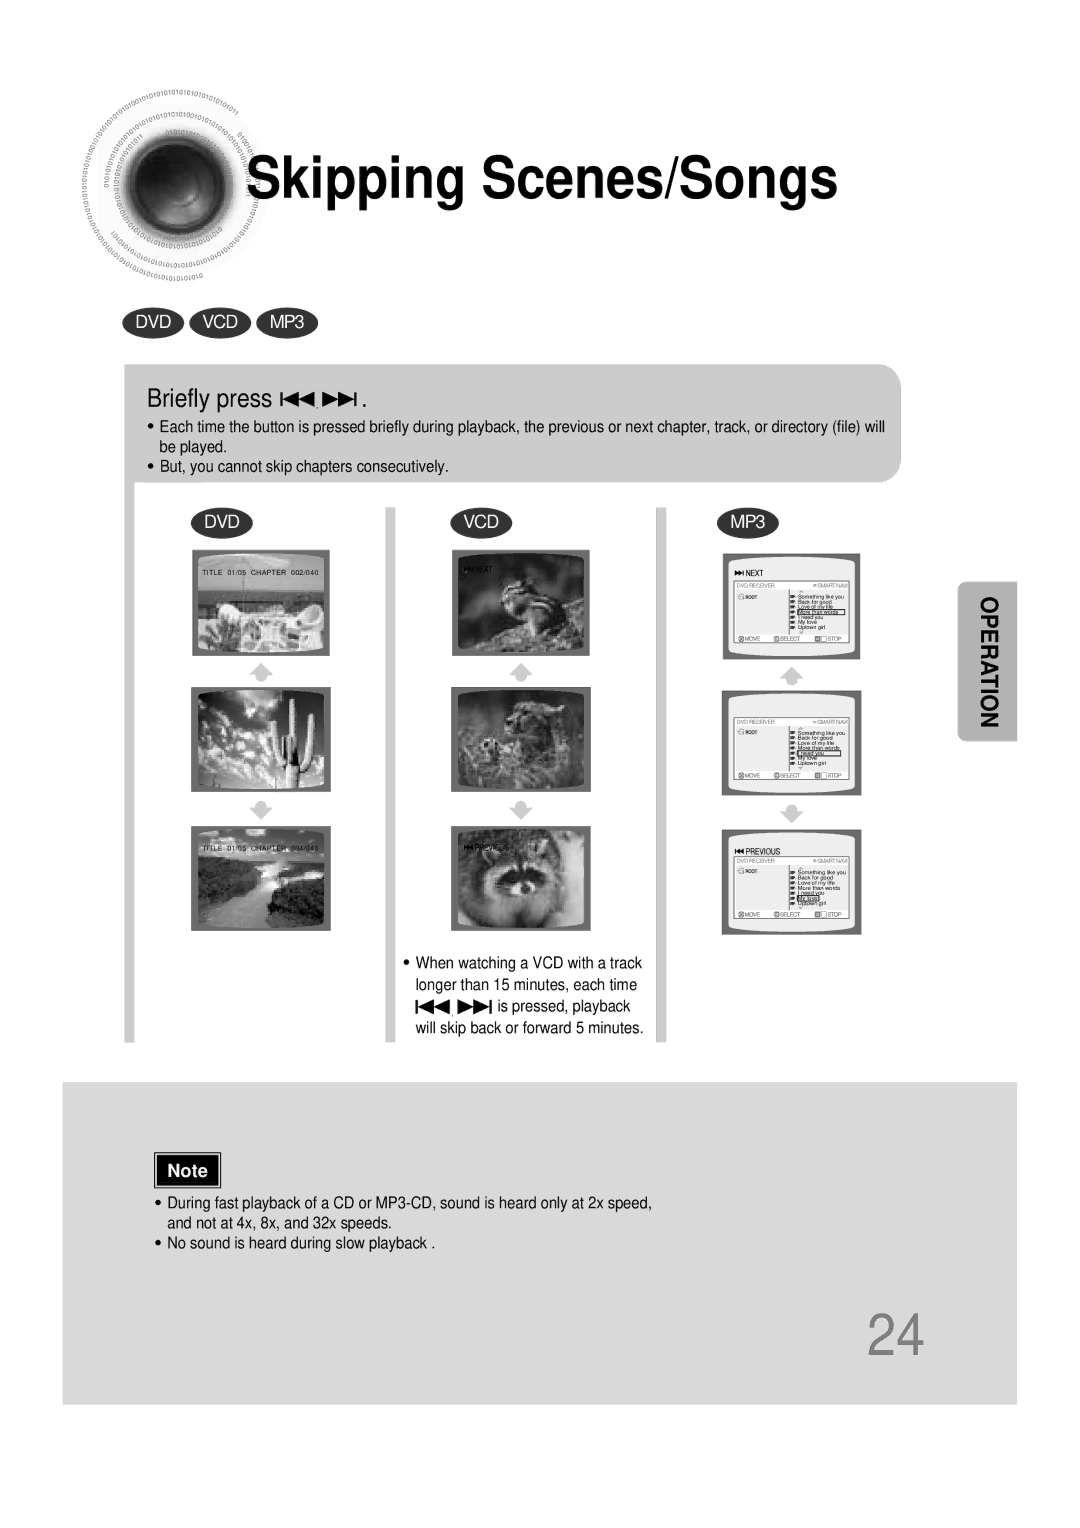
Briefly press
Skipping Scenes/Songs
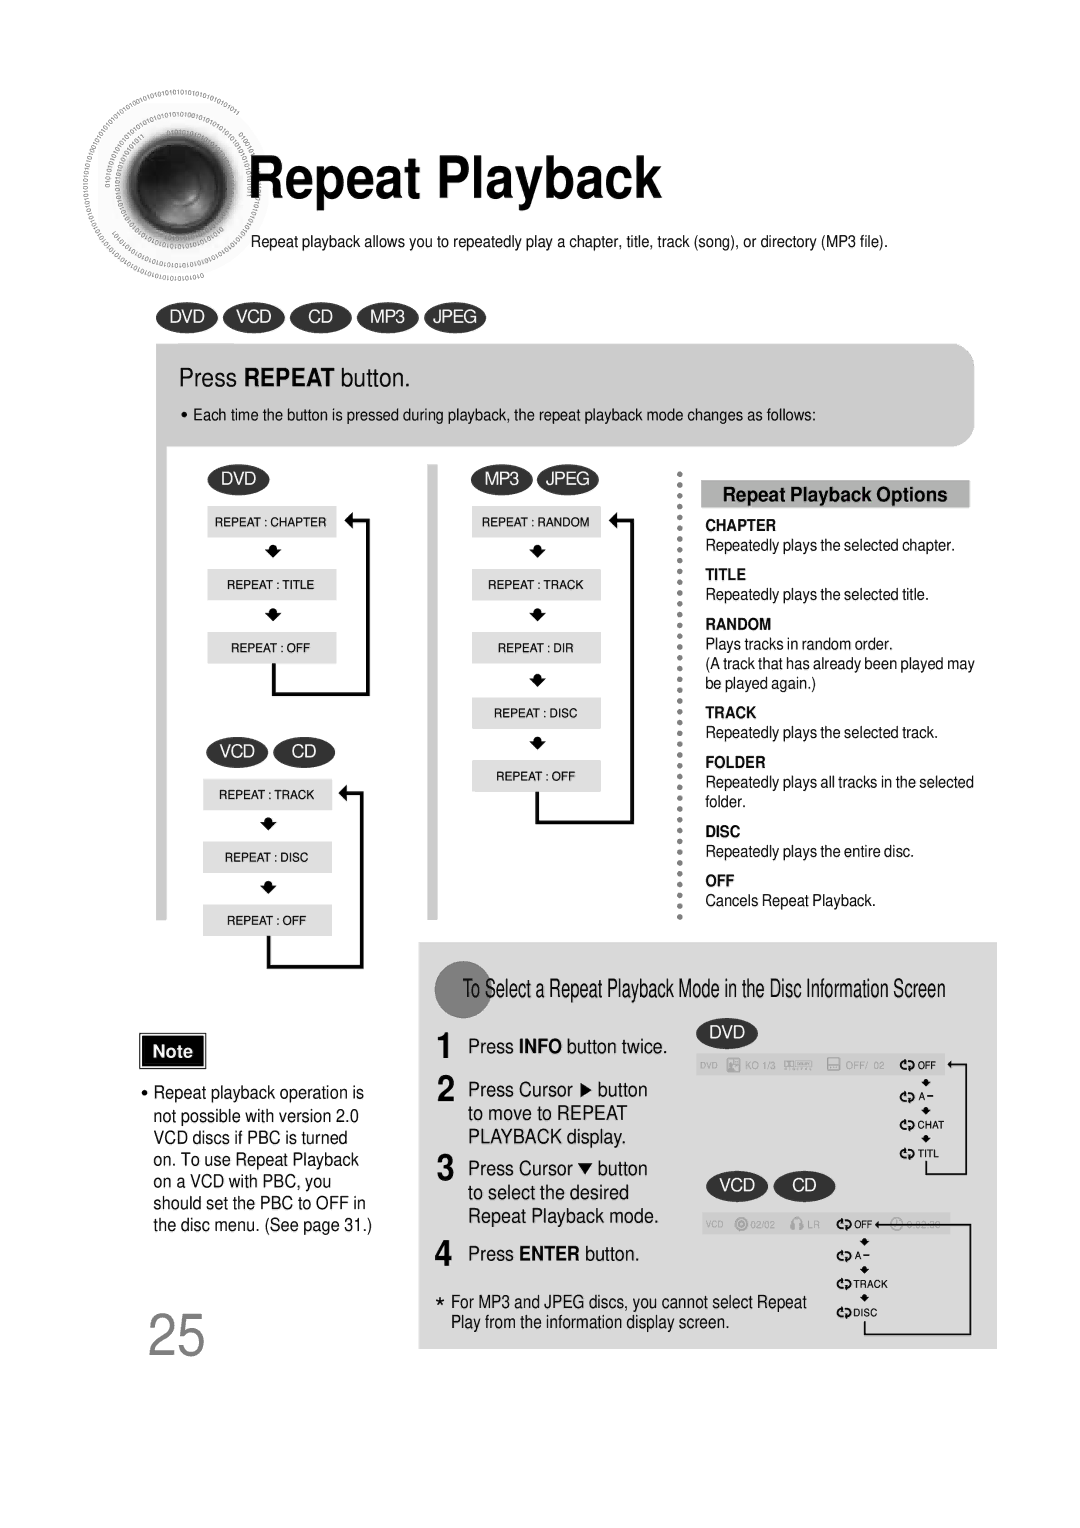
Press Info button twice
Repeat Playback
Press Repeat button
Repeat Playback Options
A-B Repeat function will not work on an MP3 or Jpeg disc
Press Info button twice
Press Cursor
Press Enter
Angle Function
Press EZ View button
Zoom Function
Press Zoom
Button
Subtitle display
1Press Info button twice
Press Info button Press Cursor
Twice
Chapter display
1Press Info button
Press Cursor , buttons
Time display
PBC Playback Control Function
Using Disc Menu
Press Cursor Buttons to Press Enter
Select the desired
Button to move to
Using the Title Menu
Press Menu button to exit the setup screen
Press Menu
Button to move to
Setting the Language
‘Setup’ and then
Press Enter button
Press Enter button
Press Enter Press Cursor
Press Cursor 3 button to move to ‘TV
Setting TV Screen type
Press Cursor 2 button to move to ‘Setup’ and then
DISPLAY’ and then
43 Pan&Scan
Letterbox
Setting Parental Controls Rating Level
Enter the password
Press Cursor , button
Press Cursor 3 button to move to
Press Cursor Button to move to Press Menu button
Setting the Password
Button Enter button
Press Cursor 6 button to move to ‘USER’ and then
Setting the Wallpaper Jpeg DVD VCD
1PLAY/PAUSE button when the image you like comes up
During playback, press
Button to open and then
‘Setup’ and then
Speaker and then press Enter button
Setting the Speaker Mode
Speaker
Press Enter button Press Cursor
Press Cursor button
Setting the Test Tone
‘Audio’ and then
Press Test Tone button
Setting the Delay Time
Press Cursor button
Press Menu button to move to ‘Audio’ and then press Enter
Setting Rear Surround Speakers
3to move to ‘DELAY TIME’ and then press Enter button
Press Cursor , 5 totime.set the Delay
Setting Center Speaker
Setting the Audio Quality
You can adjust the balance and level for each speaker
Enter button Press Cursor button
Press Sound
Method 2 When manually adjusting with the Sound Edit button
Setting the DRC Dynamic Range Compression
‘DRC’ and then press Enter button
To adjust the ‘DRC’.Press Cursor
Press and hold ASC button twice Briefly press ASC button
To Turn On or Off Sound Logo
Press and hold ASC button Briefly press ASC button
To Verify the Auto Sound Calibration
Adjust the volume control on the main Unit as follows
When the message Remove MIC
Press ASC button
Magic Sound Field Mode
Press SUPER5.1
Music Sound Field Function
Plug
Magic Headphone Function
Dolby Pro Logic II Mode
Press PL II Mode button
You can select the desired Dolby Pro Logic II audio mode
Press PL II Effect button
Press PL II Mode
Button to select ‘MUSIC’ mode
Dolby Pro Logic II Effect
Main Unit
Remote Control Unit Press Tuner
Listening to Radio
Band button
Press 1button and select
Presetting Stations
To preset another
Press
Using the RDS Radio Data System to receive FM stations
What information can RDS signals provide?
About RDS broadcasting
PTY Search is only applicable to preset stations
PTY Program Type indication and PTY-SEARCH function
Before you start, remember
OFF appears on the display
To confirm the sleep timer setting, press Sleep button
Convenient Functions
Press Sleep button
Press Mute button
Press Dimmer button
While holding down POWER, enter the code
Operating the TV with the Remote Control
Brand Code
TV Brand Code List
Before Calling for Service
Sound can be heard only
Is not produced, or the disc
Remote control does not
Aspect ratio cannot be
Main unit is not working
Handling discs
Disc Storage
Handling and Storing Discs
Specifications
1ch speaker system
Subwoofer speaker
Movies, these movies are numbered as Title 1, Title 2, etc
Be chosen from the menu displayed on the TV monitor
DVD player, the player cannot play the disc
Subtitle languages
Memo
AH68-01445K


 Precautions
