Therma-Stor Products Group EXTERNAL INSULATION KIT UA-150H, Instructions For Applying

Page 25
EXTERNAL INSULATION KIT: UA-150H

EXTERNAL INSULATION KIT: UA-150H

INSTRUCTIONS FOR APPLYING

THE INSULATION TO THE UA-150H

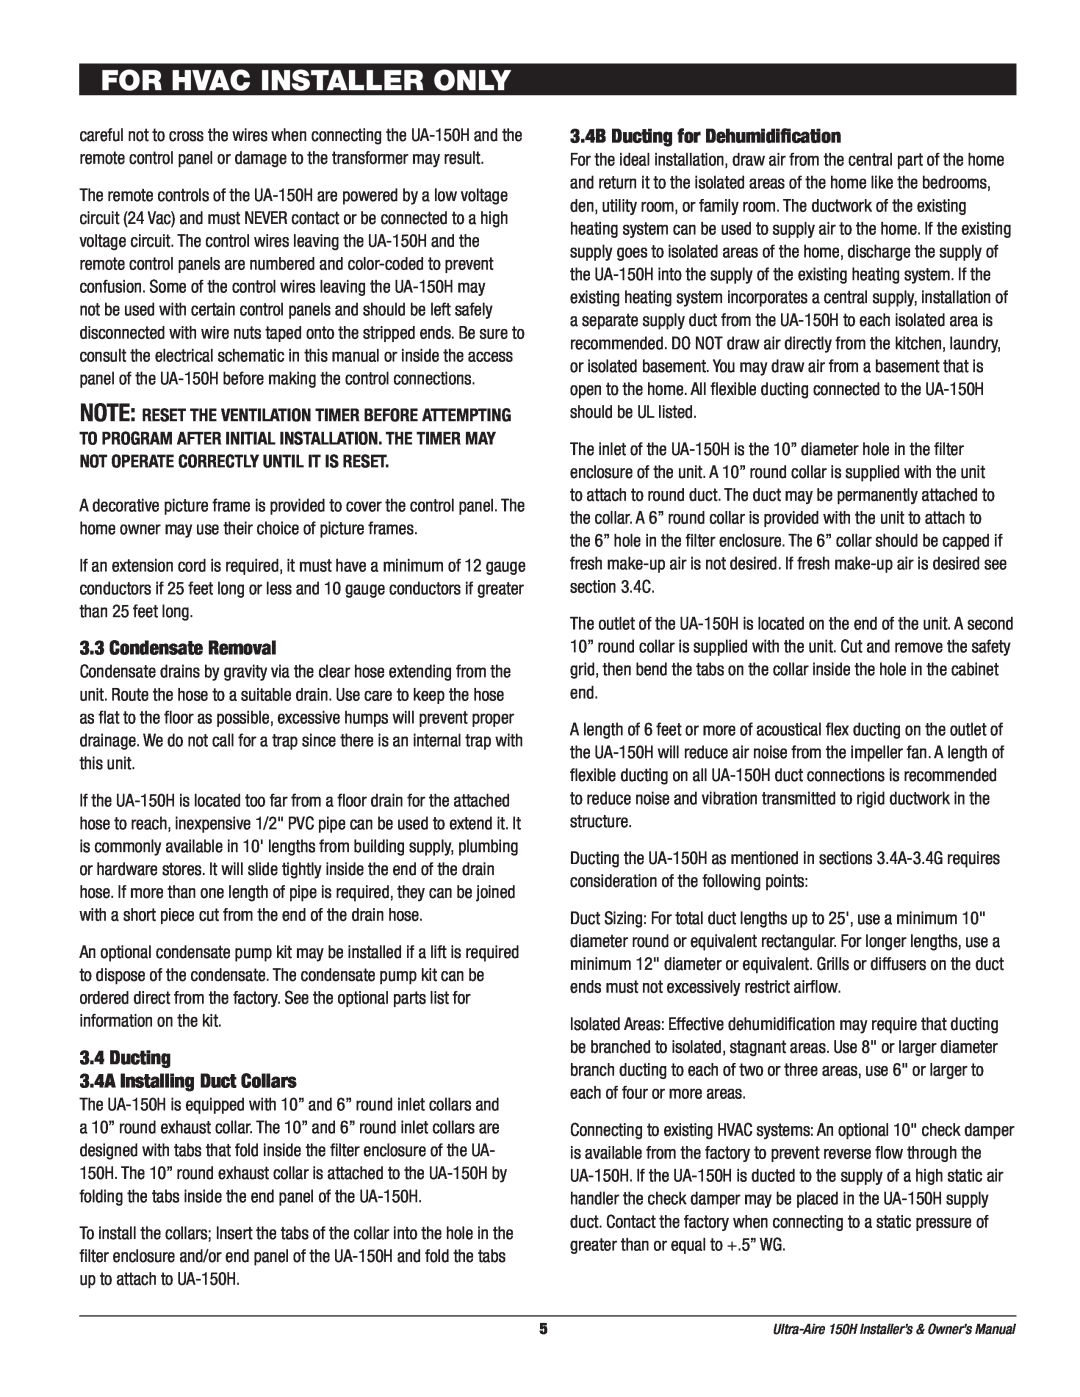
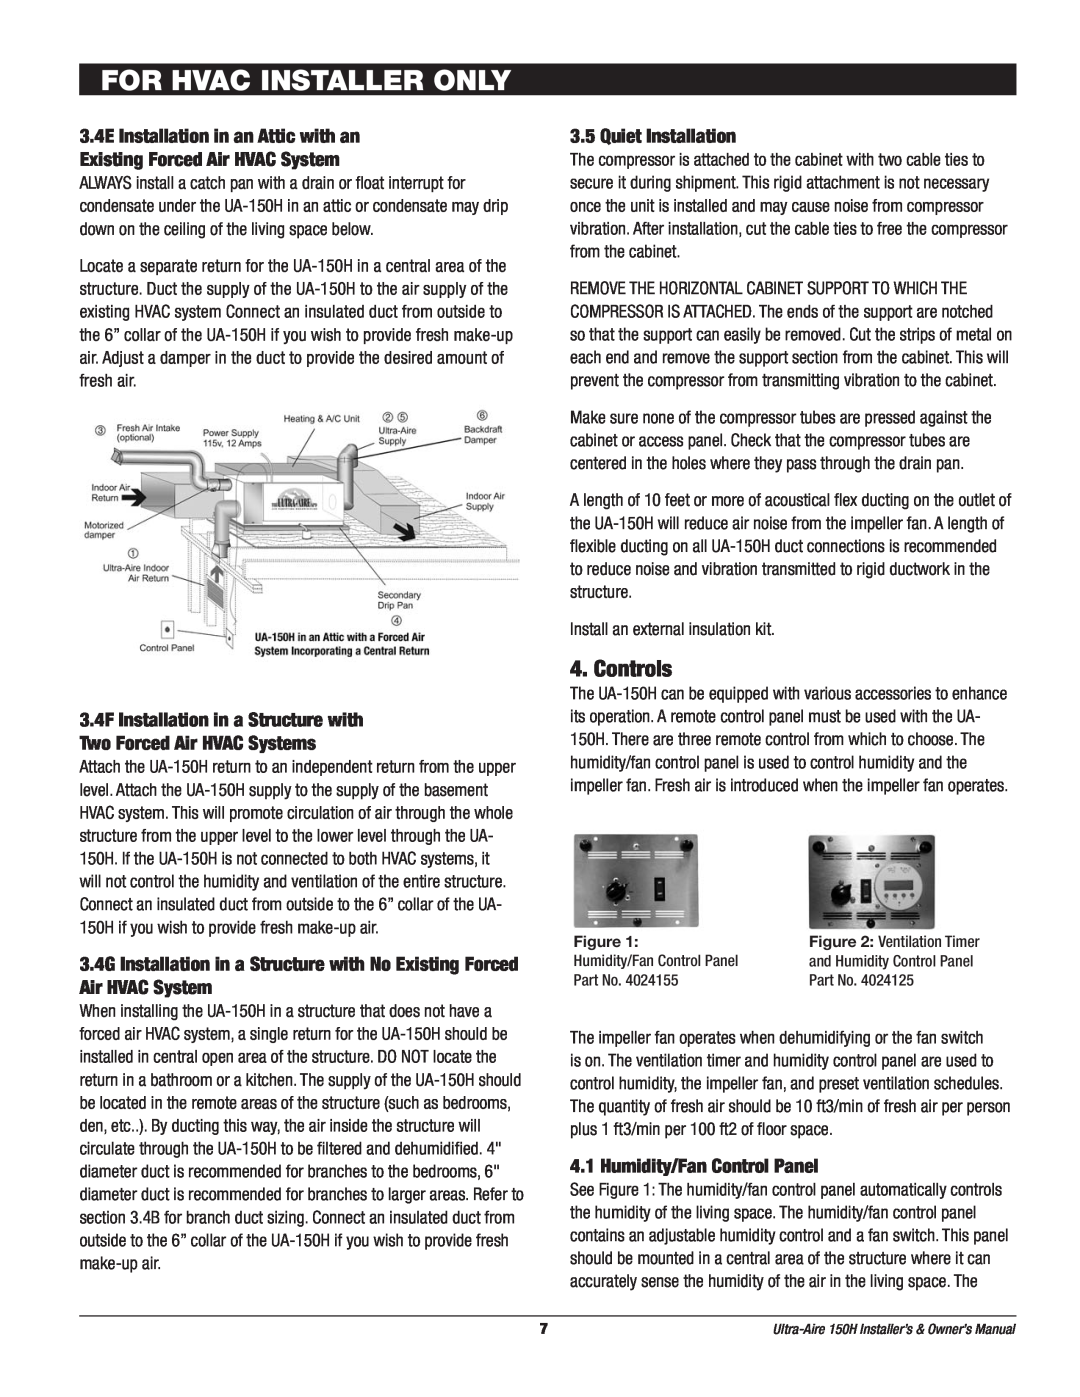
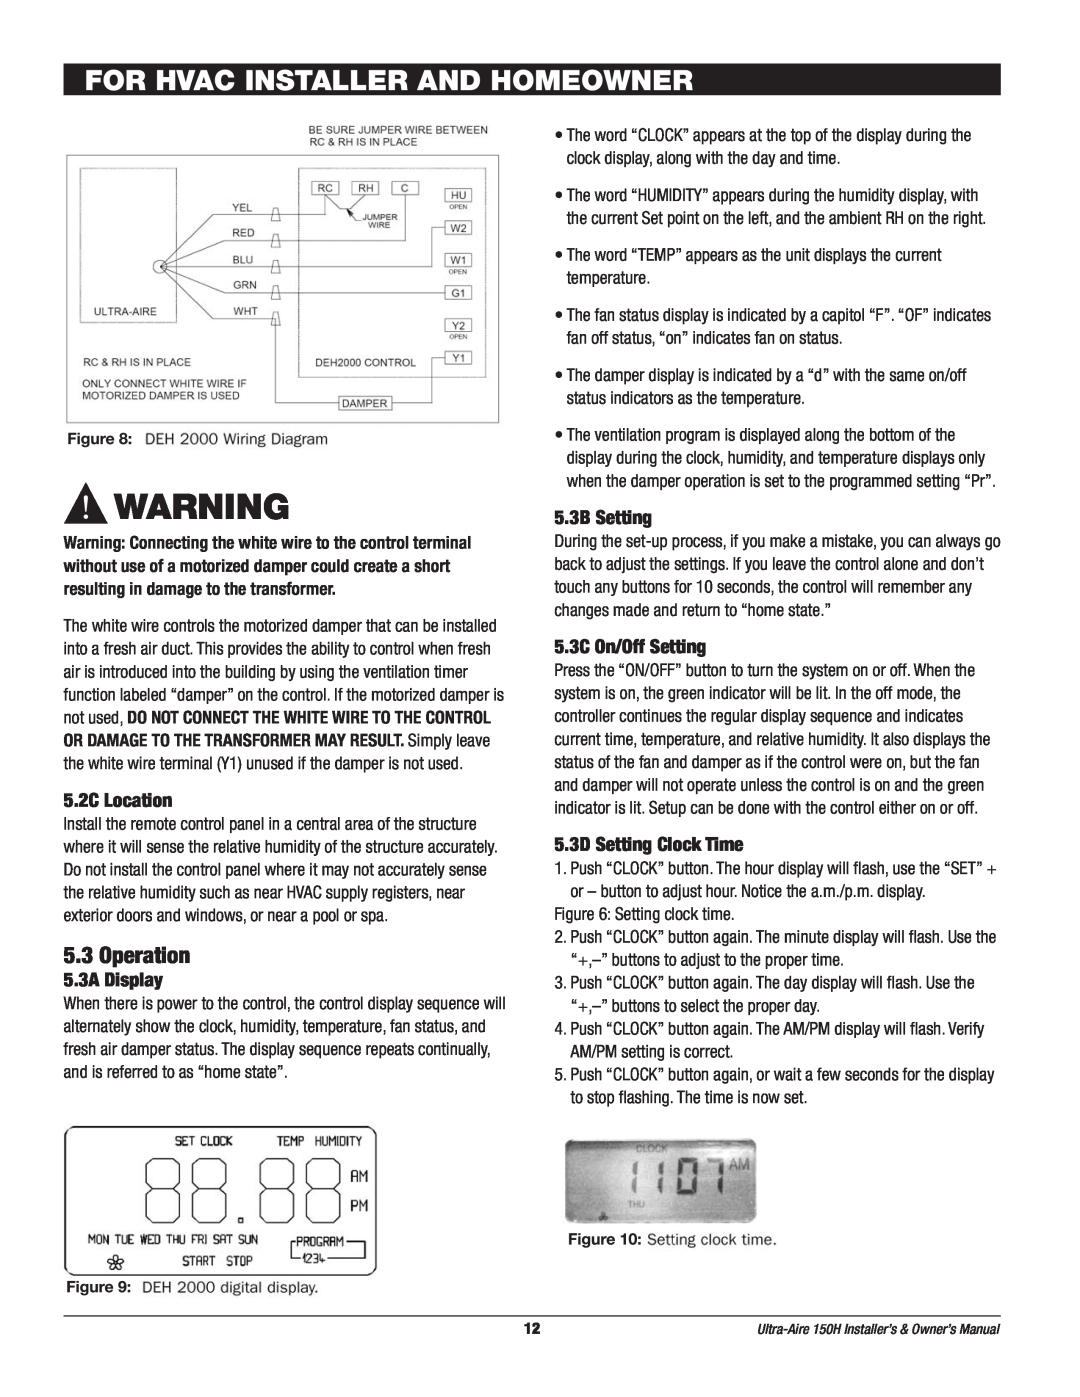
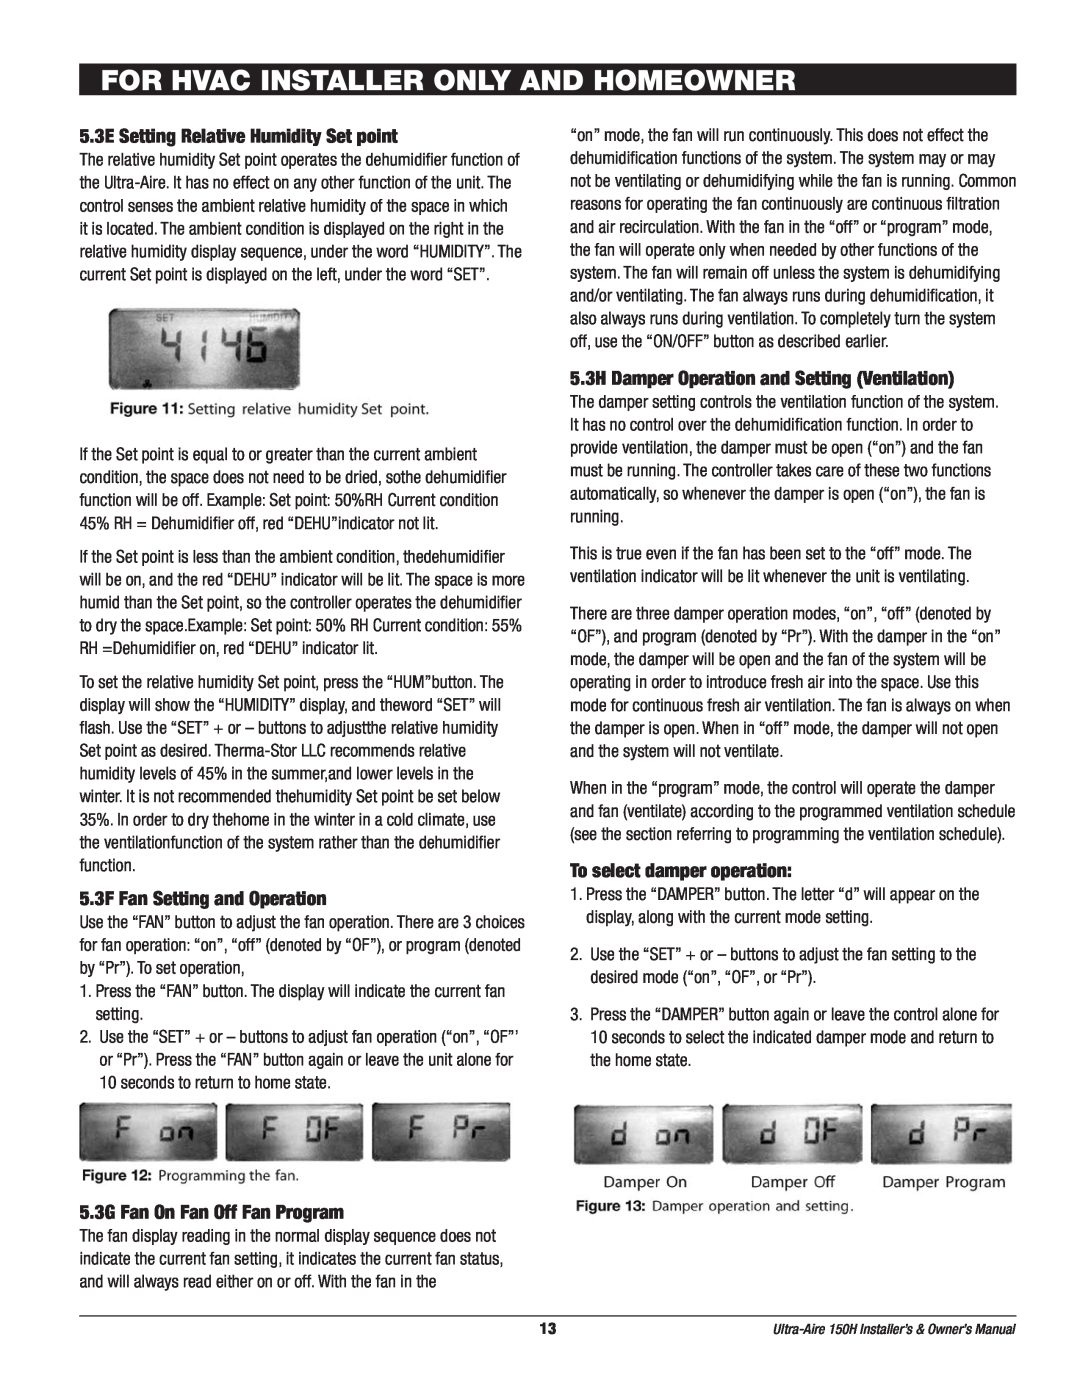
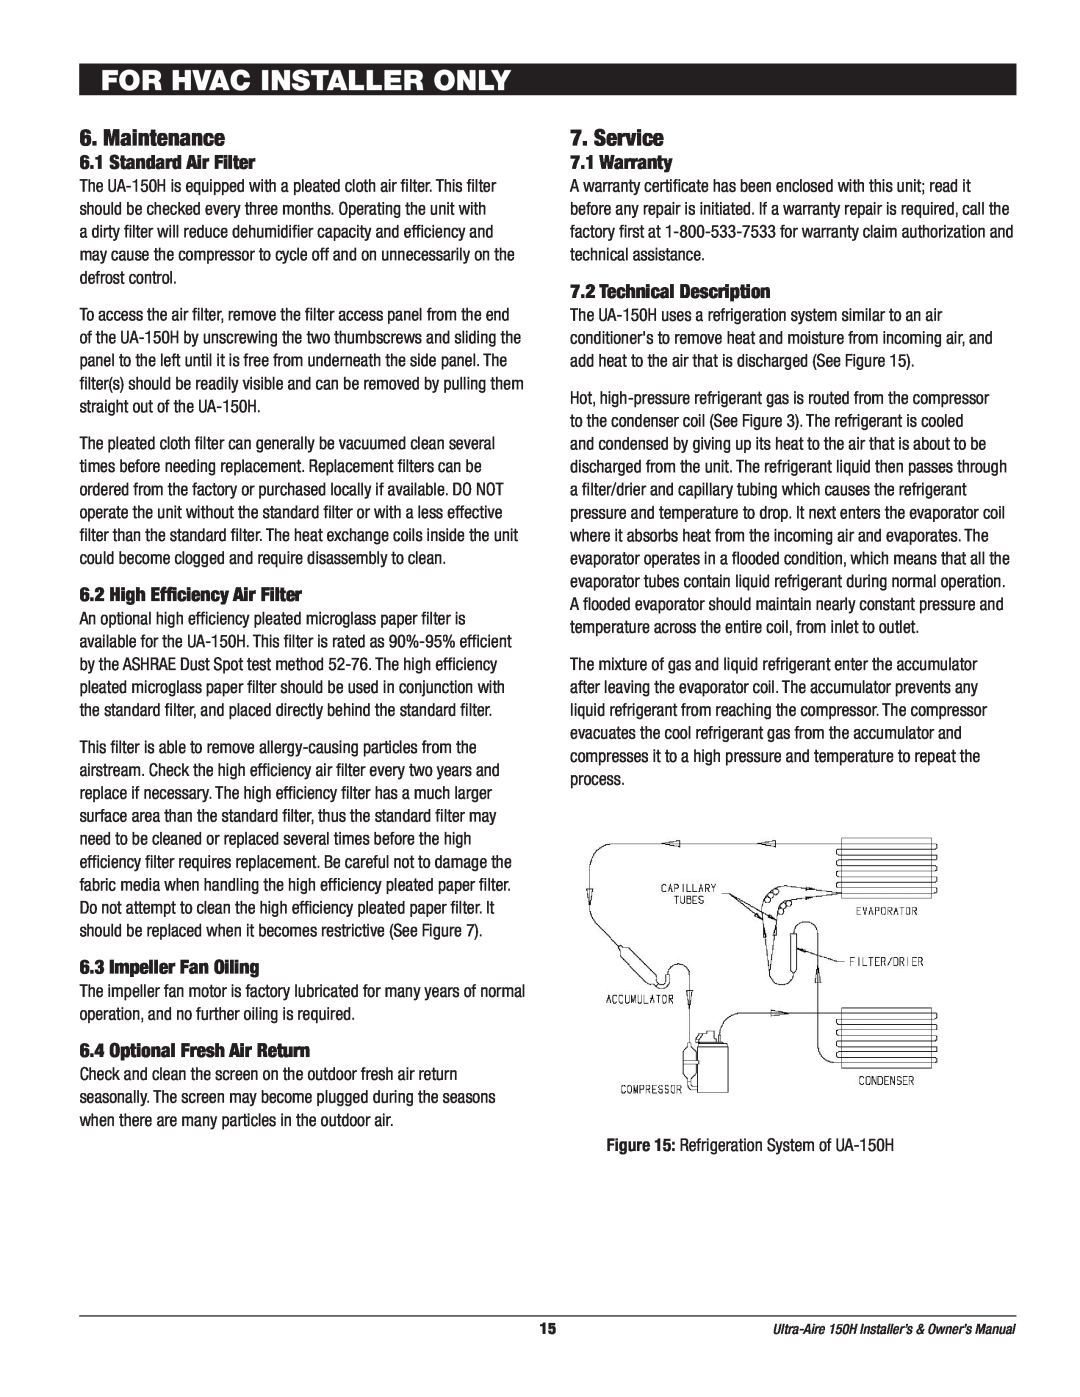
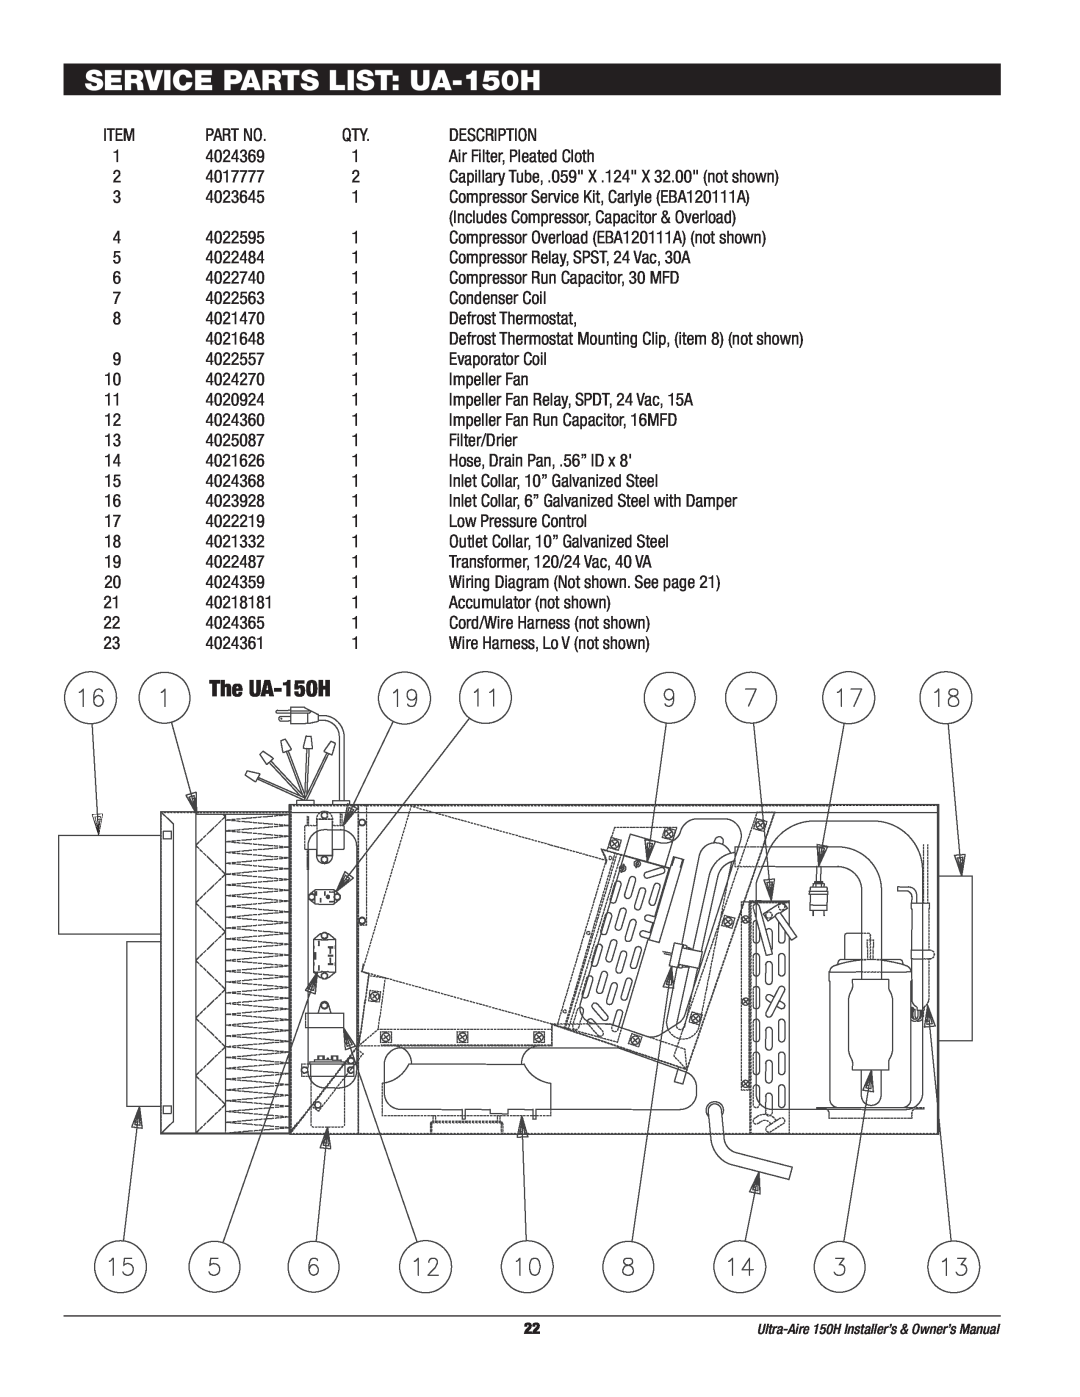
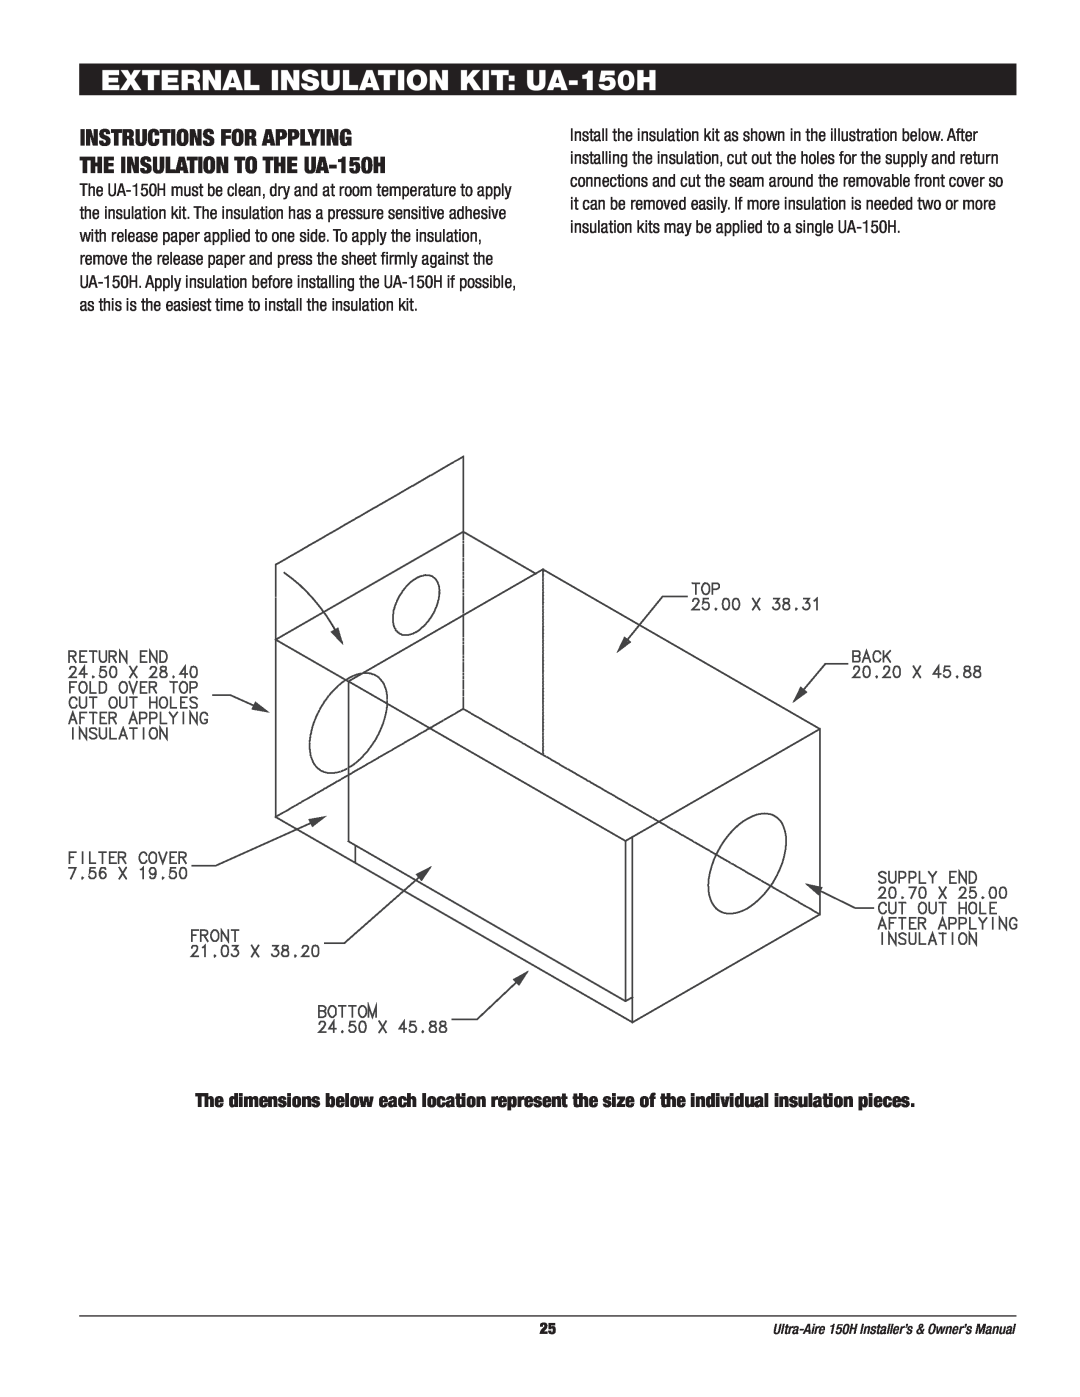
The UA-150H must be clean, dry and at room temperature to apply the insulation kit. The insulation has a pressure sensitive adhesive with release paper applied to one side. To apply the insulation, remove the release paper and press the sheet firmly against the UA-150H. Apply insulation before installing the UA-150H if possible, as this is the easiest time to install the insulation kit.

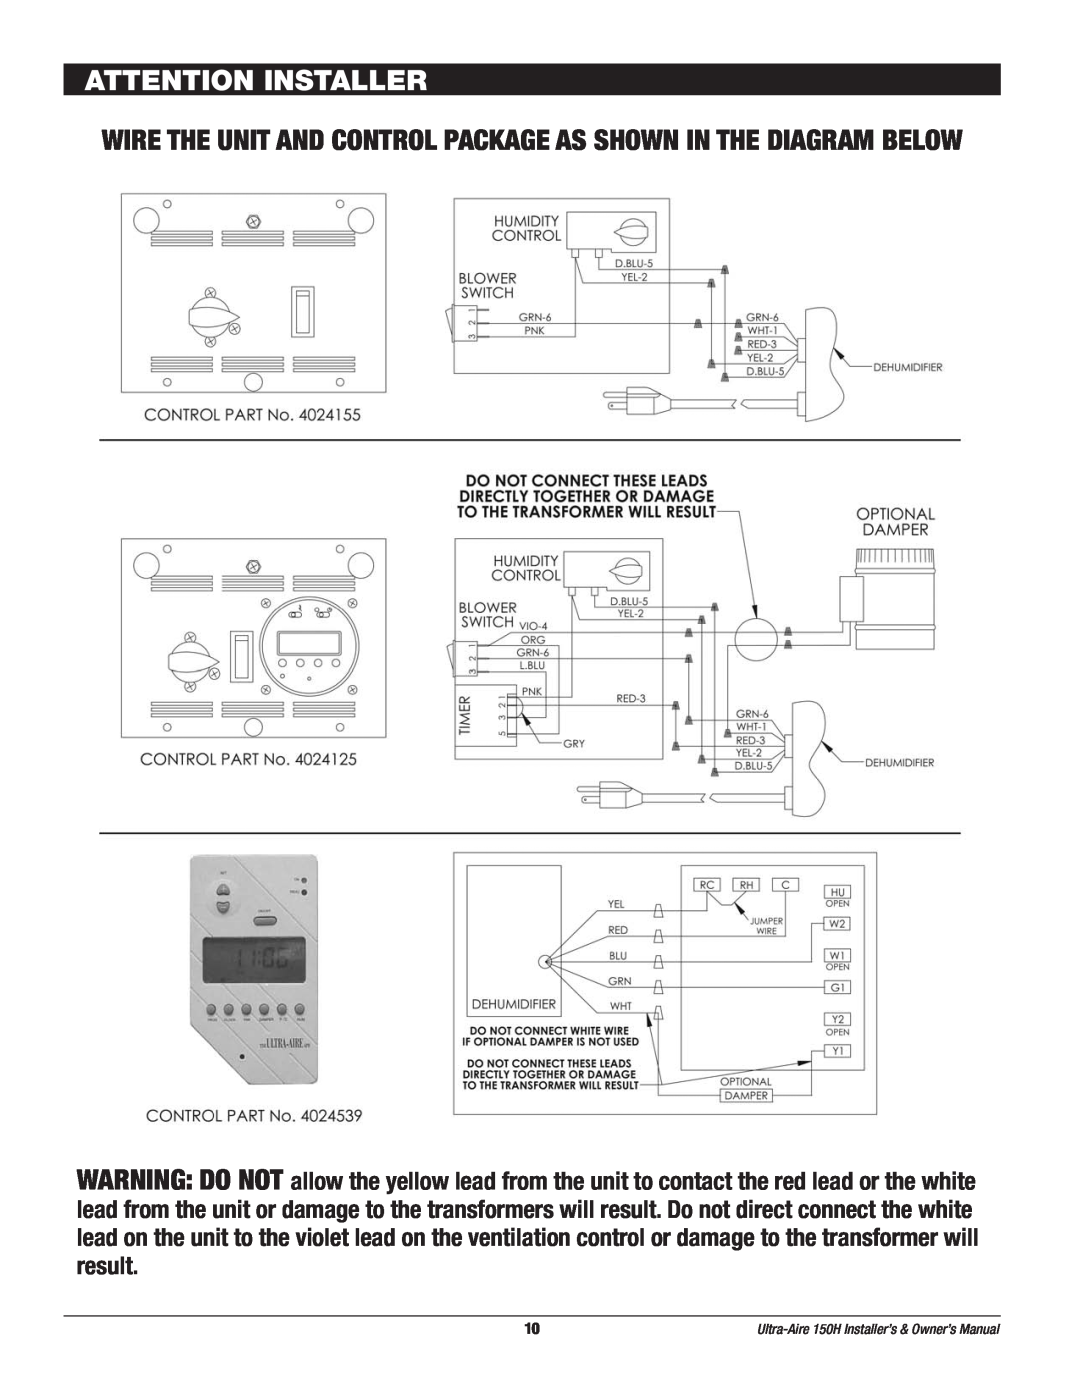
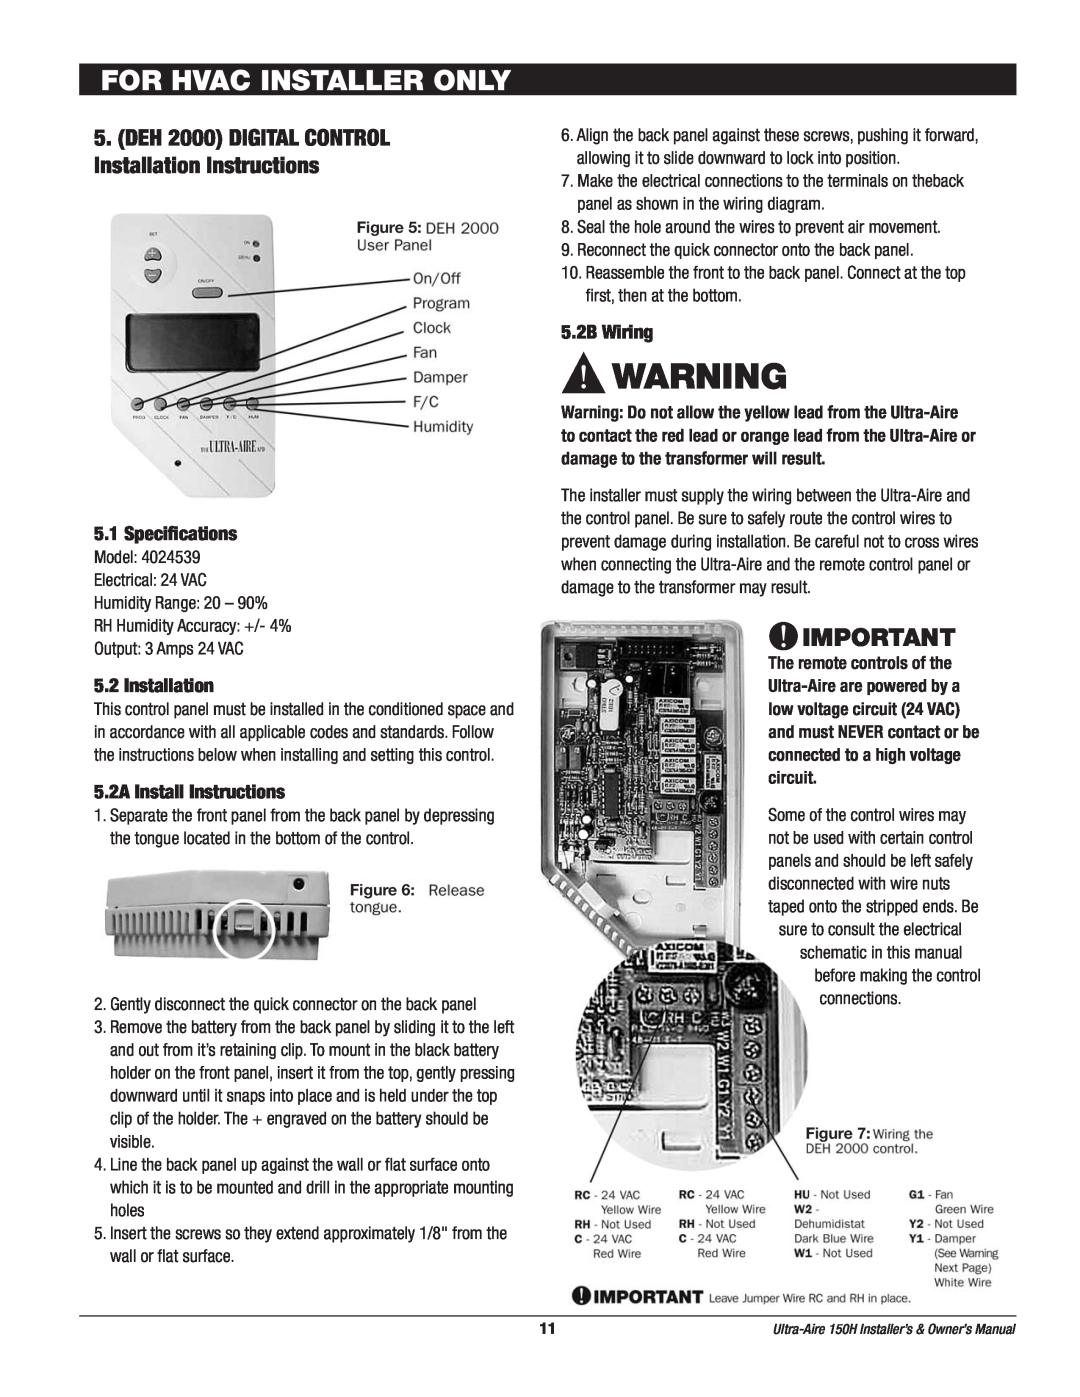
Install the insulation kit as shown in the illustration below. After installing the insulation, cut out the holes for the supply and return connections and cut the seam around the removable front cover so it can be removed easily. If more insulation is needed two or more insulation kits may be applied to a single UA-150H.

The dimensions below each location represent the size of the individual insulation pieces.

25

Ultra-Aire 150H Installer’s & Owner’s Manual

Image 25
Contents Ultra-Aire150H Whole House HVAC INSTALLER PLEASE LEAVE MANUAL FOR HOMEOWNERVentilating Dehumidifier DehumidificationTable of Contents TABLE OF CONTENTS1. Safety Precautions SAFETY PRECAUTIONSREAD AND SAVE THESE INSTRUCTIONS 2. Specifications FOR HVAC INSTALLER ONLY3. Installation 1. Intended Application for Ultra-Aire150H3.4 Ducting 3.4A Installing Duct Collars FOR HVAC INSTALLER ONLY3.3 Condensate Removal 3.4B Ducting for Dehumidification3.4C Ducting for Fresh Air FOR HVAC INSTALLER ONLY3.5 Quiet Installation FOR HVAC INSTALLER ONLY4. Controls 4.1 Humidity/Fan Control Panel4.2Ventilation Timer and Humidity Control Panel FOR HVAC INSTALLER ONLY4.3 Humidity Control Adjustment 4.4 Fan/Filter Switch4.6 Low Pressure Control FOR HVAC INSTALLER ONLYATTENTION INSTALLER 5.1Specifications FOR HVAC INSTALLER ONLY5.2Installation 5.2A Install Instructions5.3B Setting FOR HVAC INSTALLER AND HOMEOWNER5.3C On/Off Setting 5.3D Setting Clock Time5.3E Setting Relative Humidity Set point FOR HVAC INSTALLER ONLY AND HOMEOWNER5.3F Fan Setting and Operation 5.3H Damper Operation and Setting Ventilation5.3J Programming Notes FOR HVAC INSTALLER ONLY AND HOMEOWNER5.3L Stop Start 5.3M Low Pressure Control6. Maintenance FOR HVAC INSTALLER ONLY7. Service 7.1 Warranty7.3 Troubleshooting FOR HVAC INSTALLER ONLY7.6Compressor/Capacitor Replacement FOR HVAC INSTALLER ONLY7.5 Impeller Fan Replacement 7.4 Refrigerant Charging7.7 Remote Controls FOR HVAC INSTALLER ONLY7.7B Programmable Ventilation Timer 7.6C Replacing a Compressor, Nonburn OutElectric Schematics of the UA-150H FOR HVAC INSTALLER ONLY7.10 Low Pressure Control 7.11 Condensate Pump KitPictorial Electrical Diagrams of UA-150H FOR HVAC INSTALLER ONLYWiring Diagrams FOR HVAC INSTALLER ONLYThe UA-150H SERVICE PARTS LIST UA-150HAccessories OPTIONAL PARTS LIST UA-150HVIBRATION ISOLATION KIT UA-150H INSTRUCTIONS FOR APPLYING EXTERNAL INSULATION KIT UA-150HTHE INSULATION TO THE UA-150H ATTENTION INSTALLER WARRANTOR ULTRA-AIRE150H Dehumidifier Limited WarrantyPhone: 608-222-5301 Fax PO Box 8680 Madison, WI