Tecumseh LV148XA, LV148EA specifications Gas Cap

Page 18

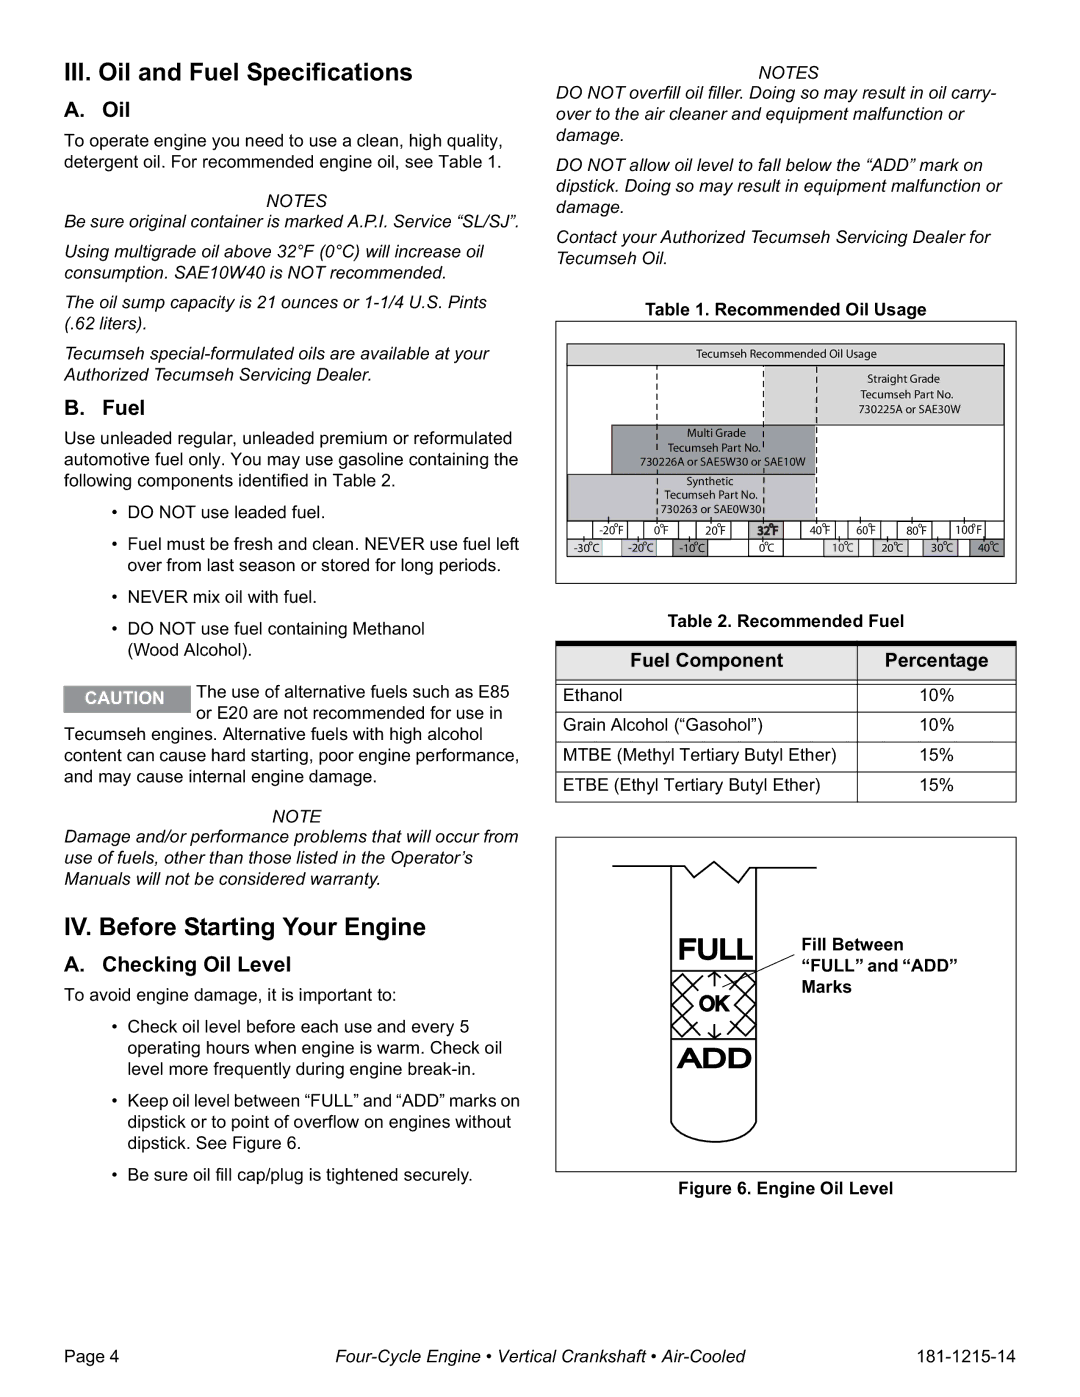
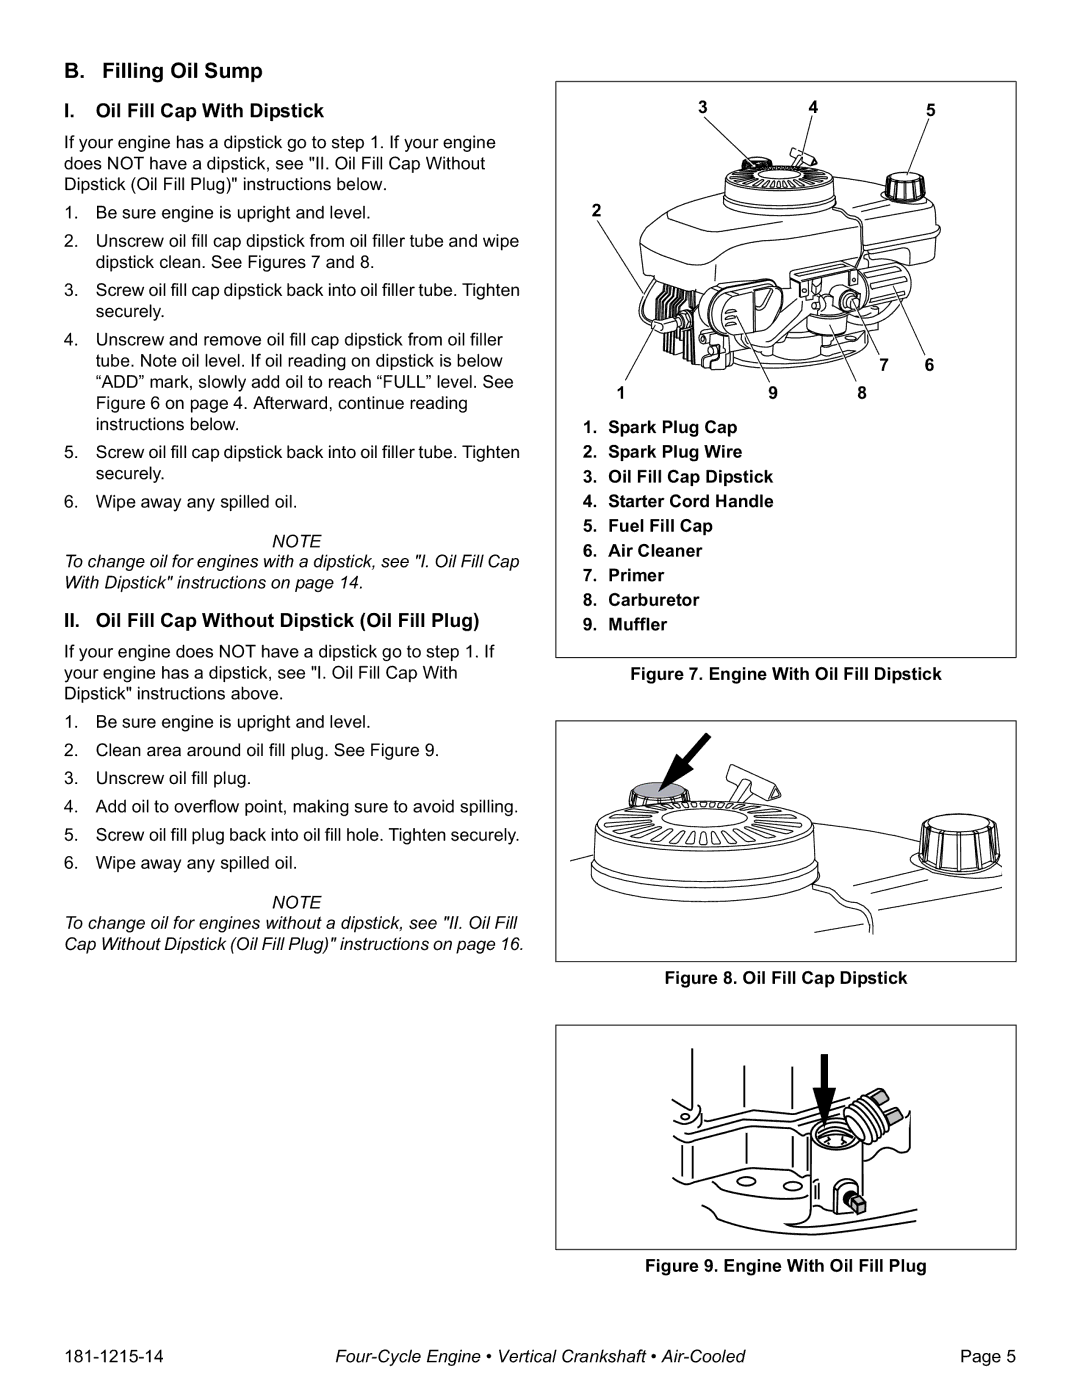
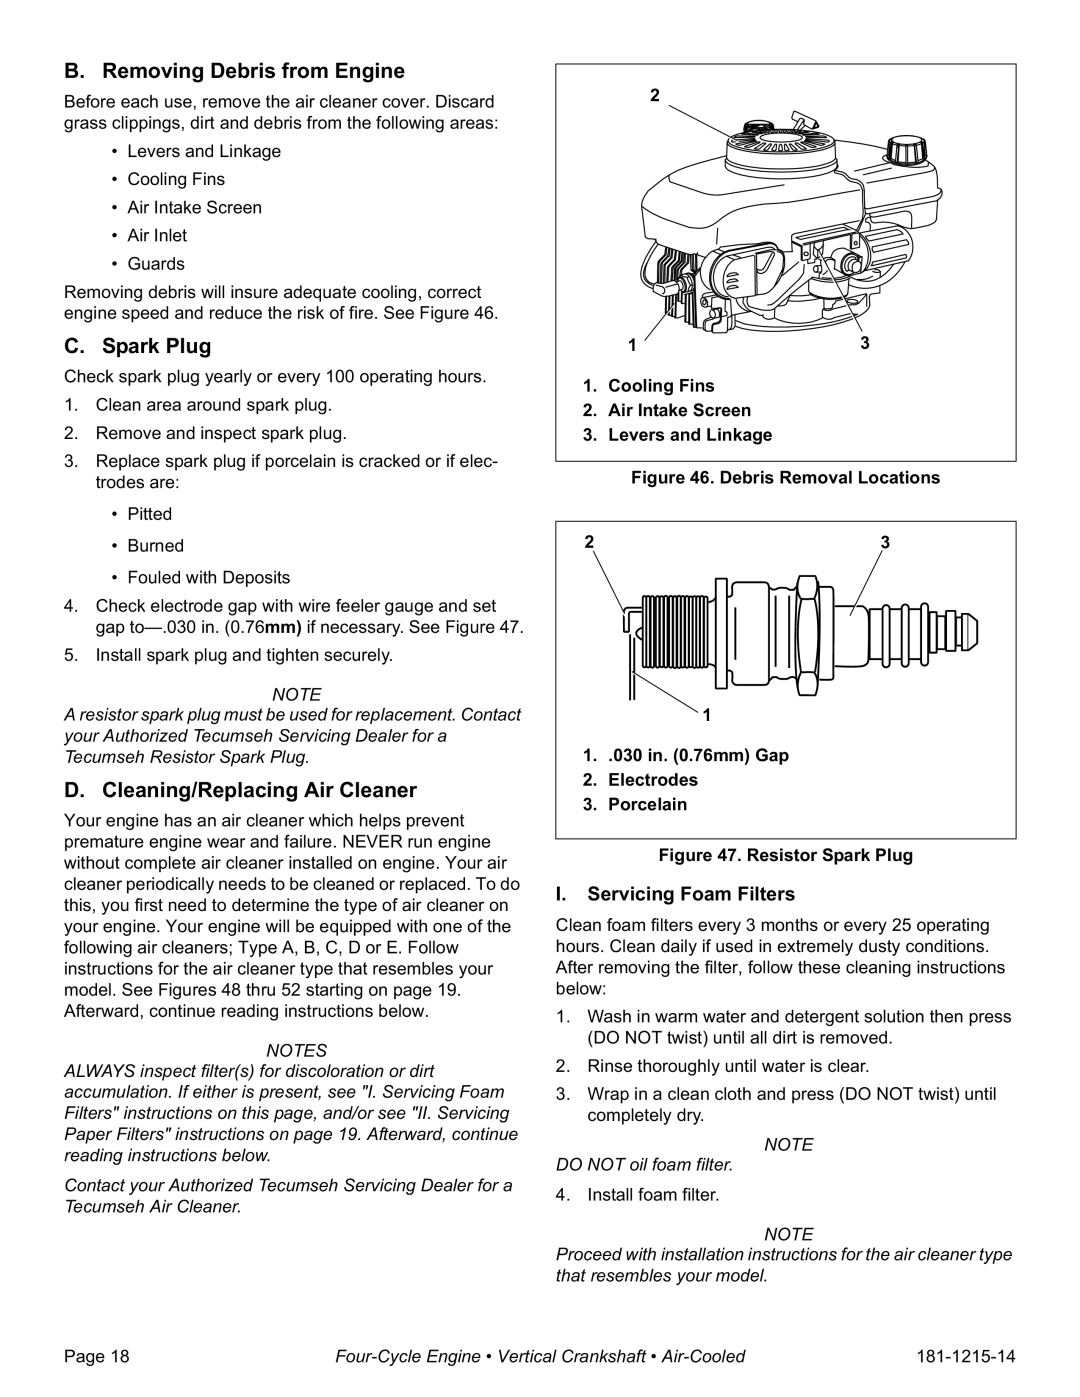
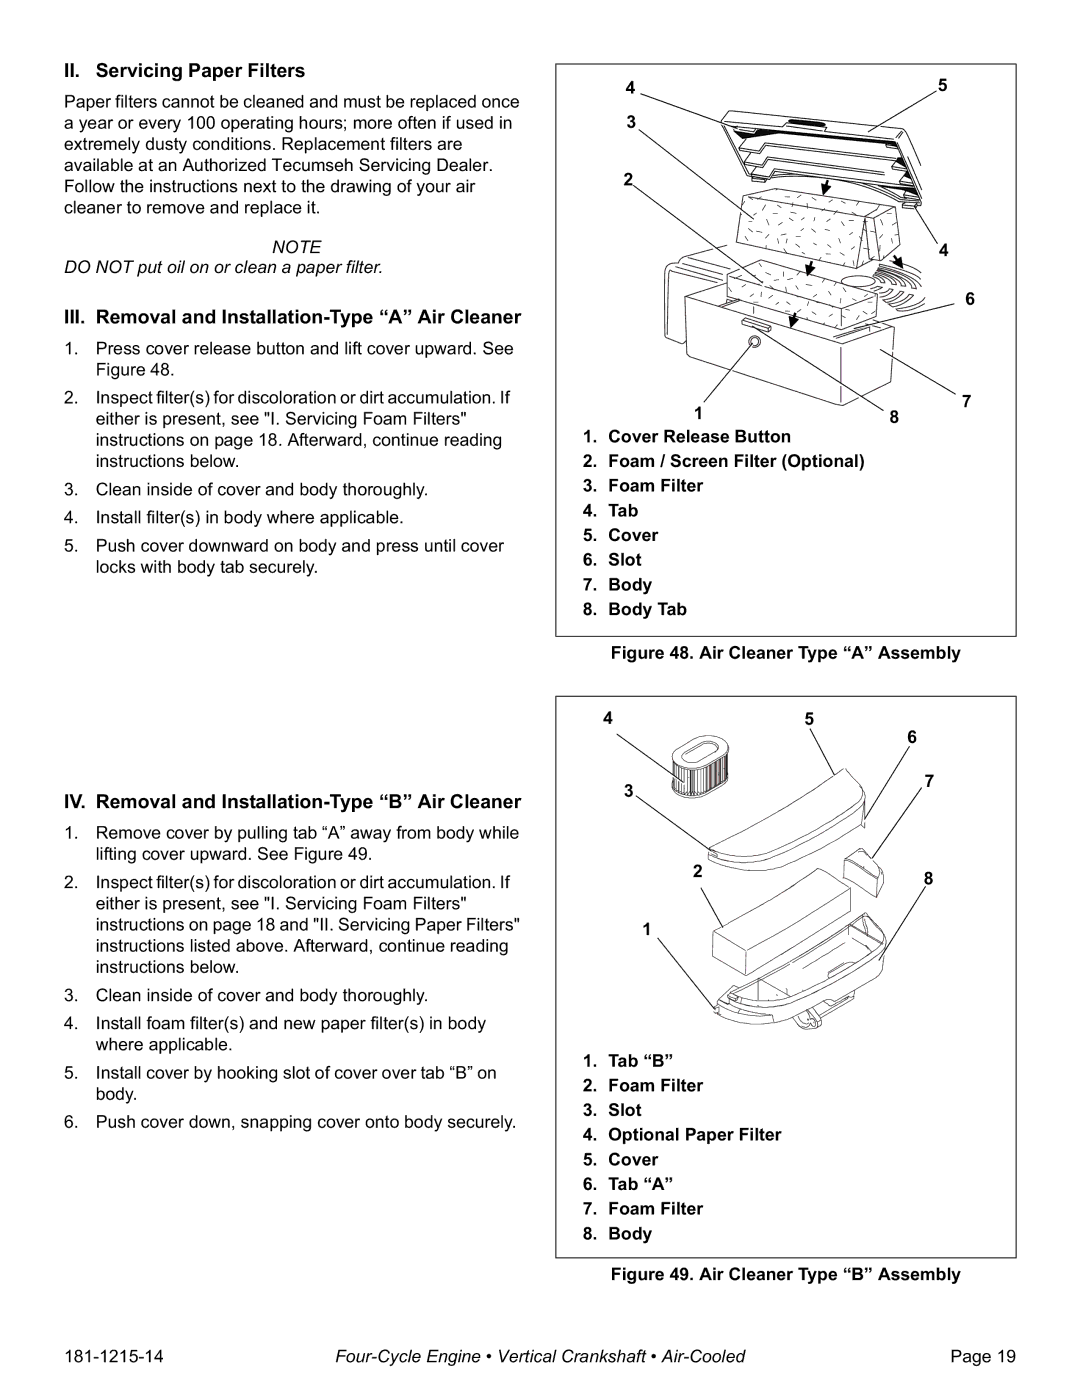
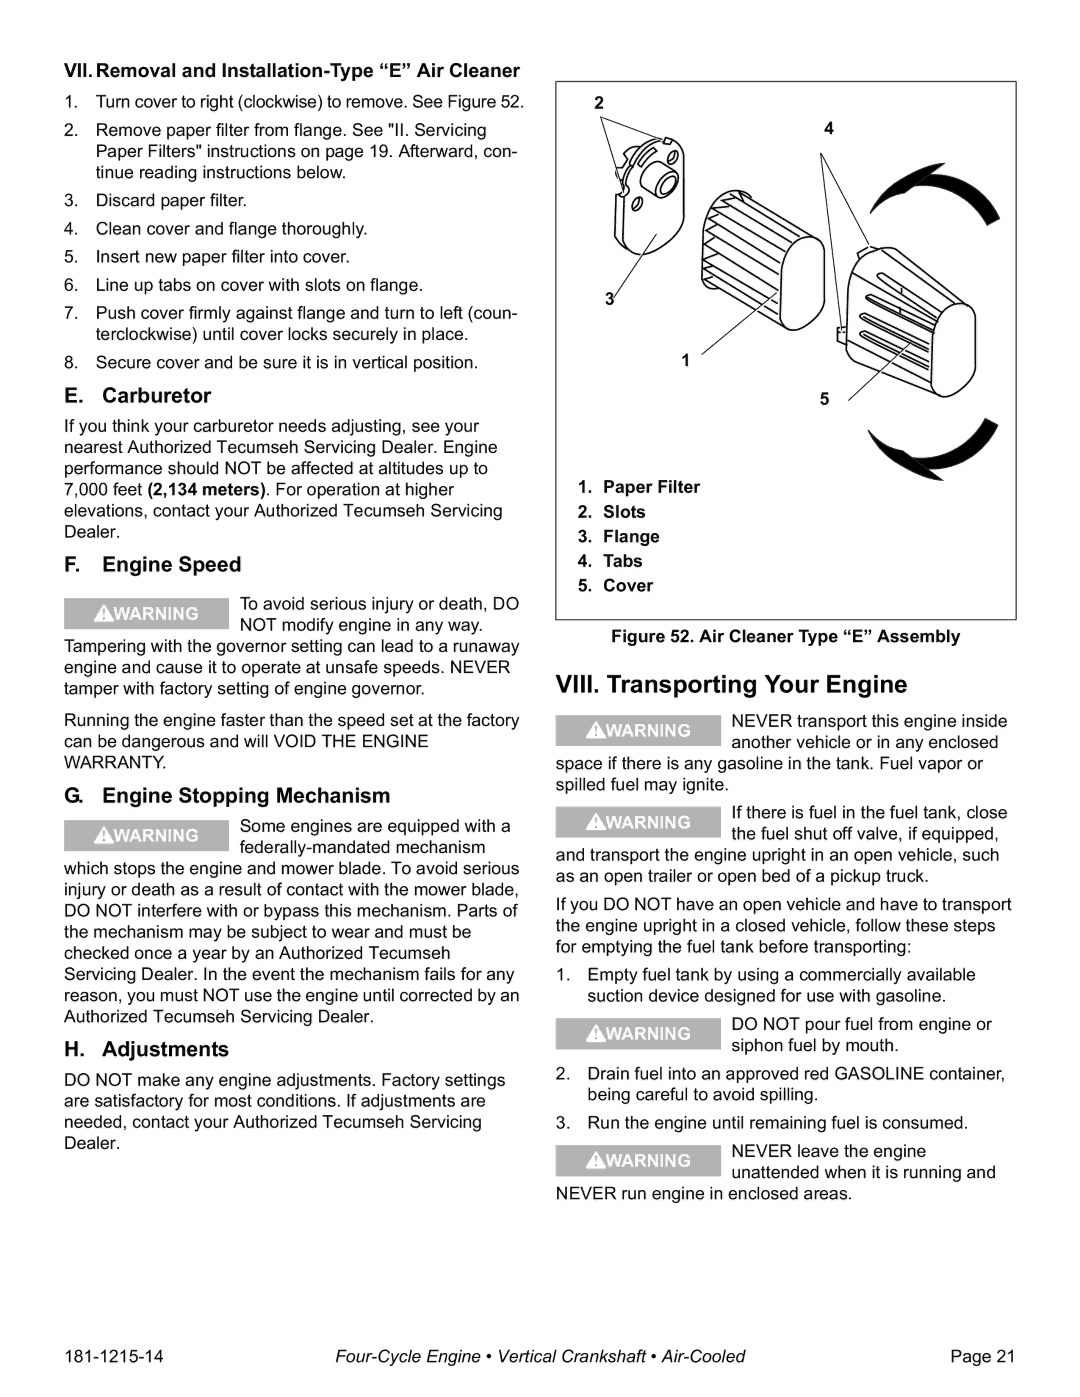
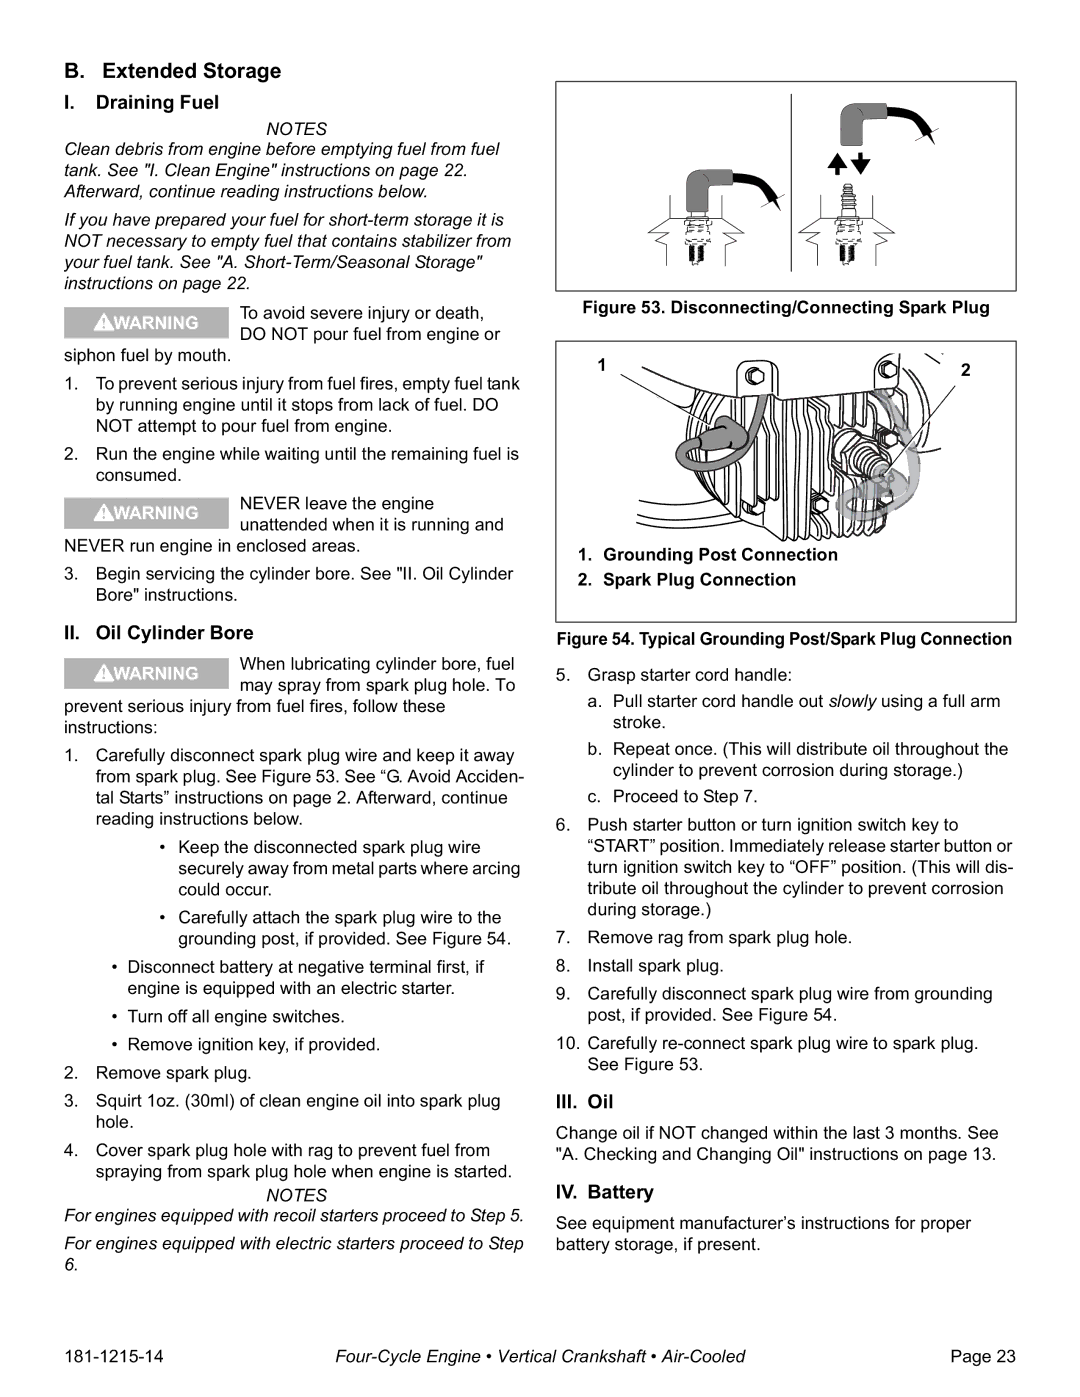
II. Oil Fill Cap Without Dipstick (Oil Fill Plug)

If your engine does NOT have a dipstick go to step 1. If your engine has a dipstick, see "I. Oil Fill Cap With Dipstick" instructions on page 14.

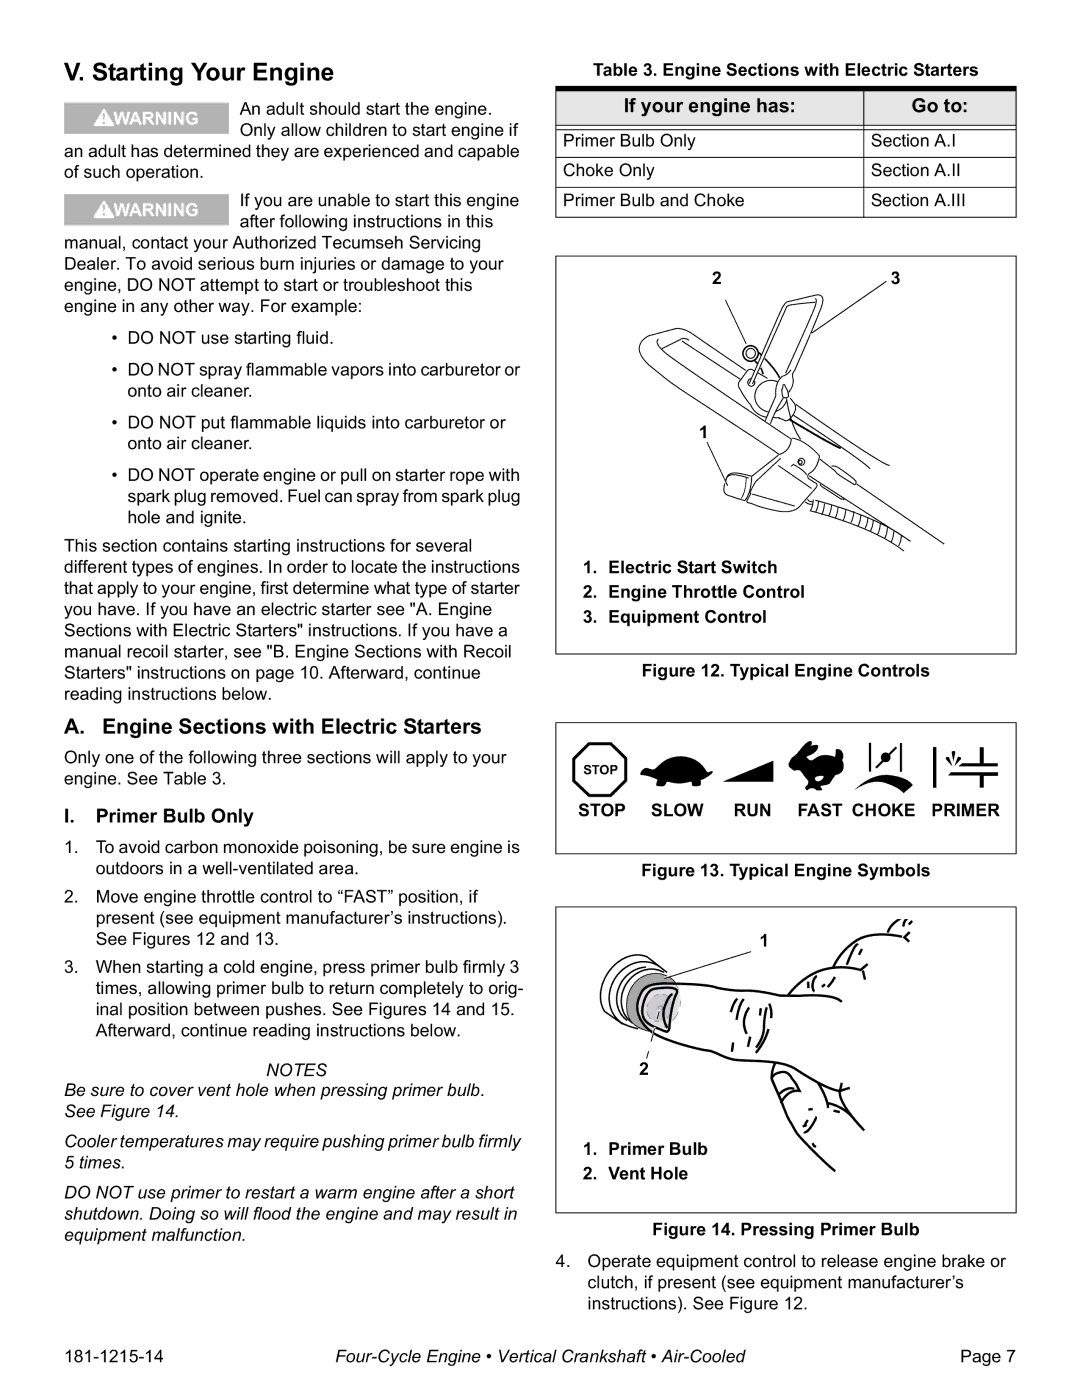
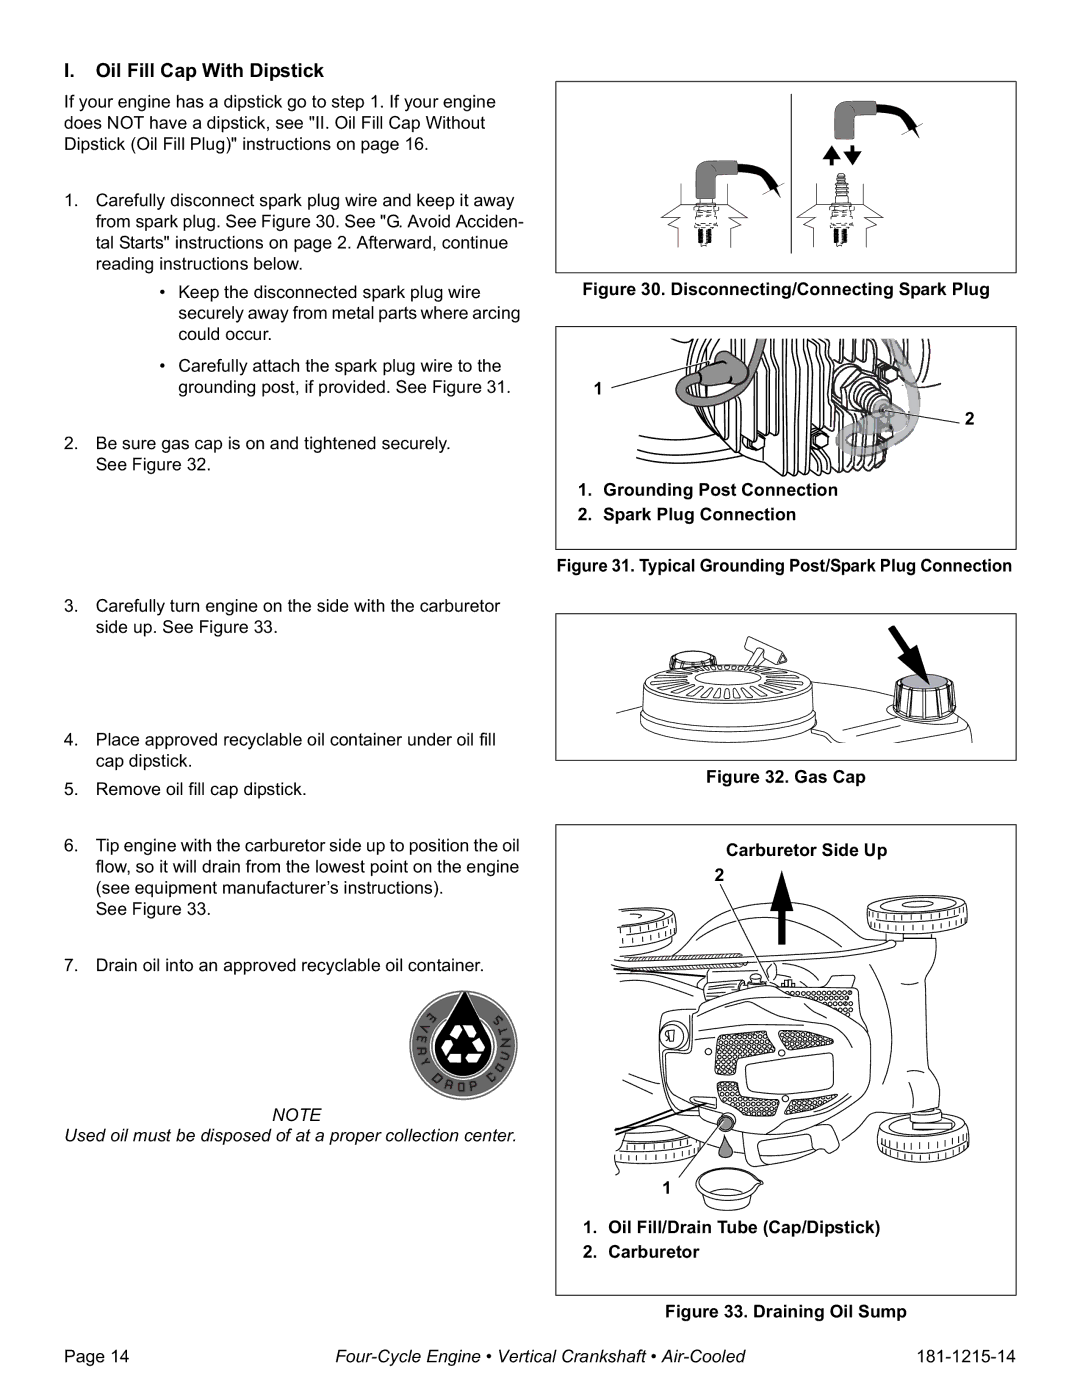
1.Carefully disconnect spark plug wire and keep it away from spark plug. See Figure 38. See “G. Avoid Acciden- tal Starts” instructions on page 2. Afterward, continue reading instructions below.

Keep the disconnected spark plug wire securely away from metal parts where arcing could occur.

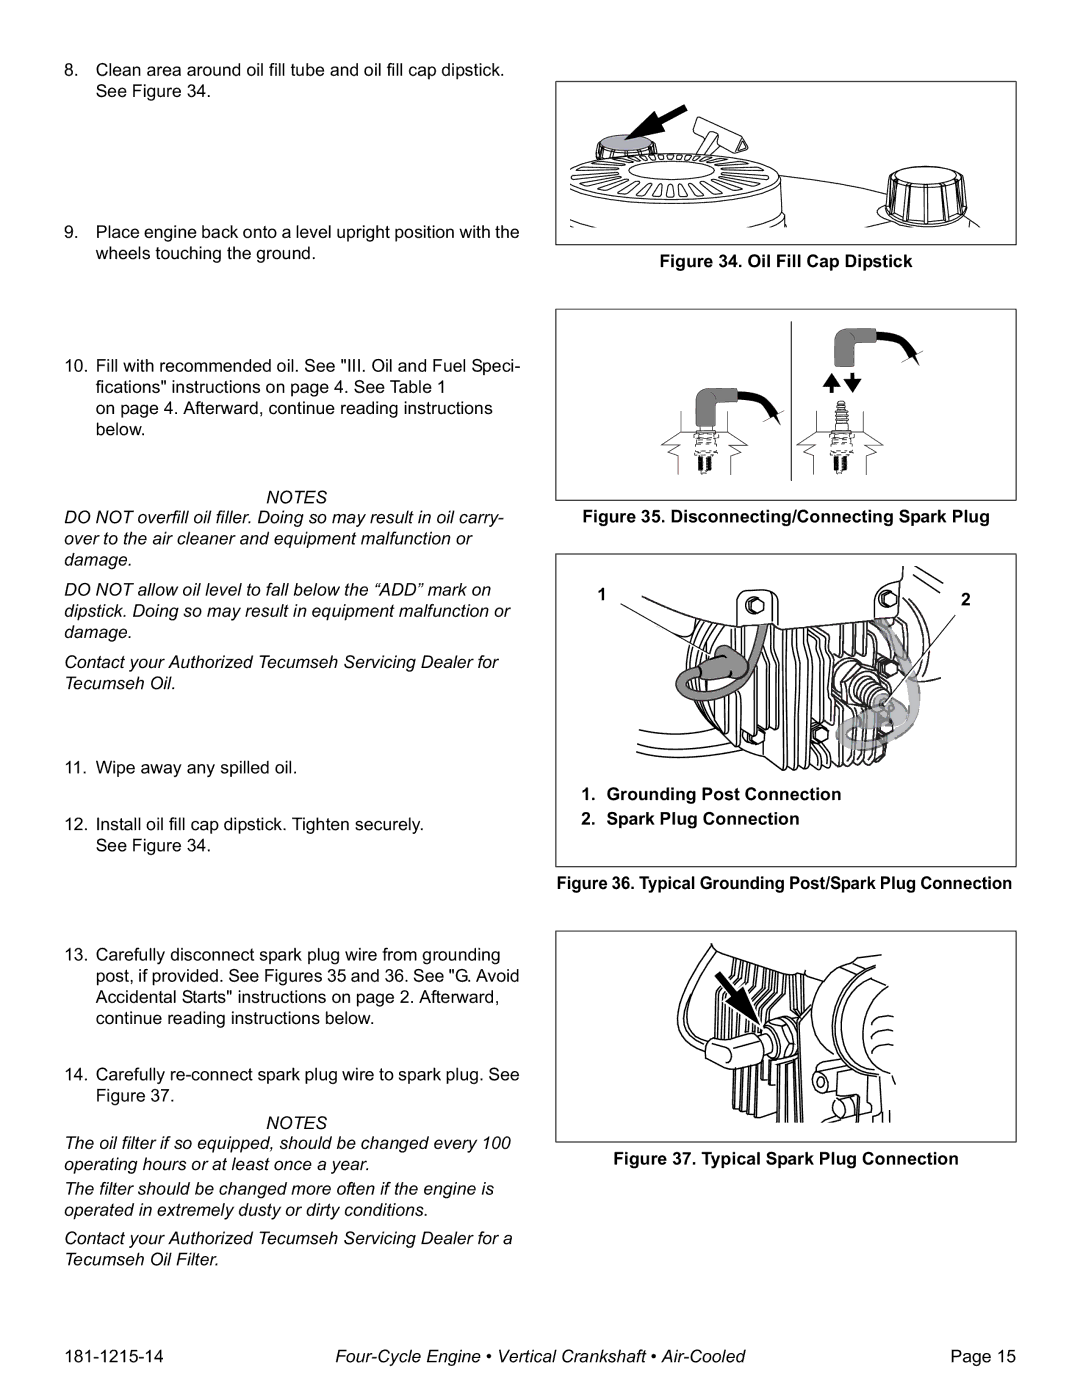
Carefully attach the spark plug wire to the grounding post, if provided. See Figure 39.

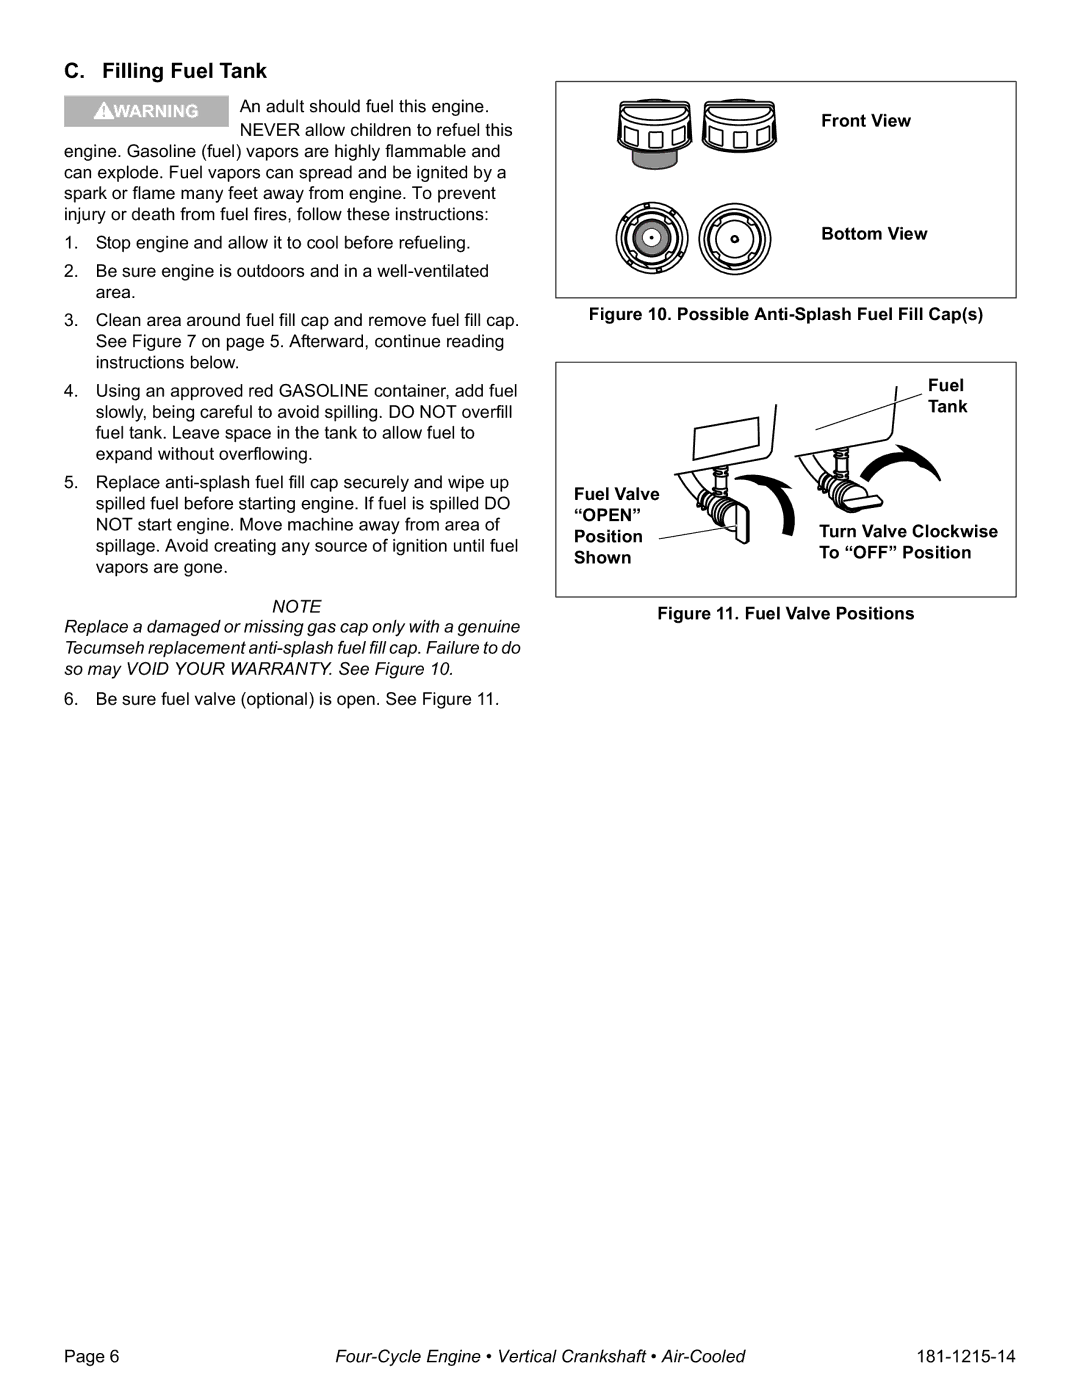
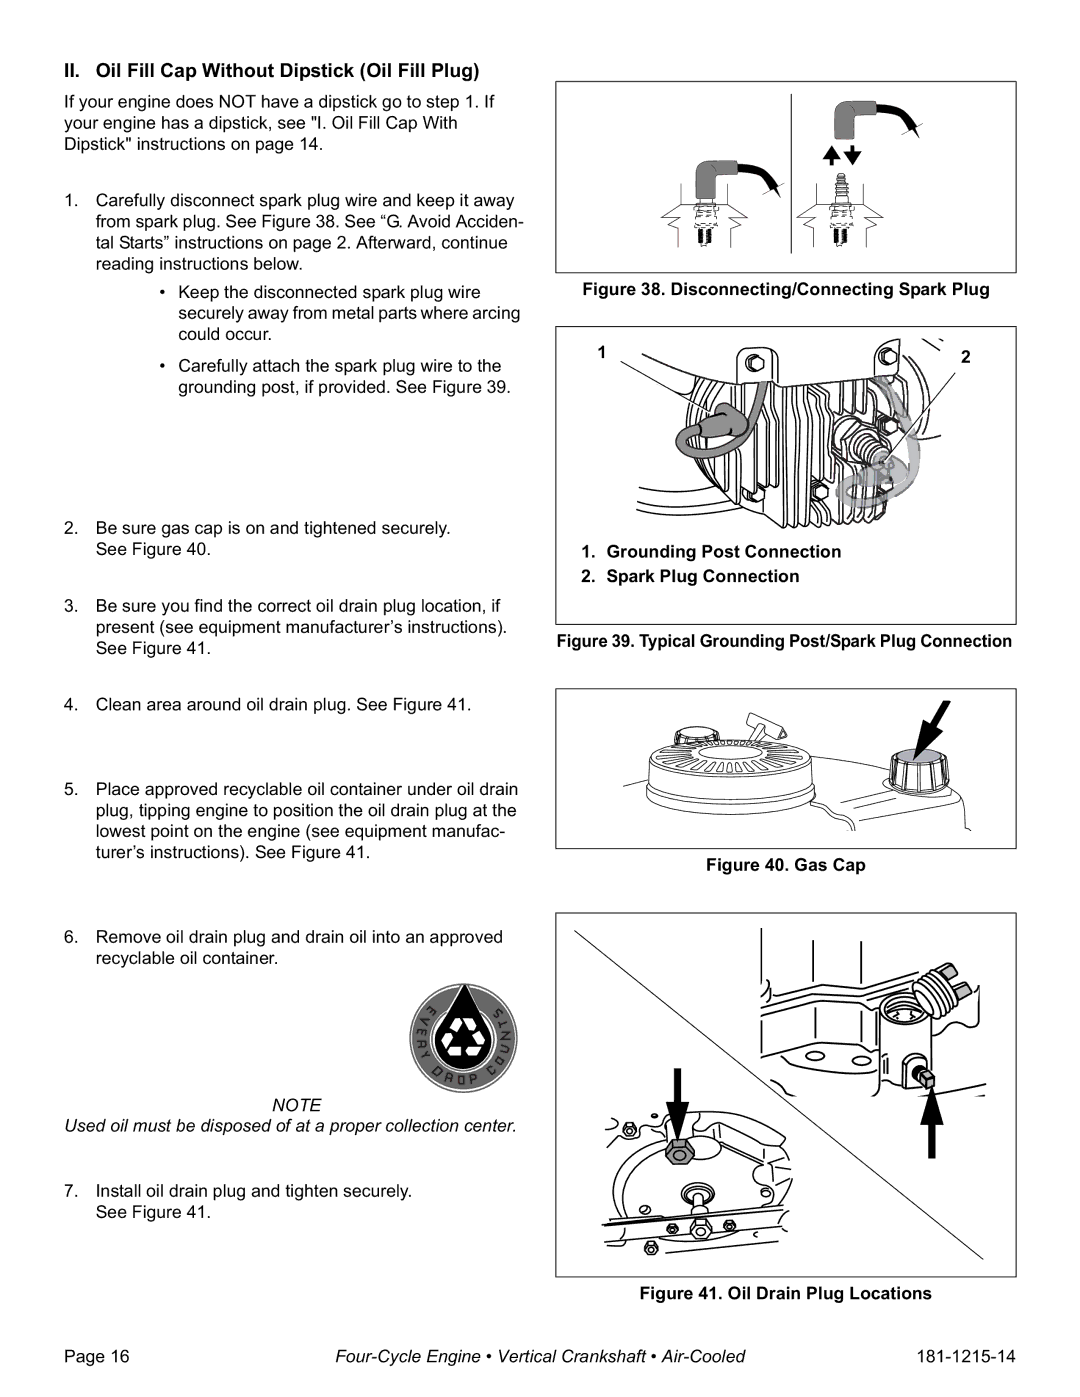
2.Be sure gas cap is on and tightened securely. See Figure 40.

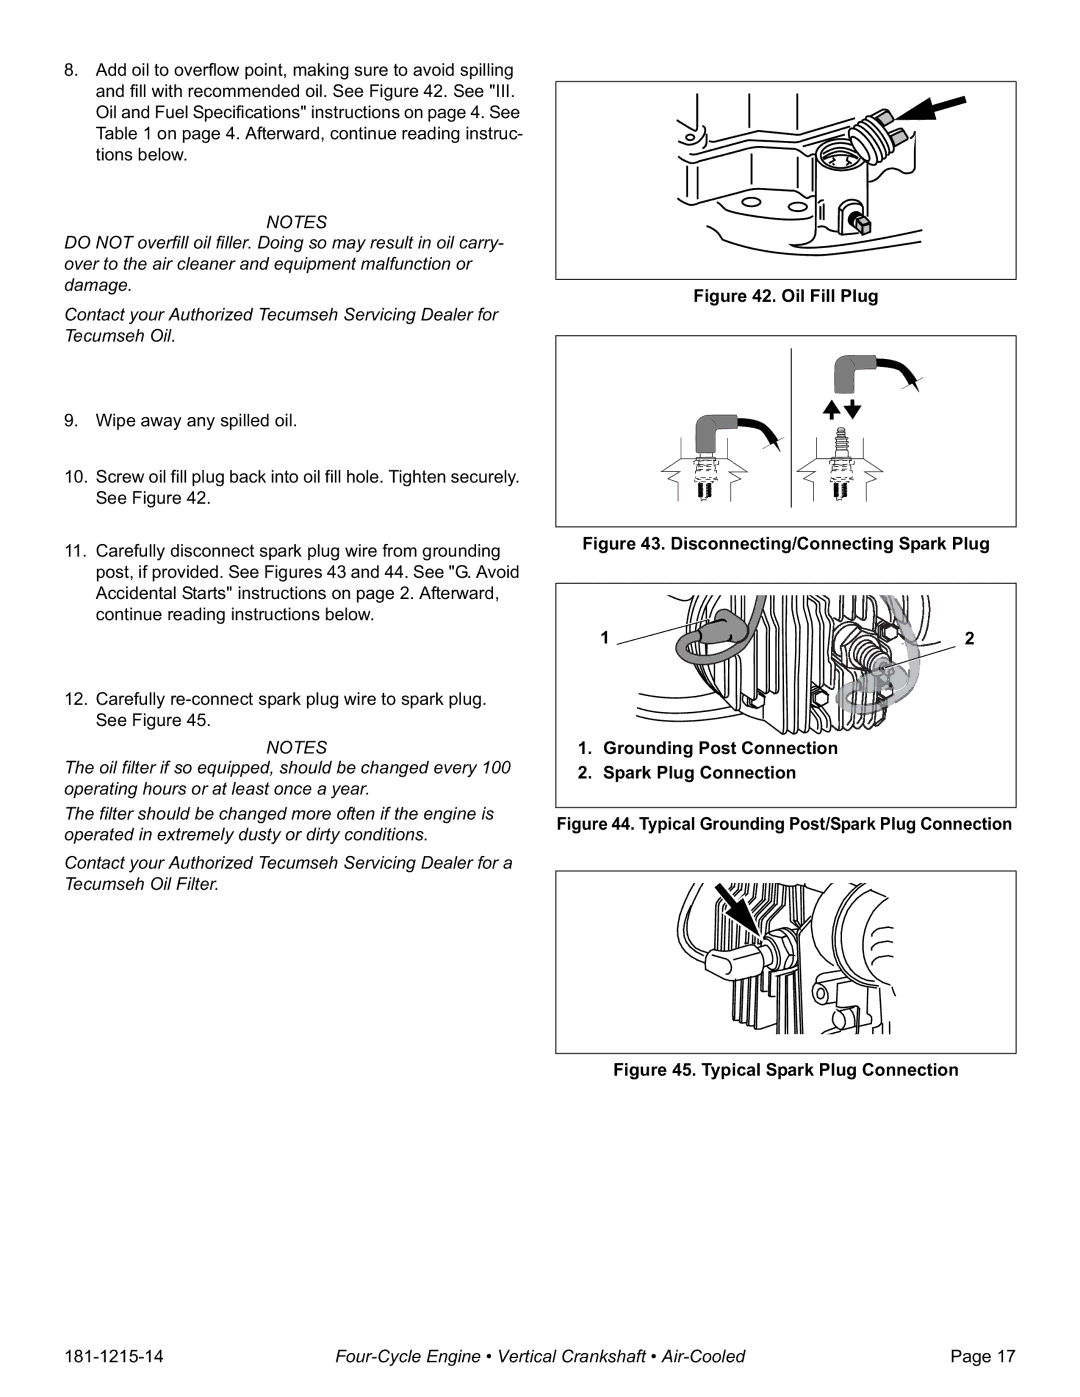
3.Be sure you find the correct oil drain plug location, if present (see equipment manufacturer’s instructions). See Figure 41.

4.Clean area around oil drain plug. See Figure 41.

5.Place approved recyclable oil container under oil drain plug, tipping engine to position the oil drain plug at the lowest point on the engine (see equipment manufac- turer’s instructions). See Figure 41.

6.Remove oil drain plug and drain oil into an approved recyclable oil container.

NOTE

Used oil must be disposed of at a proper collection center.

7.Install oil drain plug and tighten securely. See Figure 41.

Figure 38. Disconnecting/Connecting Spark Plug

1

2


1.Grounding Post Connection

2.Spark Plug Connection

Figure 39. Typical Grounding Post/Spark Plug Connection

Figure 40. Gas Cap

Figure 41. Oil Drain Plug Locations

Page 16

Four-Cycle Engine • Vertical Crankshaft • Air-Cooled

181-1215-14

Image 18
Contents LV148EA/LV148XA LV156EA/LV156XA LV195EA/LV195XA Safety Definitions Tecumseh Contact InformationAvoid Carbon Monoxide Poisoning General Safety PrecautionsAdult Supervision of Operation, Refueling and Maintenance Avoid Gasoline FiresAvoid Accidental Starts Do not Modify EngineAvoid Burns and Fire from Hot Surfaces Use Hearing ProtectionII. How to Get Service Engine Identification DecalTecumseh Technician’s Handbook Oil III. Oil and Fuel SpecificationsIV. Before Starting Your Engine FuelFilling Oil Sump Oil Fill Cap With DipstickII. Oil Fill Cap Without Dipstick Oil Fill Plug Position Filling Fuel TankFront View Bottom View To OFF PositionPrimer Bulb Only Starting Your EngineEngine Sections with Electric Starters If your engine has Go toSpark Plug Cap Spark Plug Wire Air Cleaner Primer Carburetor MufflerII. Choke Only Temperatures above 40F 5C Temperatures below 40F 5CIII. Primer Bulb and Choke Engine Sections with Recoil Starters Engine Sections with Recoil StartersPrimer Bulb Vent Hole III. Primer Bulb and Choke Checking and Changing Oil VII. MaintenanceVI. Stopping Your Engine and Short-Term Storage Grounding Post Connection Spark Plug ConnectionGas Cap Carburetor Side Up Oil Fill/Drain Tube Cap/Dipstick Typical Spark Plug Connection Gas Cap Oil Fill Plug Spark Plug Cleaning/Replacing Air CleanerRemoving Debris from Engine Servicing Foam FiltersIII. Removal and Installation-Type a Air Cleaner IV. Removal and Installation-Type B Air CleanerII. Servicing Paper Filters Retainer Slot Flange Paper Filter Tab Cover Removal and Installation-Type C Air CleanerVI. Removal and Installation-Type D Air Cleaner Tab B Foam Filter Slot Cover Tab a Paper Filter BodyCarburetor AdjustmentsVIII. Transporting Your Engine Engine SpeedIII. Fuel System IV. Fuel TreatmentDraining Fuel IV. BatteryExtended Storage II. Oil Cylinder BoreProcedure XI. Maintenance IntervalsMaintenance Intervals Preventing Forest, Brush and Grass FiresDateOwner/Dealer 181-1215-14 Every 25 Hours or 3 Months Scheduled Maintenance Change Oil Every 200 Hours or Seasonally 1. Replace Spark PlugFour-Cycle Engine Vertical Crankshaft Air-Cooled California & US EPA Emission Control Warranty Statement Emission Control System Warranty XII. Warranty Information Consumer USE Commercial USE