
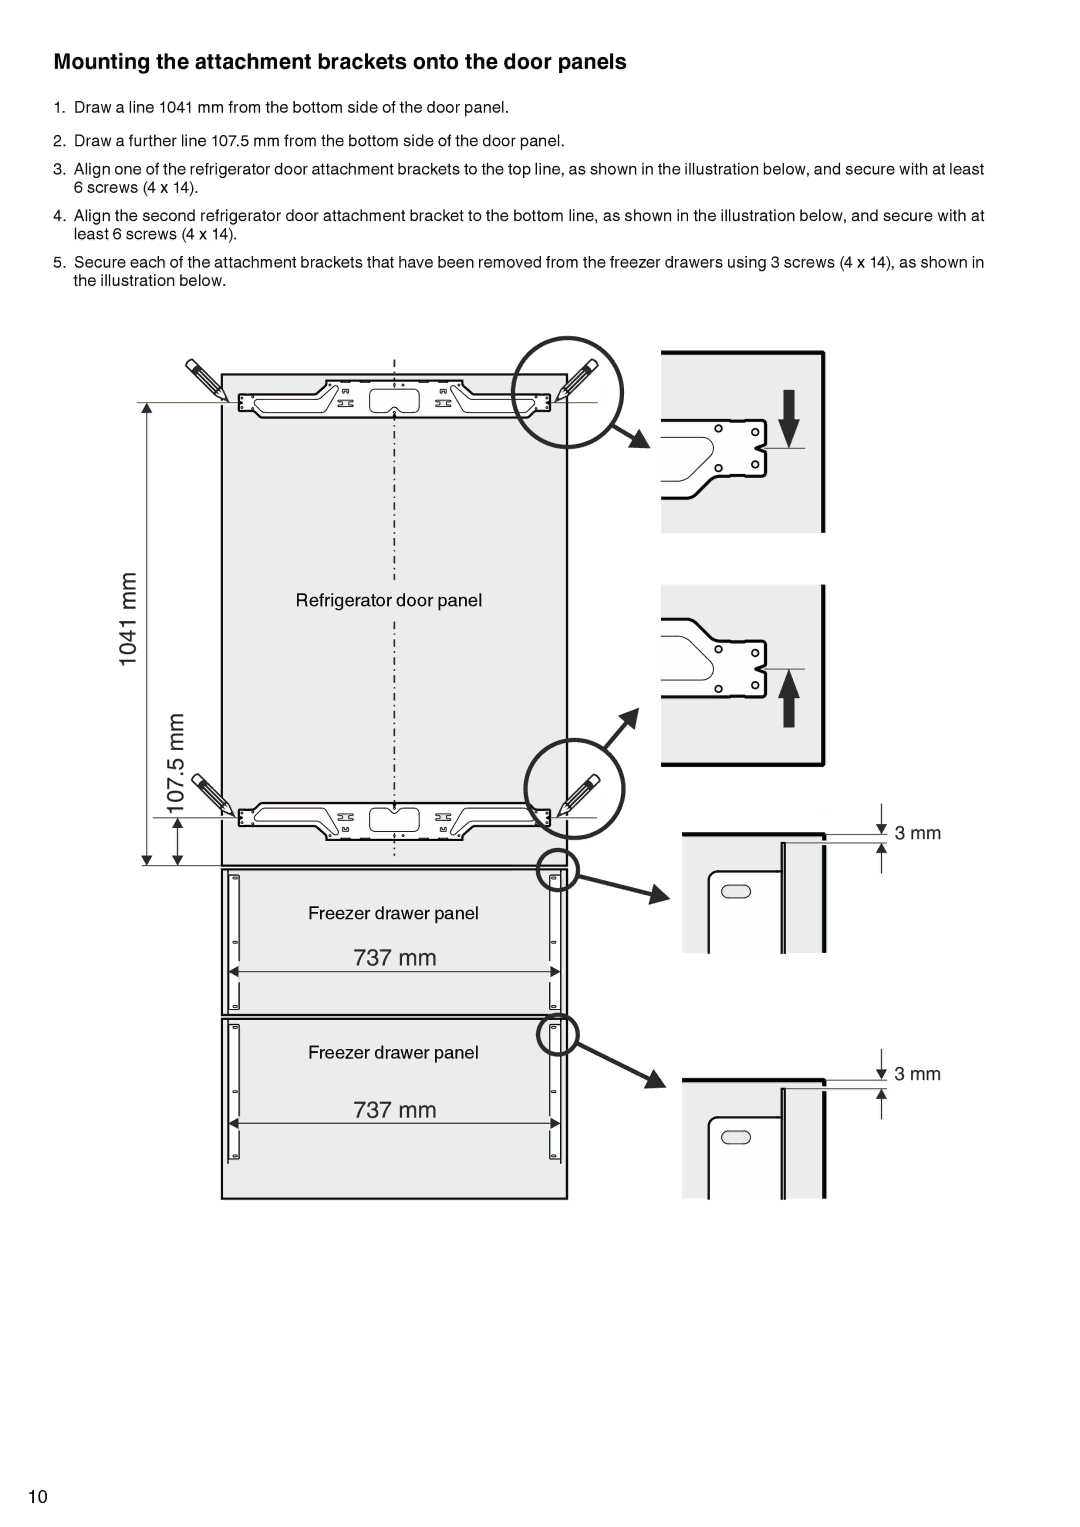


Connection to the water supply
Safety instructions and warnings
• Donotconnecttothewatersupplywhilethecombinedrefrigerator- freezer is connected to the electricity supply.
• The connection to the mains water supply may only be made by trained personnel.
• The water quality must comply with the drinking water directives of the country in which the appliance is used.
• The ice maker is designed exclusively to make ice cubes in quantities required by a household and may only be operated with water suitable for this purpose.
• All repairs and work on the ice maker may only be carried out by customer service personnel or other trained personnel.
• Themanufacturercannotacceptliabilityfordamagecaused by a faulty connection to the mains water supply.
Water pressure
The water pressure must be between 0.15 and 0.6 MPa (1.5 - 6 bar).
Important:
If the water filter is inserted in the appliance, the water pressure must lie between 0.3 and 0.6 MPa (3 - 6 bar). If the water pressure with the inserted water filter is too low, this may cause the ice maker to malfunction.
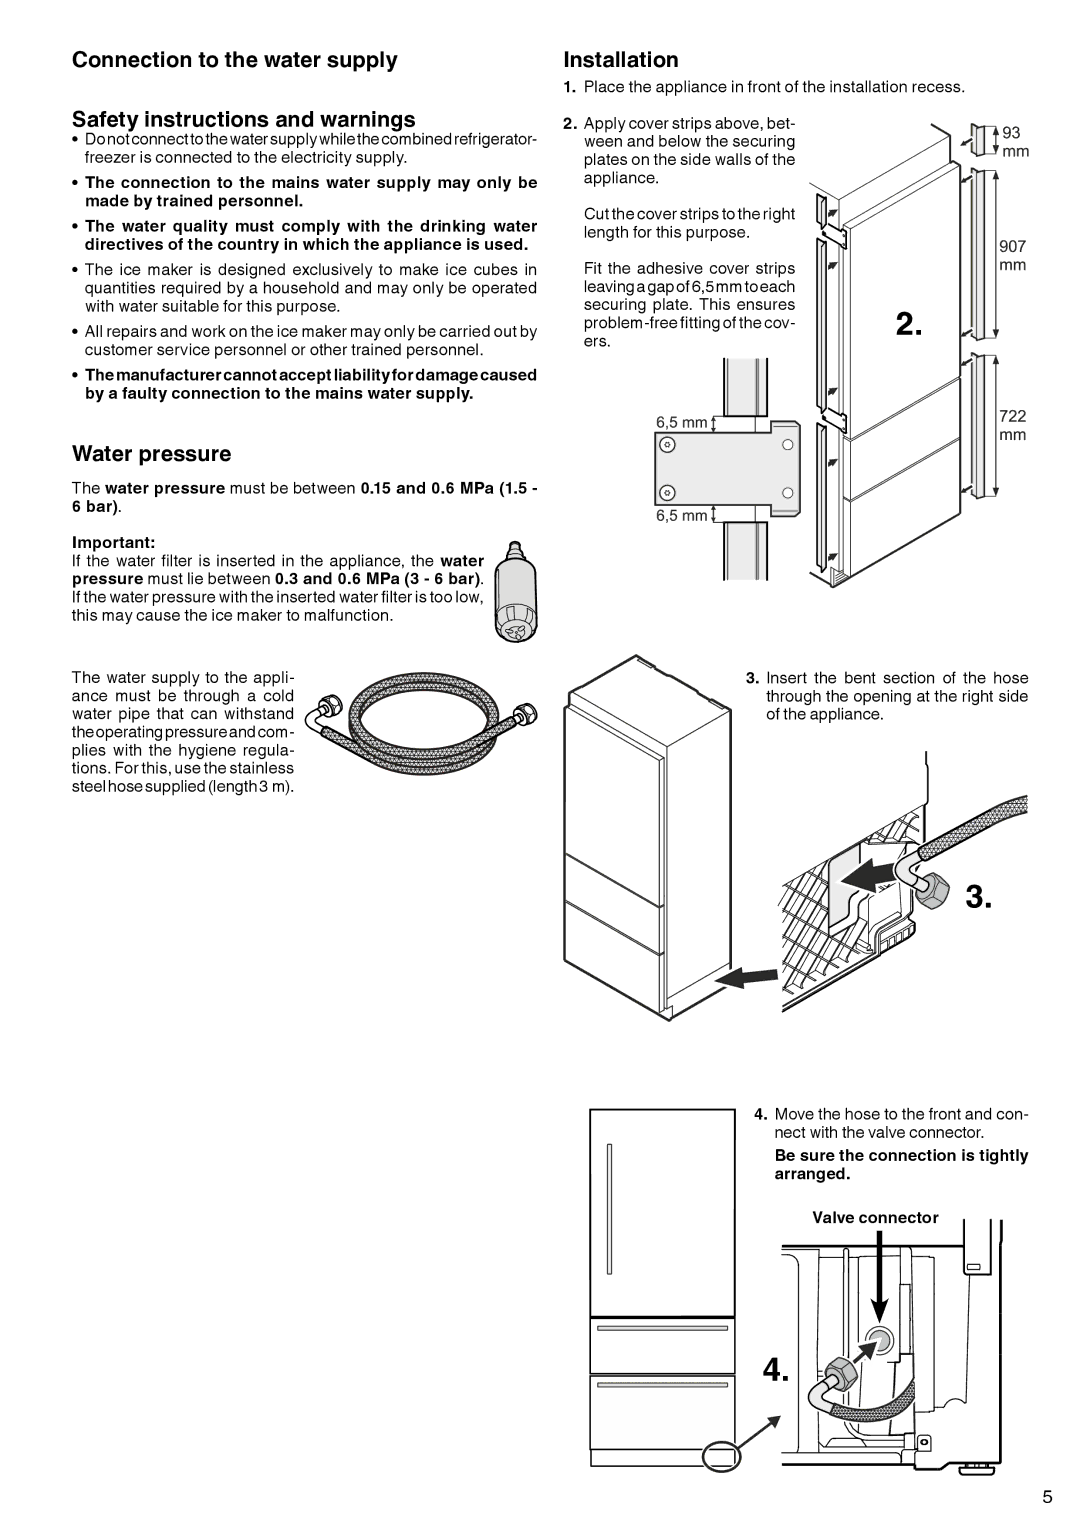
The water supply to the appli- ance must be through a cold water pipe that can withstand theoperatingpressureandcom- plies with the hygiene regula- tions. For this, use the stainless steelhosesupplied(length3 m).
Installation
1.Place the appliance in front of the installation recess.
2. Apply cover strips above, bet- |
|
ween and below the securing |
|
plates on the side walls of the |
|
appliance. |
|
Cut the cover strips to the right |
|
length for this purpose. |
|
Fit the adhesive cover strips |
|
leavingagapof6,5mmtoeach |
|
securing plate. This ensures | 2. |
ers. | |
|
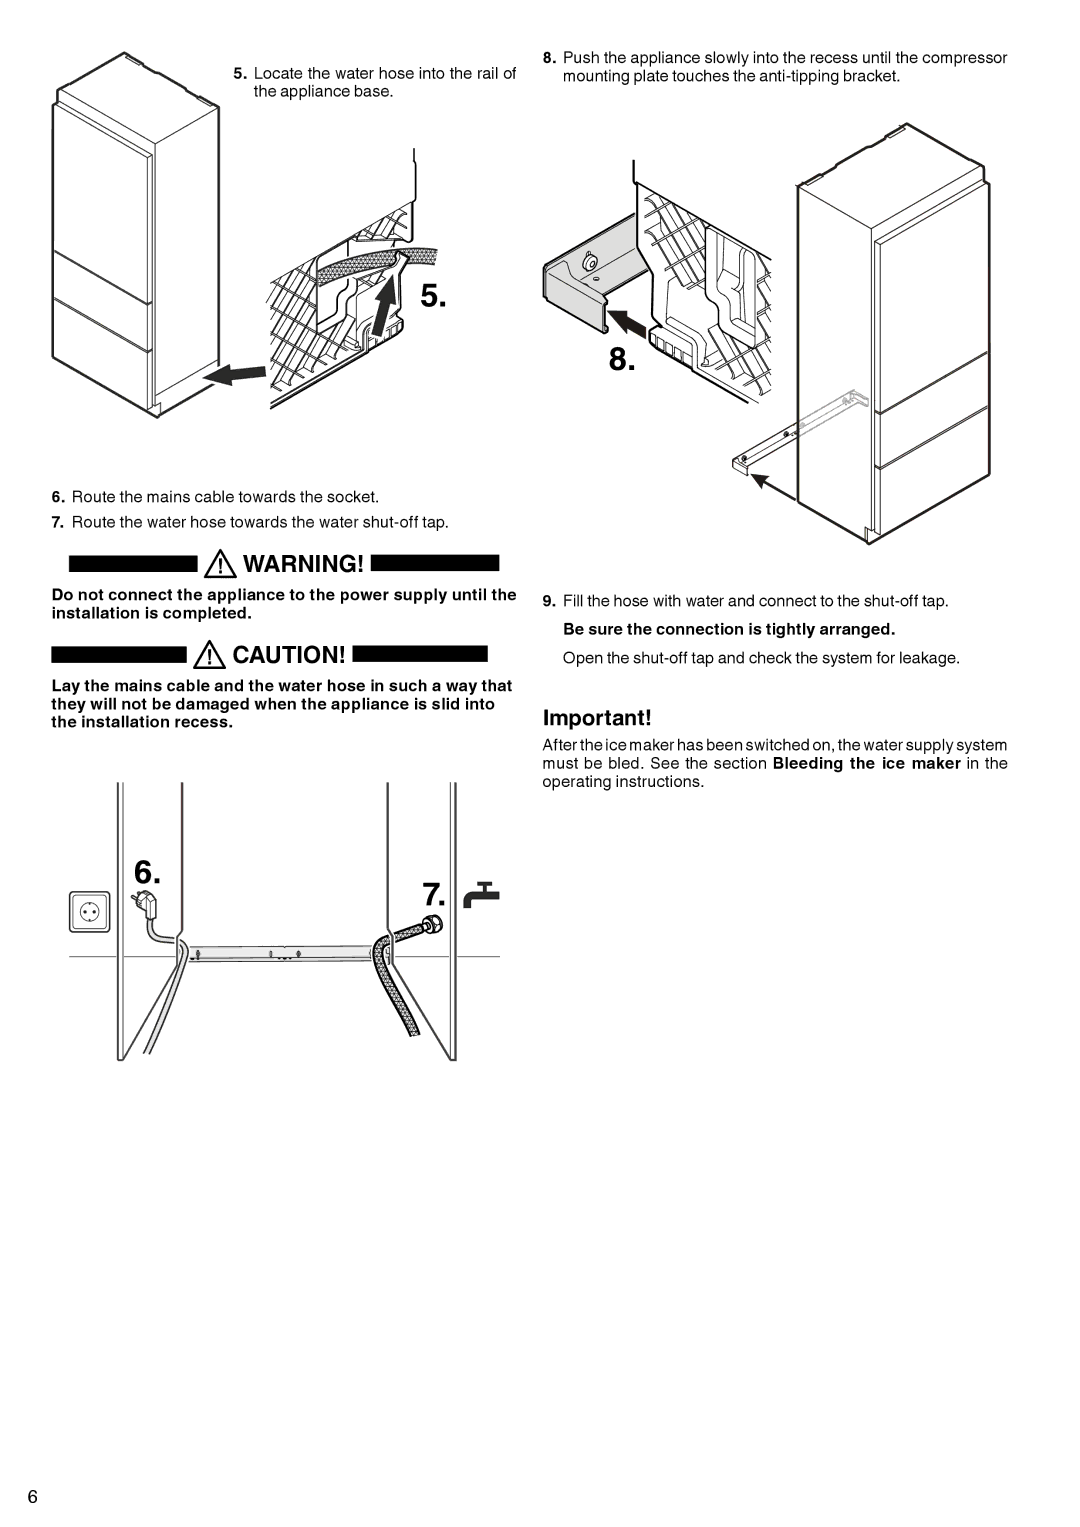
3. Insert the bent section of the hose through the opening at the right side of the appliance.
![]()
![]()
![]()
![]()
![]()
![]()
![]()

![]()
![]()
![]() 3.
3.
4.Move the hose to the front and con- nect with the valve connector.
Be sure the connection is tightly arranged.
Valve connector
4. |
5