Connection
and 2
Calibration
| Installation |
The |
|
| |
using the optional |
|
Connect the power cord to a wall outlet or to a switched outlet on the back |
|
of your preamplifier. Observe the following precautions: |
|
• Make sure the remote control receiver, located on the right side of the | Precautions |
front panel, is unobstructed. The remote control must be in line of sight |
|
to this receiver for proper operation. The |
|
doored cabinet but smoked glass will make the display hard to read. |
|
• Select a dry, |
|
• Do not stack the |
|
power amplifiers. |
|
• Avoid placing the |
|
may interfere with some FM tuners if it is placed immediately above or |
|
below them. |
|
• Install two AAA batteries in the |
|
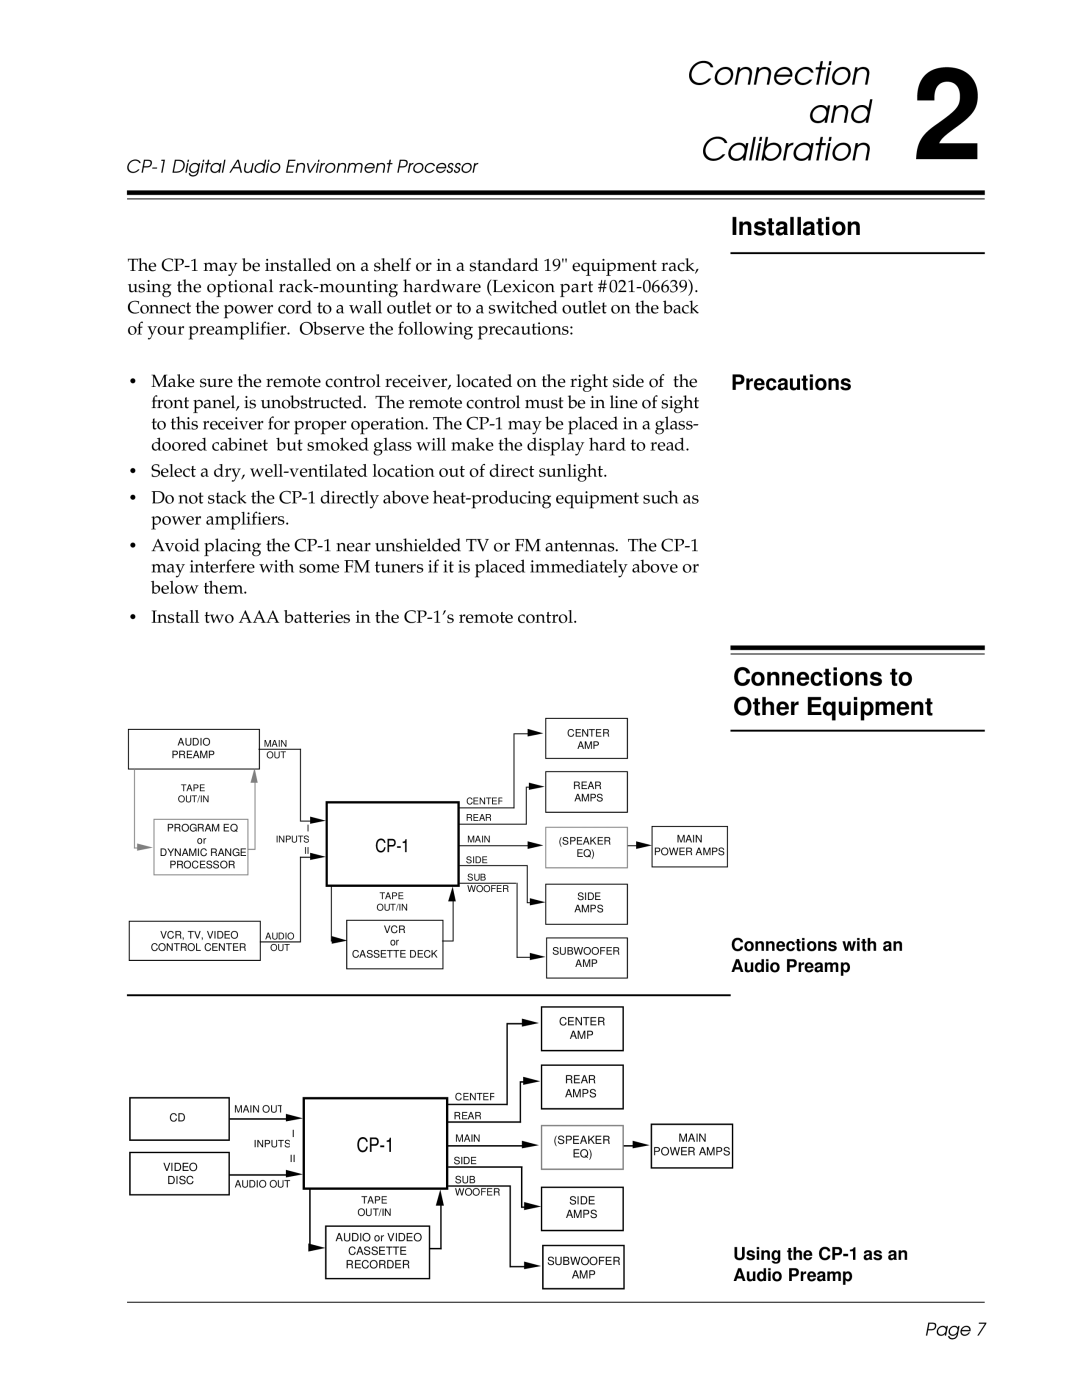
AUDIO | MAIN |
PREAMP | OUT |
TAPE |
|
OUT/IN |
|
PROGRAM EQ | I |
or | INPUTS |
DYNAMIC RANGE | II |
PROCESSOR |
|
VCR, TV, VIDEO | AUDIO |
CONTROL CENTER | OUT |
|
|
CP-1
TAPE |
OUT/IN |
VCR |
or |
CASSETTE DECK |
CENTER
REAR
MAIN
SIDE
SUB
WOOFER
CENTER
AMP
REAR
AMPS
(SPEAKER
EQ)
SIDE
AMPS
SUBWOOFER
AMP
Connections to
Other Equipment
MAIN
POWER AMPS
Connections with an
Audio Preamp
CD
VIDEO DISC
MAIN OUT
I
INPUTS
II
AUDIO OUT
CP-1
TAPE |
OUT/IN |
AUDIO or VIDEO |
CASSETTE |
RECORDER |
CENTER
REAR
MAIN
SIDE
SUB
WOOFER
CENTER
AMP
REAR
AMPS
(SPEAKER
EQ)
SIDE
AMPS
![]() SUBWOOFER AMP
SUBWOOFER AMP
MAIN
POWER AMPS
Using the
Audio Preamp
Page 7