16.0Install Termination
16.1Slide the termination body onto the cable and remove core. Pull while unwinding,
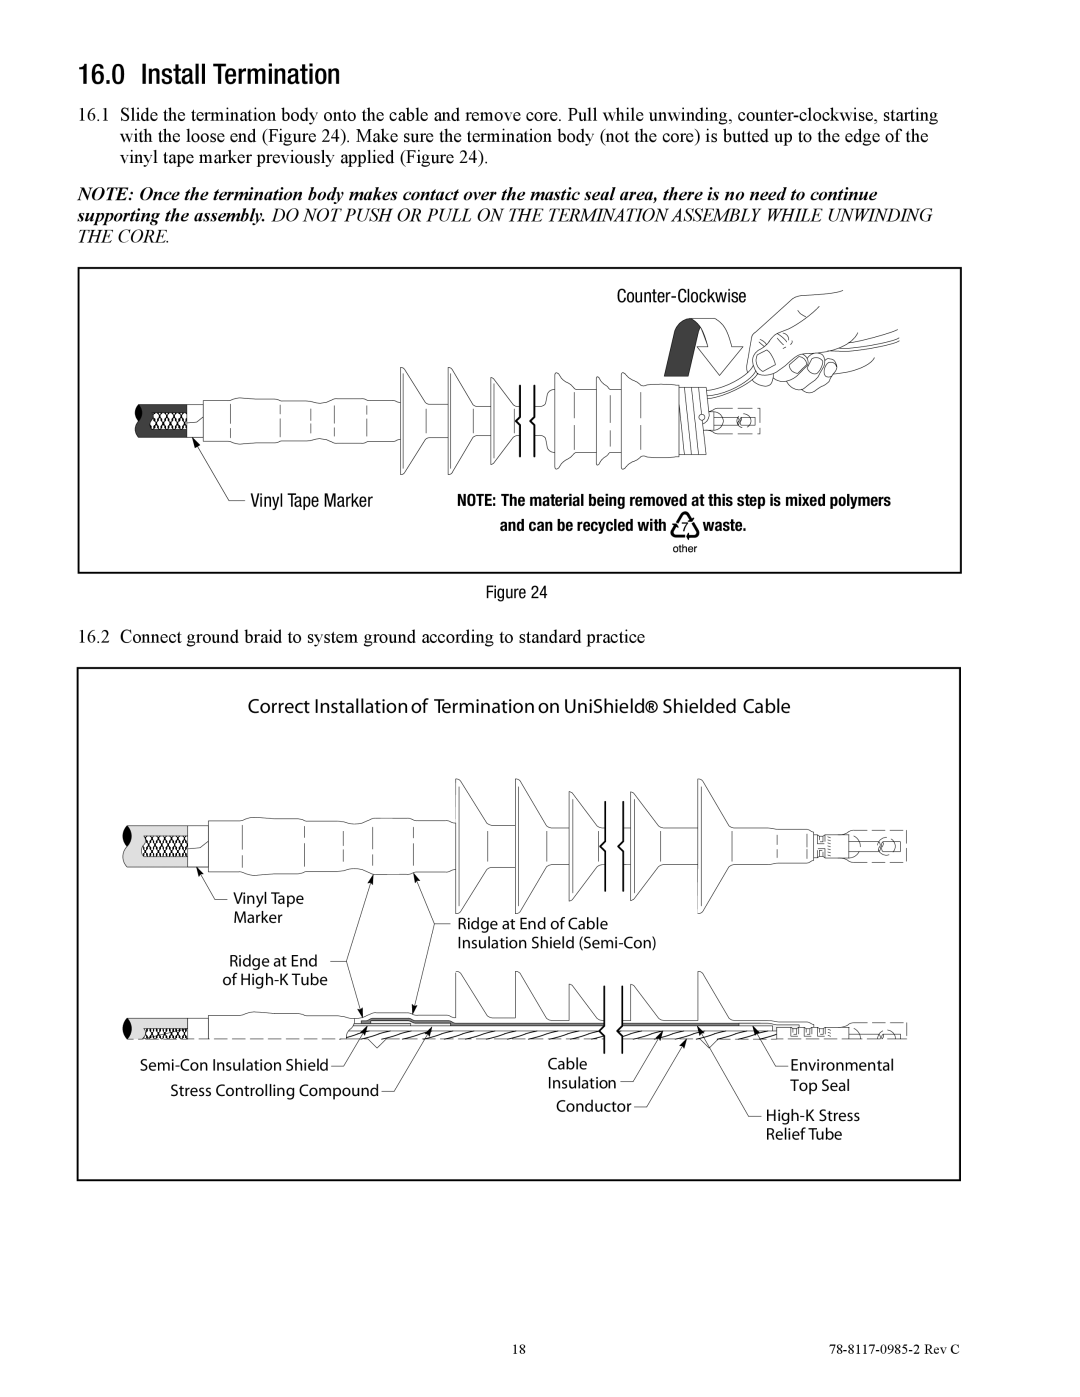
with the loose end (Figure 24). Make sure the termination body (not the core) is butted up to the edge of the vinyl tape marker previously applied (Figure 24).
NOTE: Once the termination body makes contact over the mastic seal area, there is no need to continue supporting the assembly. DO NOT PUSH OR PULL ON THE TERMINATION ASSEMBLY WHILE UNWINDING THE CORE.
| ||
Vinyl Tape Marker | NOTE: The material being removed at this step is mixed polymers | |
| and can be recycled with | waste. |
Figure 24
16.2 Connect ground braid to system ground according to standard practice
Correct Installation of Termination on UniShield® Shielded Cable | ||
Vinyl Tape |
|
|
Marker | Ridge at End of Cable |
|
|
| |
Ridge at End | Insulation Shield |
|
|
| |
of |
|
|
Cable | Environmental | |
Stress Controlling Compound | Insulation | Top Seal |
| Conductor | |
|
| |
|
| Relief Tube |
| 18 | |