Operation
Startup
1
Power
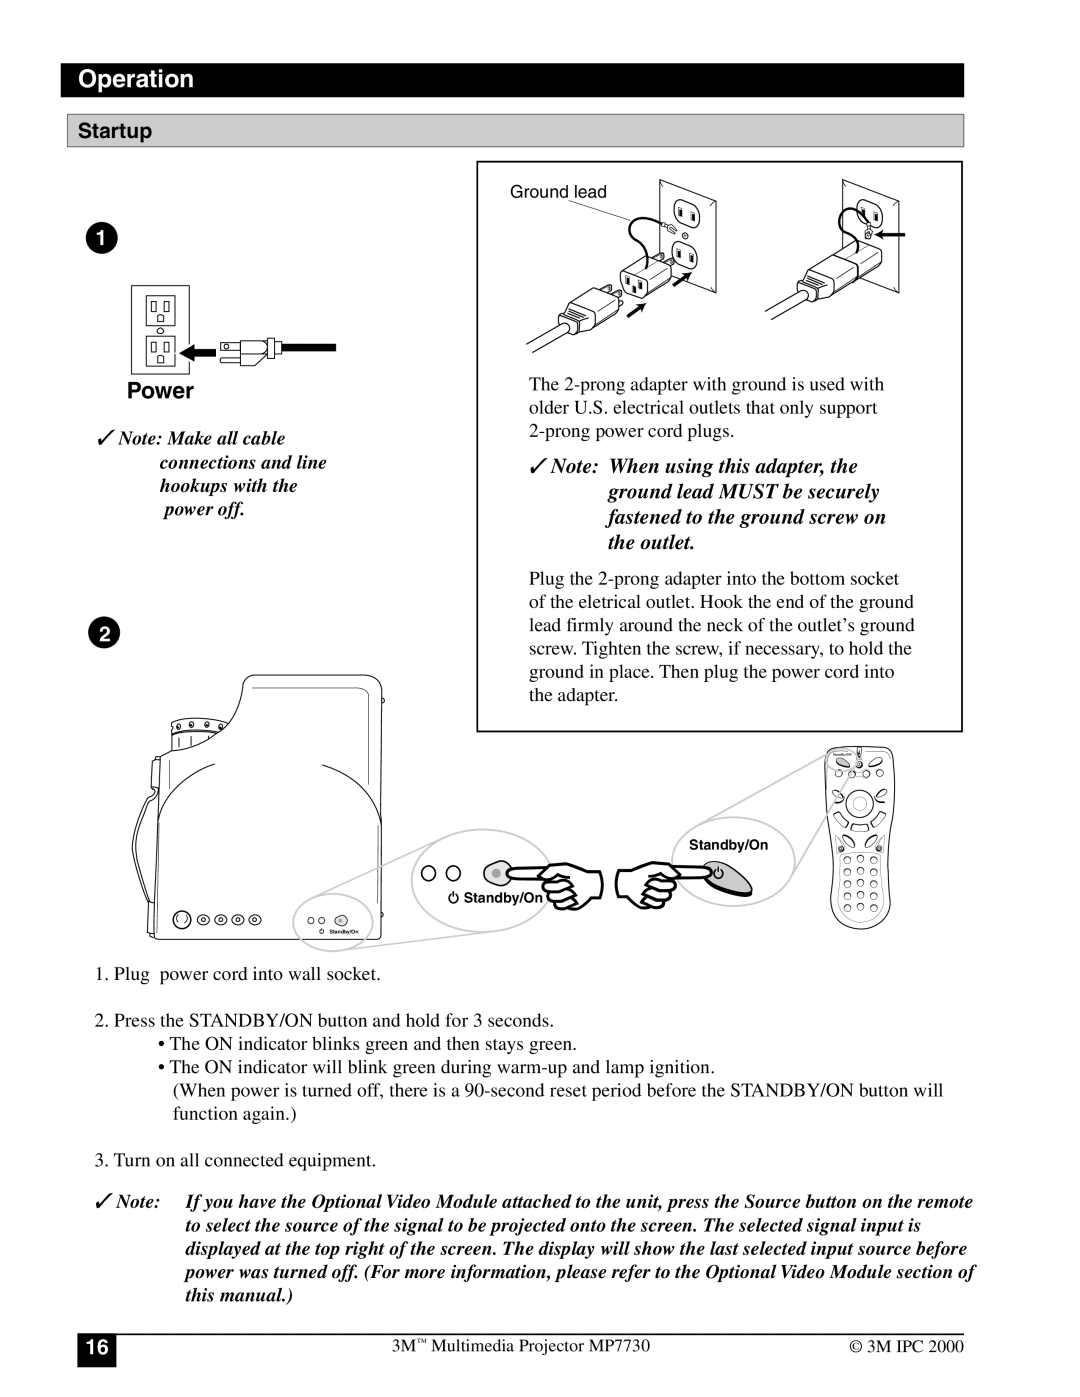
✓Note: Make all cable connections and line hookups with the power off.
2
Standby/On
Ground lead
The
✓Note: When using this adapter, the ground lead MUST be securely fastened to the ground screw on the outlet.
Plug the
Standby/ON
Standby/On
![]() Standby/On
Standby/On ![]()
1.Plug power cord into wall socket.
2.Press the STANDBY/ON button and hold for 3 seconds.
•The ON indicator blinks green and then stays green.
•The ON indicator will blink green during
(When power is turned off, there is a
3. Turn on all connected equipment.
✓ Note: If you have the Optional Video Module attached to the unit, press the Source button on the remote to select the source of the signal to be projected onto the screen. The selected signal input is displayed at the top right of the screen. The display will show the last selected input source before power was turned off. (For more information, please refer to the Optional Video Module section of this manual.)
16
3M™ Multimedia Projector MP7730 | © 3M IPC 2000 |
