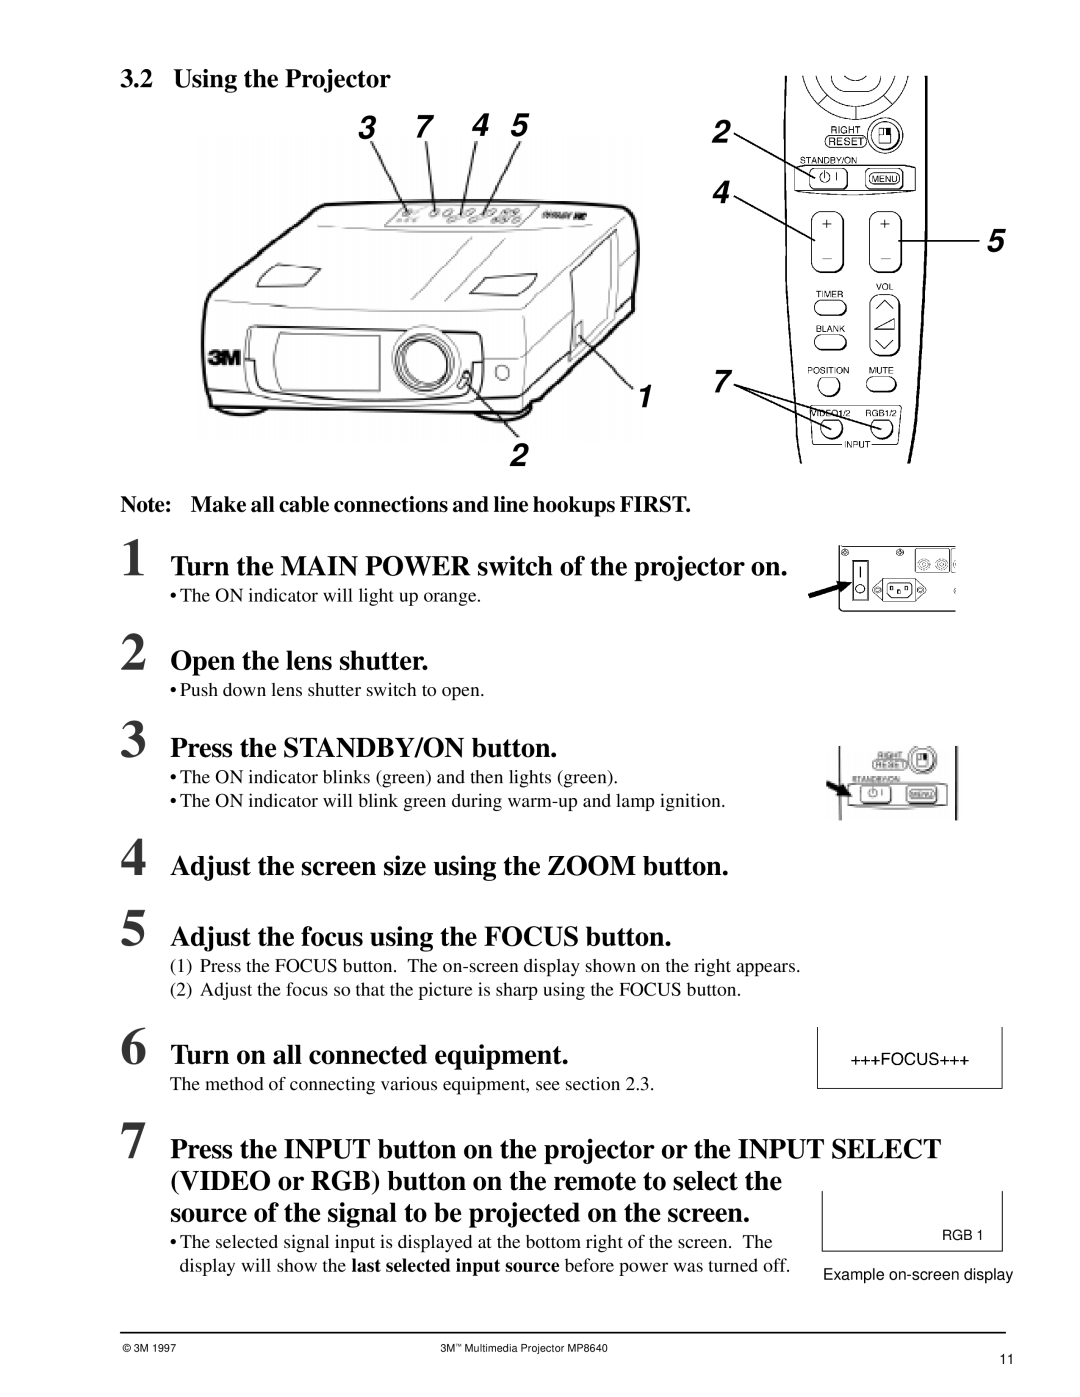
3.2 Using the Projector |
|
|
|
|
3 | 7 | 4 | 5 | 2 |
|
|
|
| 4 |
5
1 7
2
Note: Make all cable connections and line hookups FIRST.
1
2
Turn the MAIN POWER switch of the projector on.
• The ON indicator will light up orange.
Open the lens shutter.
• Push down lens shutter switch to open.
3 Press the STANDBY/ON button.
•The ON indicator blinks (green) and then lights (green).
•The ON indicator will blink green during
4
5
Adjust the screen size using the ZOOM button.
Adjust the focus using the FOCUS button.
(1)Press the FOCUS button. The
(2)Adjust the focus so that the picture is sharp using the FOCUS button.
6 Turn on all connected equipment.
The method of connecting various equipment, see section 2.3.
7 Press the INPUT button on the projector or the INPUT SELECT (VIDEO or RGB) button on the remote to select the
source of the signal to be projected on the screen.
• The selected signal input is displayed at the bottom right of the screen. The | RGB 1 |
|
display will show the last selected input source before power was turned off. | Example |
|
© 3M 1997 | 3M™ Multimedia Projector MP8640 |
11
