Manuals
/
3M
/
Home Audio
/
Home Theater System
3M
warranty
NETWORK menu, 3M Digital Projector X30N/X35N
Models:
X35N
1
51
76
76
Download
76 pages
36.96 Kb
48
49
50
51
52
53
54
55
Troubleshooting
Specification
Install
Selecting an input signal
Password
Regarding the indicator lamps
Connecting your devices
Warranty
Maintenance
Reset
Page 51
Image 51
Page 50
Page 52
Page 51
Image 51
Page 50
Page 52
Contents
Digital Projector X30N/X35N
About this manual
Thank you for purchasing this projector
Trademark acknowledgment
Setting up. . . . . . . . . . . . . . . . . .
Contents
Contents. . . . . . . . . . . . . . . . . . .
Projector features
3M Digital Projector X30N/X35N
Projector features
Checking the contents of package
Preparations
Part names
Projector
3M Digital Projector X30N/X35N
AUDIO IN1 port
Control panel
Rear panel &9,
STANDBY/ON button &15
2COMPUTER button &17
Remote control
11VOLUME - button &14,
13PAGE DOWN button &14 14VOLUME + button &16
Suspended from the ceiling
Setting up
Calculate Screen Size and Projector Distance
On a horizontal surface
bottom
3M Digital Projector X30N/X35N
3M Digital Projector X30N/X35N
Connecting your devices
3M Digital Projector X30N/X35N
Connecting your devices continued
About Plug-and-Playcapability
Connecting your devices continued
3M Digital Projector X30N/X35N
Connecting power supply
Using the security bar and slot
3M Digital Projector X30N/X35N
Holding the hook part of the battery
Remote control
Installing the batteries
About the remote control signal
Changing the frequency of remote control signal
Using as a simple PC mouse & keyboard
3M Digital Projector X30N/X35N
3M Digital Projector X30N/X35N
Power on/off
Turning on the power
Turning off the power
Temporarily muting the sound
Adjusting the volume
Selecting an input signal
Operating
Selecting an input signal continued
Press the MY SOURCE / DOC. CAMERA button on
3M Digital Projector X30N/X35N
Selecting an aspect ratio
Searching an input signal
For a computer signal
For no signal
Adjusting the projectors elevator
Adjusting the zoom and focus
3M Digital Projector X30N/X35N
For a computer signal
Using the automatic adjustment feature
Adjusting the position
For a component video signal
Using the magnify feature
Correcting the keystone distortions
3M Digital Projector X30N/X35N
Temporarily freezing the screen
Temporarily blanking the screen
3M Digital Projector X30N/X35N
3M Digital Projector X30N/X35N
Using the menu function
2. In the EASY MENU
In the ADVANCED MENU
3M Digital Projector X30N/X35N
Using the menu function continued
POSITION button
Indication in OSD On Screen Display
3M Digital Projector X30N/X35N
EASY MENU
ECO MODE
RESET
3M Digital Projector X30N/X35N
Description
3M Digital Projector X30N/X35N
PICTUREmenu
1 HIGH 1 CUSTOM 2 MID
To adjust CUSTOM
3M Digital Projector X30N/X35N
Description
ACTIVE IRIS
3M Digital Projector X30N/X35N
Item
Description
3M Digital Projector X30N/X35N
IMAGEmenu
AUTO ADJUST
H PHASE
For a computer signal
For a video signal and s-videosignal
3M Digital Projector X30N/X35N
INPUTmenu
VIDEO FORMAT
3M Digital Projector X30N/X35N
Item
Description
Description
RESOLUTION
3M Digital Projector X30N/X35N
Item
3M Digital Projector X30N/X35N
SETUP menu
STANDBY MODE
3M Digital Projector X30N/X35N
Description
MIRROR
Description
AUDIO menu
VOLUME
3M Digital Projector X30N/X35N
3M Digital Projector X30N/X35N
SCREEN menu
MyScreen
3M Digital Projector X30N/X35N
Item
Description
MyScreen Lock
3M Digital Projector X30N/X35N
Item
Description
SOURCE NAME
3M Digital Projector X30N/X35N
Item
Description
C.C Closed Caption
3M Digital Projector X30N/X35N
Item
Description
3M Digital Projector X30N/X35N
OPTION menu
AUTO OFF
3M Digital Projector X30N/X35N
Item
Description
Messenger Function of the Network Guide
3M Digital Projector X30N/X35N
Description
MY BUTTON
Item
SERVICE
AUTO ADJUST
3M Digital Projector X30N/X35N
KEY LOCK
SERVICE
3M Digital Projector X30N/X35N
Description
SERVICE
commands.Controlling the external device
via the projector using the NETWORK BRIDGE
SERIAL SETTINGS
Description
SERVICE
BYTES INTERVAL TIMEOUT
3M Digital Projector X30N/X35N
Item
3M Digital Projector X30N/X35N
SERVICE
FACTORY RESET
3M Digital Projector X30N/X35N
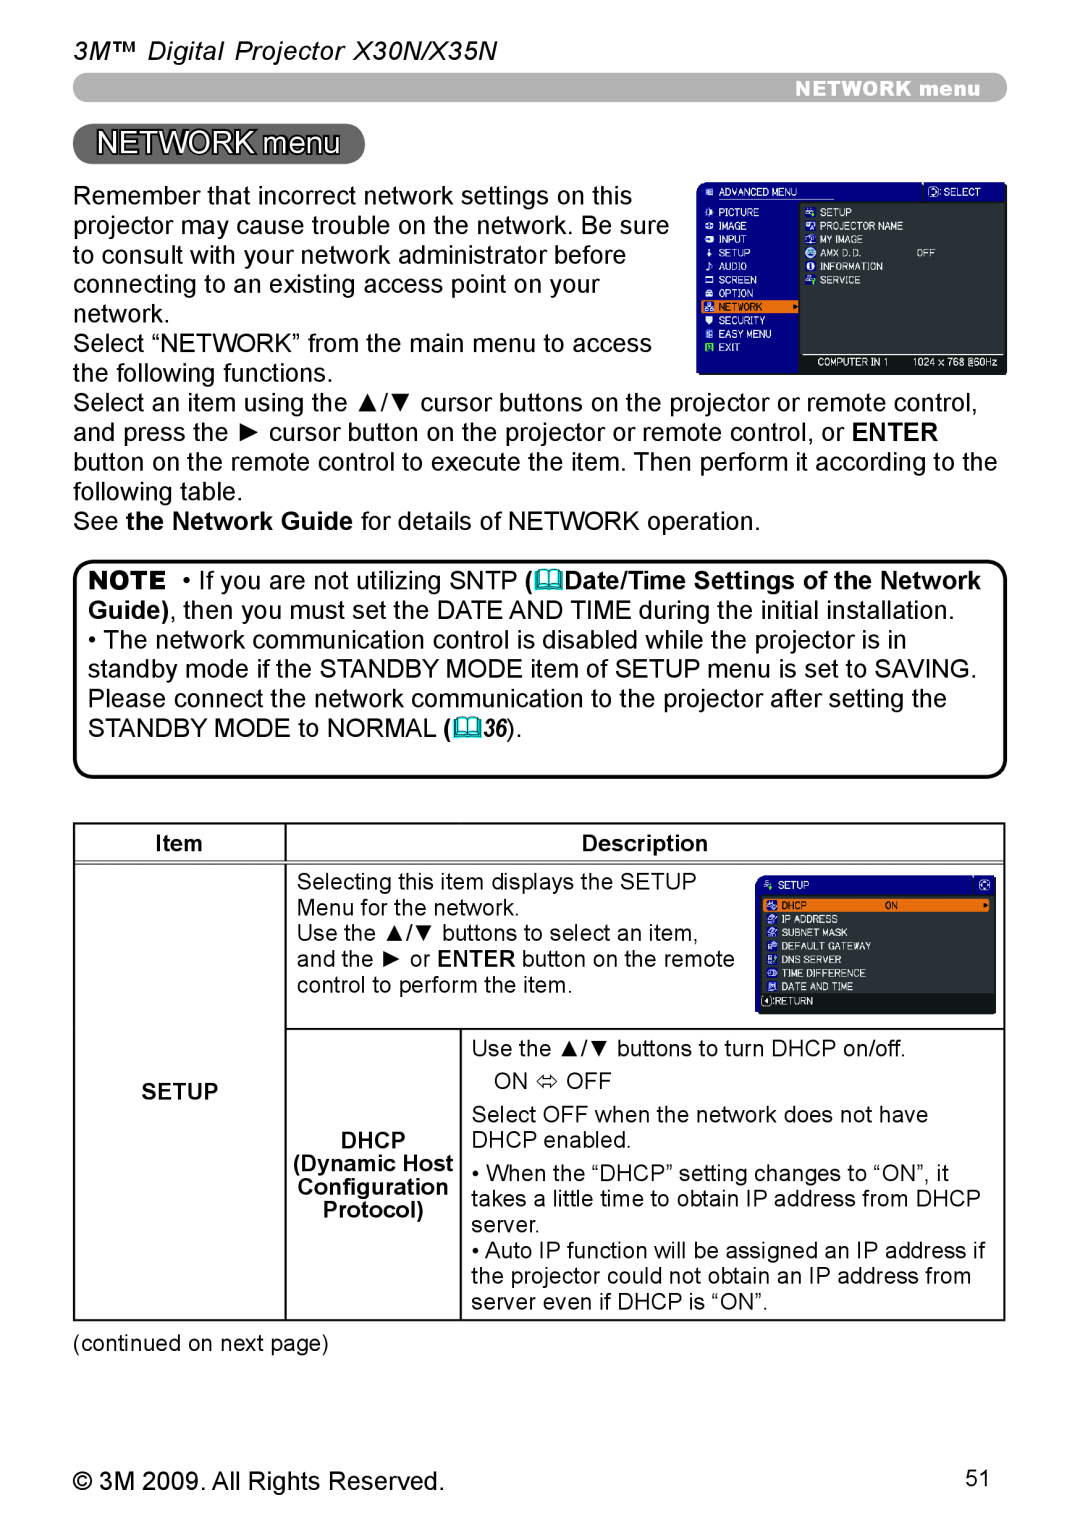
NETWORK menu
Item
SETUP
DEFAULT
3M Digital Projector X30N/X35N
PROJECTOR
3M Digital Projector X30N/X35N
Item
Description
Description
To switch the image displayed
3M Digital Projector X30N/X35N
Item
Description
SERVICE
3M Digital Projector X30N/X35N
Item
PASSWORD
SECURITY menu
Enter the SECURITY menu
If you have forgotten your password
3 If you have forgotten your password
MyScreen PASSWORD
1 Turning on the MyScreen PASSWORD
2 Turning off the MyScreen PASSWORD
PIN LOCK
3M Digital Projector X30N/X35N
Item
Description
Description
3 If you have forgotten your password
3M Digital Projector X30N/X35N
Item
3 If you have forgotten your password
1 Turning on the MY TEXT PASSWORD
MY TEXT PASSWORD
2 Turning off the MY TEXT PASSWORD
MY TEXT
3M Digital Projector X30N/X35N
Item
Description
Replacing the lamp
Maintenance
Replacing the lamp
Type number :
HIGH VOLTAGE
Lamp warning
HIGH PRESSURE
Replacing the lamp continued
Cleaning and replacing the air filter
Type number : 78-8138-1041-9 MU06481Filter set
3M Digital Projector X30N/X35N
3M Digital Projector X30N/X35N
Cleaning and replacing the air filter continued
Replacing the internal clock battery
HITACHI MAXELL, part number CR2032 or CR2032H
3M Digital Projector X30N/X35N
Caring for the lens
Caring for the cabinet and remote control
Other care
Inside of the projector
A note of precaution when cleaning the air filter
Troubleshooting
There is no input signal
An improper signal is input
The projector is warming up
Regarding the indicator lamps
The projector is cooling down. A certain error
The projector is in a standby state
Shutting the projector down
Resetting all settings
Regarding the indicator lamps continued
It is time to clean the air filter
The input changeover settings are mismatched
The electrical power cord is not plugged in
The signal cables are not correctly connected
Signal source does not correctly work
The MUTE function is working
The volume is adjusted to an extremely low level
Color settings are not correctly adjusted
COLOR SPACE setting is not suitable
The ECO MODE function is working
The brightness and/or contrast are adjusted to an
not properly adjusted
extremely low level
Item
Specifications
Specification
Specification
unit: mm
Specifications continued
Specifications
3M Digital Projector X30N/X35N
3M Canada
Warranty
Important Notice
3M Austin Center
Top
Page
Image
Contents