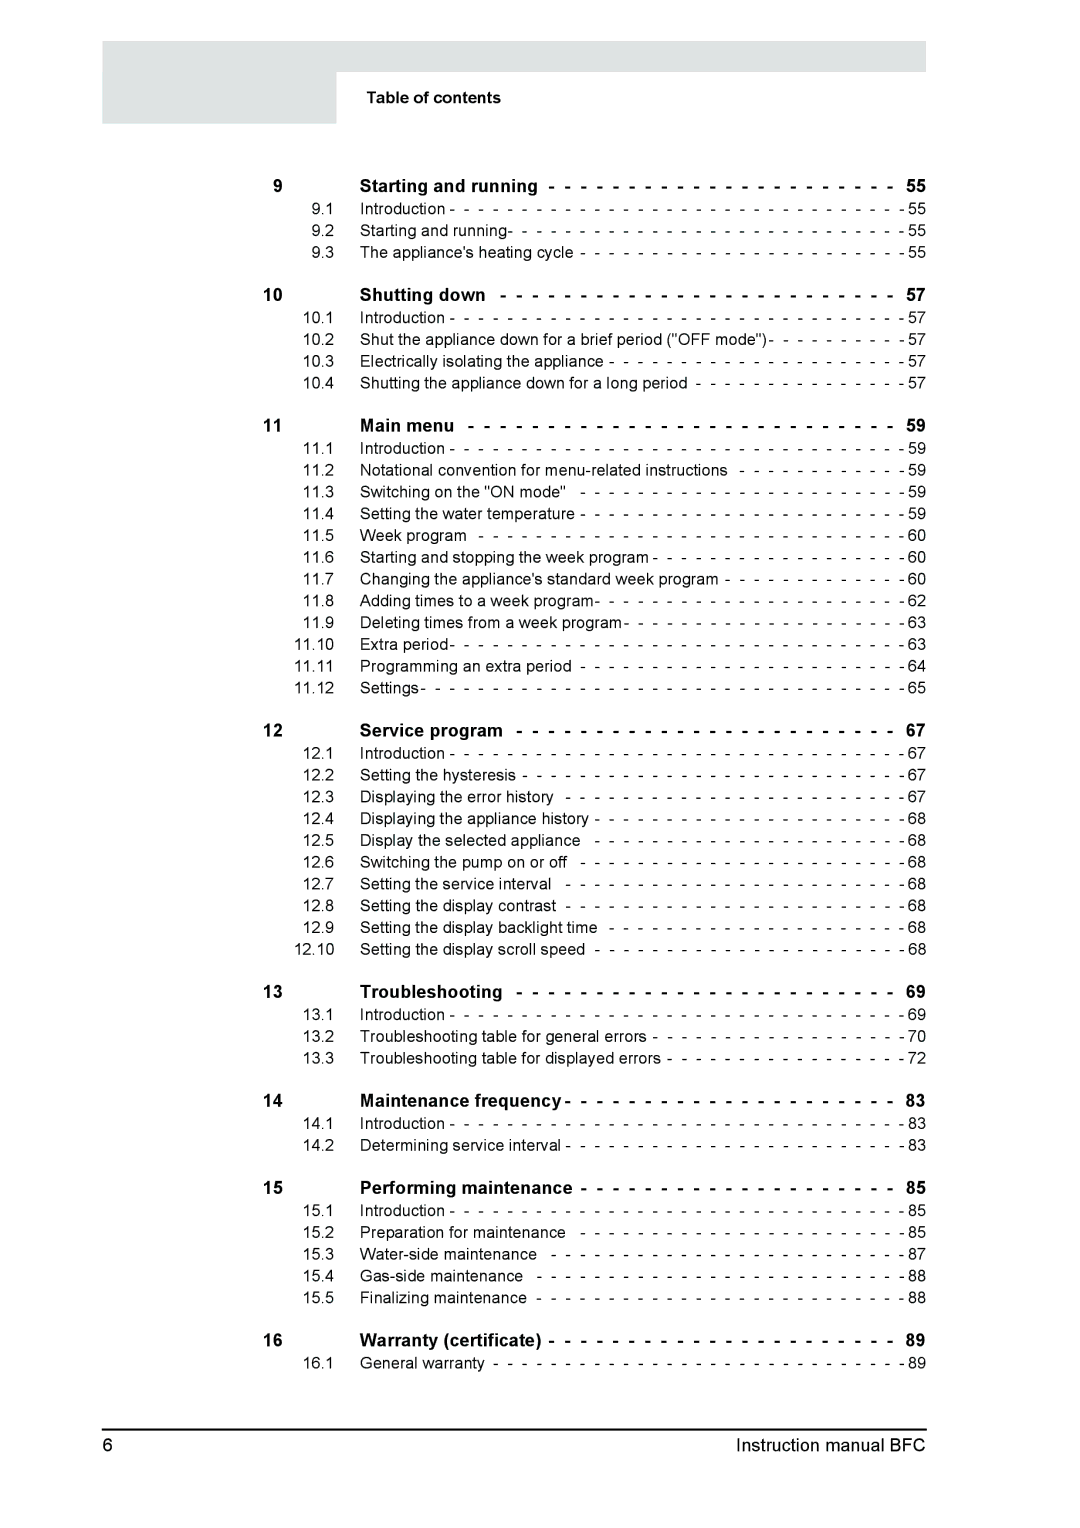
Table of contents

9

Starting and running - -

-

-

-

-


-

-


-

-

-

-

-

-

-


-

-

-

-

-

-

-

55

9.1

Introduction - - - - -

-

- - -

-

-

-

-

-


-

-

-

-

-

-

-

-

-

-

-

-

-

-

-

-

-

- 55

9.2

Starting and running-

-

- - -

- - -

-

-

-

-

-

-

-

-

-

-

-

-

-

-

-

-

-

-

-

- 55

9.3

The appliance's heating cycle -

-

-

-

-

-

-

-

-

-

-

-

-

-

-

-

-

-

-

-

-

-

- 55

10

Shutting down

-

-

-

-

-

-

-

-

-

-

-

-

-

-

-

-

-

-

-

-

-

-

-

-

-

57

10.1

Introduction - - -

-

-

- -

-

-

-

-

-

-

-

-

- -

-

-

-

-

-

-

- -

-

-

-

-

-

-

- 57

10.2Shut the appliance down for a brief period ("OFF mode")- - - - - - - - - - 57

10.3

Electrically isolating the appliance - - - - - - -

-

-

-

-

-

-

-

-

-

-

-

-

-

- 57

10.4

Shutting the appliance down for a long period -

-

-

-

-

-

-

-

-

-

-

-

-

-

- 57

11

Main menu

- -

-

-

-

-

-

-

-

-

-

-

-

-

-

-

-

-

-

-

-

-

-

-

-

-

-

59

11.1

Introduction -

- - -

-

-

-

-

-

-

-

-

-

-

-

- -

-

-

-

-

-

-

- -

-

-

-

-

-

-

- 59

11.2Notational convention for menu-related instructions - - - - - - - - - - - - 59

11.3

Switching on the "ON mode" - - - - - -

-

-

-

-

-

-

-

-

-

-

-

-

-

-

-

-

- 59

11.4

Setting the water temperature - - - - - -

-

-

-

-

-

-

-

-

-

-

-

-

-

-

-

-

- 59

11.5

Week program - - - - - - - - - - - - -

-

-

-

-

-

-

-

-

-

-

-

-

-

-

-

-

- 60

11.6

Starting and stopping the week program -

-

-

-

-

-

-

-

-

-

-

-

-

-

-

-

-

- 60

11.7Changing the appliance's standard week program - - - - - - - - - - - - - 60

11.8 Adding times to a week program- - - - - - - - - - - - - - - - - - - - - - 62

11.9Deleting times from a week program- - - - - - - - - - - - - - - - - - - - 63

11.10

Extra period-

-

-

-

-

-

-

-

-

- - - - - - - - - - - -

-

-

-

-

-

-

-

-

-

-

- 63

11.11

Programming an extra period

-

-

-

-

-

-

-

-

-

-

-

-

-

-

-

-

-

-

-

-

-

-

- 64

11.12

Settings- - -

-

-

-

-

-

-

-

-


-

-

-

-

-

-

-

-

-

-

-

-

-

-

-

-

-

-

-

-

-

-

- 65

12

Service program - - -

-

-

-

-

-


- -


-

-

-

-

-

-

-


- -


-

-

-

-

-

67

12.1

Introduction - - - - - - - - - - -

-

-

-

-

-

-

-

-

-

-

-

-

-

-

-

-

-

-

-

-

- 67

12.2

Setting the hysteresis - - -

-

-

-

-

-

-

-

-

-

-

-

-

-

-

-

-

-

-

-

-

-

-

-

- 67

12.3

Displaying the error history

-

-

-

-

-

-

-

-

-

-

-

-

-

-

-

-

-

-

-

-

-

-

-

- 67

12.4

Displaying the appliance history -

-

-

-

-

-

-

-

-

-

-

-

-

-

-

-

-

-

-

-

-

- 68

12.5

Display the selected appliance

-

-

-

-

-

-

-

-

-

-

-

-

-

-

-

-

-

-

-

-

-

- 68

12.6

Switching the pump on or off

-

-

-

-

-

-

-

-

-

-

-

-

-

-

-

-

-

-

-

-

-

-

- 68

12.7

Setting the service interval

-

-

-

-

-

-

-

-

-

-

-

-

-

-

-

-

-

-

-

-

-

-

-

- 68

12.8

Setting the display contrast

-

-

-

-

-

-

-

-

-

-

-

-

-

-

-

-

-

-

-

-

-

-

-

- 68

12.9

Setting the display backlight time

-

-

-

-

-

-

-

-

-

-

-

-

-

-

-

-

-

-

-

-

- 68

12.10

Setting the display scroll speed

-

-

-

-

-

-

-

-

-

-

-

-

-

-

-

-

-

-

-

-

-

- 68

13

Troubleshooting - - - - - - - - - - - - - - - - - - - - - - - - 69

13.1

Introduction - - - - - - - - - - - - - - - - - - - -

-

-

-

- - - - - - -

-

- 69

13.2

Troubleshooting table for general errors - - - - - - - - - - - - - - - - - - 70

13.3

Troubleshooting table for displayed errors - - - - -

-

-

-

- - - - - - -

-

- 72

14

Maintenance frequency -

-

-

-

-

-

-


-

-

-

-

-

-

-


-

-

-

-

-

-

-

83

14.1

Introduction - - - - - - -

- -

-

-

-

-

-

-

-

-

-

-

-

-

-

-

-

-

-

-

-

-

-

-

- 83

14.2

Determining service interval -

- -

-

-

-

- -

- - -

- -

- -

-

- -

- -

- - - - 83

15

Performing maintenance - - - - - - - - - - - - - - - - - - - -

85

15.1

Introduction - - - - - - -

- -

-

-

-

-

-

-

-

-

-

-

-

-

-

-

-

-

-

-

-

-

-

-

- 85

15.2

Preparation for maintenance

-

-

-

-

-

-

-

-

-

-

-

-

-

-

-

-

-

-

-

-

-

-

- 85

15.3

Water-side maintenance

-

-

-

-

-

-

-

-

-

-

-

-

-

-

-

-

-

-

-

-

-

-

-

-

- 87

15.4

Gas-side maintenance

-

-

-

-

-

-

-

-

-

-

-

-

-

-

-

-

-

-

-

-

-

-

-

-

-

- 88

15.5

Finalizing maintenance

-

-

-

-

-

-

-

-

-

-

-

-

-

-

-

-

-

-

-

-

-

-

-

-

-

- 88

16

Warranty (certificate) -

-

-

-

-

-

-

-


-

-

-

-

-

-

-


-

-

-

-

-

-

-

89

16.1

General warranty - - -

-

-

-

-

-

-

-

-

-

-

-

-

-

-

-

-

-

-

-

-

-

-

-

-

-

- 89

6

Instruction manual BFC

Page 6
Image 6
A.O. Smith BFC - 60 Starting and running, Shutting down, Main menu, Service program, Troubleshooting, Warranty certificate

BFC - 30, BFC - 60 specifications

A.O. Smith is a well-regarded name in the water heating industry, known for producing innovative and efficient water heaters. Among their renowned products are the BFC - 60 and BFC - 30 models, which have gained popularity for their performance and reliability.

The A.O. Smith BFC - 60 and BFC - 30 are both designed to meet the diverse needs of residential and commercial users. The BFC - 60 has a capacity of 60 gallons, making it ideal for larger households or commercial settings where hot water demand is high. Meanwhile, the BFC - 30, with its 30-gallon capacity, caters to smaller households or establishments with lower hot water requirements.

One of the standout features of both models is their advanced heating technology. They are equipped with a high-efficiency burner system, which enhances the heating process while minimizing energy consumption. This means that users experience quicker recovery times and can enjoy a steady supply of hot water without the long wait associated with traditional heaters. The BFC series is designed to save energy, aligning with modern demands for sustainability.

Another significant characteristic of these models is their durable construction. Made with high-quality materials, including glass-lined tanks, they are built to resist corrosion and extend the lifespan of the water heater. This durability contributes to fewer maintenance requirements, giving users peace of mind.

In terms of safety, A.O. Smith has incorporated numerous features into the BFC series. Both models come with safety valves and thermostat controls to ensure that water is heated to appropriate temperatures, reducing the risk of scalding and malfunction. Additionally, their design allows for easy installation and maintenance, making them a user-friendly option.

Another aspect that distinguishes the BFC series is its compact design. Both models have a space-saving profile, making them suitable for installation in various locations, including tight utility rooms or basements. This flexibility allows homeowners and businesses to maximize their space without sacrificing performance.

Overall, the A.O. Smith BFC - 60 and BFC - 30 are exemplary water heating solutions that combine efficiency, durability, and safety. With their advanced features and technologies, they are an excellent choice for anyone in need of reliable hot water, ensuring comfort and satisfaction for years to come.