Removing the ODD Module(1)
1.See “Removing the Battery” on page 52.
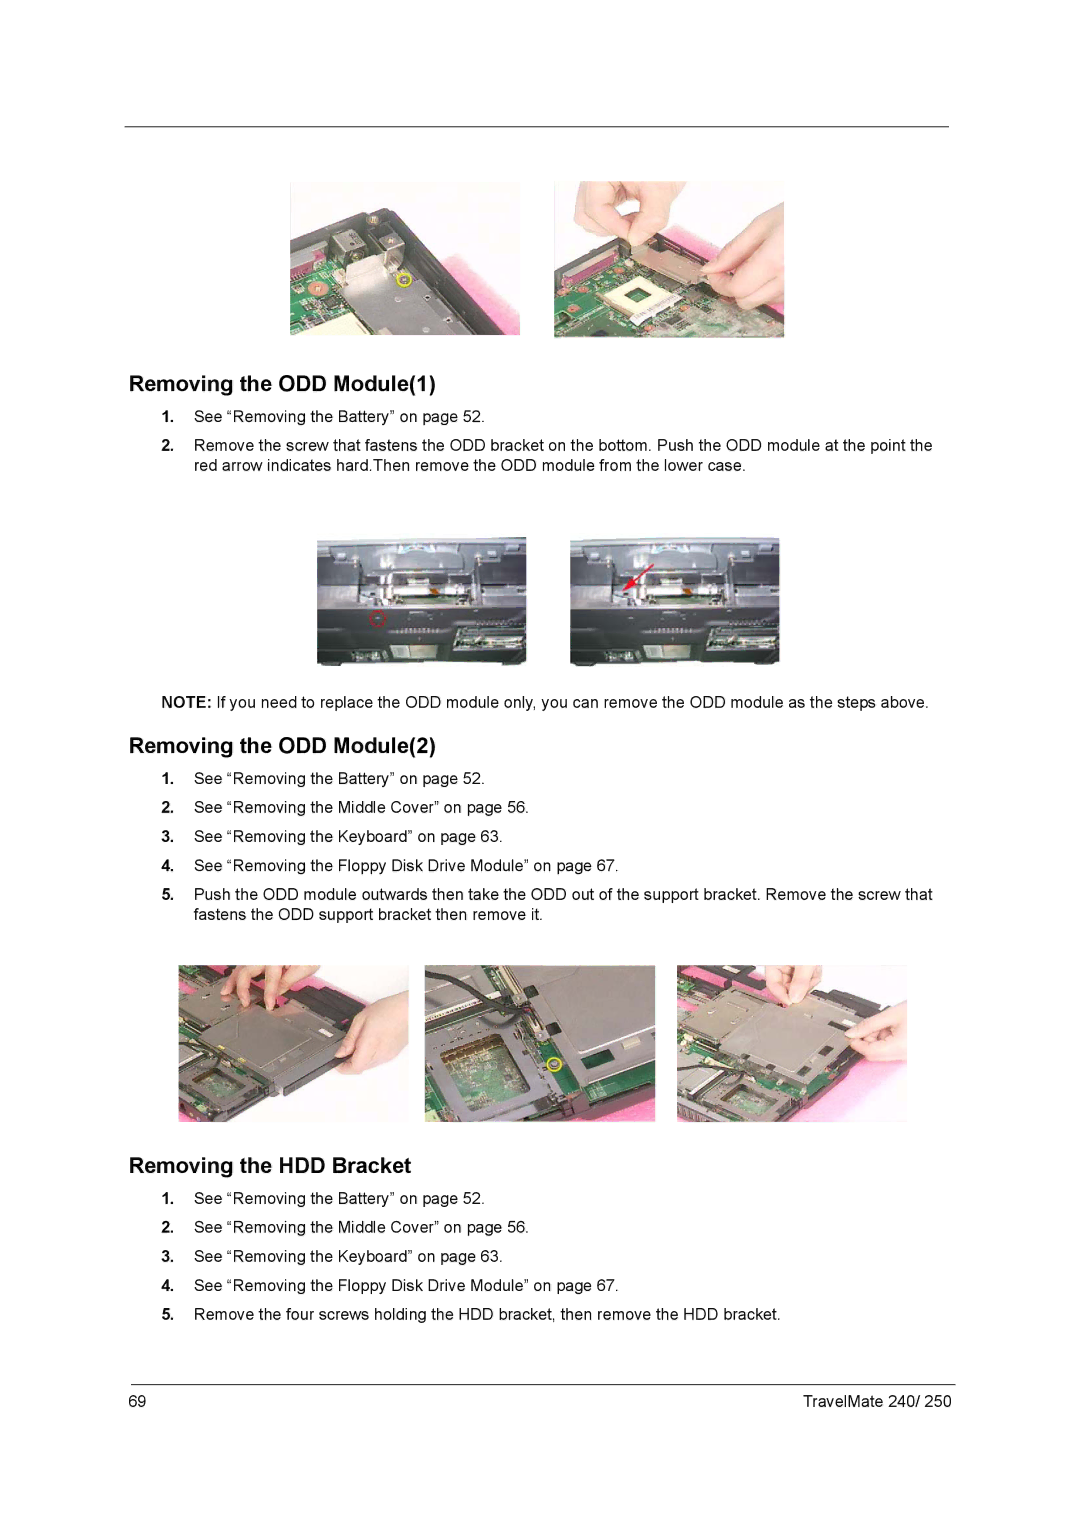
2.Remove the screw that fastens the ODD bracket on the bottom. Push the ODD module at the point the red arrow indicates hard.Then remove the ODD module from the lower case.
NOTE: If you need to replace the ODD module only, you can remove the ODD module as the steps above.
Removing the ODD Module(2)
1.See “Removing the Battery” on page 52.
2.See “Removing the Middle Cover” on page 56.
3.See “Removing the Keyboard” on page 63.
4.See “Removing the Floppy Disk Drive Module” on page 67.
5.Push the ODD module outwards then take the ODD out of the support bracket. Remove the screw that fastens the ODD support bracket then remove it.
Removing the HDD Bracket
1.See “Removing the Battery” on page 52.
2.See “Removing the Middle Cover” on page 56.
3.See “Removing the Keyboard” on page 63.
4.See “Removing the Floppy Disk Drive Module” on page 67.
5.Remove the four screws holding the HDD bracket, then remove the HDD bracket.
69 | TravelMate 240/ 250 |