Installation and connection instructions
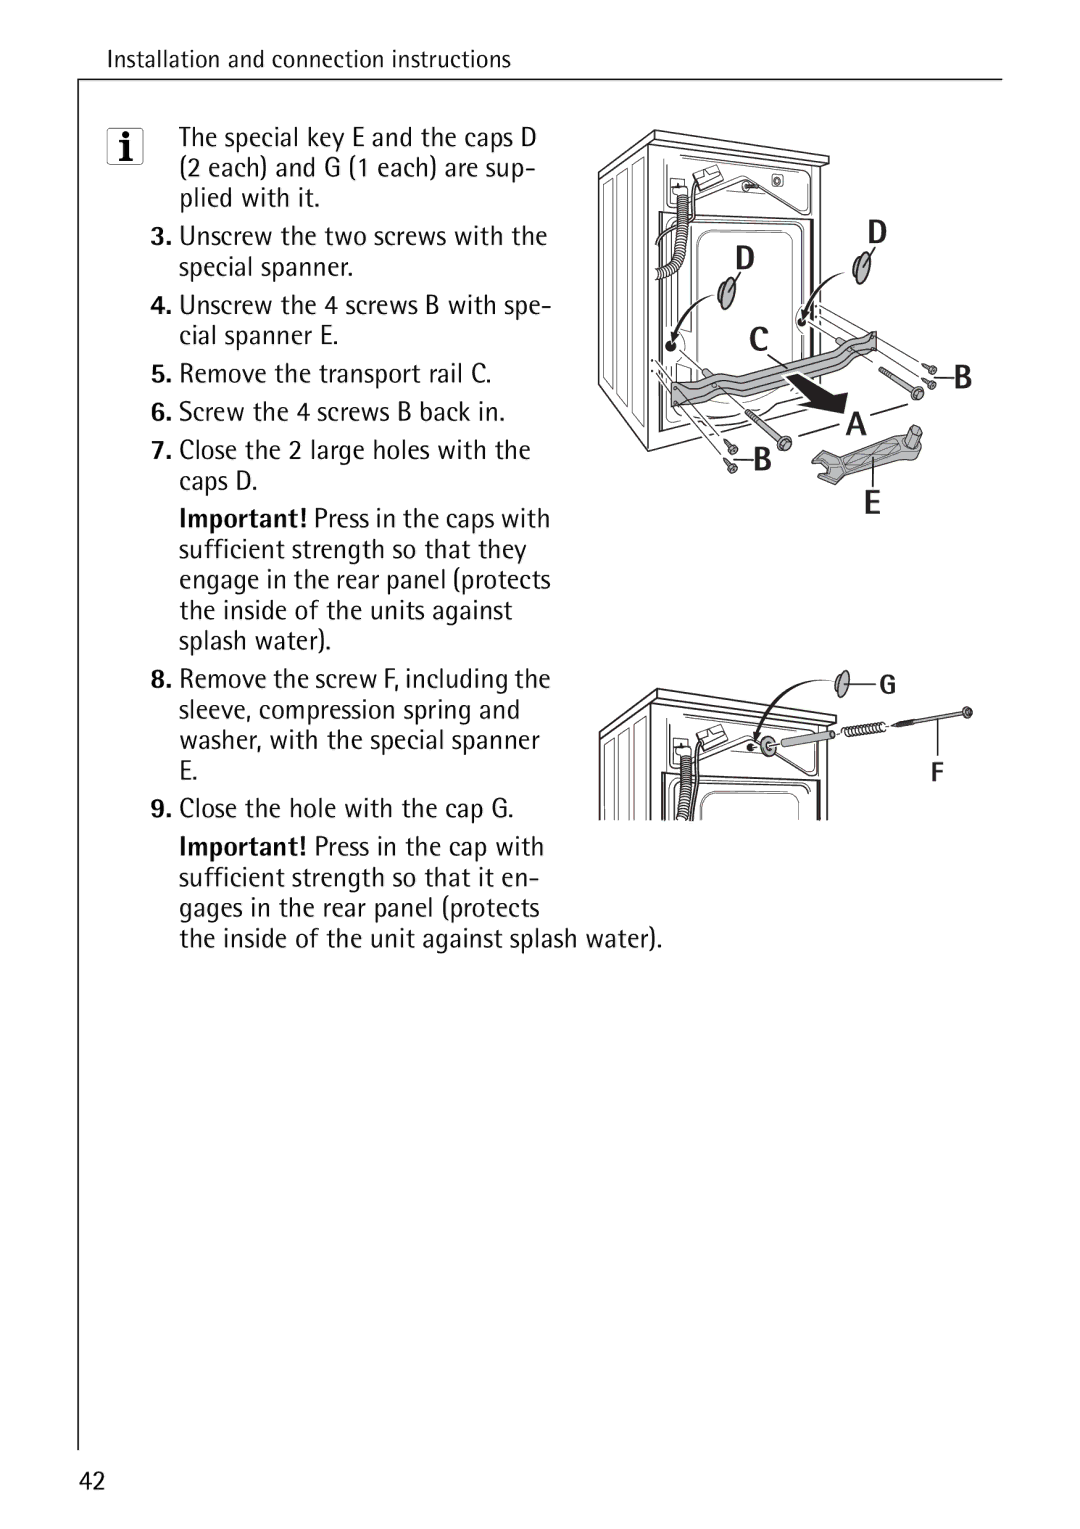
3 | The special key E and the caps D |
| (2 each) and G (1 each) are sup- |
plied with it.
3. Unscrew the two screws with the special spanner.
4. Unscrew the 4 screws B with spe- cial spanner E.
5. Remove the transport rail C. 6. Screw the 4 screws B back in.
7. Close the 2 large holes with the caps D.
Important! Press in the caps with sufficient strength so that they engage in the rear panel (protects the inside of the units against splash water).
8. Remove the screw F, including the sleeve, compression spring and washer, with the special spanner E.
9. Close the hole with the cap G.
Important! Press in the cap with sufficient strength so that it en- gages in the rear panel (protects
the inside of the unit against splash water).
42
