10Click Close.
You return to the Configure Buttons window.
11Select My Scan Image to File (autoselect) from the
12Click OK.
Pushing the
#Note: For low quality originals (originals that are too bright or too dark), we advice you to select the PhotoGenie checkbox, which will enhance the colors.
Creating a New Configuration (SnapScan e50)
It is possible to create a new configuration and assign it to one of the four buttons of your SnapScan e50. The following example will show you how this is done.
In this example we will create a new configuration and assign it to the
1Open the Agfa ScanWise software.
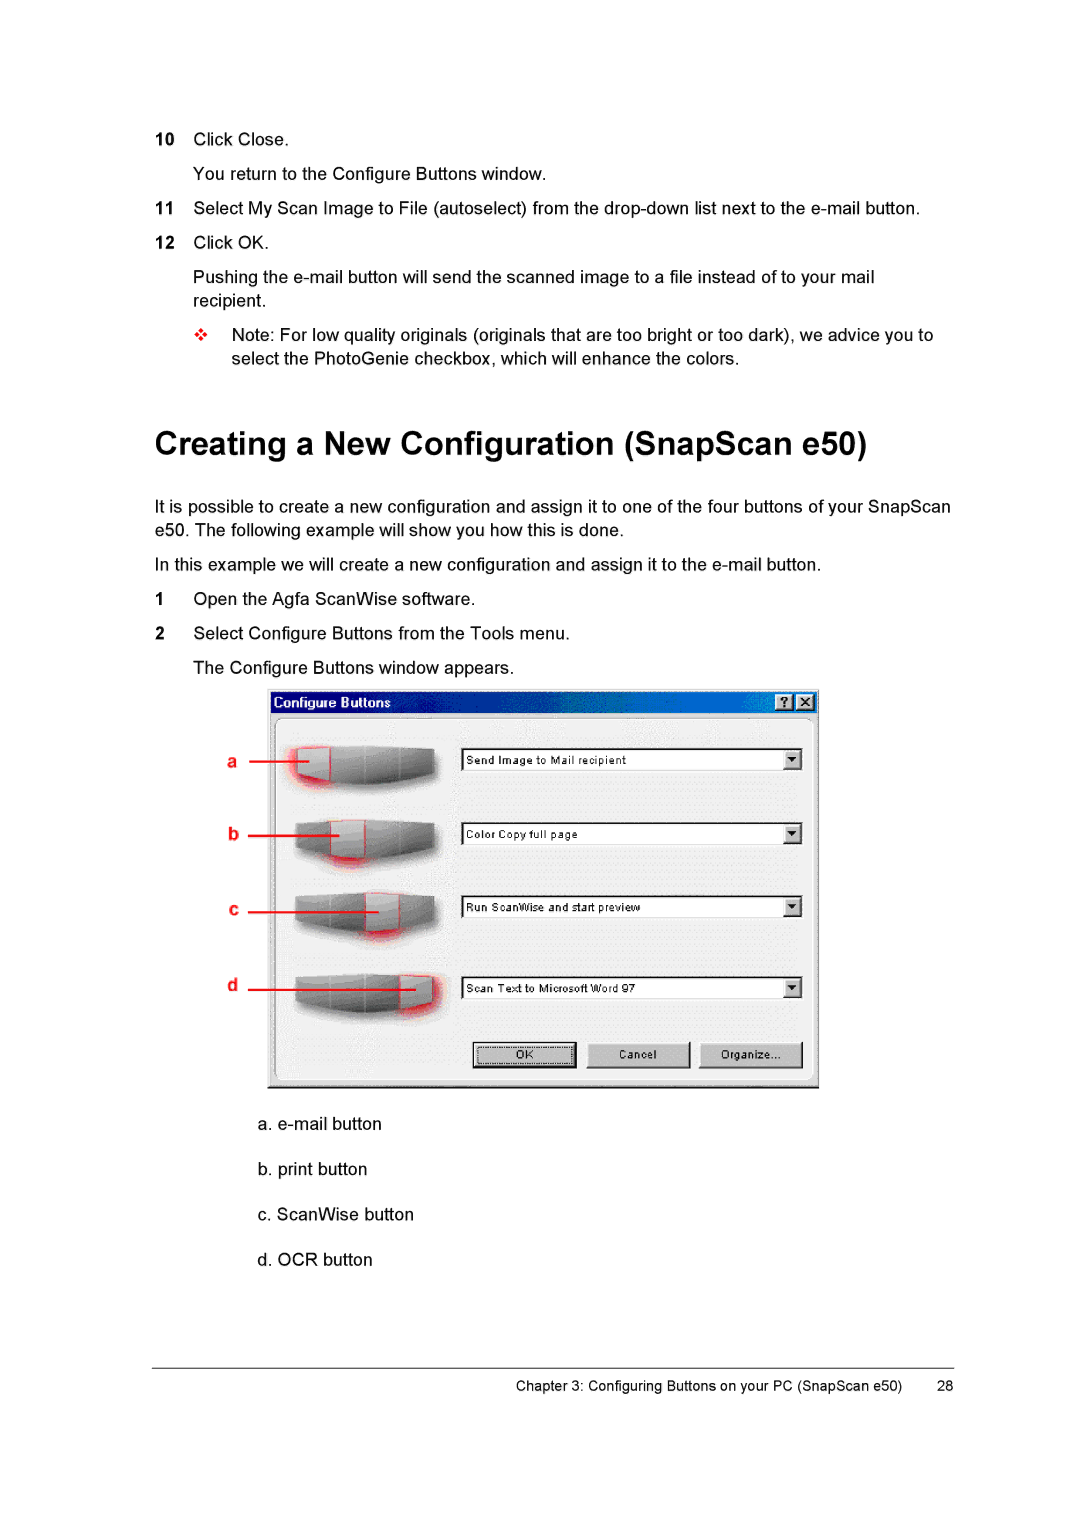
2Select Configure Buttons from the Tools menu. The Configure Buttons window appears.
a.
b.print button
c.ScanWise button
d.OCR button
Chapter 3: Configuring Buttons on your PC (SnapScan e50) | 28 |