ENGLISH
24.Place the screen down into the hopper, sliding the edge of the screen under one of the clips. Slightly bow the screen to slide the opposite side of the screen under the other clip. See figure 14.
CLIP SCREEN
27.For most vehicles, assemble the hitch extension bracket to the holes in the hitch tube shown at the top of figure 16.Use two 1/4" x
(B) 1/4" x
CLIPS
FIGURE 14
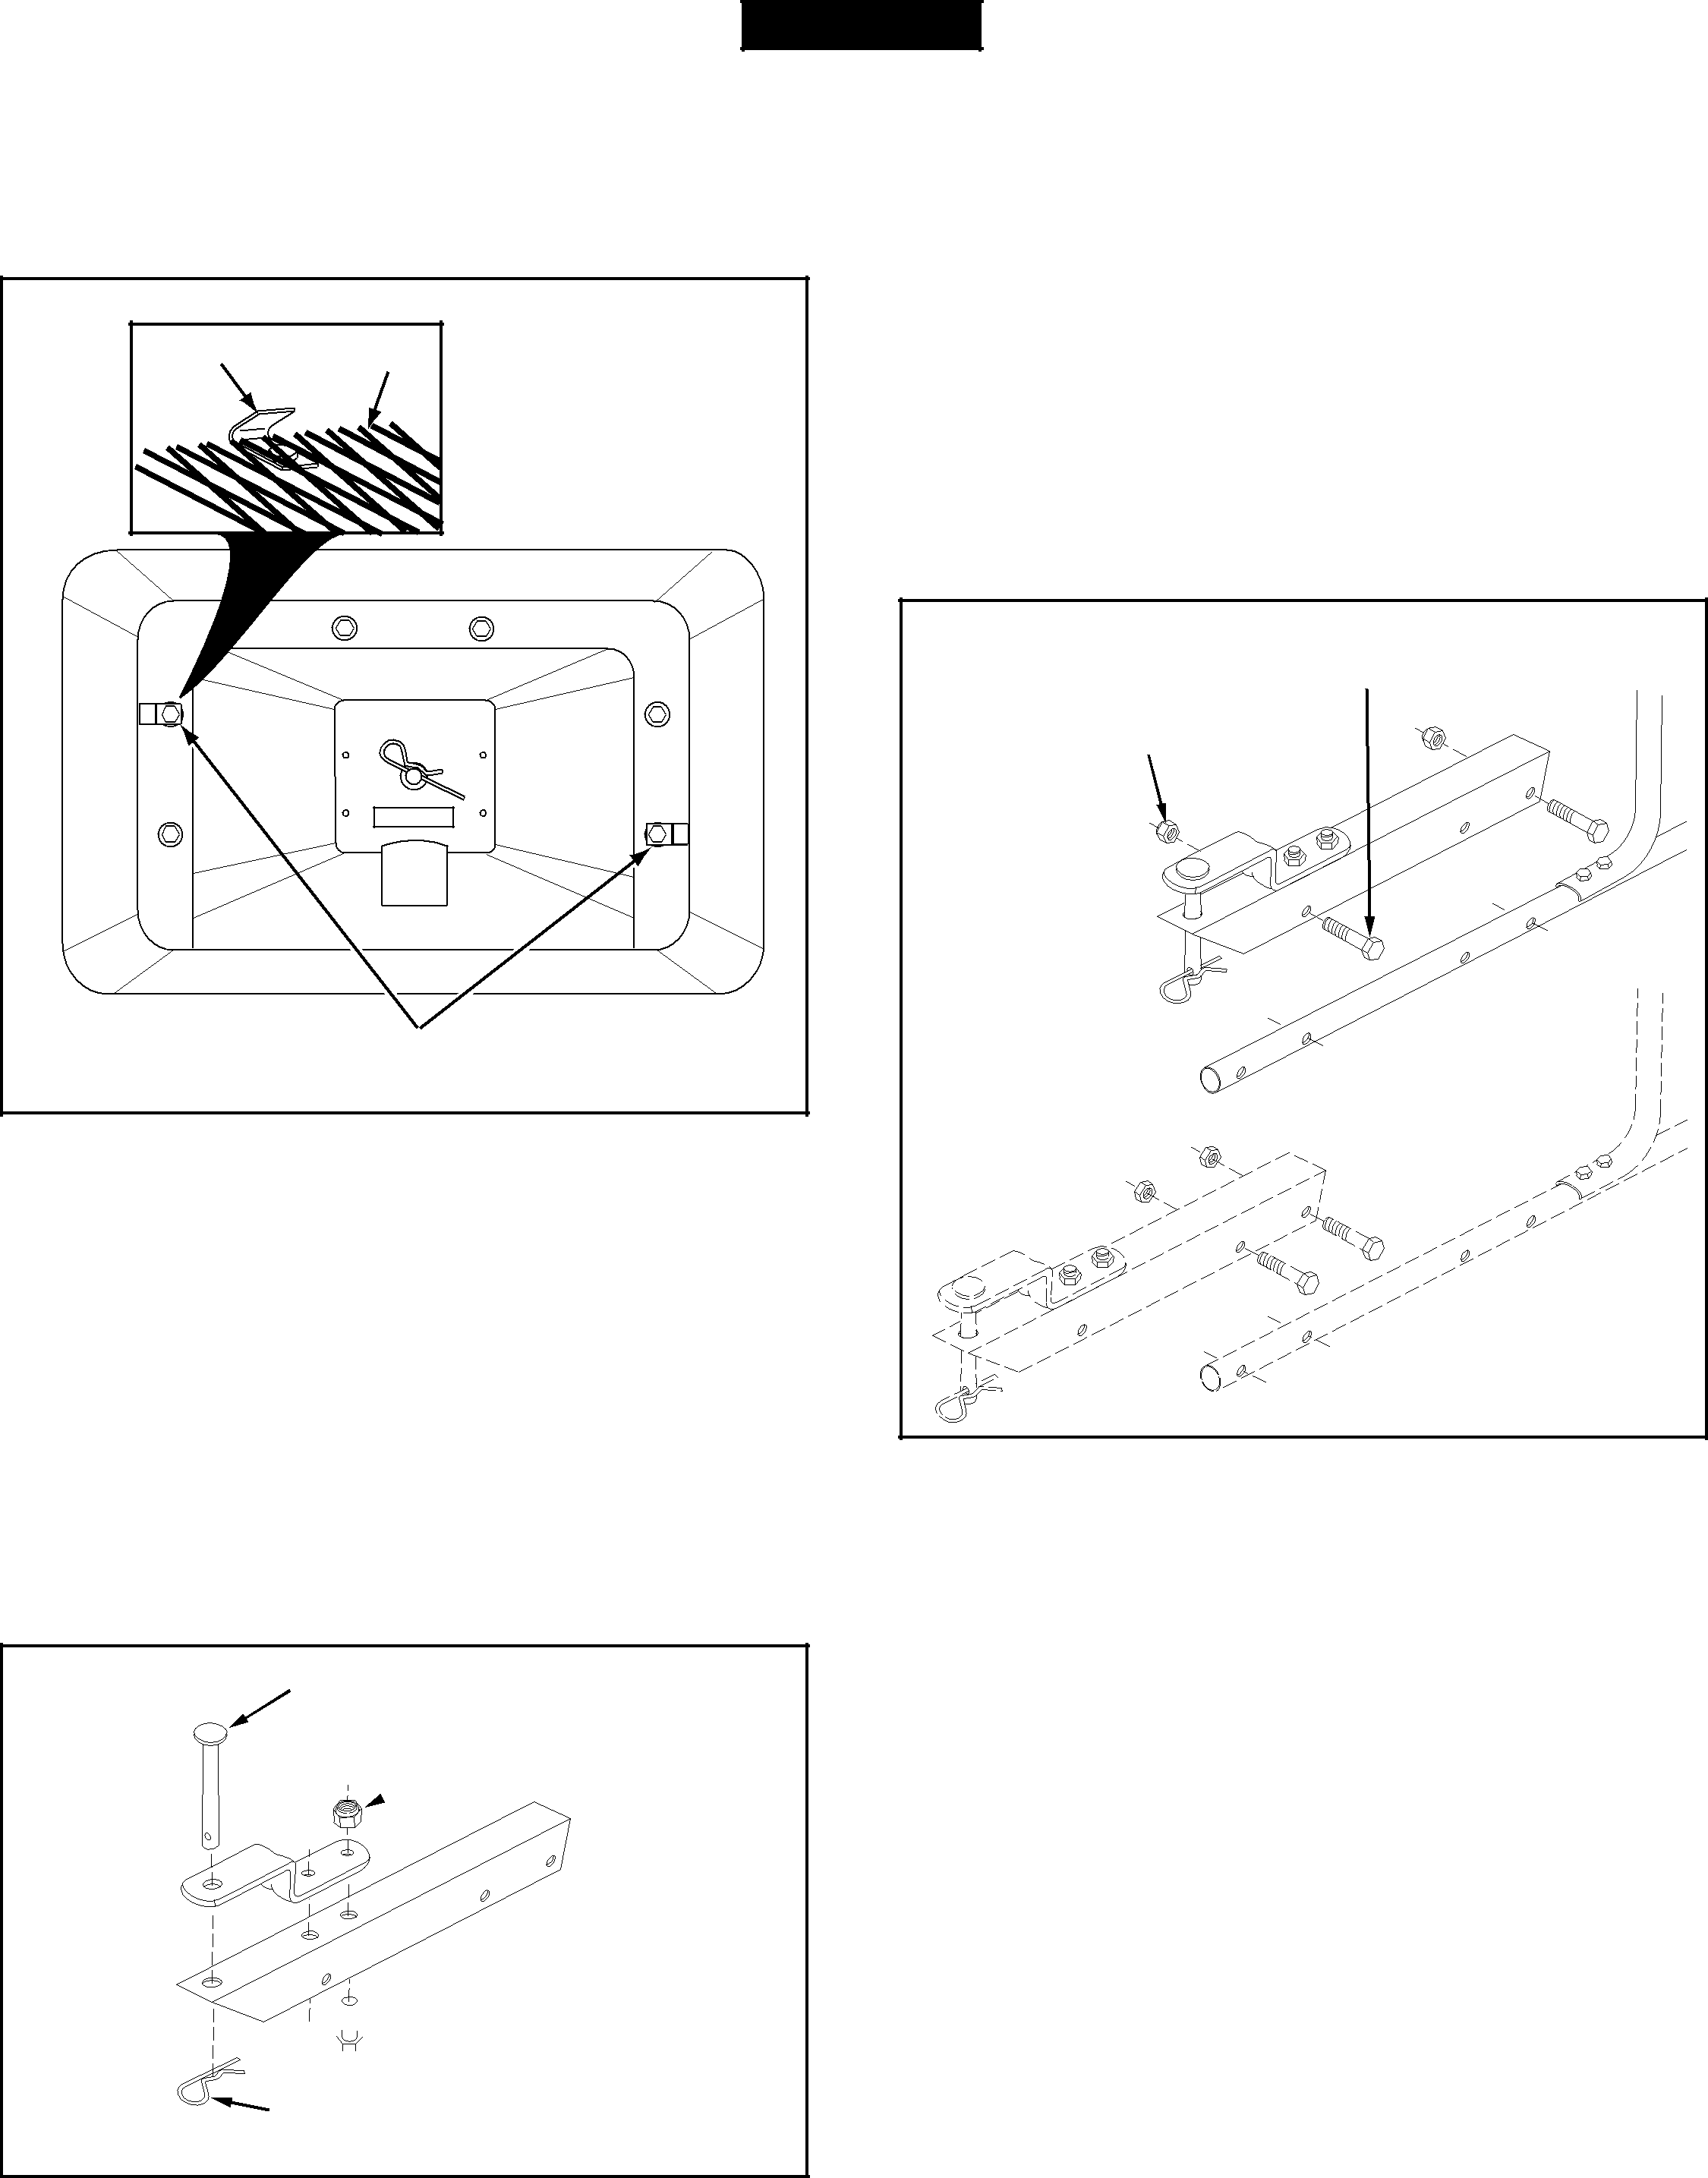
25.Assemble the hitch bracket to the hitch extension bracket using two 3/8" x 3/4" hex bolts (C) and 3/8" nylock hex nuts (H). Insert the bolts from the bottom. See figure
15.
26.Assemble the hitch pin (O) through the hitch bracket and the hitch extension bracket and secure with the hair cotter pin (N). See figure 15.
(O) HITCH PIN
(H) 3/8" NYLOCK  HEX NUT
(C) 3/8" x 3/4"

 HEX BOLT
(N) 1/8" HAIR
COTTER PIN
FIGURE 15
(F) 1/4" NYLOCK
HEX NUT
FIGURE 16
HEX BOLT
9