ENGLISH
| CONTENTS |
|
SAFETY........................................................................... | 4 |
ASSEMBLY...................................................................... | 5 |
OPERATION.................................................................. | 11 |
MAINTENANCE............................................................. | 11 |
STORAGE...................................................................... | 12 |
SERVICE AND ADJUSTMENTS................................... | 12 |
TROUBLESHOOTING................................................... | 12 |
REPAIR PARTS.............................................................. | 22 |
| ASSEMBLY |
|
TOOLS REQUIRED FOR ASSEMBLY
(1)Knife or Scissors
(2)1/2" Open End or Box End Wrenches
All loose parts are shown on page 2. Fasteners in the parts bag are shown full size on page 3.
Remove the hardware pack and all loose parts from the carton and verify that all the parts and fasteners shown on pages 2 and 3 are included.
2.Cut off the plastic tie that holds the height adjustment tube in place.
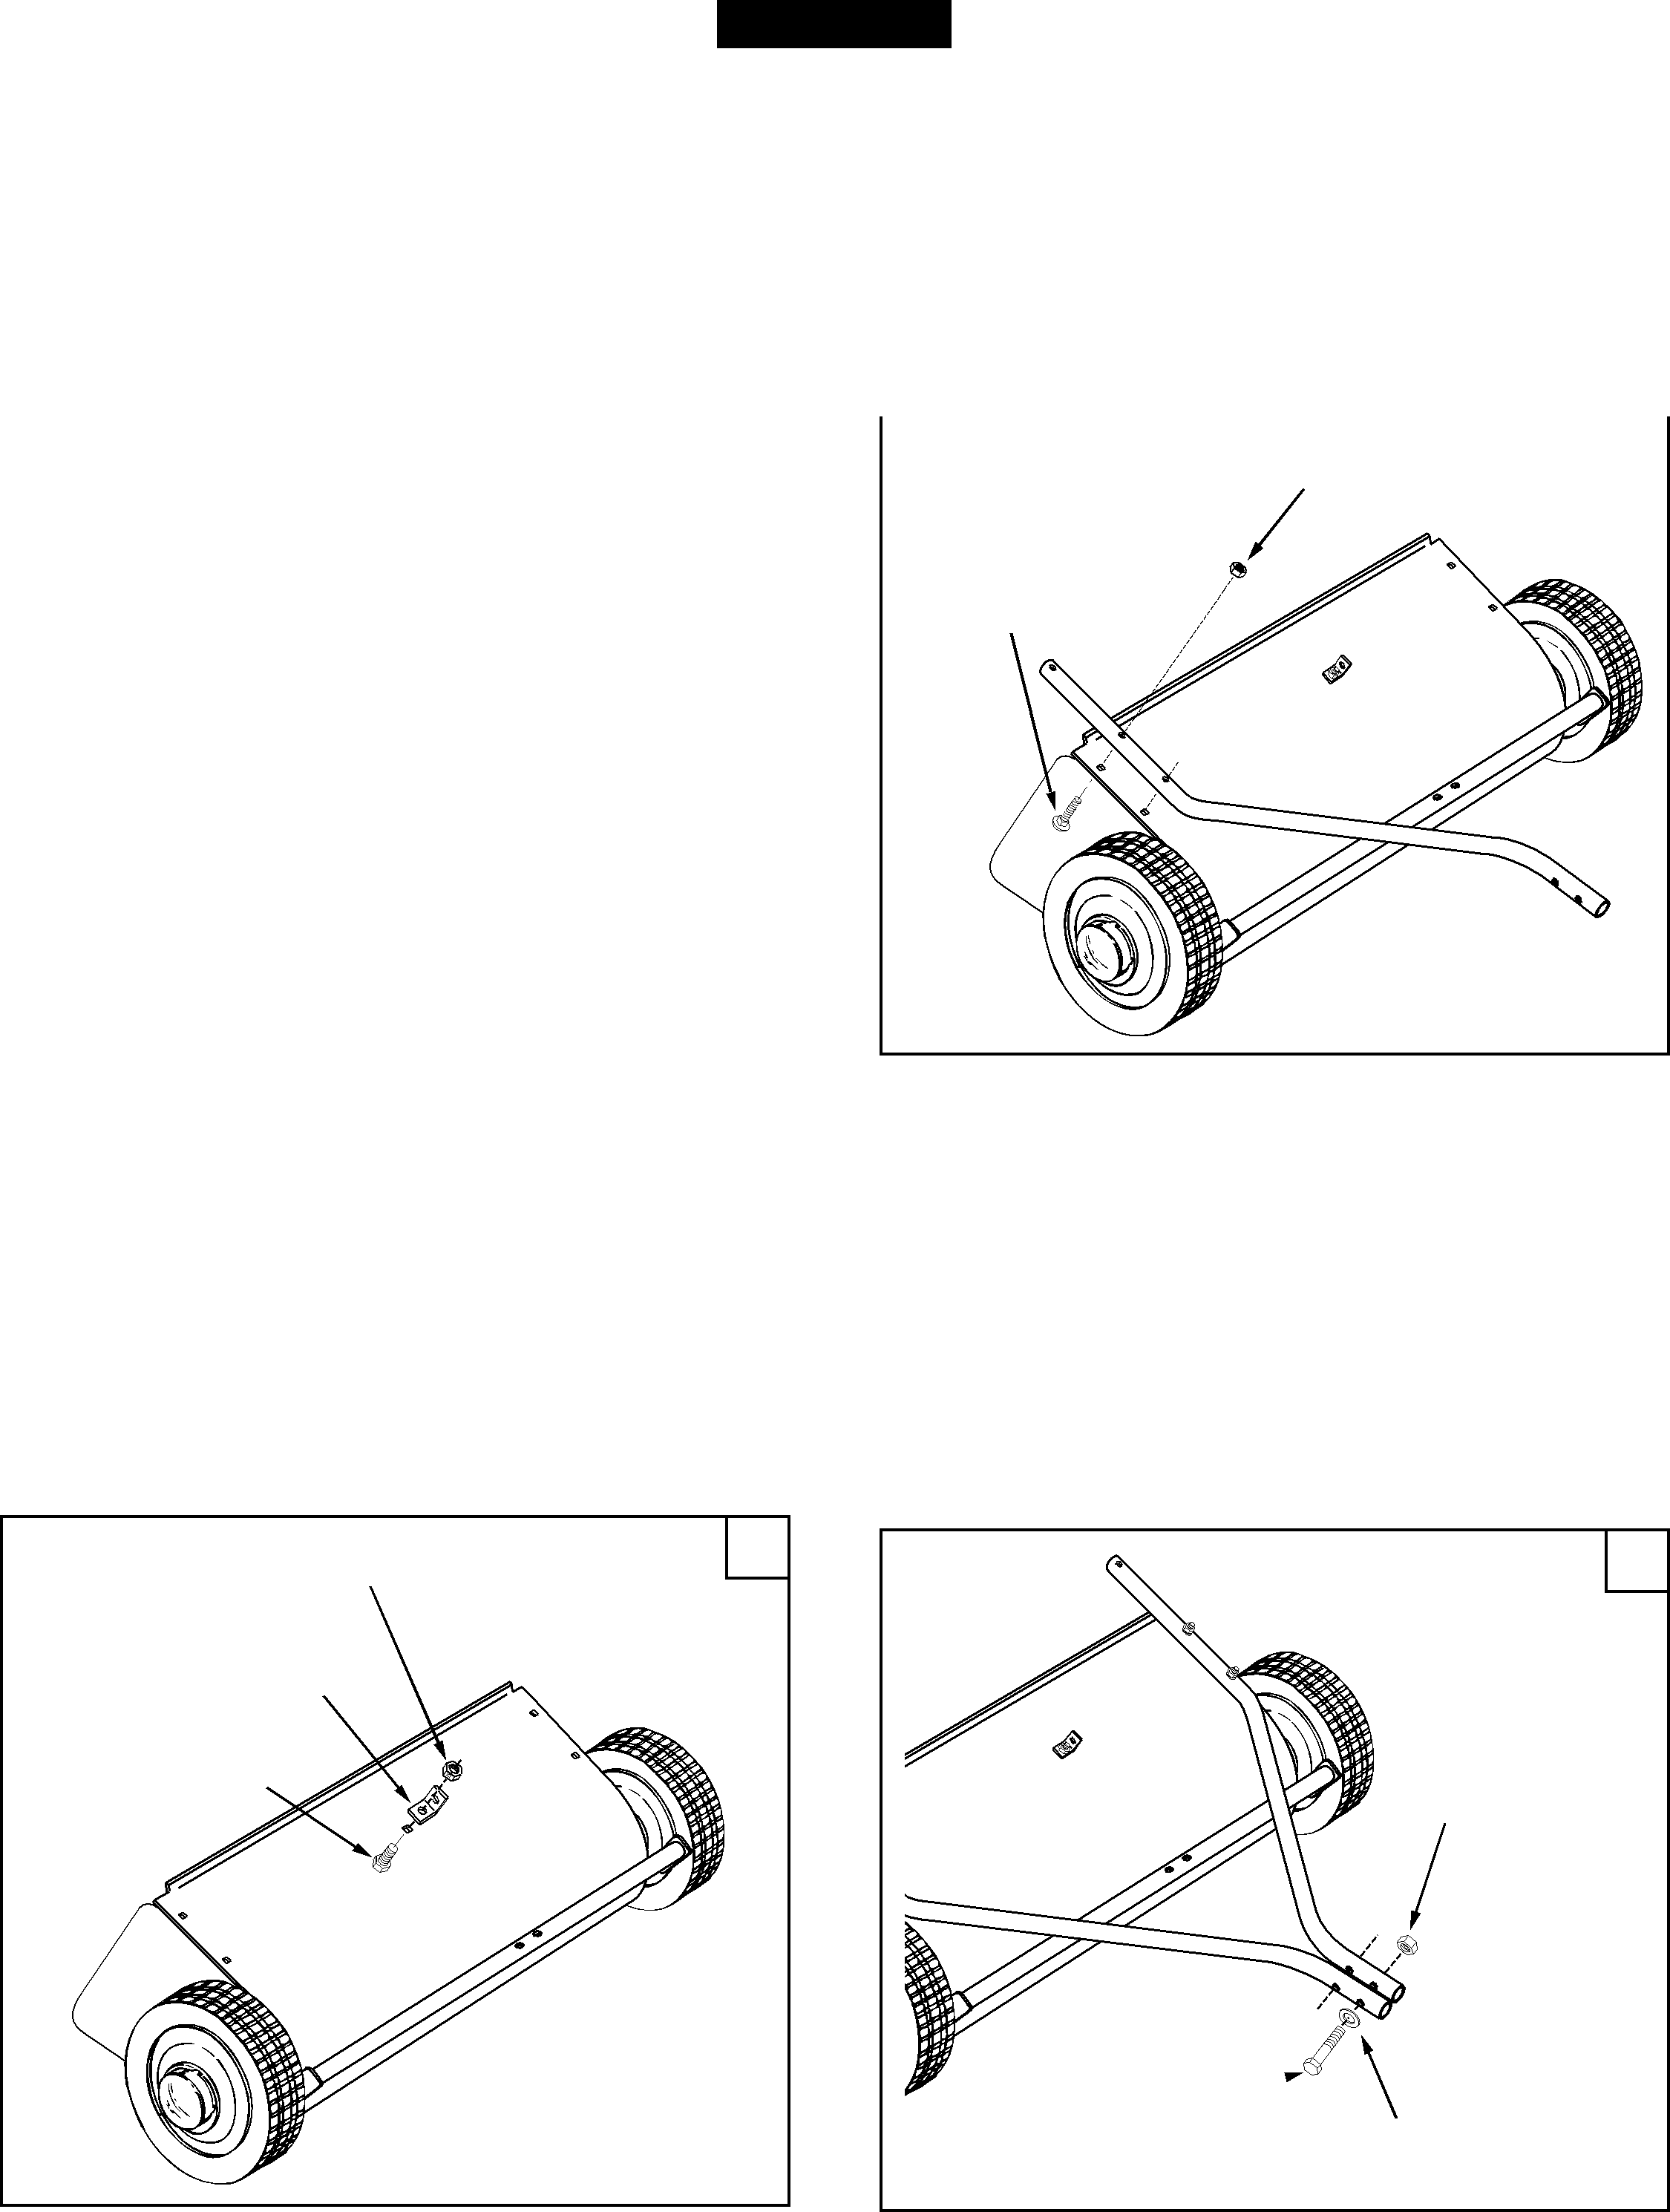
3.(Figure 2) Assemble the R.H. hitch tube to the sweeper housing using two 5/16" x
5/16" NYLOCK NUT (G) | 2 |
|
5/16" x
CARRIAGE BOLT (D)
ASSEMBLY OF SWEEPER
Note: Righthand(R.H.)andlefthand(L.H.)aredetermined from the operator's position while seated on the tractor.
1.(Figure 1) Assemble the angle bracket to the sweeper housing using a 5/16" x 3/4" hex bolt (F) and a 5/16" nylock nut (G). Make sure the bracket is turned as shown and aligned straight with the housing and then tighten.
4.(Figure 3) Fasten the hitch tubes together using two
5/16" x
5/16" NYLOCK NUT (G) | 1 | 3 |
| ||
ANGLE |
|
|
BRACKET |
|
|
5/16" x 3/4" |
| 5/16" NYLOCK |
HEX BOLT (F) |
| |
|
| NUT (G) |
5/16" x 
HEX BOLT (A)5/16" SMALL FLAT WASHER (I)