ENGLISH
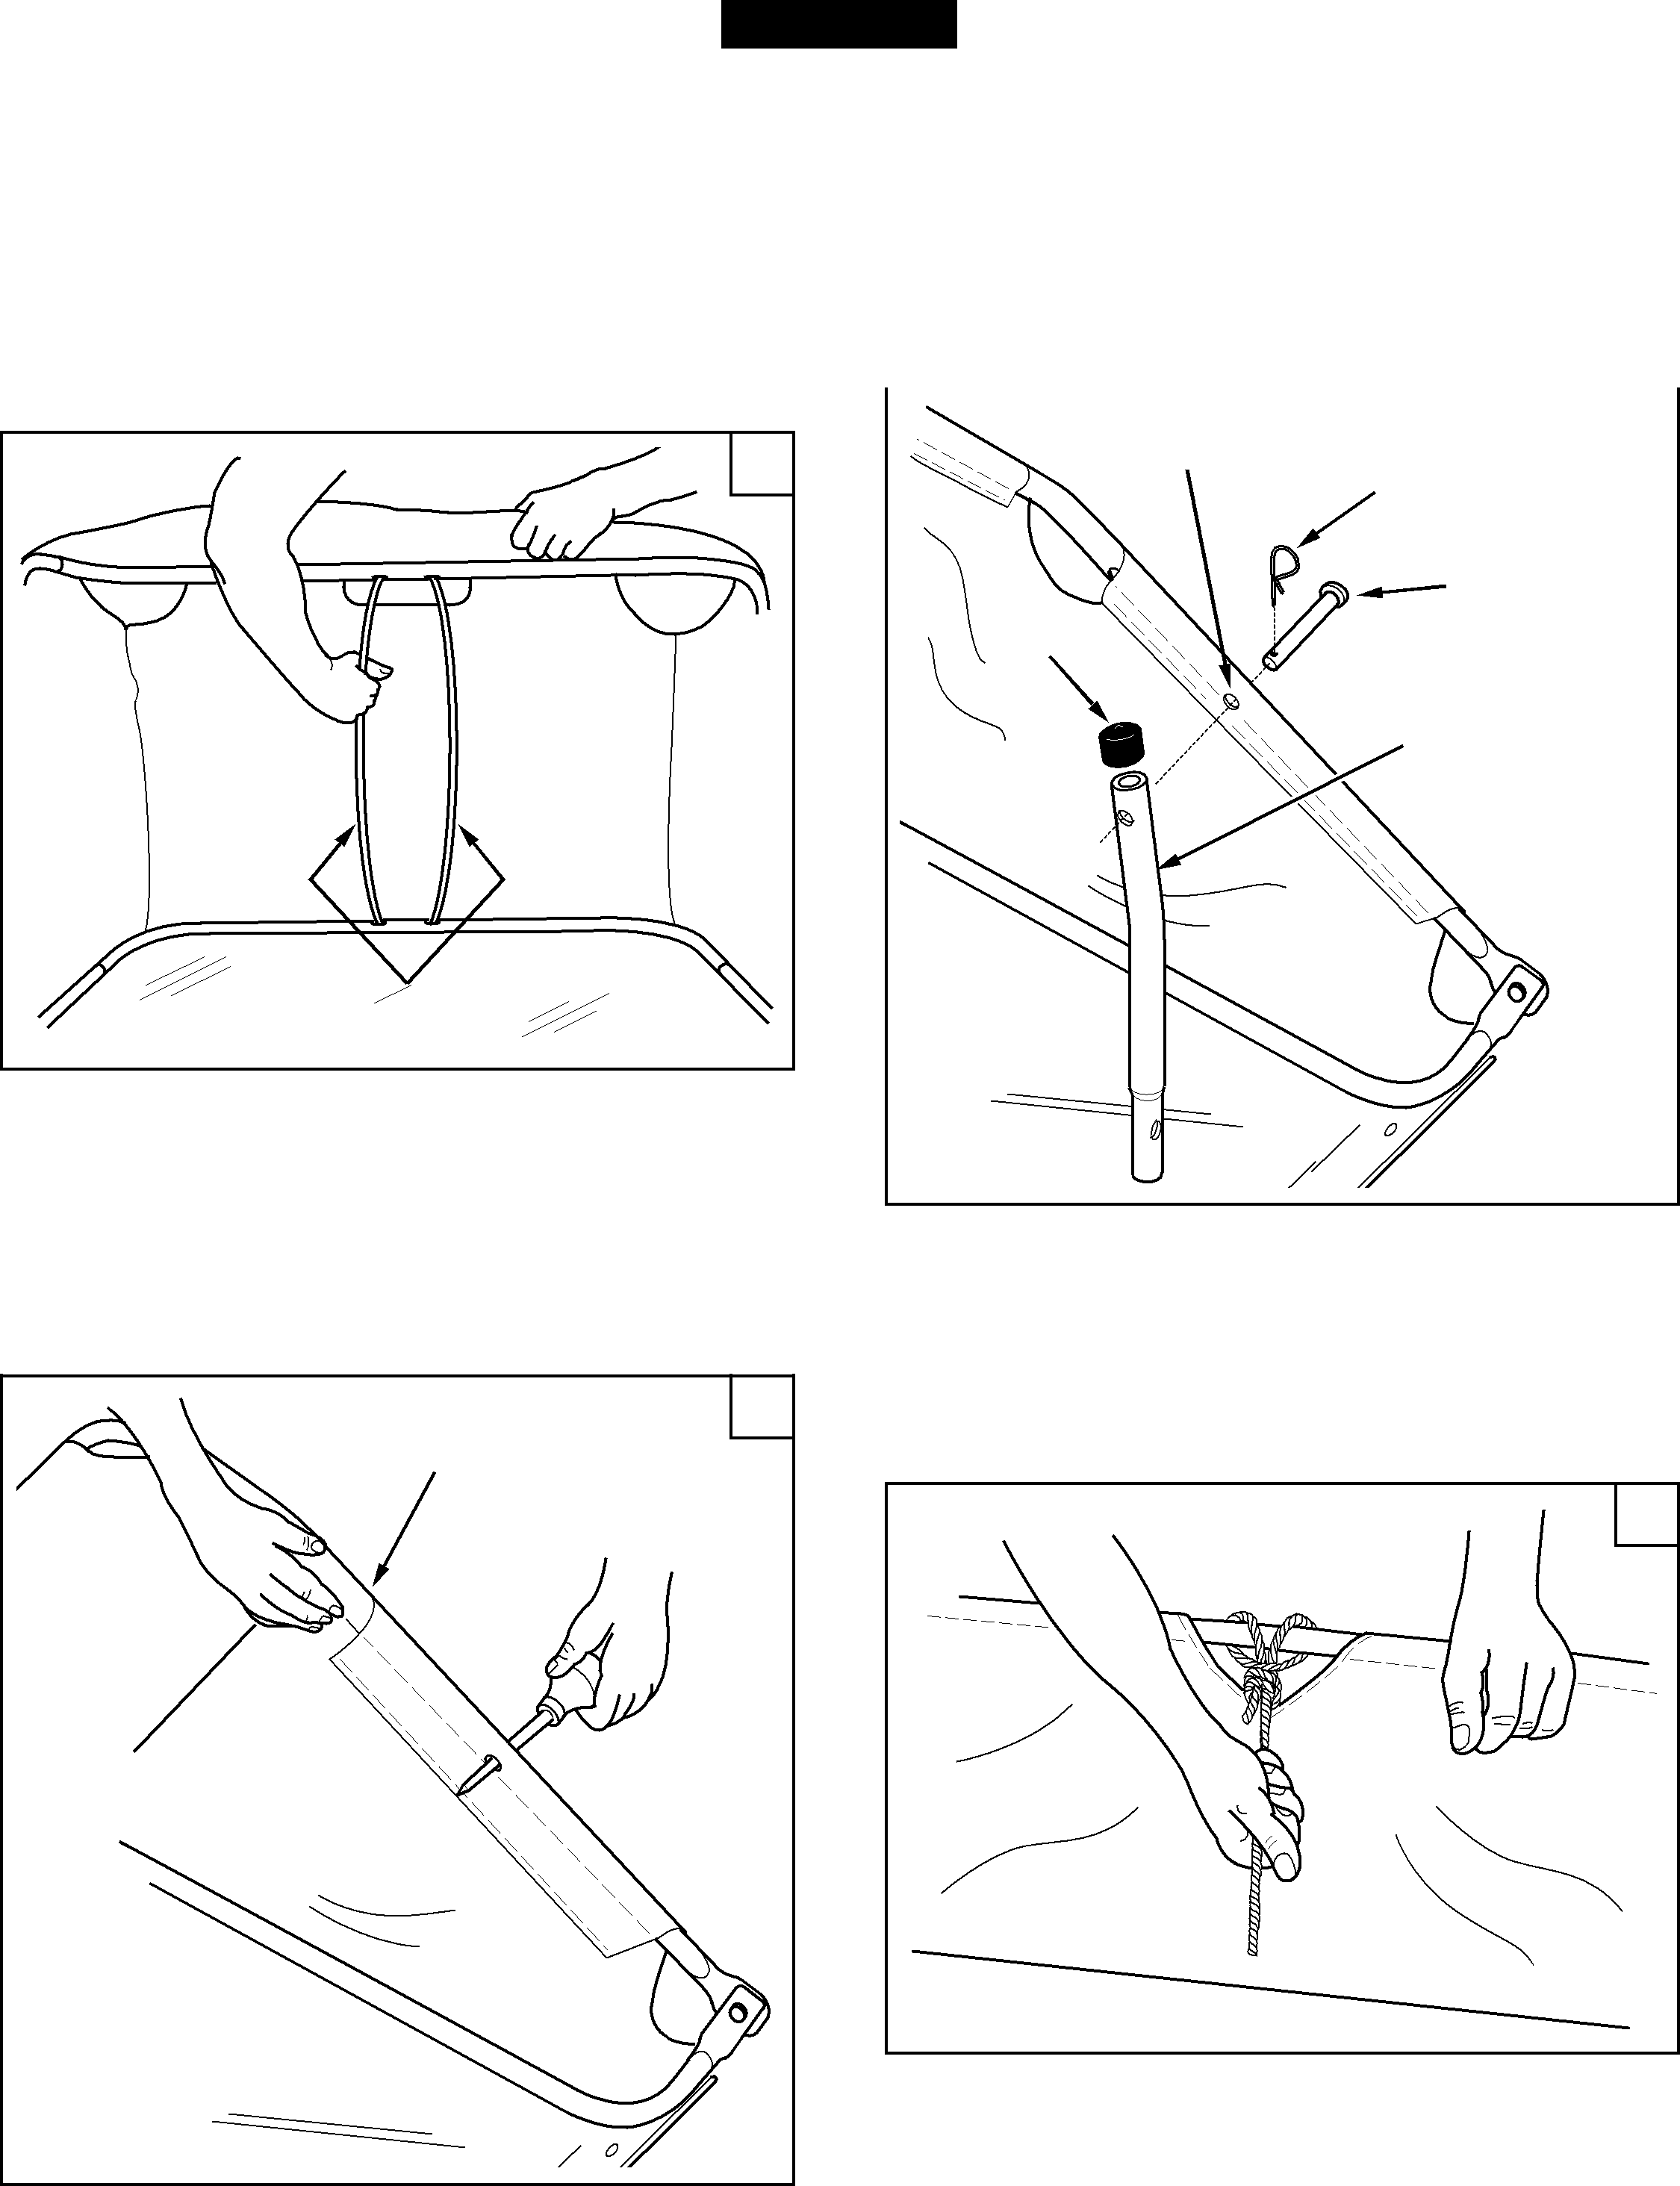
IMPORTANT: Do not over bend the support rods during the following step. Over bending will cause the steel rods to loose supporting tension.
10.(Figure 16) Tip the hopper onto it's back to assemble the two hopper support rods. Place the ends of each rod into the upper and lower rear hopper tubes, bending the rod just enough to fit into the holes in the tubes.
16
12.(Figure 18) Insert a 3/8" x 3" clevis pin (S) through the lower hole in each upper hopper side tube. Next, assemble a bag arm tube (pointing in direction shown) onto each clevis pin and secure it with a 3/32" hair cotter pin (O).
13.(Figure 18) Assemble a vinyl cap (V) onto the end of each bag arm tube.
LOWER HOLE | 3/32" HAIR | 18 |
| ||
|
COTTER PIN (O)
VINYL CAP
3/8" x 3"
CLEVIS PIN (S)
SUPPORT
RODS
11.(Figure 17) Feel along the stitched flap on the hopper bag to locate the hole in each upper hopper side tube.
Pierce a hole through both sides of the stitched flaps in alignment with the lower hole.
17
UPPER HOPPER SIDE TUBEBAG ARM TUBE
14.(Figure 19) Secure the rope to the top center of the hopper bag frame.
19