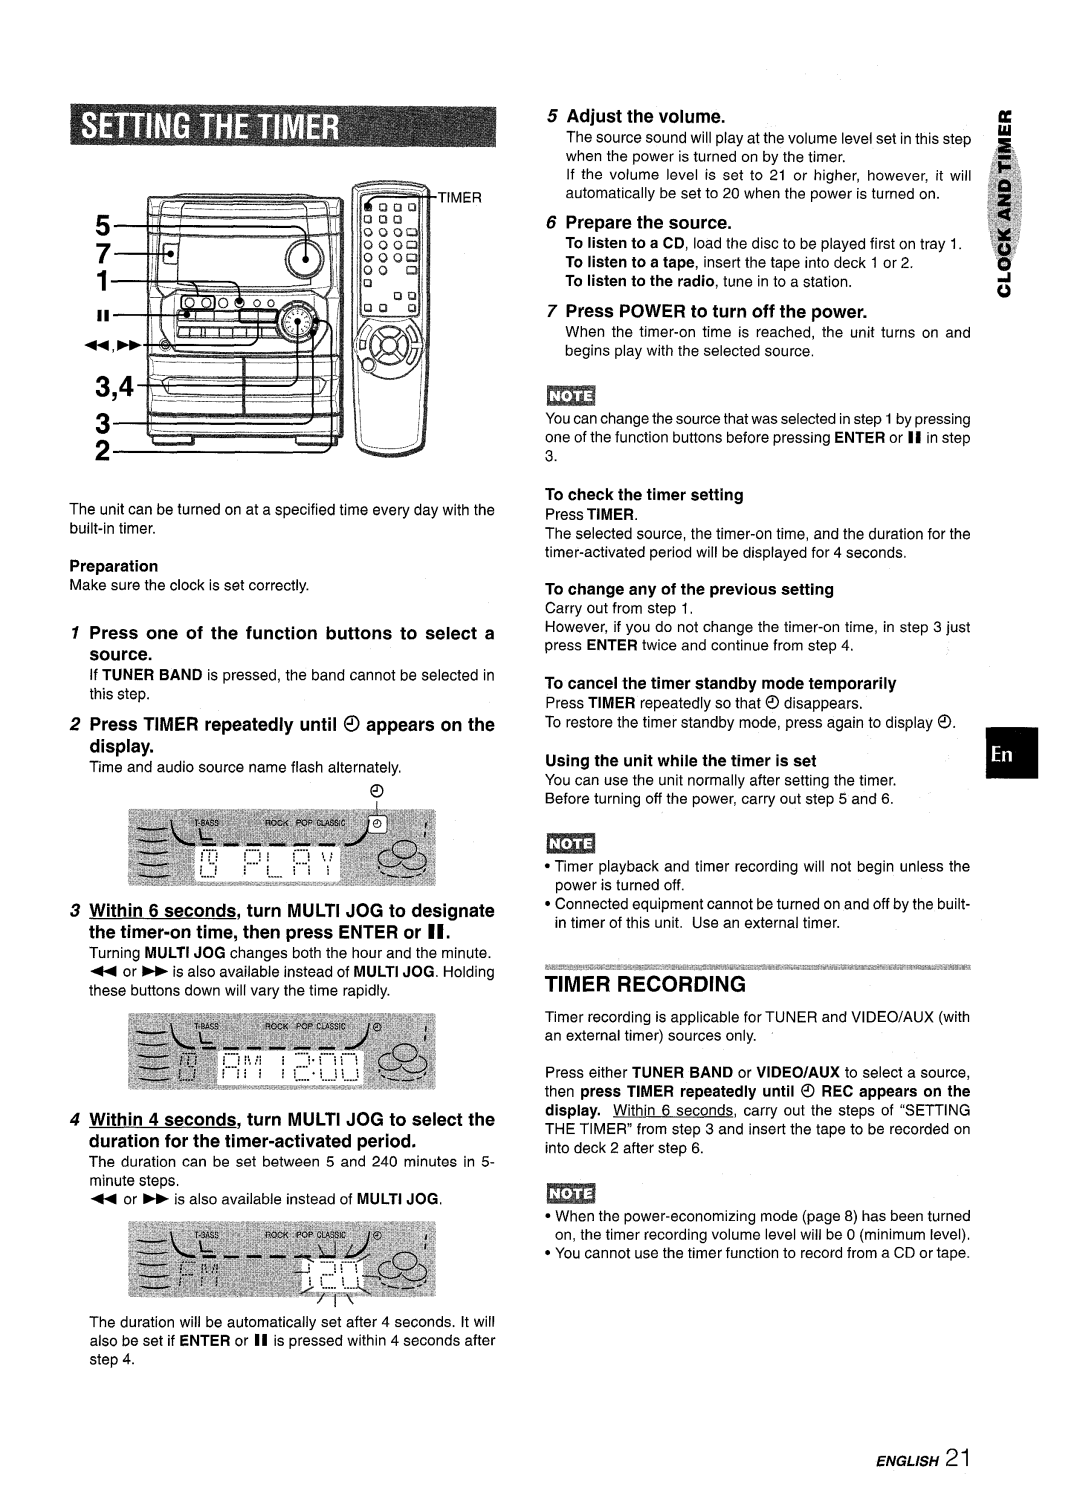
TIMER

3

2

The unit can be turned on at a specified time every day with the built-in timer.

Preparation

Make sure the clock is set correctly.

1 Press one of the function buttons to select a

source.

If TUNER BAND is pressed, the band cannot be selected in this step.

2 Press TIMER repeatedly until C!)appears on the display.

Time and audio source name flash alternately,

3 Within 6 seconds, turn MULTI JOG to designate the timer-on time, then press ENTER or II.

Turning MULTI JOG changes both the hour and the minute.

+or - is also available instead of MULTI JOG. Holding these buttons down will vary the time rapidly.

4 Within 4 seconds, turn MULTI JOG to select the duration for the timer-activated period.

The duration can be set between 5 and 240 minutes in 5- minute steps,

+or > is also available instead of MULTI JOG,

The duration will be automatically set after 4 seconds. it will also be set if ENTER or II is pressed within 4 seconds after step 4.

5

Adjust the volume.

5


The source sound will play at the volume level set in this step


,s,


when the power is turned on by the timer.


@$j


If the volume level is set to 21 or higher, however, it will


et~j.,


automatically be set to 20 when the power is turned on.


j?,

~,,,


.,,&

,,,,.


).2”;

6

Prepare the source.

*


‘$$?


To listen to a CD, load the disc to be played first on tray 1.


To listen to a tape, insert the tape into deck 1 or 2.

‘q”


To listen to the radio, tune in to a station.

o


7 Press POWER to turn off the power.


When the timer-on time is reached: the unit turns on and


begins play with the selected source,


You can change the source that was selected in step 1 by pressing


one of the function buttons before pressing ENTER or II in step


3.


To check the timer setting


Press TIMER.


The selected source, the timer-on time, and the duration for the


timer-activated period will be displayed for 4 seconds,


To change any of the previous setting


Carry out from step 1,


However, if you do not change the timer-on time, in step 3 just


press ENTER twice and continue from step 4.


To cancel the timer standby mode temporarily


Press TIMER repeatedly so that@ disappears.


To restore the timer standby mode, press again to display 0.

Using the unit while the timer is set

You can use the unit normallv after setting the timer.

Before turning off the power, ”carry out st;p 5 and 6.

m

Timer playback and timer recording will not begin unless the power is turned off.

Connected equipment cannot be turned on and off by the built- in timer of this unit, Use an external timer.

TIMER RECORDING

Timer recording is applicable for TUNER and VI DEO/AUX (with an external timer) sources only.

Press either TUNER BAND or VIDEO/AUX to select a source, then press TIMER repeatedly until 0 REC appears on the display. Within 6 seconds, carry out the steps of “SETTING THE TIMER” from step 3 and insert the tape to be recorded on into deck 2 after step 6.

m

s When the power-economizing mode (page 8) has been turned on, the timer recording volume level will be O (minimum level),

You cannot use the timer function to record from a CD or tape.

ENGLISH 21

Page 21
Image 21
Aiwa NSX-MT241, CX-NMT240 manual Timer Recording, Press Timer repeatedly until C!appears on the display, Adjust the volume

NSX-MT241, CX-NMT240 specifications

The Aiwa CX-NMT240 and NSX-MT241 are audio systems designed to deliver exceptional sound quality and user-friendly experiences for music enthusiasts. These compact yet powerful devices embody Aiwa's commitment to innovative technology and aesthetic appeal, making them ideal for both casual listeners and audiophiles alike.

One of the standout features of the CX-NMT240 is its advanced mini stereo system design. It combines a sleek, modern look with powerful audio capabilities, allowing it to fit seamlessly into any home environment. The dual cassette deck is a hallmark of this model, allowing users to play and record tapes with ease, further appealing to those who appreciate the nostalgia of physical media.

The NSX-MT241 model builds upon this legacy by incorporating a CD player capable of handling various formats, including CD-R and CD-RW, ensuring versatility in audio playback. The system supports FM/AM radio, providing access to a wide range of channels, which enhances the overall listening experience. Additionally, with its digital tuner, users can quickly and easily find their favorite stations without the hassle of manual tuning.

Both systems benefit from advanced audio technologies, including digital sound processing (DSP) which enhances sound clarity and richness across different frequencies. They also feature equalizer presets, allowing users to customize their listening experience to match their personal preferences and musical styles.

Connectivity options are ample in both models, with multiple input sources, including auxiliary and headphone jacks, enabling users to connect devices like smartphones, tablets, or other media players. The inclusion of USB connectivity further modernizes these systems, offering a straightforward pathway to play digital music files.

Aiwa has also ensured that these systems prioritize user convenience. They come equipped with intuitive remote controls, allowing users to manage playback and settings from a distance, enhancing the overall listening experience.

In terms of sound quality, the CX-NMT240 and NSX-MT241 deliver a balanced audio profile, capable of producing deep bass without compromising clarity in mid and high frequencies. This makes them suitable for a wide range of music genres, from classical to rock.

Both the Aiwa CX-NMT240 and NSX-MT241 exemplify the brand's legacy of audio excellence, providing powerful performance, versatile playback options, and appealing designs, making them perfect additions to any music lover's setup.