3Cable de alimentacion de CA

-Cuamdo desconecte el cable de alimentacion de CA, sujete la claVija de alimentacion de CA y tire de ells. No tire del propio cable.

-Nunca maneje la clavija de alimentacion de CA con Ias manes mojadas porque podr[a producirse un incendio o una sacudida electrica.

-Los cables de alimentacion deberan colocarse de forma que no scan doblados excesivamente, pellizcados o pisados. Tenga mucho cuidado con el cable que va de la unidad a la toma de corriente.

-Evite sobrecargar Ias tomas de CA y Ios cables de extension mas alla de su capacidad porque esto podria causar un incendio o una sacudida electrica.

4Cable de extension — Para evitar sacudidas electrical, no utilice la clavija de alimentacion de CA polarizada con un cable de extension, ni tampoco en un receptaculo u otra toma de corriente a menos que la clavija polarizada pueda insertarse completamente evitando que sus patinas queden expuestas.

5Periodos de no utilization — Desenchufe el cable de alimentacion de CA de la toma de corriente si la unidad nova a ser utilizada durante varies meses o mas. Cuando el cable de alimentacion este conectado, por la unidad continuara circulando una pequefia cantidad de corriente, aunque la alimentacion este desconectada.

Antena exterior

1Lineas de alta tension — Cuando conecte una antena exterior, asegfirese de colocarla Iejos de Ias Iineas de alta tension.

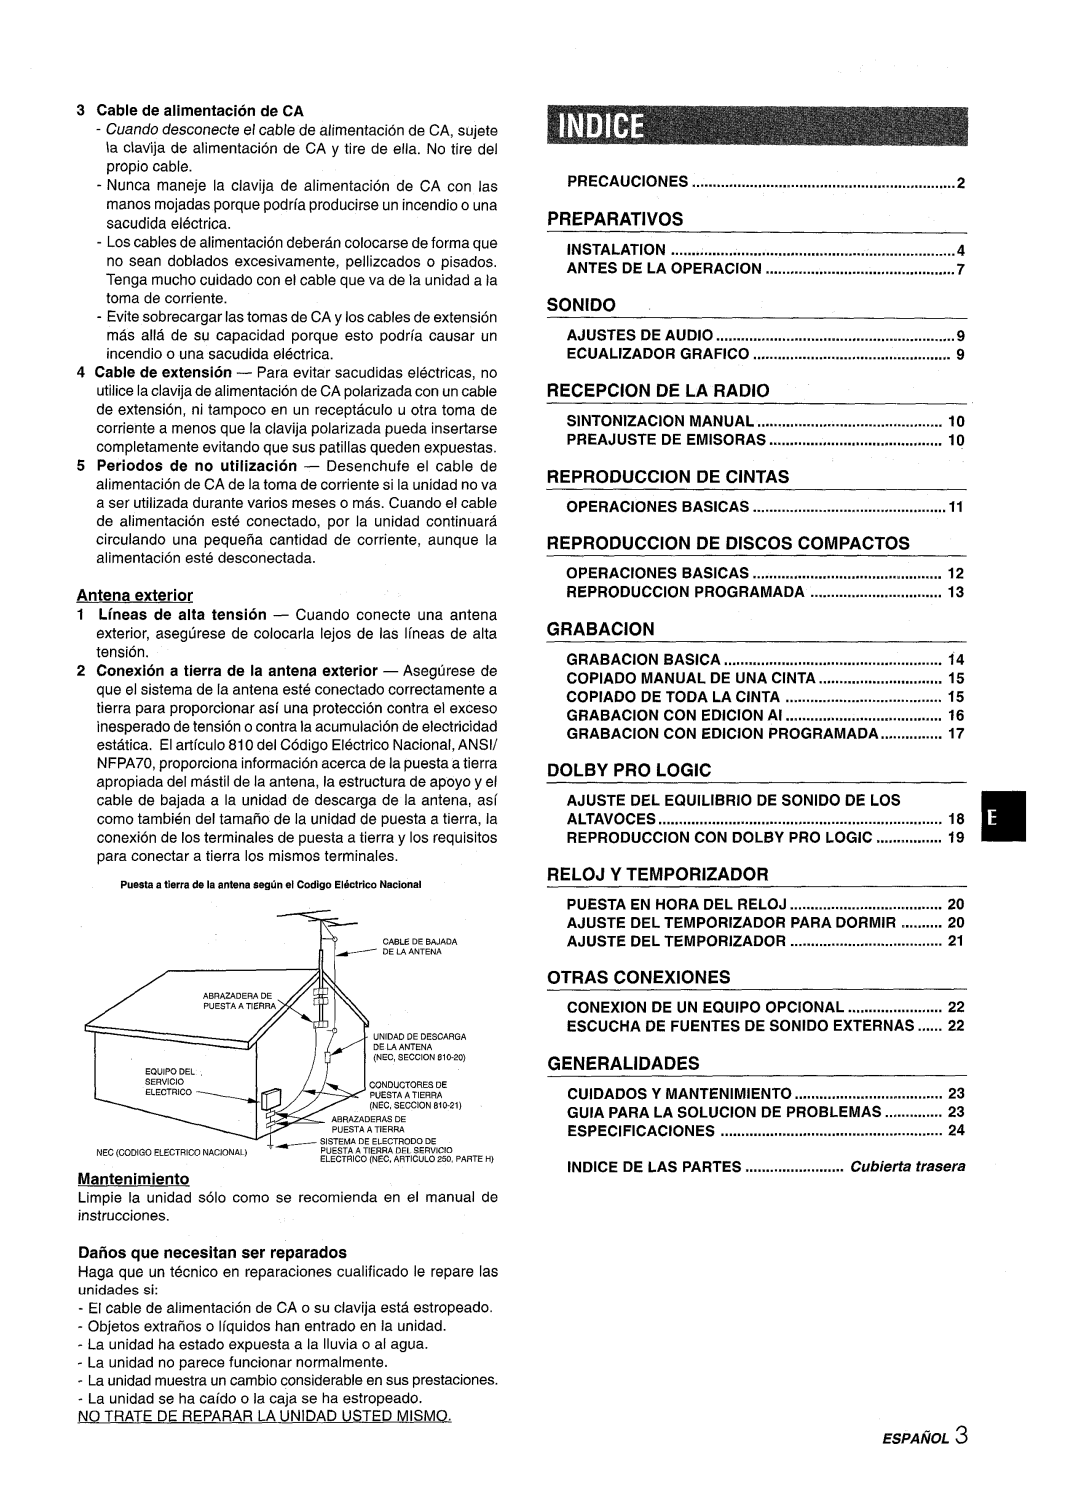
2Conexion a tierra de la antena exterior — Asegtirese de que el sistema de la antena este conectado correctamente a tierra para proporcionar asi una protection contra el exceso inesperado de tension o contra la acumulacion de electricidad estatica. El artfculo 810 del Codigo Electrico National, ANS1/ NFPA70, proporciona information acerca de la puesta a tierra apropiada del mastil de la antena, la estructura de apoyo y el cable de bajada a la unidad de descarga de la antena, as( como tambien del tamarlo de la unidad de puesta a tierra, la conexion de Ios terminals de puesta a tierra y Ios requisites para conectar a tierra Ios mismos terminals.

Puesta a tierrs de la sntens segtin el Codigo El&ctrico National

T ~

CABLEDE BAJADA

DE LAANTENA

UNIDADDE DESCARGA DE LAANTENA (NEC,SECCION810-20)

CONDUCTORESDE

PUESTA ATIERRA (NEC,SEGCION810-21)

ABRAZADERASDE

PUESTA ATIERRA

, ~ SISTEMA DE ELECTRODODE

NEC(CODIGOELECTRICONACIONAL)PUESTA ATIERRA DEL SE RVICIO ELECTRICO(NEC,ARTICULO250,PARTE H)

Mantenimiento

Limpie la unidad solo como se recomienda en el manual de instrucciones.

Daiios que necesitan ser reparados

Haga que un tecnico en reparaciones cualificado Ie repare Ias unidades si:

-El cable de alimentacion de CA o su clavija esta estropeado.

-Objetos extrafios o I[quidos han entrado en la unidad.

-La unidad ha estado expuesta a la Iluvia o al agua.

-La unidad no parece funcionar normalmente.

-La unidad muestra un cambio considerable en sus prestaciones.

-La unidad se ha caido o la caja se ha estropeado.

NO TRATE DE REPARAR LA UNIDAD USTED MISMO.

PRECAUCIONES . . . . . . . . . . . . . ..m . . . . . ..m . . . . . . . . . . . . . . . . . . . . . . . . . . . . . . . . . . . . . ...2

PREPARATIVES

INSTALLATION

4

ANTES DE LA OPERACION

7

SONIDO

AJUSTES DE AUDIO

9

ECUALIZADOR GRAFICO

9

RECEPCION

DE LA RADIO


SINTONIZACION

MANUAL


10


PREAJUSTE

DE EMISORAS

..........................................

10


REPRODUCTION

DE CINTAS


OPERAClONES

BASICAS


11


REPRODUCTION

DE DISCOS

COMPACTOS


OPERAClONES

BASICAS


12


REPRODUCTION

PROGRAMADA

13


GRABACION


GRABACION

BASICA


+4


COPIADO MANUAL DE UNA CINTA

15


COPIADO DE TODA LA CINTA

15


GRABACION

CON EDICION Al

16


GRABACION

CON EDICION PROGRAMADA

17


DOLBY PRO LOGIC


AJUSTE DEL EQUILIBRIA DE SONIDO DE LOS


ALTAVOCES

.....................................................................


18

REPRODUCTION

CON DOLBY PRO LOGIC

19

RELOJ Y TEMPORIZADOR


PUESTA EN HORA DEL RELOJ

20


AJUSTE DEL TEMPORIZADOR

PARA DORMIR

20


AJUSTE DEL TEMPORIZADOR

21


OTRAS CONEXIONES


CONEXION DE UN EQUIPO OPCIONAL

22


ESCUCHA DE FUENTES DE SONIDO EXTERNAS m.... 22


GENERALIDADES


CUIDADOS Y MANTENIMIENTO

....................................

23


GUIA PARA LA SOLUCION

DE PROBLEMAS

23


ESPECIFICACIONES

n

24


INDICE DE LAS PARTES

Cubierta

trasera


ESPANOL 3

Page 27
Image 27
Aiwa NSX-MT241 manual Preparatives, Sonido, Recepcion DE LA Radio, Reproduction DE Cintas, Grabacion, Reloj Y Temporizador

NSX-MT241, CX-NMT240 specifications

The Aiwa CX-NMT240 and NSX-MT241 are audio systems designed to deliver exceptional sound quality and user-friendly experiences for music enthusiasts. These compact yet powerful devices embody Aiwa's commitment to innovative technology and aesthetic appeal, making them ideal for both casual listeners and audiophiles alike.

One of the standout features of the CX-NMT240 is its advanced mini stereo system design. It combines a sleek, modern look with powerful audio capabilities, allowing it to fit seamlessly into any home environment. The dual cassette deck is a hallmark of this model, allowing users to play and record tapes with ease, further appealing to those who appreciate the nostalgia of physical media.

The NSX-MT241 model builds upon this legacy by incorporating a CD player capable of handling various formats, including CD-R and CD-RW, ensuring versatility in audio playback. The system supports FM/AM radio, providing access to a wide range of channels, which enhances the overall listening experience. Additionally, with its digital tuner, users can quickly and easily find their favorite stations without the hassle of manual tuning.

Both systems benefit from advanced audio technologies, including digital sound processing (DSP) which enhances sound clarity and richness across different frequencies. They also feature equalizer presets, allowing users to customize their listening experience to match their personal preferences and musical styles.

Connectivity options are ample in both models, with multiple input sources, including auxiliary and headphone jacks, enabling users to connect devices like smartphones, tablets, or other media players. The inclusion of USB connectivity further modernizes these systems, offering a straightforward pathway to play digital music files.

Aiwa has also ensured that these systems prioritize user convenience. They come equipped with intuitive remote controls, allowing users to manage playback and settings from a distance, enhancing the overall listening experience.

In terms of sound quality, the CX-NMT240 and NSX-MT241 deliver a balanced audio profile, capable of producing deep bass without compromising clarity in mid and high frequencies. This makes them suitable for a wide range of music genres, from classical to rock.

Both the Aiwa CX-NMT240 and NSX-MT241 exemplify the brand's legacy of audio excellence, providing powerful performance, versatile playback options, and appealing designs, making them perfect additions to any music lover's setup.