BASIC OPERATIONS (Cont.)

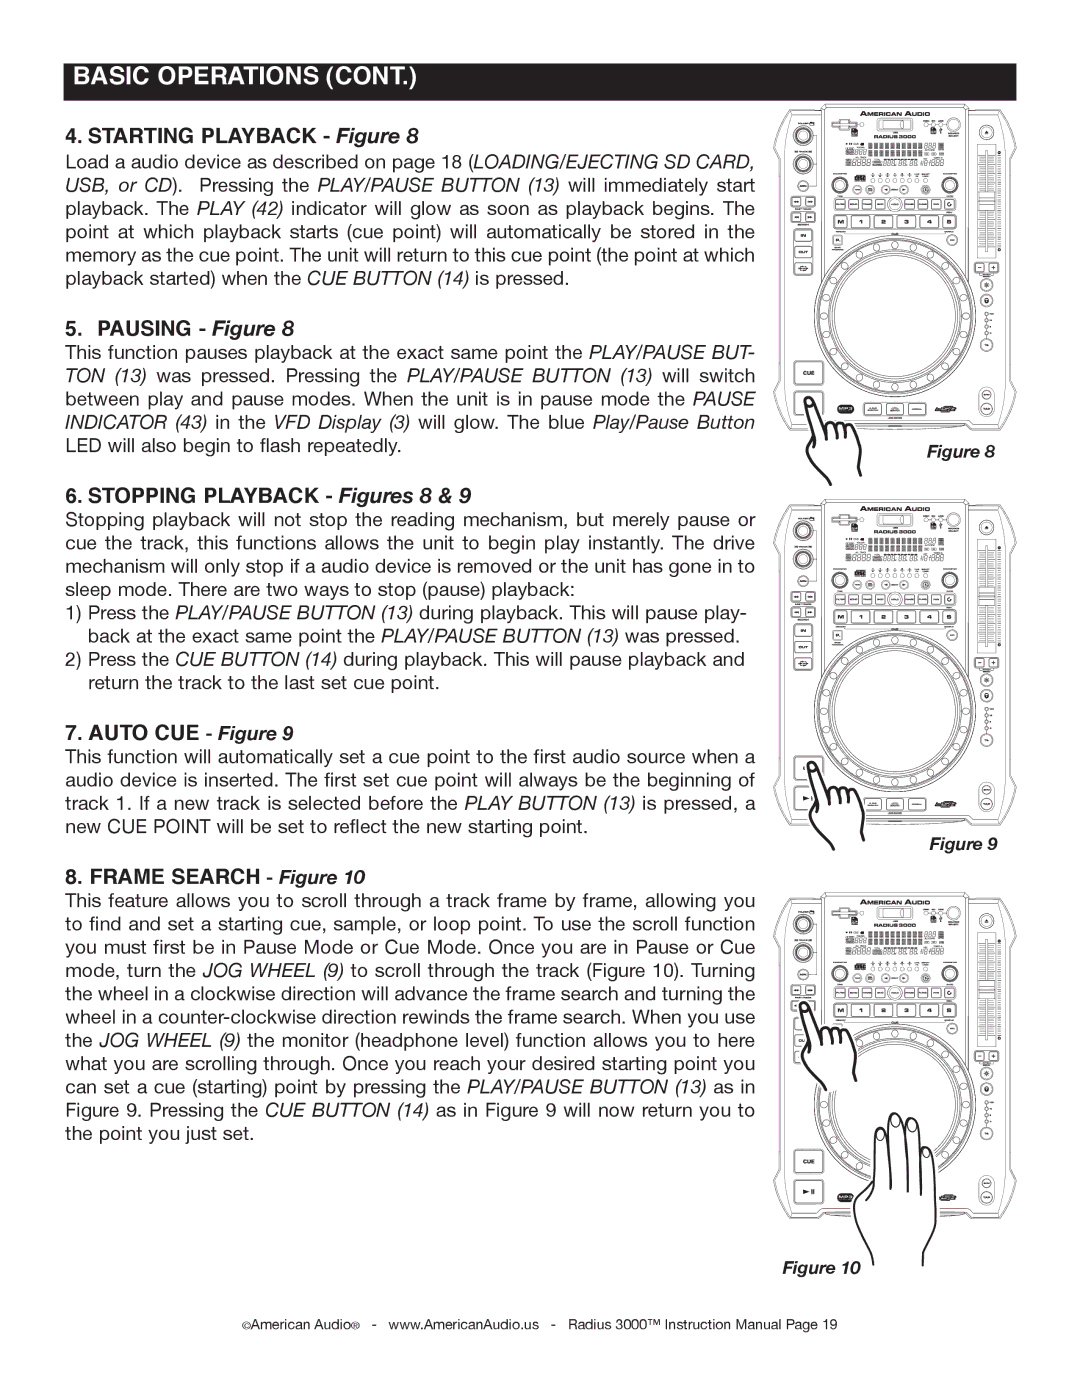
4. STARTING PLAYBACK - Figure 8

Load a audio device as described on page 18 (LOADING/EJECTING SD CARD, USB, or CD). Pressing the PLAY/PAUSE button (13) will immediately start playback. The PLAY (42) indicator will glow as soon as playback begins. The point at which playback starts (cue point) will automatically be stored in the memory as the cue point. The unit will return to this cue point (the point at which playback started) when the CUE button (14) is pressed.

5. Pausing - Figure 8

This function pauses playback at the exact same point the PLAY/PAUSE but- ton (13) was pressed. Pressing the PLAY/PAUSE button (13) will switch between play and pause modes. When the unit is in pause mode the PAUSE indicator (43) in the VFD Display (3) will glow. The blue Play/Pause Button LED will also begin to flash repeatedly.

6. Stopping Playback - Figures 8 & 9

Stopping playback will not stop the reading mechanism, but merely pause or cue the track, this functions allows the unit to begin play instantly. The drive mechanism will only stop if a audio device is removed or the unit has gone in to sleep mode. There are two ways to stop (pause) playback:

1)Press the PLAY/PAUSE button (13) during playback. This will pause play- back at the exact same point the PLAY/PAUSE button (13) was pressed.

2)Press the CUE button (14) during playback. This will pause playback and return the track to the last set cue point.

7. Auto cue - Figure 9

This function will automatically set a cue point to the first audio source when a audio device is inserted. The first set cue point will always be the beginning of track 1. If a new track is selected before the Play Button (13) is pressed, a new cue point will be set to reflect the new starting point.

8. Frame search - Figure 10

This feature allows you to scroll through a track frame by frame, allowing you to find and set a starting cue, sample, or loop point. To use the scroll function you must first be in Pause Mode or Cue Mode. Once you are in Pause or Cue mode, turn the jog wheel (9) to scroll through the track (Figure 10). Turning the wheel in a clockwise direction will advance the frame search and turning the wheel in a counter-clockwise direction rewinds the frame search. When you use the jog wheel (9) the monitor (headphone level) function allows you to here what you are scrolling through. Once you reach your desired starting point you can set a cue (starting) point by pressing the PLAY/PAUSE button (13) as in Figure 9. Pressing the CUE button (14) as in Figure 9 will now return you to the point you just set.

Figure 8

Figure 9

Figure 10

©American Audio® - www.AmericanAudio.us - Radius 3000™ Instruction Manual Page 19

Page 19
Image 19
American Audio Radius 3000 manual Basic Operations

Radius 3000 specifications

The American Audio Radius 3000 is a versatile and powerful DJ controller designed for both aspiring and professional DJs. This innovative device stands out due to its user-friendly features, high-quality build, and extensive capabilities, making it an ideal choice for live performances as well as studio sessions.

One of the key features of the Radius 3000 is its dual DJ controller layout. This allows DJs to seamlessly transition between two decks, making it easy to mix and blend tracks on the fly. The controller includes large, responsive jog wheels that provide precise control over track playback and scratching. With a touch-sensitive design, DJs can manipulate tracks intuitively, which is essential for live expression.

The Radius 3000 is equipped with a wide range of connectivity options. It includes multiple USB ports, allowing for easy integration with laptops and external hard drives. This feature is particularly beneficial for DJs who may need to access their music library swiftly. Additionally, the controller can connect to professional audio systems using its balanced XLR outputs, ensuring high-quality sound delivery during performances.

Another noteworthy aspect of the Radius 3000 is the inclusion of built-in effects. This allows DJs to add creative flair to their mixes without relying on external hardware. The controller features an intuitive layout for accessing various effects, enabling real-time adjustments to enhance the audio experience.

The device is also designed with user comfort in mind. Its ergonomic layout ensures that all controls are easily accessible, reducing the learning curve for new users. The comprehensive LED feedback system provides visual cues for various functions, making it easier to monitor performance and make adjustments as necessary.

Moreover, the Radius 3000 is compatible with popular DJ software, which opens up a world of additional features and functionalities. This compatibility ensures that users can customize their setup to best fit their mixing style.

Overall, the American Audio Radius 3000 is a robust and modern DJ controller that delivers outstanding performance. With its dual-deck layout, seamless connectivity, built-in effects, and ergonomic design, it caters to the needs of both novice and seasoned DJs alike. Whether in a club setting or a home studio, the Radius 3000 proves to be a reliable and powerful tool for music mixing and production.