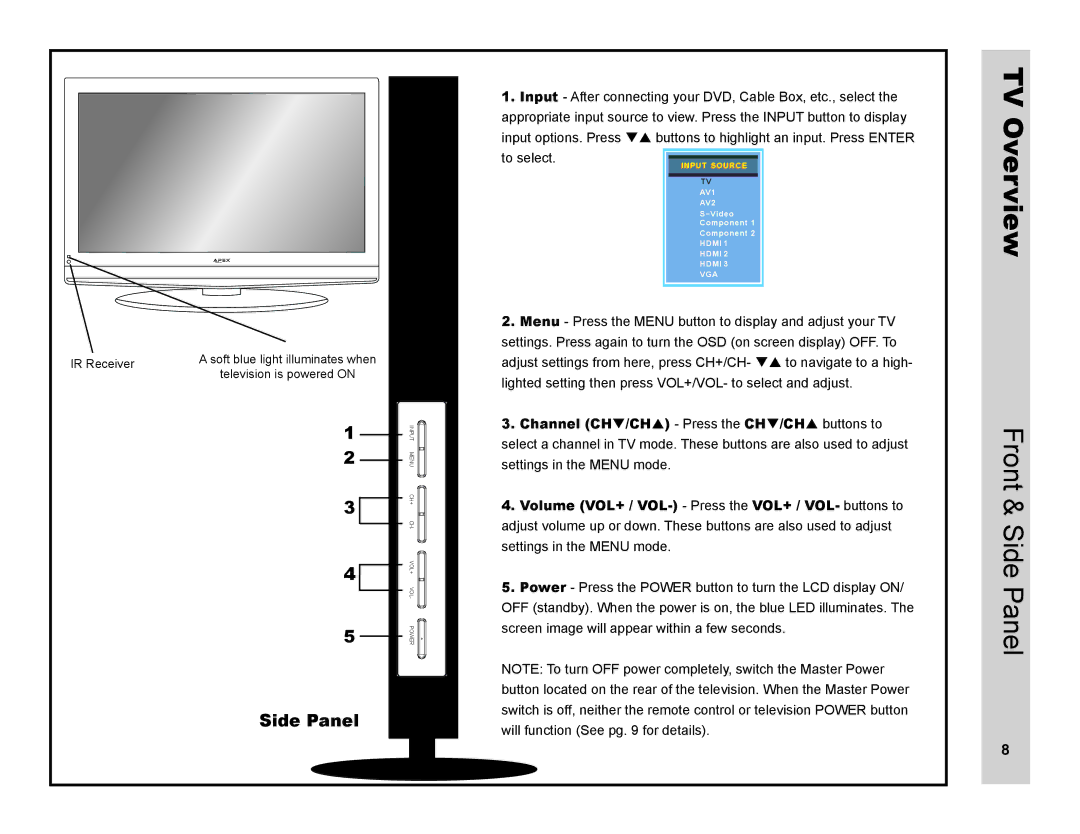
IR Receiver | A soft blue light illuminates when | |
television is powered ON | ||
|
1
2
3
4
5
Side Panel
INPUT |
MENU |
CH+ |
CH- |
VOL+ |
VOL- |
POWER |
1.Input - After connecting your DVD, Cable Box, etc., select the appropriate input source to view. Press the INPUT button to display input options. Press qp buttons to highlight an input. Press ENTER
to select. |
|
|
| I |
| IINPUT SOURCE |
| ||
|
|
|
| |
|
| TV |
|
|
|
| AV1 |
|
|
|
| AV2 |
|
|
|
|
|
| |
|
| Component 1 |
|
|
|
| Component 2 |
|
|
|
| HDMI 1 |
|
|
|
| HDMI 2 |
|
|
|
| HDMI 3 |
|
|
|
| VGA |
|
|
|
|
|
|
|
2. Menu - Press the MENU button to display and adjust your TV settings. Press again to turn the OSD (on screen display) OFF. To adjust settings from here, press CH+/CH- qp to navigate to a high- lighted setting then press VOL+/VOL- to select and adjust.
3. Channel (CHq/CHp) - Press the CHq/CHp buttons to select a channel in TV mode. These buttons are also used to adjust settings in the MENU mode.
4. Volume (VOL+ /
5. Power - Press the POWER button to turn the LCD display ON/ OFF (standby). When the power is on, the blue LED illuminates. The screen image will appear within a few seconds.
NOTE: To turn OFF power completely, switch the Master Power button located on the rear of the television. When the Master Power switch is off, neither the remote control or television POWER button will function (See pg. 9 for details).
TV Overview
Front & Side Panel
8