AVR200 specifications
The Arcam AVR200 is a sophisticated audio-video receiver that is designed for home cinema enthusiasts who seek superior sound quality and advanced features. With its sleek design and high-performance capabilities, the AVR200 stands out as an impressive addition to any home theatre setup.One of the main features of the AVR200 is its comprehensive support for various audio formats. It is equipped with the latest digital processing technologies, including Dolby Digital and DTS decoding, enabling it to deliver immersive surround sound for movies, music, and video games. With a total power output of 100 watts per channel, the AVR200 can drive a wide range of speakers, ensuring a rich and dynamic audio experience.
The Arcam AVR200 supports high-definition video formats and is equipped with multiple HDMI inputs, allowing users to connect several devices like Blu-ray players, gaming consoles, and streaming devices. It is compatible with 4K Ultra HD video pass-through, making it future-proof for upcoming high-resolution content. Additionally, the onboard video scaling technology upscales lower-resolution video to enhance image quality, providing a visually stunning experience.
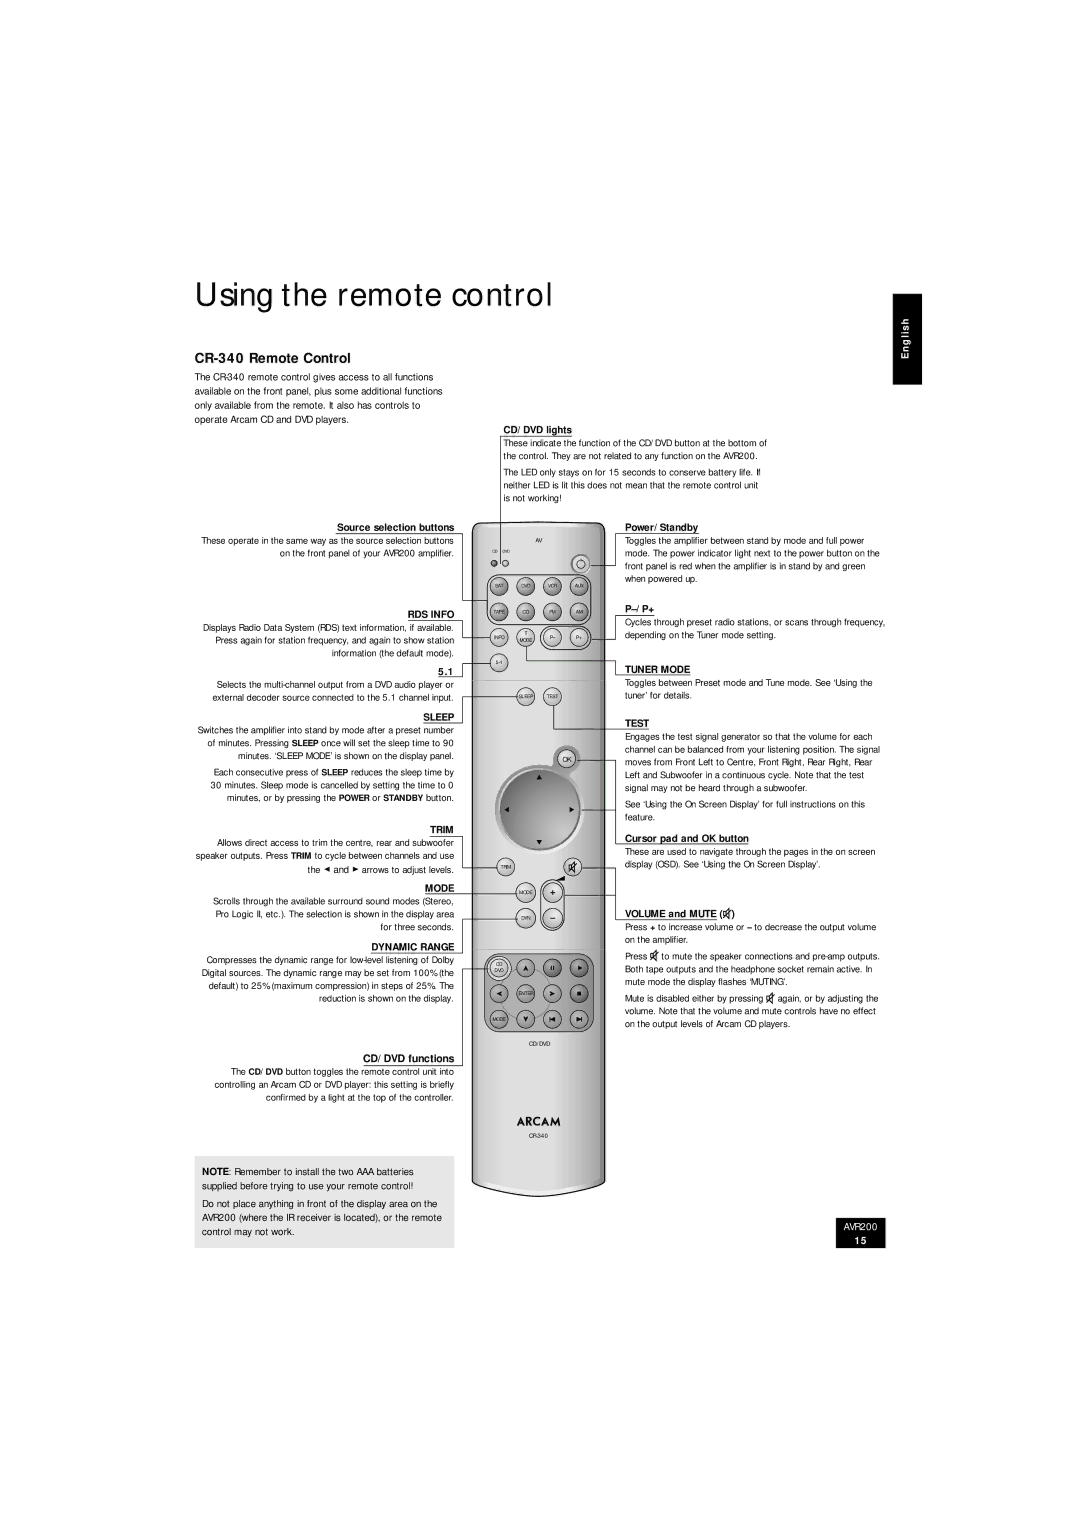
Another significant characteristic of the AVR200 is its user-friendly interface. The receiver features an intuitive on-screen display that simplifies setup and operation. Users can easily navigate through the menus to select inputs, adjust settings, and customize audio preferences. The inclusion of a remote control further enhances convenience, allowing effortless management of the receiver’s functions from the comfort of a sofa.
Room acoustics can significantly impact audio performance, and the AVR200 incorporates advanced room calibration technology. This feature automatically analyzes the acoustics of the listening environment and adjusts speaker settings accordingly, ensuring optimized performance regardless of room shape or size. This adaptability is crucial for achieving the best sound experience in various home environments.
In terms of connectivity, the AVR200 boasts a variety of options, including coaxial and optical digital inputs, and analog audio connections. Additionally, it features a dedicated 12V trigger output to facilitate easy integration with other equipment, like cinema screens or projectors.
Overall, the Arcam AVR200 combines high-performance audio capabilities with user-friendly features and modern technology, making it an excellent choice for anyone looking to elevate their home theatre experience. With its emphasis on sound quality and video performance, the AVR200 remains a top contender in the competitive market of AV receivers.

