OPERATION
WARNING: AVOID INJURY. Read and understand the entire Safety section before proceeding.
WARNING: To avoid injury to hands and feet, always disengage clutches, shut off engine, and wait for all movement to stop before unclogging or working on brush. Keep hands and feet away from brush.
STANDARD CONTROLS
See Controls and Features on page 10.
Traction Drive Clutch -
Left Hand Lever
Dual Handle Interlock
When Attachment Clutch and then Traction Drive Clutch are engaged, the Attachment Clutch Lever will remain engaged (down) if released. To stop attachment, release Traction Drive Clutch Lever and both clutches will disengage.
Choke Control Lever
1.Choke Closed position (lever to left): chokes off air to engine for easier start.
2.Choke Open position (lever to right): allows for normal operation.
Gradually open choke after engine starts.
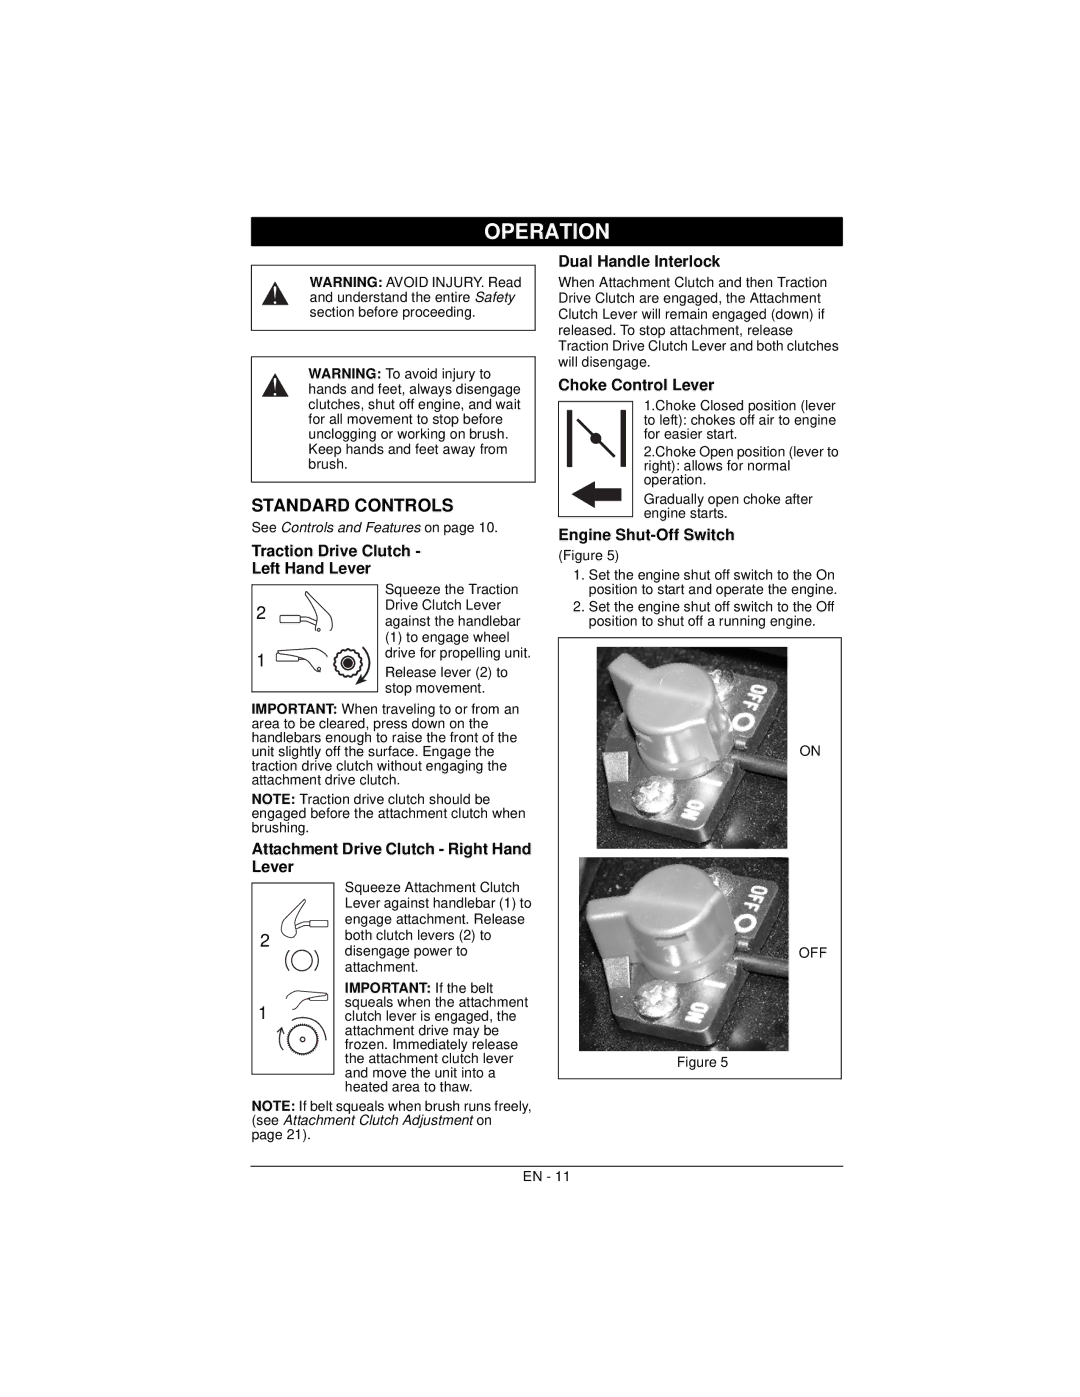
Engine Shut-Off Switch
(Figure 5)
1. Set the engine shut off switch to the On |
2
1 ![]()
![]()
![]()
Squeeze the Traction Drive Clutch Lever against the handlebar
(1)to engage wheel
drive for propelling unit.
Release lever (2) to stop movement.
position to start and operate the engine. |
2. Set the engine shut off switch to the Off |
position to shut off a running engine. |
IMPORTANT: When traveling to or from an area to be cleared, press down on the handlebars enough to raise the front of the unit slightly off the surface. Engage the traction drive clutch without engaging the attachment drive clutch.
NOTE: Traction drive clutch should be engaged before the attachment clutch when brushing.
Attachment Drive Clutch - Right Hand Lever
| Squeeze Attachment Clutch |
| Lever against handlebar (1) to |
2 | engage attachment. Release |
both clutch levers (2) to | |
| disengage power to |
| attachment. |
| IMPORTANT: If the belt |
1 | squeals when the attachment |
clutch lever is engaged, the | |
| attachment drive may be |
| frozen. Immediately release |
| the attachment clutch lever |
| and move the unit into a |
| heated area to thaw. |
NOTE: If belt squeals when brush runs freely, (see Attachment Clutch Adjustment on page 21).
ON
OFF
Figure 5
EN - 11
