4. | Place battery on bench or other |
| area. |
5. | Connect positive (+) lead of charger to positive (+) |
| terminal, and negative |
| terminal. |
6. | Charge battery according to charger and battery |
1
2
manufacturers’ instructions. |
7. Reinstall battery on unit and connect positive (+) |
cable first, then negative |
unit with battery hold down. |
4
3
3
2
1 | 4 |
OH0170
OH0240
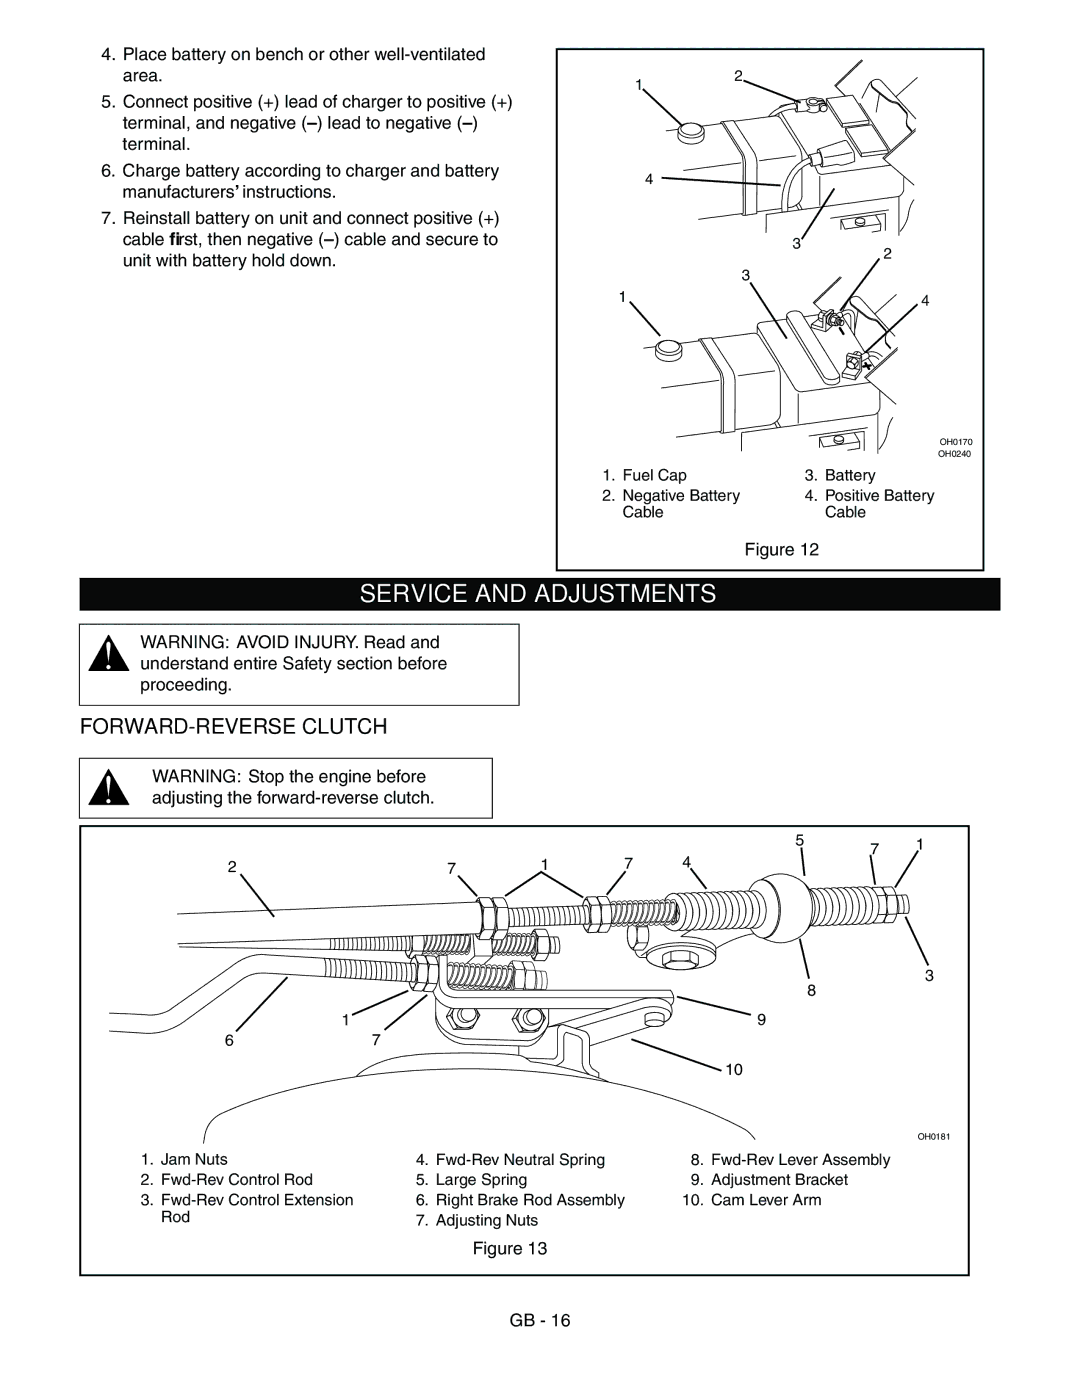
1. | Fuel Cap | 3. | Battery |
2. | Negative Battery | 4. | Positive Battery |
| Cable |
| Cable |
Figure 12
SERVICE AND ADJUSTMENTS
WARNING: AVOID INJURY. Read and understand entire Safety section before proceeding.
FORWARD-REVERSE CLUTCH
WARNING: Stop the engine before adjusting the
|
|
|
|
| 5 | 7 | 1 |
2 |
|
| 1 | 7 | 4 |
| |
| 7 |
|
| ||||
|
|
|
|
| 8 |
| 3 |
|
|
|
|
|
|
| |
1 |
|
|
|
| 9 |
|
|
6 | 7 |
|
|
|
|
|
|
|
|
|
|
| 10 |
|
|
|
|
|
|
|
|
| OH0181 |
1. Jam Nuts | 4. |
| 8. |
| |||
2. | 5. | Large Spring |
| 9. Adjustment Bracket |
|
| |
3. | 6. | Right Brake Rod Assembly | 10. Cam Lever Arm |
|
| ||
Rod | 7. | Adjusting Nuts |
|
|
|
| |
|
|
| Figure 13 |
|
|
|
|
|
|
| GB - 16 |
|
|
|
|
