2.8.1.2 Installing Three SLITM-Ready Graphics Cards
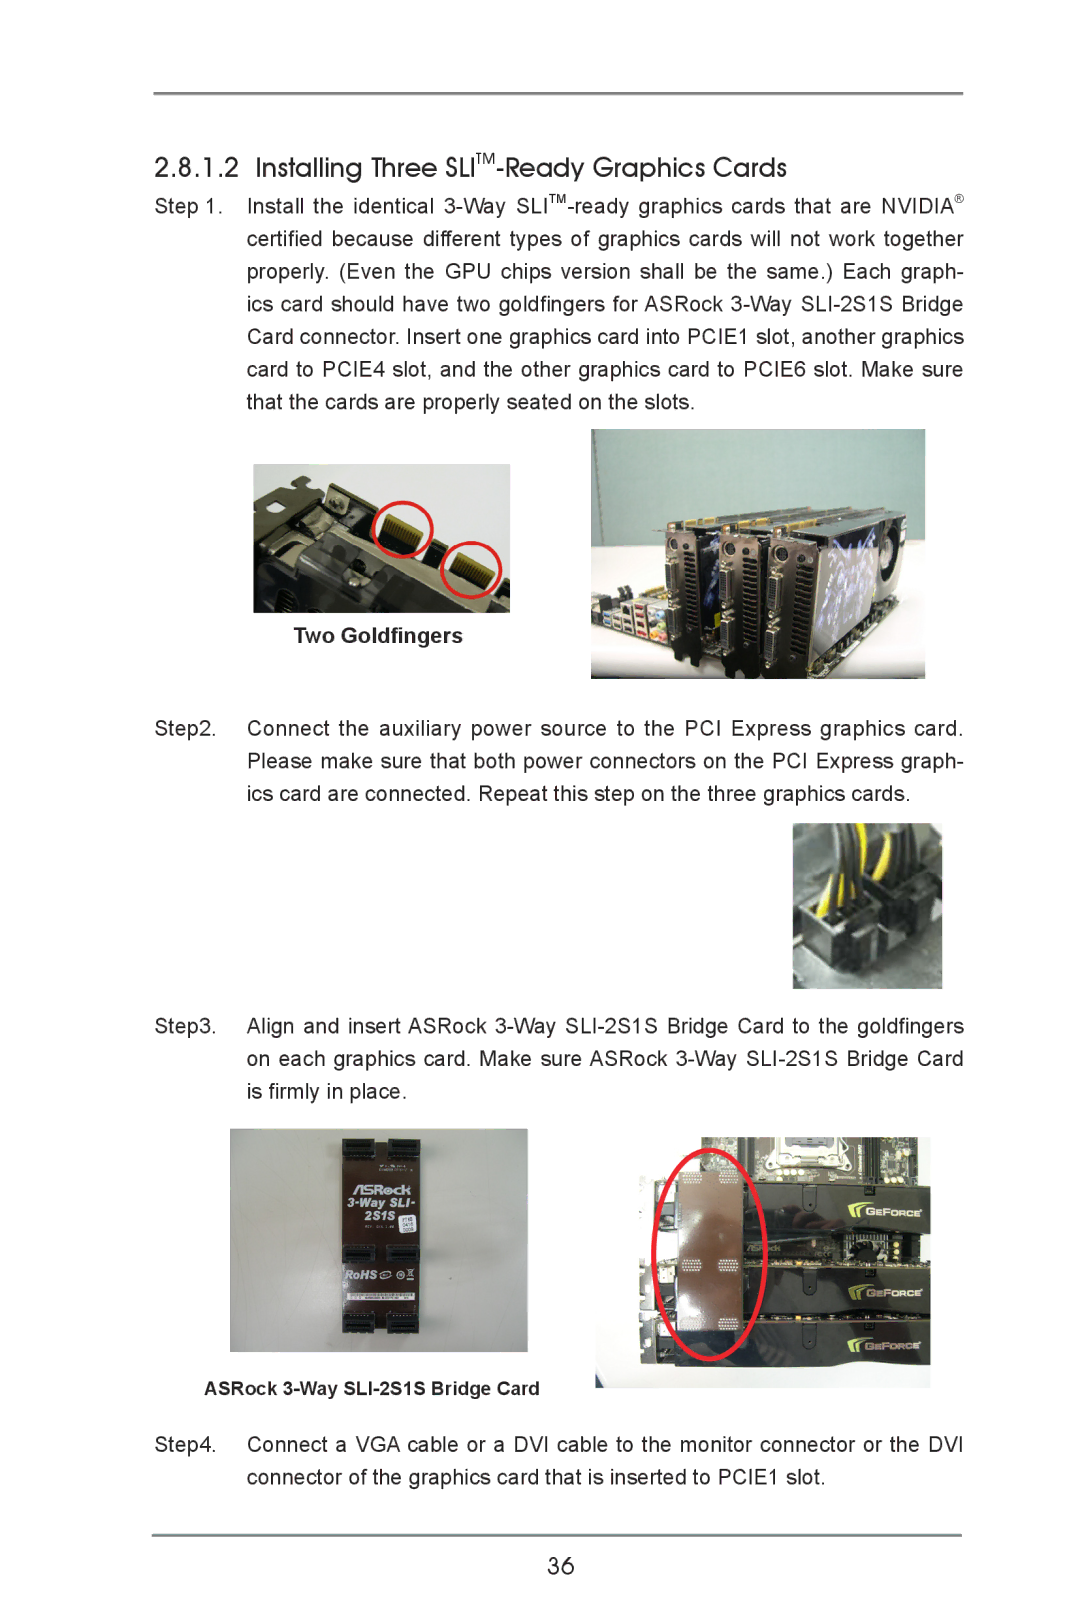
Step 1. Install the identical 3-Way SLITM-ready graphics cards that are NVIDIA® certified because different types of graphics cards will not work together properly. (Even the GPU chips version shall be the same.) Each graph- ics card should have two goldfingers for ASRock 3-Way SLI-2S1S Bridge Card connector. Insert one graphics card into PCIE1 slot, another graphics card to PCIE4 slot, and the other graphics card to PCIE6 slot. Make sure that the cards are properly seated on the slots.
Two Goldfingers
Step2. Connect the auxiliary power source to the PCI Express graphics card. Please make sure that both power connectors on the PCI Express graph- ics card are connected. Repeat this step on the three graphics cards.
Step3. Align and insert ASRock 3-Way SLI-2S1S Bridge Card to the goldfingers on each graphics card. Make sure ASRock 3-Way SLI-2S1S Bridge Card is firmly in place.
ASRock 3-Way SLI-2S1S Bridge Card
Step4. Connect a VGA cable or a DVI cable to the monitor connector or the DVI connector of the graphics card that is inserted to PCIE1 slot.