2.4.4 Removing and Installing the CPU fan and heatsink assembly
The system package includes a proprietary CPU fan and heatsink assembly to ensure optimum thermal condition and performance.
DO NOT replace the proprietary CPU fan and heatsink with other models!
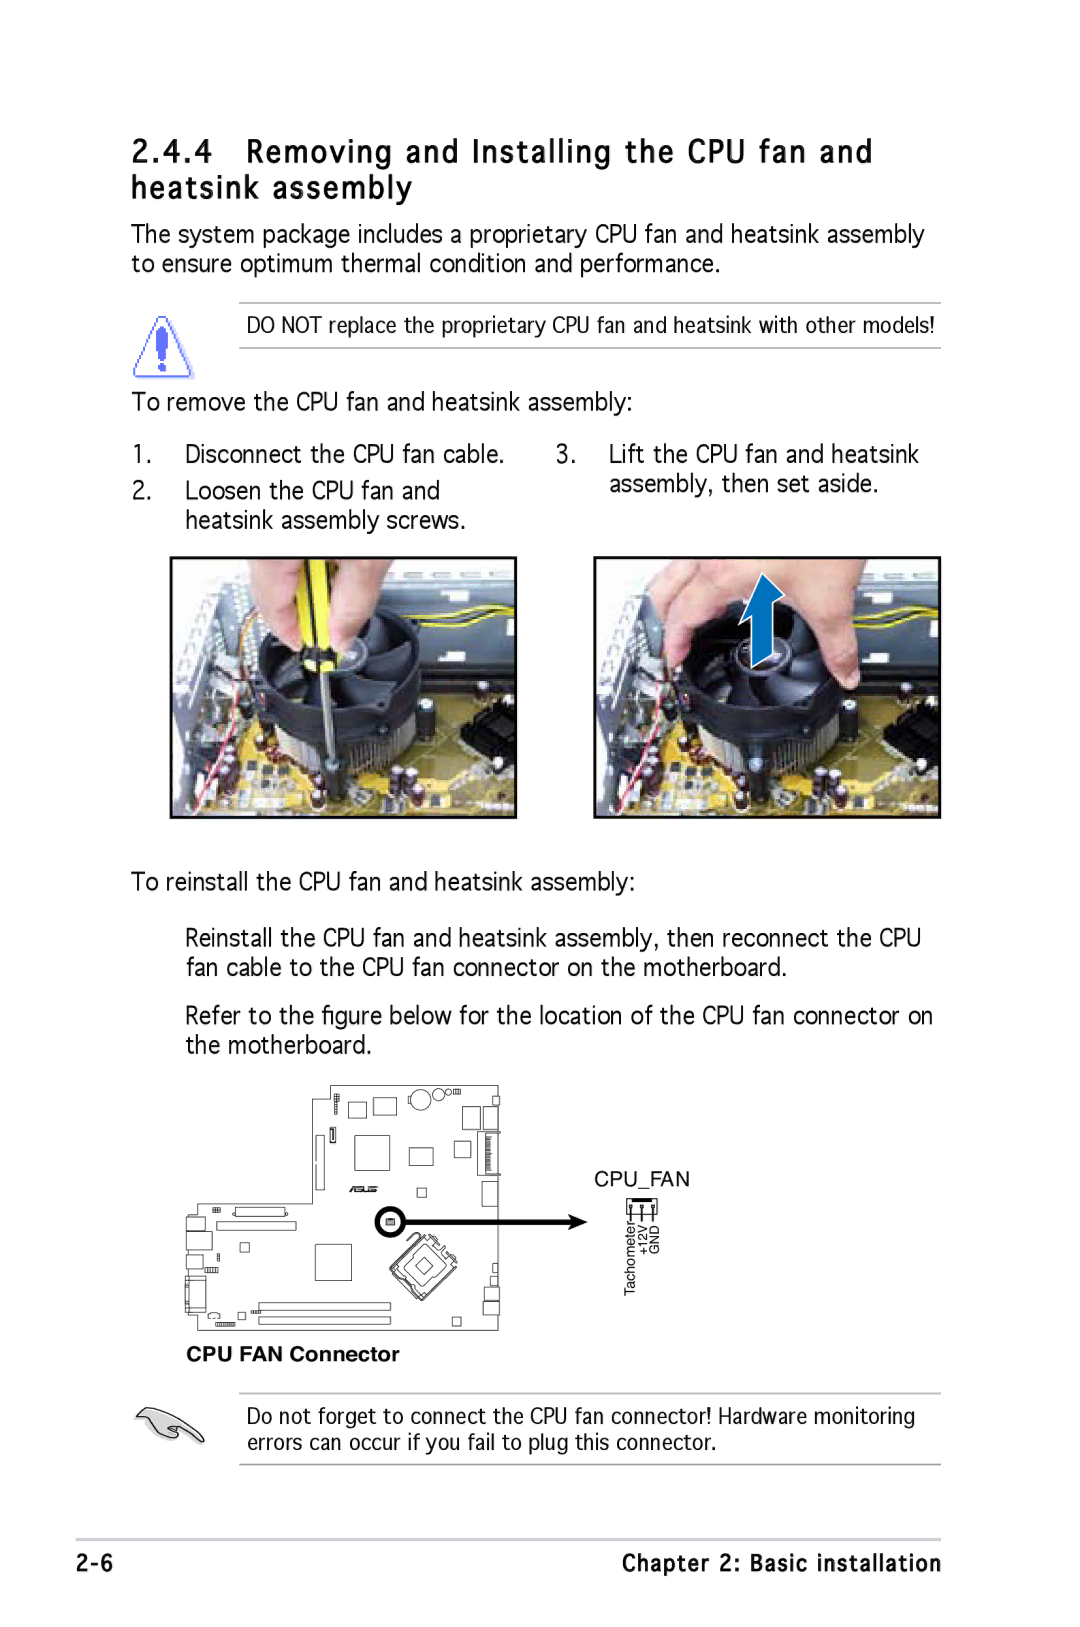
To remove the CPU fan and heatsink assembly:
1.Disconnect the CPU fan cable.
2.Loosen the CPU fan and heatsink assembly screws.
3.Lift the CPU fan and heatsink assembly, then set aside.
To reinstall the CPU fan and heatsink assembly:
Reinstall the CPU fan and heatsink assembly, then reconnect the CPU fan cable to the CPU fan connector on the motherboard.
Refer to the figure below for the location of the CPU fan connector on the motherboard.
CPU_FAN
Tachometer +12V GND
CPU FAN Connector
Do not forget to connect the CPU fan connector! Hardware monitoring errors can occur if you fail to plug this connector.
2- | Chapter 2: Basic installation |
