進入 JMB363 RAID BIOS 公用程式
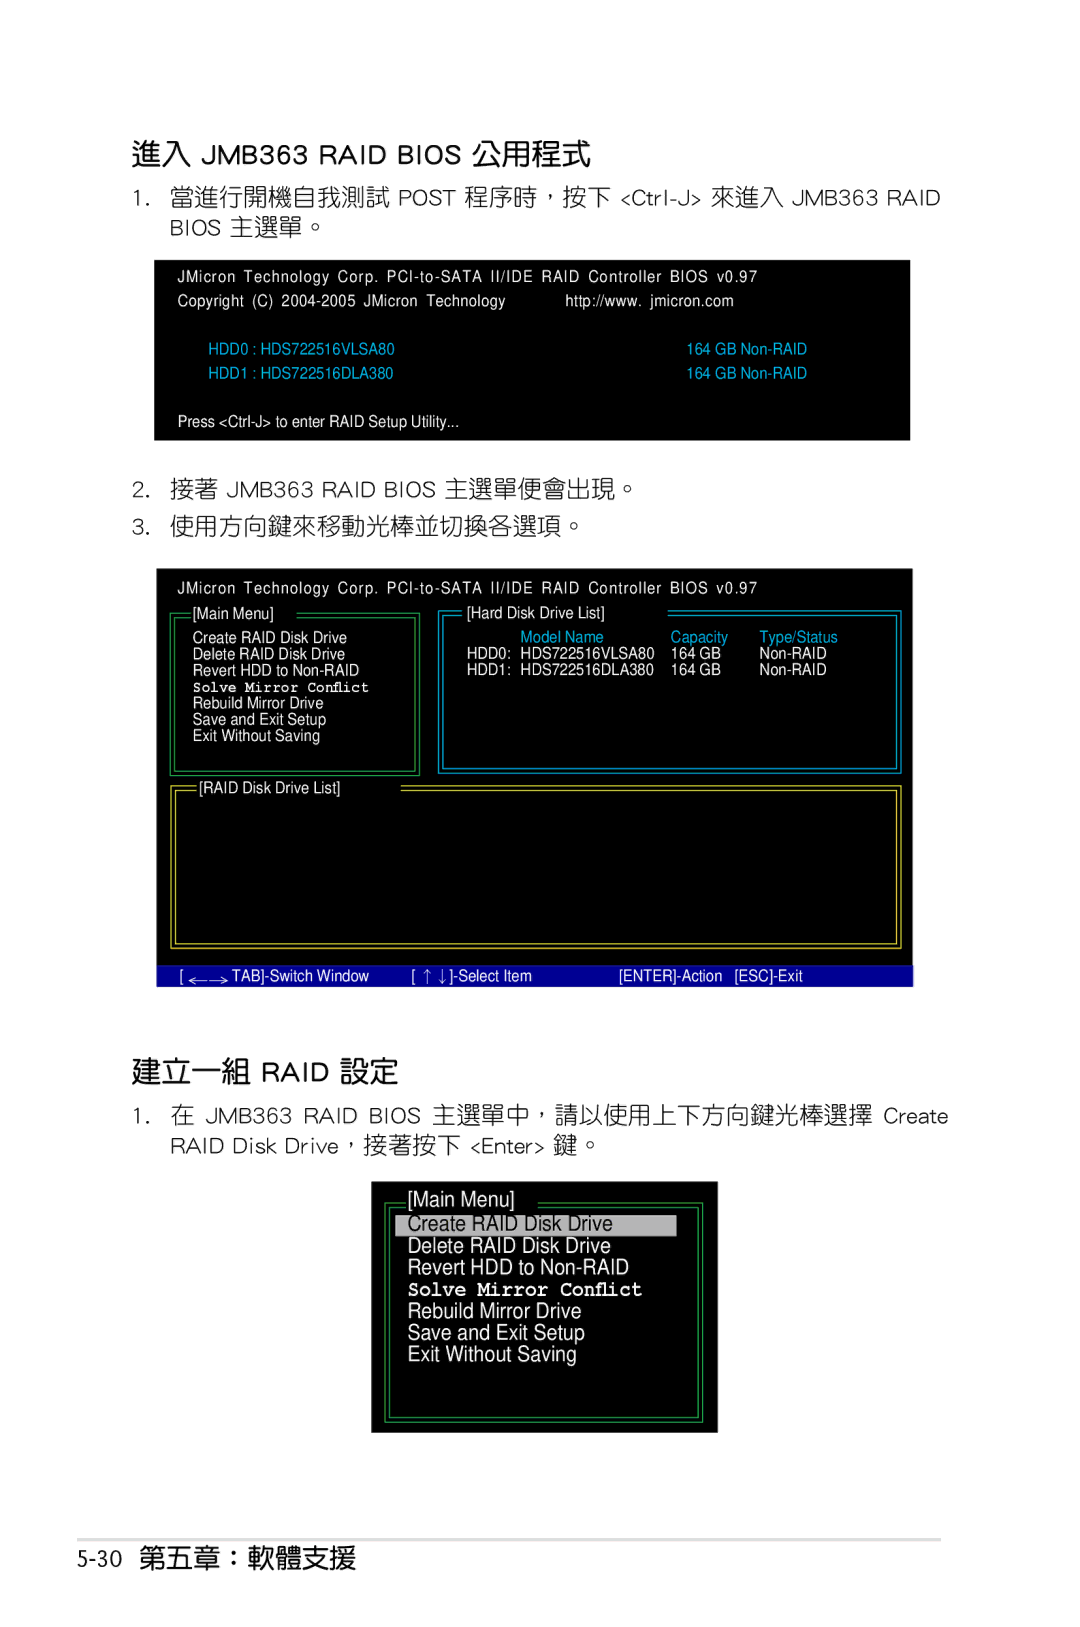
1.當進行開機自我測試 POST 程序時,按下 <Ctrl-J> 來進入 JMB363 RAID BIOS 主選單。
JMicron Technology Corp.
Copyright (C) | http://www. jmicron.com | ||
HDD0 | : HDS722516VLSA80 | 164 | GB |
HDD1 | : HDS722516DLA380 | 164 | GB |
Press
2.接著 JMB363 RAID BIOS 主選單便會出現。
3.使用方向鍵來移動光棒並切換各選項。
JMicron Technology Corp.
![]() [Main Menu]
[Main Menu]
Create RAID Disk Drive Delete RAID Disk Drive Revert HDD to
|
|
|
|
|
| [Hard Disk Drive List] |
|
|
|
| Model Name | Capacity | Type/Status | |
| HDD0: HDS722516VLSA80 | 164 | GB | |
| HDD1: HDS722516DLA380 | 164 | GB | |
|
|
|
|
|
|
|
|
|
|
![]() [RAID Disk Drive List]
[RAID Disk Drive List]
[ |
建立一組 RAID 設定
1.在 JMB363 RAID BIOS 主選單中,請以使用上下方向鍵光棒選擇 Create RAID Disk Drive,接著按下 <Enter> 鍵。
[Main Menu]
Create RAID Disk Drive
Delete RAID Disk Drive
Revert HDD to
Solve Mirror Conflict
Rebuild Mirror Drive
Save and Exit Setup
Exit Without Saving
