I N S T A L L A T I O N
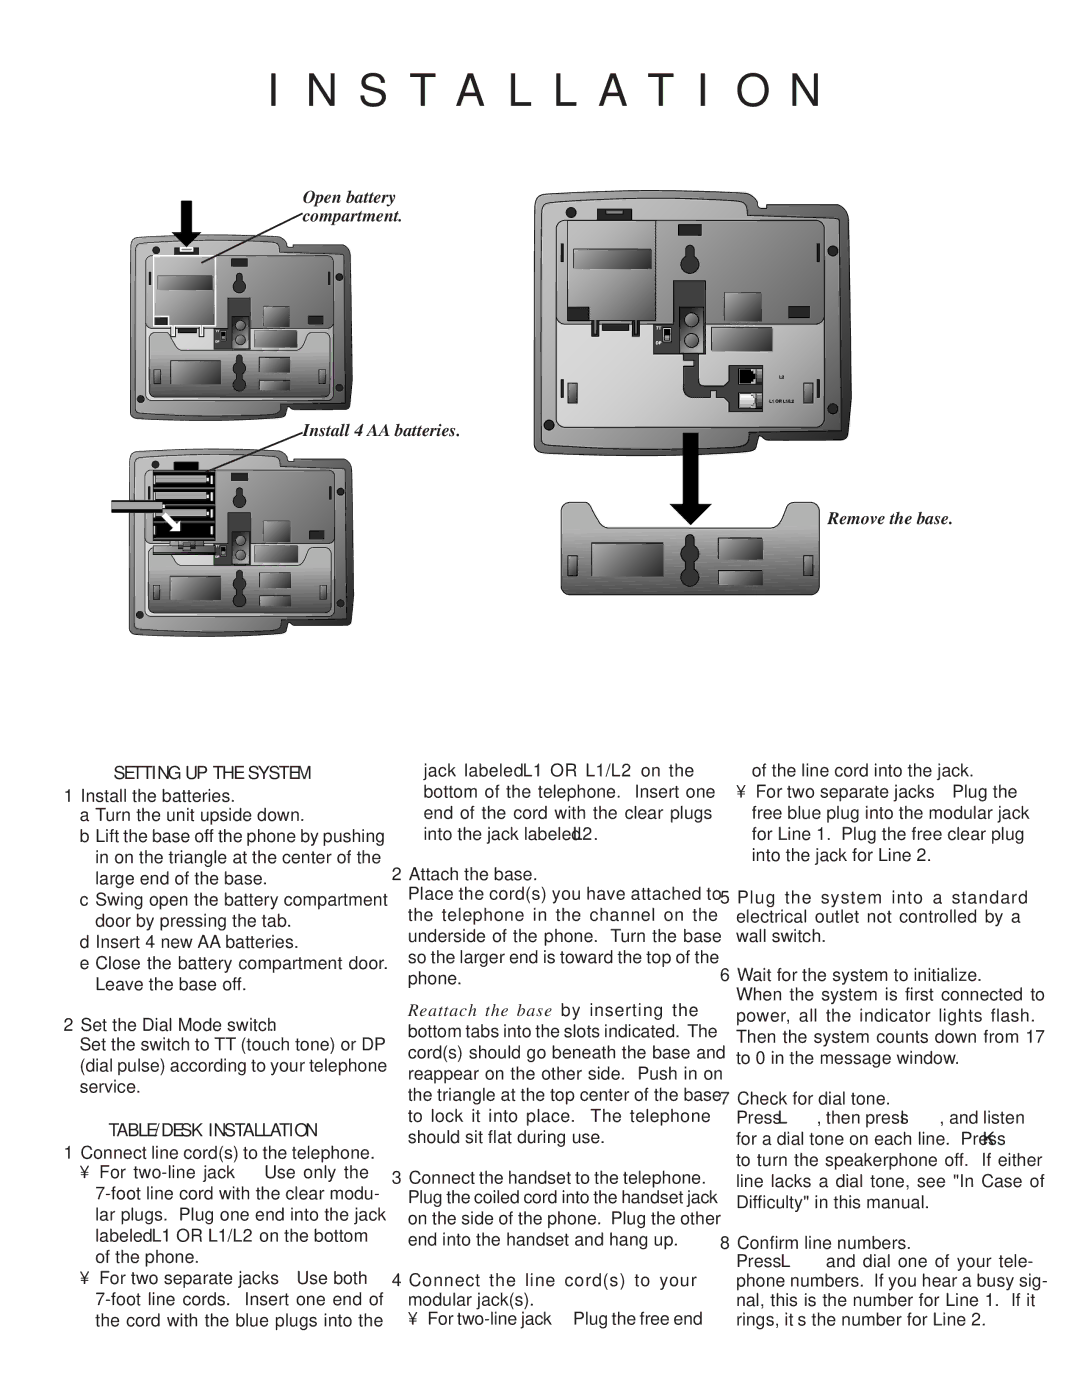
Open battery compartment.
Install 4 AA batteries.
Remove the base.
SETTING UP THE SYSTEM
1Install the batteries.
a Turn the unit upside down.
b Lift the base off the phone by pushing in on the triangle at the center of the large end of the base.
c Swing open the battery compartment door by pressing the tab.
d Insert 4 new AA batteries.
e Close the battery compartment door. Leave the base off.
2Set the Dial Mode switch.
Set the switch to TT (touch tone) or DP (dial pulse) according to your telephone service.
TABLE/DESK INSTALLATION
1Connect line cord(s) to the telephone.
•For
•For two separate jacks — Use both
jack labeled L1 OR L1/L2 on the bottom of the telephone. Insert one end of the cord with the clear plugs into the jack labeled L2.
2Attach the base.
Place the cord(s) you have attached to the telephone in the channel on the underside of the phone. Turn the base so the larger end is toward the top of the phone.
Reattach the base by inserting the bottom tabs into the slots indicated. The cord(s) should go beneath the base and reappear on the other side. Push in on the triangle at the top center of the base to lock it into place. The telephone should sit flat during use.
3Connect the handset to the telephone. Plug the coiled cord into the handset jack on the side of the phone. Plug the other end into the handset and hang up.
4Connect the line cord(s) to your modular jack(s).
• For
of the line cord into the jack.
•For two separate jacks — Plug the free blue plug into the modular jack for Line 1. Plug the free clear plug into the jack for Line 2.
5 Plug the system into a standard electrical outlet not controlled by a wall switch.
6Wait for the system to initialize. When the system is first connected to power, all the indicator lights flash. Then the system counts down from 17 to 0 in the message window.
7Check for dial tone.
Press L, then press l, and listen for a dial tone on each line. Press K to turn the speakerphone off. If either line lacks a dial tone, see "In Case of Difficulty" in this manual.
8Confirm line numbers.
Press Land dial one of your tele- phone numbers. If you hear a busy sig- nal, this is the number for Line 1. If it rings, it’s the number for Line 2.