Chapter 2. Hardware Setup
InstallationInstallation of the VS482 is simply a matter of plugging in the appropriate cables.
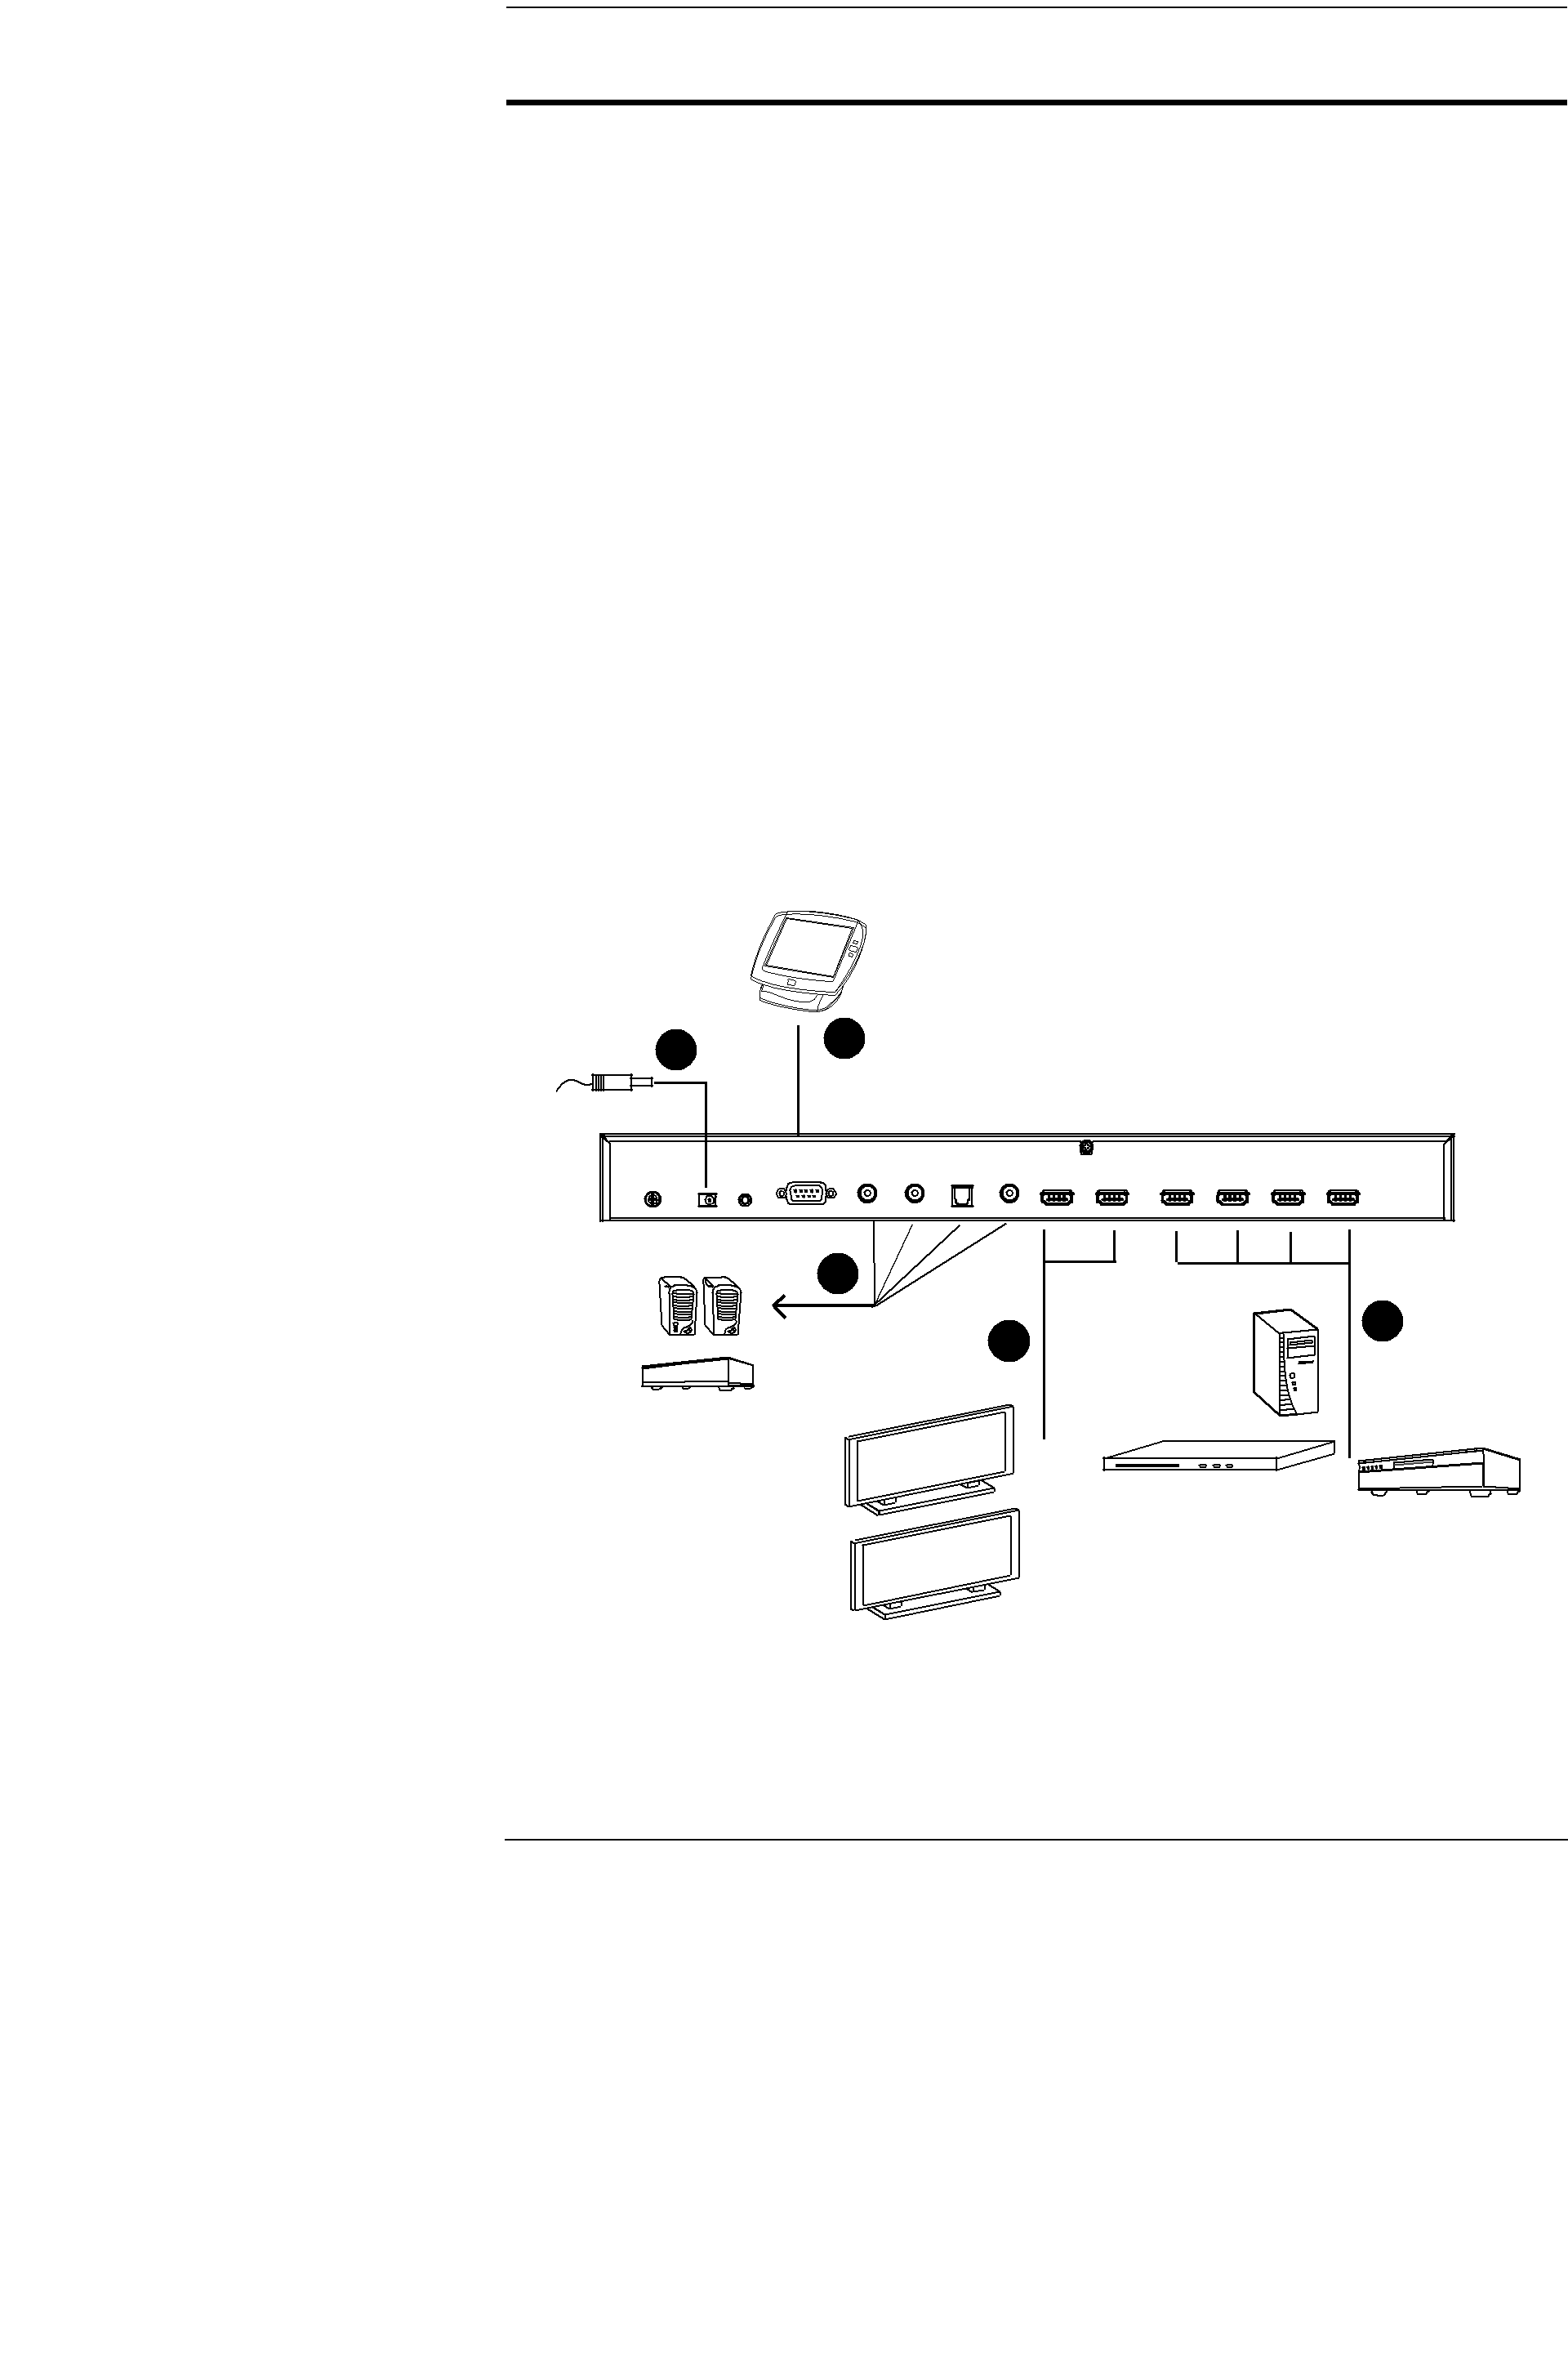
To install the switch, refer to the installation diagram below as you perform the following steps:
1.Use an HDMI cable to connect the HDMI input port on the video display device to the HDMI output port on the rear of the VS482.
2.Use HDMI cables to connect the HDMI output ports on the source device(s) to the HDMI input ports on the VS482.
3.Plug the provided power adapter into an appropriate AC power source; plug the power adapter cable into the Power Jack on the VS482.
4.Connect your audio devices (such as speakers or AVRs) to the Stereo Audio Ports or Digital Audio Ports.
5.(Optional) To edit the VS482 system settings through the
Hardware / Software
Controller
35
4
1 | 2 |
| |
HDMI Output Device | HDMI A/V |
| Source Devices |
This completes the basic installation of the
9