The Strength of Digital™
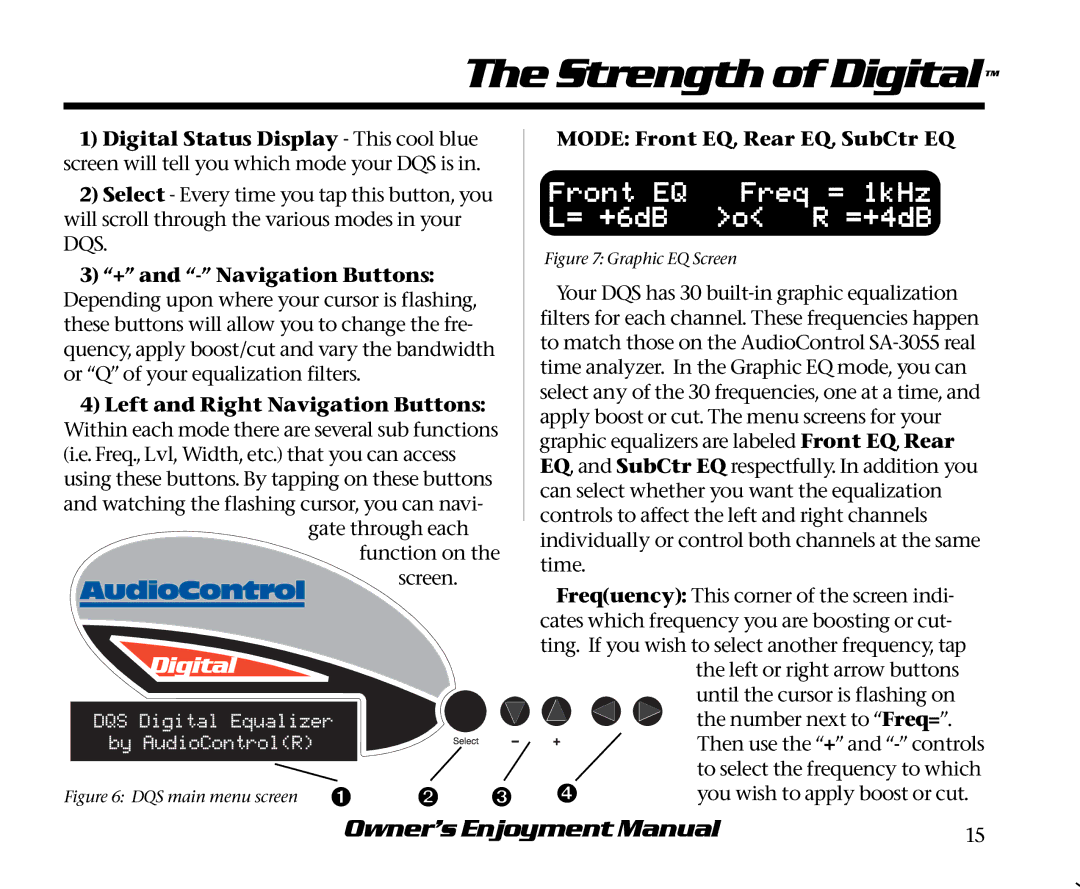
1)Digital Status Display - This cool blue screen will tell you which mode your DQS is in.
2)Select - Every time you tap this button, you will scroll through the various modes in your DQS.
3)“+” and
4)Left and Right Navigation Buttons: Within each mode there are several sub functions (i.e. Freq., Lvl, Width, etc.) that you can access using these buttons. By tapping on these buttons and watching the flashing cursor, you can navi-
gate through each function on the
screen.
Figure 6: DQS main menu screen ➊ | ➋ ➌ |
MODE: Front EQ, Rear EQ, SubCtr EQ
Front EQ | Freq = 1kHz |
L= +6dB | >o< R =+4dB |
Figure 7: Graphic EQ Screen
Your DQS has 30
Freq(uency): This corner of the screen indi- cates which frequency you are boosting or cut- ting. If you wish to select another frequency, tap
| the left or right arrow buttons |
| until the cursor is flashing on |
| the number next to “Freq=”. |
| Then use the “+” and |
| to select the frequency to which |
➍ | you wish to apply boost or cut. |
Owner’s Enjoyment Manual | 15 |
