Installation
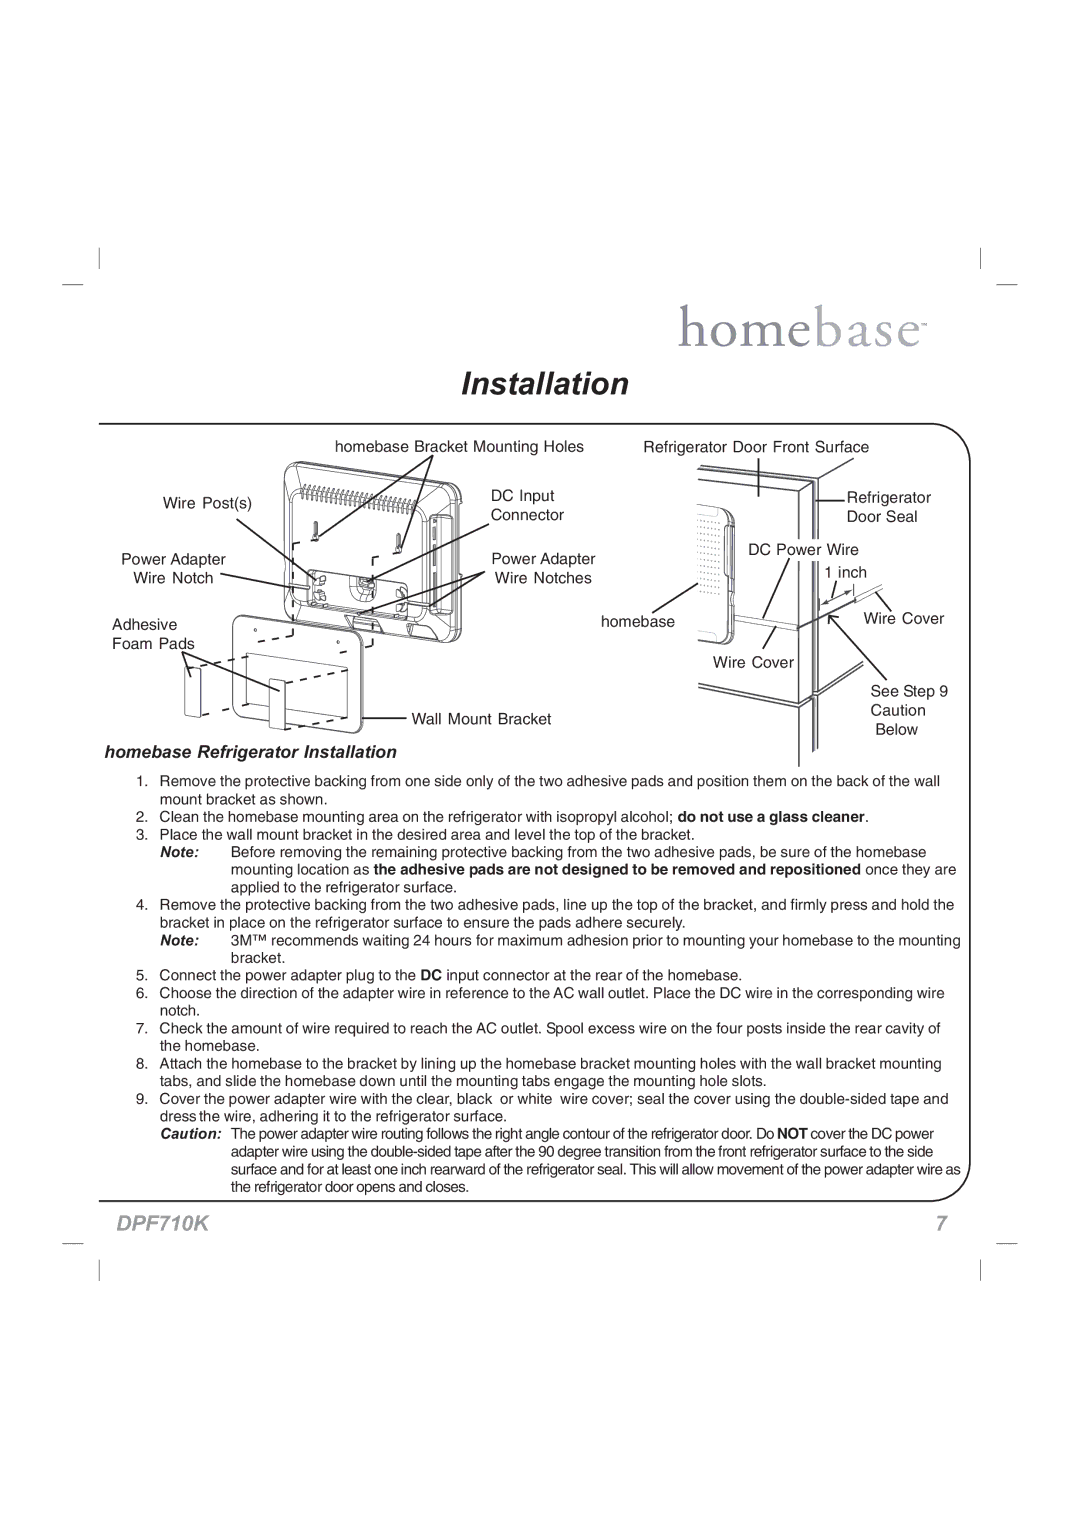
| homebase Bracket Mounting Holes | Refrigerator Door Front Surface | |
Wire Post(s) | DC Input |
| Refrigerator |
Connector |
| Door Seal | |
|
| ||
Power Adapter | Power Adapter |
| DC Power Wire |
| 1 inch | ||
Wire Notch | Wire Notches |
| |
|
| ||
Adhesive |
| homebase | Wire Cover |
Foam Pads |
|
|
|
|
|
| Wire Cover |
|
|
| See Step 9 |
| Wall Mount Bracket |
| Caution |
|
| Below | |
|
|
| |
homebase Refrigerator Installation
1.Remove the protective backing from one side only of the two adhesive pads and position them on the back of the wall mount bracket as shown.
2.Clean the homebase mounting area on the refrigerator with isopropyl alcohol; do not use a glass cleaner.
3.Place the wall mount bracket in the desired area and level the top of the bracket.
Note: Before removing the remaining protective backing from the two adhesive pads, be sure of the homebase mounting location as the adhesive pads are not designed to be removed and repositioned once they are applied to the refrigerator surface.
4.Remove the protective backing from the two adhesive pads, line up the top of the bracket, and firmly press and hold the bracket in place on the refrigerator surface to ensure the pads adhere securely.
Note: 3M™ recommends waiting 24 hours for maximum adhesion prior to mounting your homebase to the mounting bracket.
5.Connect the power adapter plug to the DC input connector at the rear of the homebase.
6.Choose the direction of the adapter wire in reference to the AC wall outlet. Place the DC wire in the corresponding wire notch.
7.Check the amount of wire required to reach the AC outlet. Spool excess wire on the four posts inside the rear cavity of the homebase.
8.Attach the homebase to the bracket by lining up the homebase bracket mounting holes with the wall bracket mounting tabs, and slide the homebase down until the mounting tabs engage the mounting hole slots.
9.Cover the power adapter wire with the clear, black or white wire cover; seal the cover using the
Caution: The power adapter wire routing follows the right angle contour of the refrigerator door. Do NOT cover the DC power adapter wire using the
DPF710K | 7 |