Wall Installation
Note: For
supplied with the telephone, but can be ordered by using this comcode: 103786760.)
1.Make sure the
2.Place the telephone face down on a flat surface.
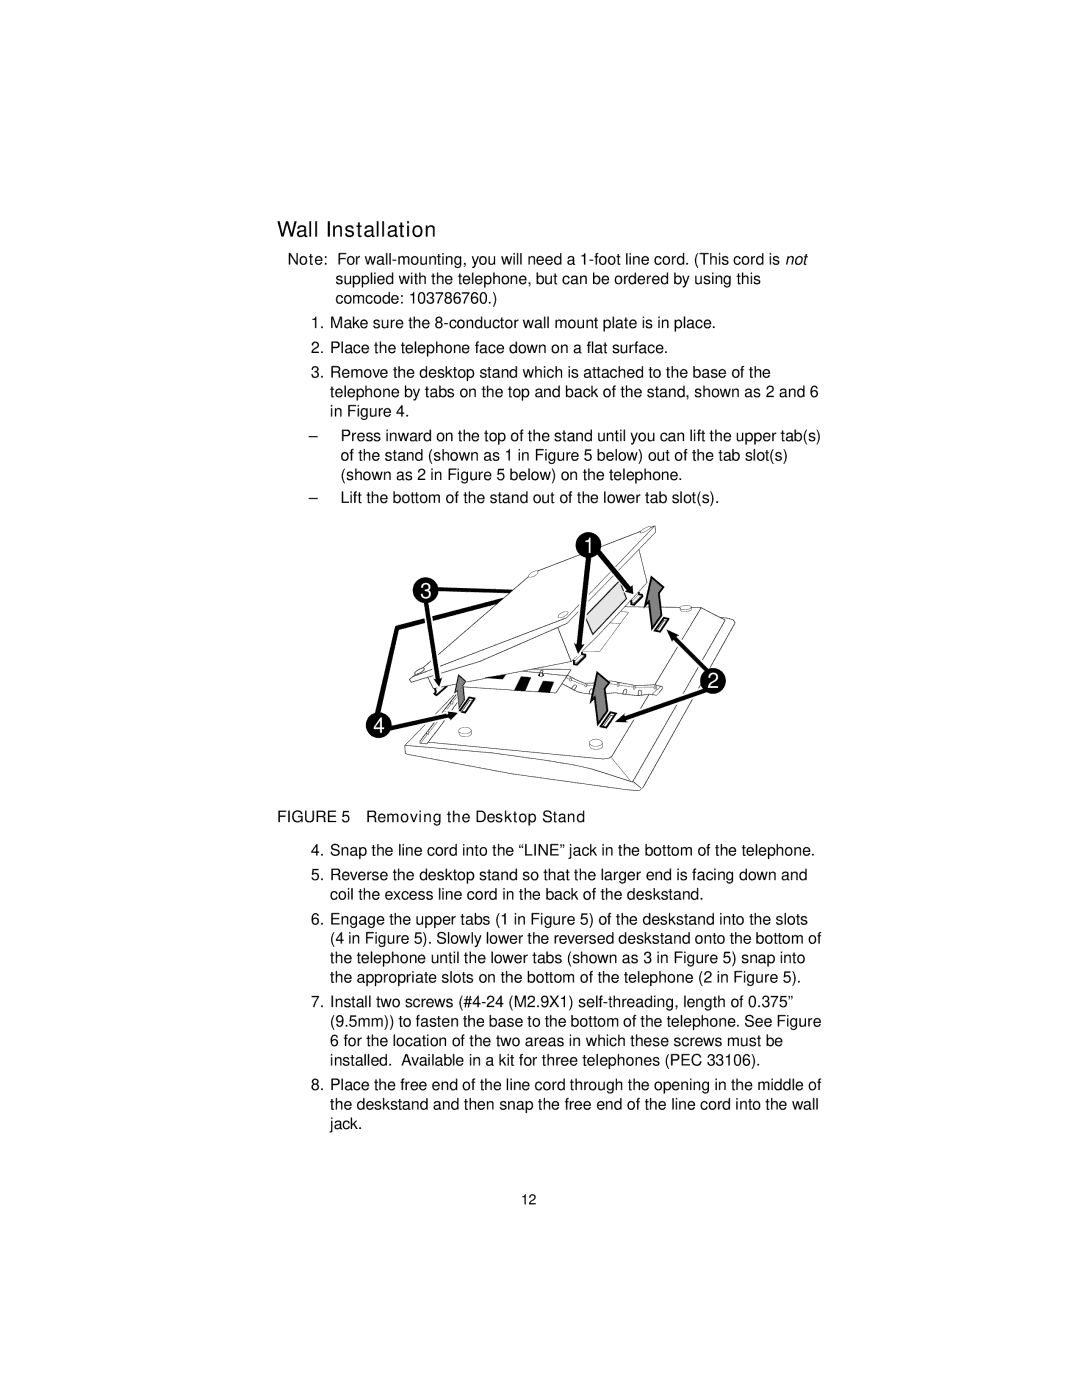
3.Remove the desktop stand which is attached to the base of the telephone by tabs on the top and back of the stand, shown as 2 and 6 in Figure 4.
–Press inward on the top of the stand until you can lift the upper tab(s) of the stand (shown as 1 in Figure 5 below) out of the tab slot(s) (shown as 2 in Figure 5 below) on the telephone.
–Lift the bottom of the stand out of the lower tab slot(s).
1![]()
3
2
4![]()
![]()
![]() 2
2
FIGURE 5 Removing the Desktop Stand
4.Snap the line cord into the “LINE” jack in the bottom of the telephone.
5.Reverse the desktop stand so that the larger end is facing down and coil the excess line cord in the back of the deskstand.
6.Engage the upper tabs (1 in Figure 5) of the deskstand into the slots (4 in Figure 5). Slowly lower the reversed deskstand onto the bottom of the telephone until the lower tabs (shown as 3 in Figure 5) snap into the appropriate slots on the bottom of the telephone (2 in Figure 5).
7.Install two screws
8.Place the free end of the line cord through the opening in the middle of the deskstand and then snap the free end of the line cord into the wall jack.
12
