6 | Log into the Switch |
|
|
oConnect a stand alone PC to a port on the switch. Change the PC’s network IP Address to allow it to connect to the switch (ex: 192.168.16.2). Use the default subnet mask and gateway.
oLaunch the PC’s web browser and navigate to the
switch by typing the switch’s IP address in the browser address window.
oNavigate the web page by clicking on the links located on the top of the web page.
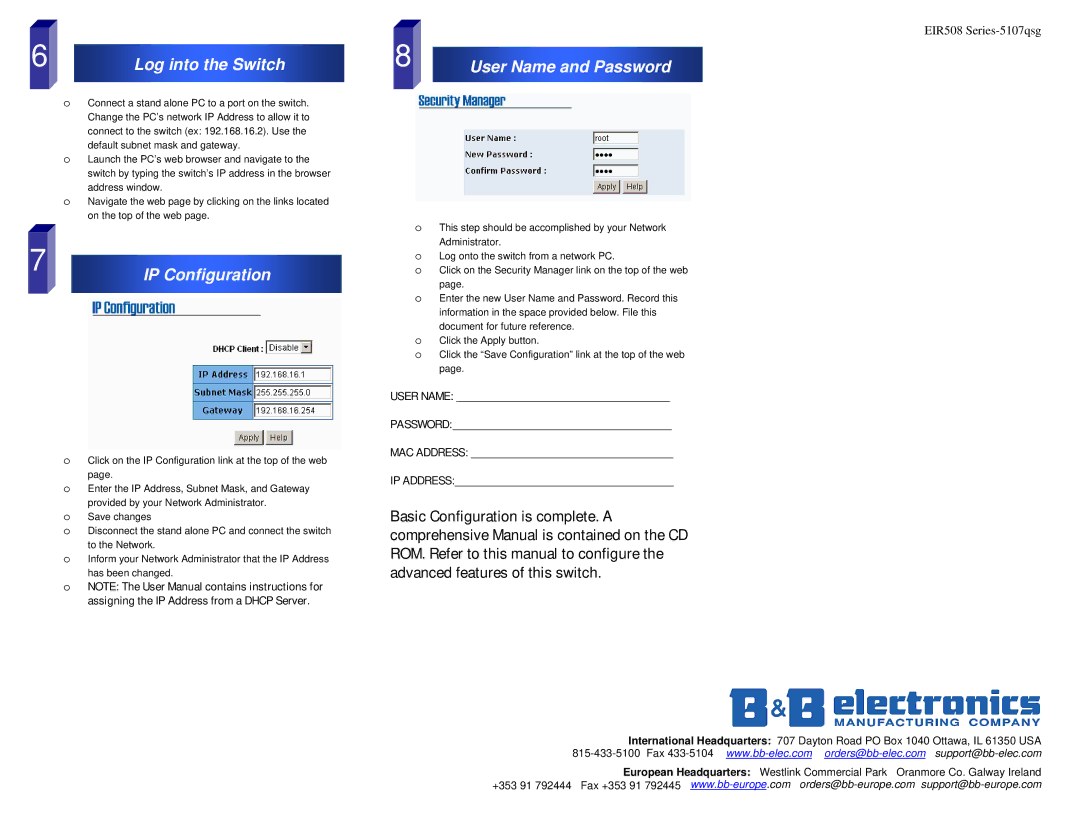
7 | IP Configuration |
|
oClick on the IP Configuration link at the top of the web page.
oEnter the IP Address, Subnet Mask, and Gateway provided by your Network Administrator.
oSave changes
oDisconnect the stand alone PC and connect the switch
to the Network.
oInform your Network Administrator that the IP Address has been changed.
oNOTE: The User Manual contains instructions for assigning the IP Address from a DHCP Server.
| EIR508 | |
8 | ||
User Name and Password | ||
|
|
oThis step should be accomplished by your Network
Administrator.
oLog onto the switch from a network PC.
oClick on the Security Manager link on the top of the web
page.
oEnter the new User Name and Password. Record this
information in the space provided below. File this document for future reference.
oClick the Apply button.
oClick the “Save Configuration” link at the top of the web page.
USER NAME: ______________________________________
PASSWORD:_______________________________________
MAC ADDRESS: ____________________________________
IP ADDRESS:_______________________________________
Basic Configuration is complete. A comprehensive Manual is contained on the CD ROM. Refer to this manual to configure the advanced features of this switch.
International Headquarters: 707 Dayton Road PO Box 1040 Ottawa, IL 61350 USA
European Headquarters: Westlink Commercial Park Oranmore Co. Galway Ireland +353 91 792444 Fax +353 91 792445