CARE AND MAINTENANCE
QUICK ACCESS CASSETTE SYSTEM
Large foreign objects, such as children’s toys, tree branches and rocks, should be removed manually from your pool prior to operating an automatic pool cleaner. In the event a foreign object does not get manually removed and a blockage occurs, the Quick Access Cassette System allows you the opportunity to remove the blockage or check the diaphragm for damage in minutes at poolside.
Inspect the diaphragm for the blockage or damage. If damage is evident, i.e., a cut or hole on the sides of the diaphragm, contact Zodiac Pool Care Canada, Ltd.
If a blockage is apparent, grasp it and remove it. If this can’t be done, a garden hose may be used to flush the obstacle through. Do not use any sharp objects to probe or push an obstruction as this may damage the diaphragm.
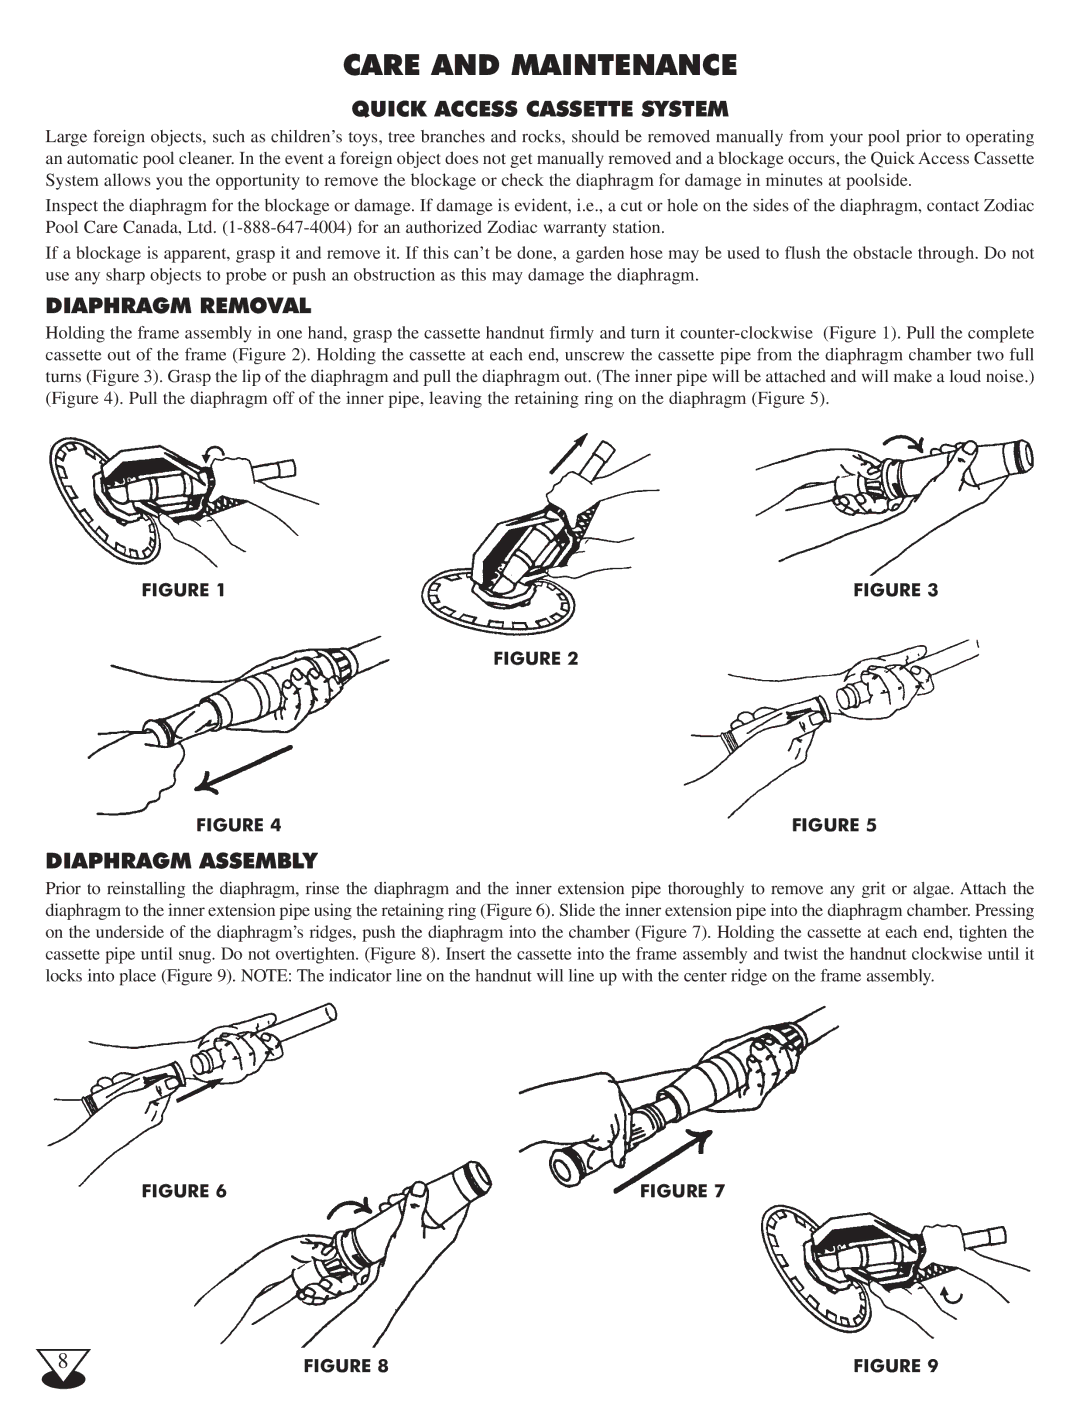
DIAPHRAGM REMOVAL
Holding the frame assembly in one hand, grasp the cassette handnut firmly and turn it
FIGURE 1 | FIGURE 3 |
FIGURE 2
FIGURE 4 | FIGURE 5 |
DIAPHRAGM ASSEMBLY
Prior to reinstalling the diaphragm, rinse the diaphragm and the inner extension pipe thoroughly to remove any grit or algae. Attach the diaphragm to the inner extension pipe using the retaining ring (Figure 6). Slide the inner extension pipe into the diaphragm chamber. Pressing on the underside of the diaphragm’s ridges, push the diaphragm into the chamber (Figure 7). Holding the cassette at each end, tighten the cassette pipe until snug. Do not overtighten. (Figure 8). Insert the cassette into the frame assembly and twist the handnut clockwise until it locks into place (Figure 9). NOTE: The indicator line on the handnut will line up with the center ridge on the frame assembly.
FIGURE | 6 | FIGURE 7 |
|
|
|
8 | FIGURE 8 | FIGURE 9 |