Installation Adjustments
Scheimpfug adjustment
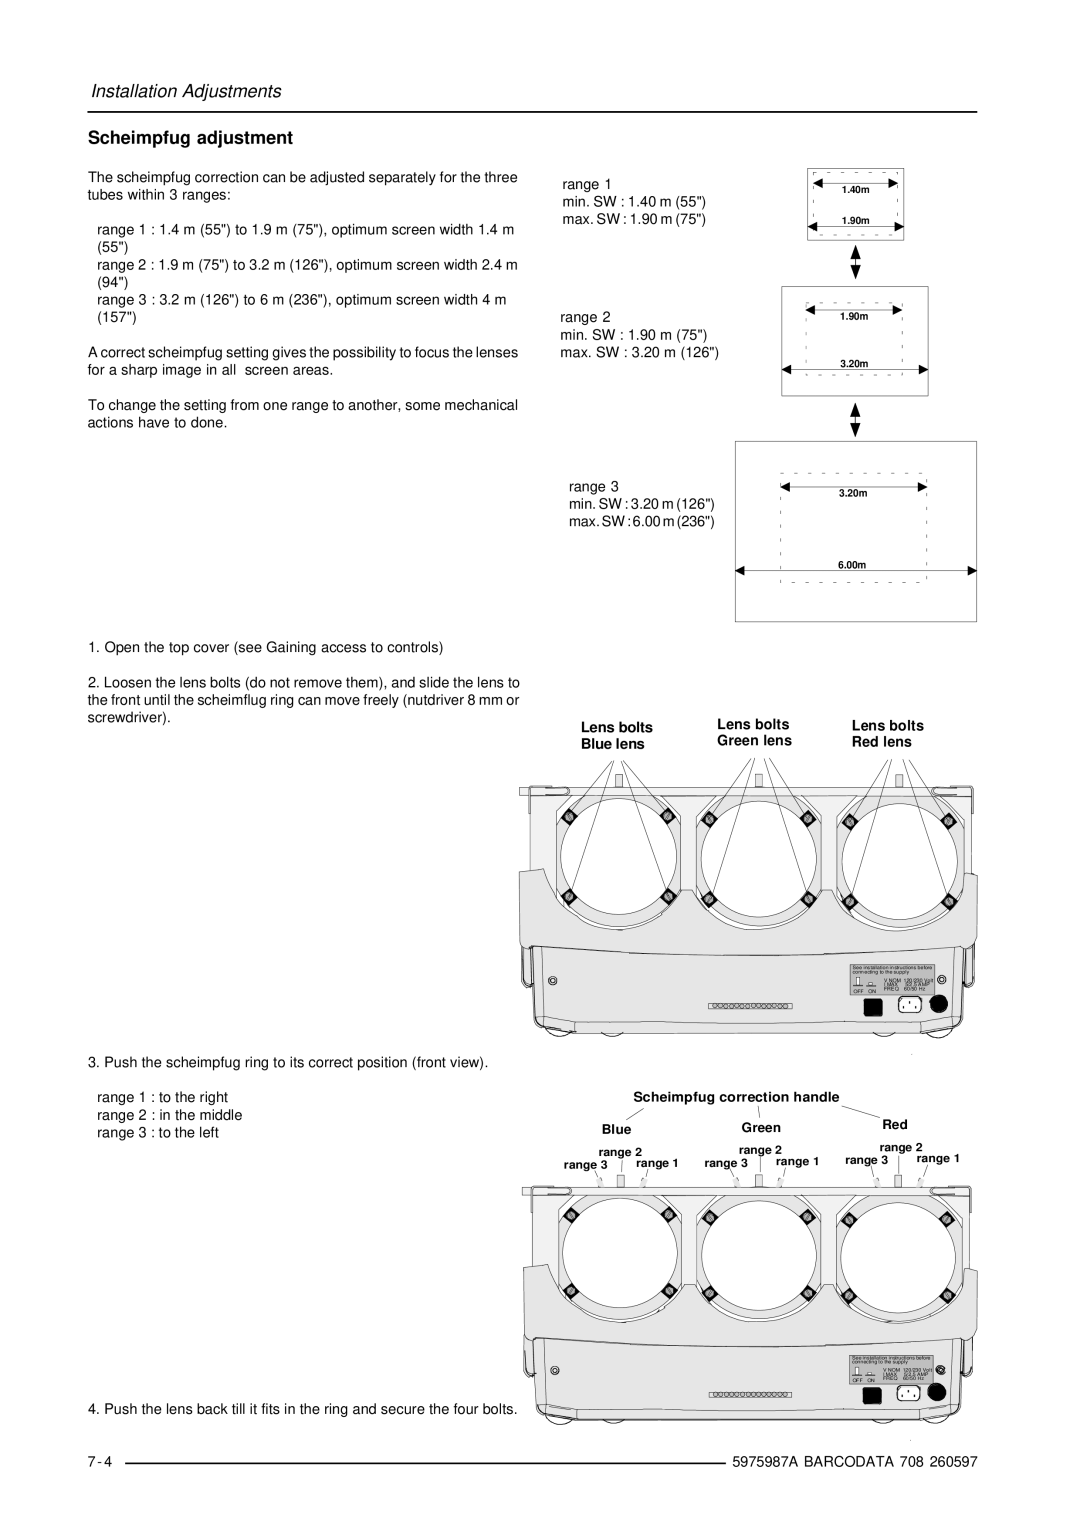
The scheimpfug correction can be adjusted separately for the three tubes within 3 ranges:
range 1 : 1.4 m (55") to 1.9 m (75"), optimum screen width 1.4 m (55")
range 2 : 1.9 m (75") to 3.2 m (126"), optimum screen width 2.4 m (94")
range 3 : 3.2 m (126") to 6 m (236"), optimum screen width 4 m (157")
A correct scheimpfug setting gives the possibility to focus the lenses for a sharp image in all screen areas.
To change the setting from one range to another, some mechanical actions have to done.
range 1
min. SW : 1.40 m (55")
max. SW : 1.90 m (75")
range 2
min. SW : 1.90 m (75")
max. SW : 3.20 m (126")
1.40m |
1.90m |
1.90m |
3.20m |
range 3
min. SW : 3.20 m (126")
max. SW : 6.00 m (236")
3.20m
6.00m
1. Open the top cover (see Gaining access to controls) |
|
|
2. Loosen the lens bolts (do not remove them), and slide the lens to |
|
|
the front until the scheimflug ring can move freely (nutdriver 8 mm or |
|
|
screwdriver). | Lens bolts | Lens bolts |
Lens bolts | ||
Blue lens | Green lens | Red lens |
See installation instructions before connecting to the supply
|
|
|
|
| V NOM 120/230 Volt | |
|
|
|
|
| I MAX | 5/2.5 AMP |
OFF ON | FREQ | 60/50 Hz | ||||
|
| |||||
3. Push the scheimpfug ring to its correct position (front view).
range 1 : to the right |
| Scheimpfug correction handle |
|
| ||
range 2 : in the middle | Blue |
| Green | Red |
| |
range 3 : to the left |
|
| ||||
| range 2 | |||||
| range 2 | range 2 | ||||
| range 3 | range 1 | range 3 | range 1 | range 3 | range 1 |
See installation instructions before connecting to the supply
|
|
|
| V NOM 120/230 Volt | |
|
|
|
| I MAX | 5/2.5 AMP |
OFF ON | FREQ | 60/50 Hz | |||
4. Push the lens back till it fits in the ring and secure the four bolts.
7 - 4 |
| 5975987A BARCODATA 708 260597 |
|