Using the Ice Dispenser
Please note, first ice cubes will not be ready before 12 hours after switching on the appliance.
If you don’t require ice cubes - for example in winter or during holidays away from home, turn on “Ice off” function.
The ice maker produces approximately 120 pieces of ice cubes in 24 hours which can be dispensed as ice cubes or crushed ice. This amount may vary depending on certain conditions.
It is normal to get crushed ice from the dispenser in a longer time than in getting the ice cubes and also flowing of some crushed ice before the ice cubes drop if crushed ice option had been selected before selecting ice cube option. Furthermore, in cases when no ice was taken from the dispenser for a long time, any difference in the smell and taste of the ice as well as having smaller pieces is very normal. If this is the case, the ice in the icebank should be emptied and the icebank must be cleaned thoroughly.
Warnings
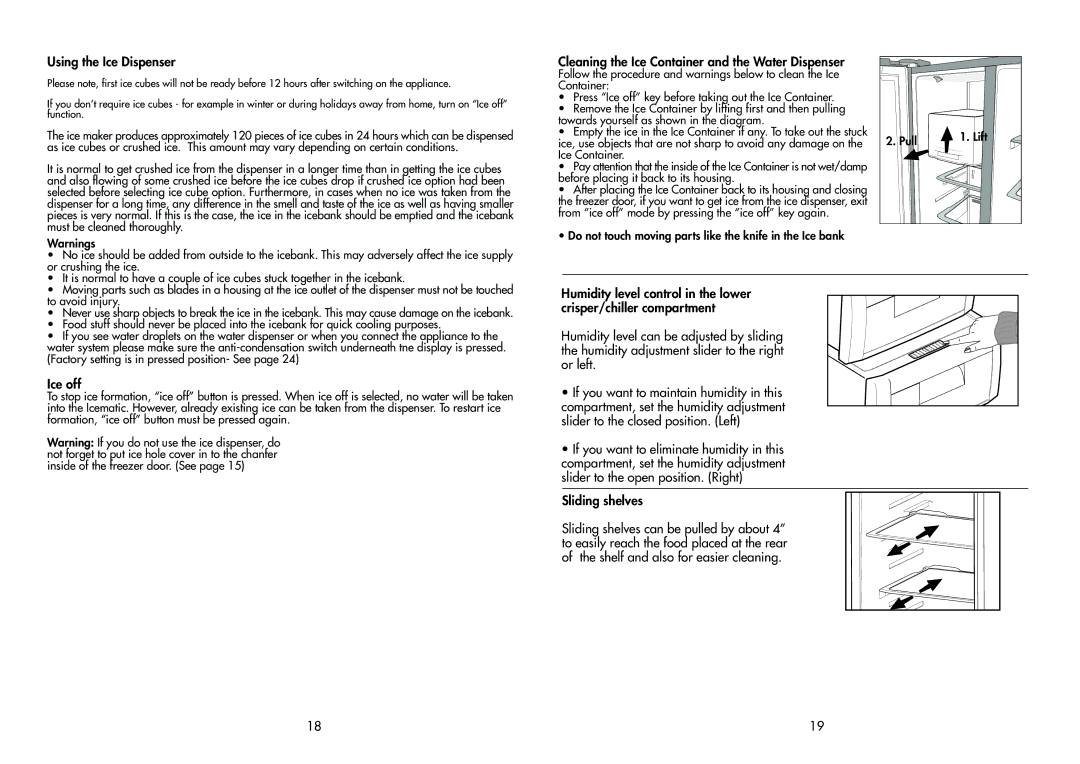
Cleaning the Ice Container and the Water Dispenser
Follow the procedure and warnings below to clean the Ice Container:
•Press “Ice off” key before taking out the Ice Container.
•Remove the Ice Container by lifting first and then pulling towards yourself as shown in the diagram.
•Empty the ice in the Ice Container if any. To take out the stuck ice, use objects that are not sharp to avoid any damage on the Ice Container.
•Pay attention that the inside of the Ice Container is not wet/damp before placing it back to its housing.
•After placing the Ice Container back to its housing and closing the freezer door, if you want to get ice from the ice dispenser, exit from “ice off” mode by pressing the “ice off” key again.
•Do not touch moving parts like the knife in the Ice bank
2. Pull | 1. Lift |
|
•No ice should be added from outside to the icebank. This may adversely affect the ice supply or crushing the ice.
•It is normal to have a couple of ice cubes stuck together in the icebank.
•Moving parts such as blades in a housing at the ice outlet of the dispenser must not be touched to avoid injury.
•Never use sharp objects to break the ice in the icebank. This may cause damage on the icebank.
•Food stuff should never be placed into the icebank for quick cooling purposes.
•If you see water droplets on the water dispenser or when you connect the appliance to the water system please make sure the
Ice off
To stop ice formation, “ice off” button is pressed. When ice off is selected, no water will be taken into the Icematic. However, already existing ice can be taken from the dispenser. To restart ice formation, “ice off” button must be pressed again.
Warning: If you do not use the ice dispenser, do not forget to put ice hole cover in to the chanfer inside of the freezer door. (See page 15)
Humidity level control in the lower crisper/chiller compartment
Humidity level can be adjusted by sliding the humidity adjustment slider to the right or left.
•If you want to maintain humidity in this compartment, set the humidity adjustment slider to the closed position. (Left)
•If you want to eliminate humidity in this compartment, set the humidity adjustment slider to the open position. (Right)
Sliding shelves
Sliding shelves can be pulled by about 4” to easily reach the food placed at the rear of the shelf and also for easier cleaning.
18 | 19 |